Posted on Leave a comment

FUN FOLD FRIDAY IS HERE AGAIN!

Today’s fun fold card is a CENTRE STEP CARD. I have adapted the measurements I found on the internet to use a piece of cardstock measuring 11-1/2″x 4-1/8″ (29.3cm x 10.5cm).

I am also continuing to use some of the product Artfully Composed Suite.

Here is a diagram of my template.

I started with an Evening Evergreen cardbase and prepared it using the instructions above. Then I cut the two vertical lines that are 3/4″ in from the left and right hand sides. The cut started 1″ above the bottom of the cardbase and stopped 5″ from the top.

The three shorter horizontal lines were scored so that they can bend to create the steps.

Another horizontal was scored in the centre panel at the halfway point – 5-3/4″.

Then I cut the Designer Series Paper panels to adhere tp the front of the card. The paper for the centre panel measures 5-3/8″x 2-1/2″. The two narrow side pieces each measure 4-5/8″x 5/8″. The two small rectangles in the bottom corners measure 7/8″x 5/8″.

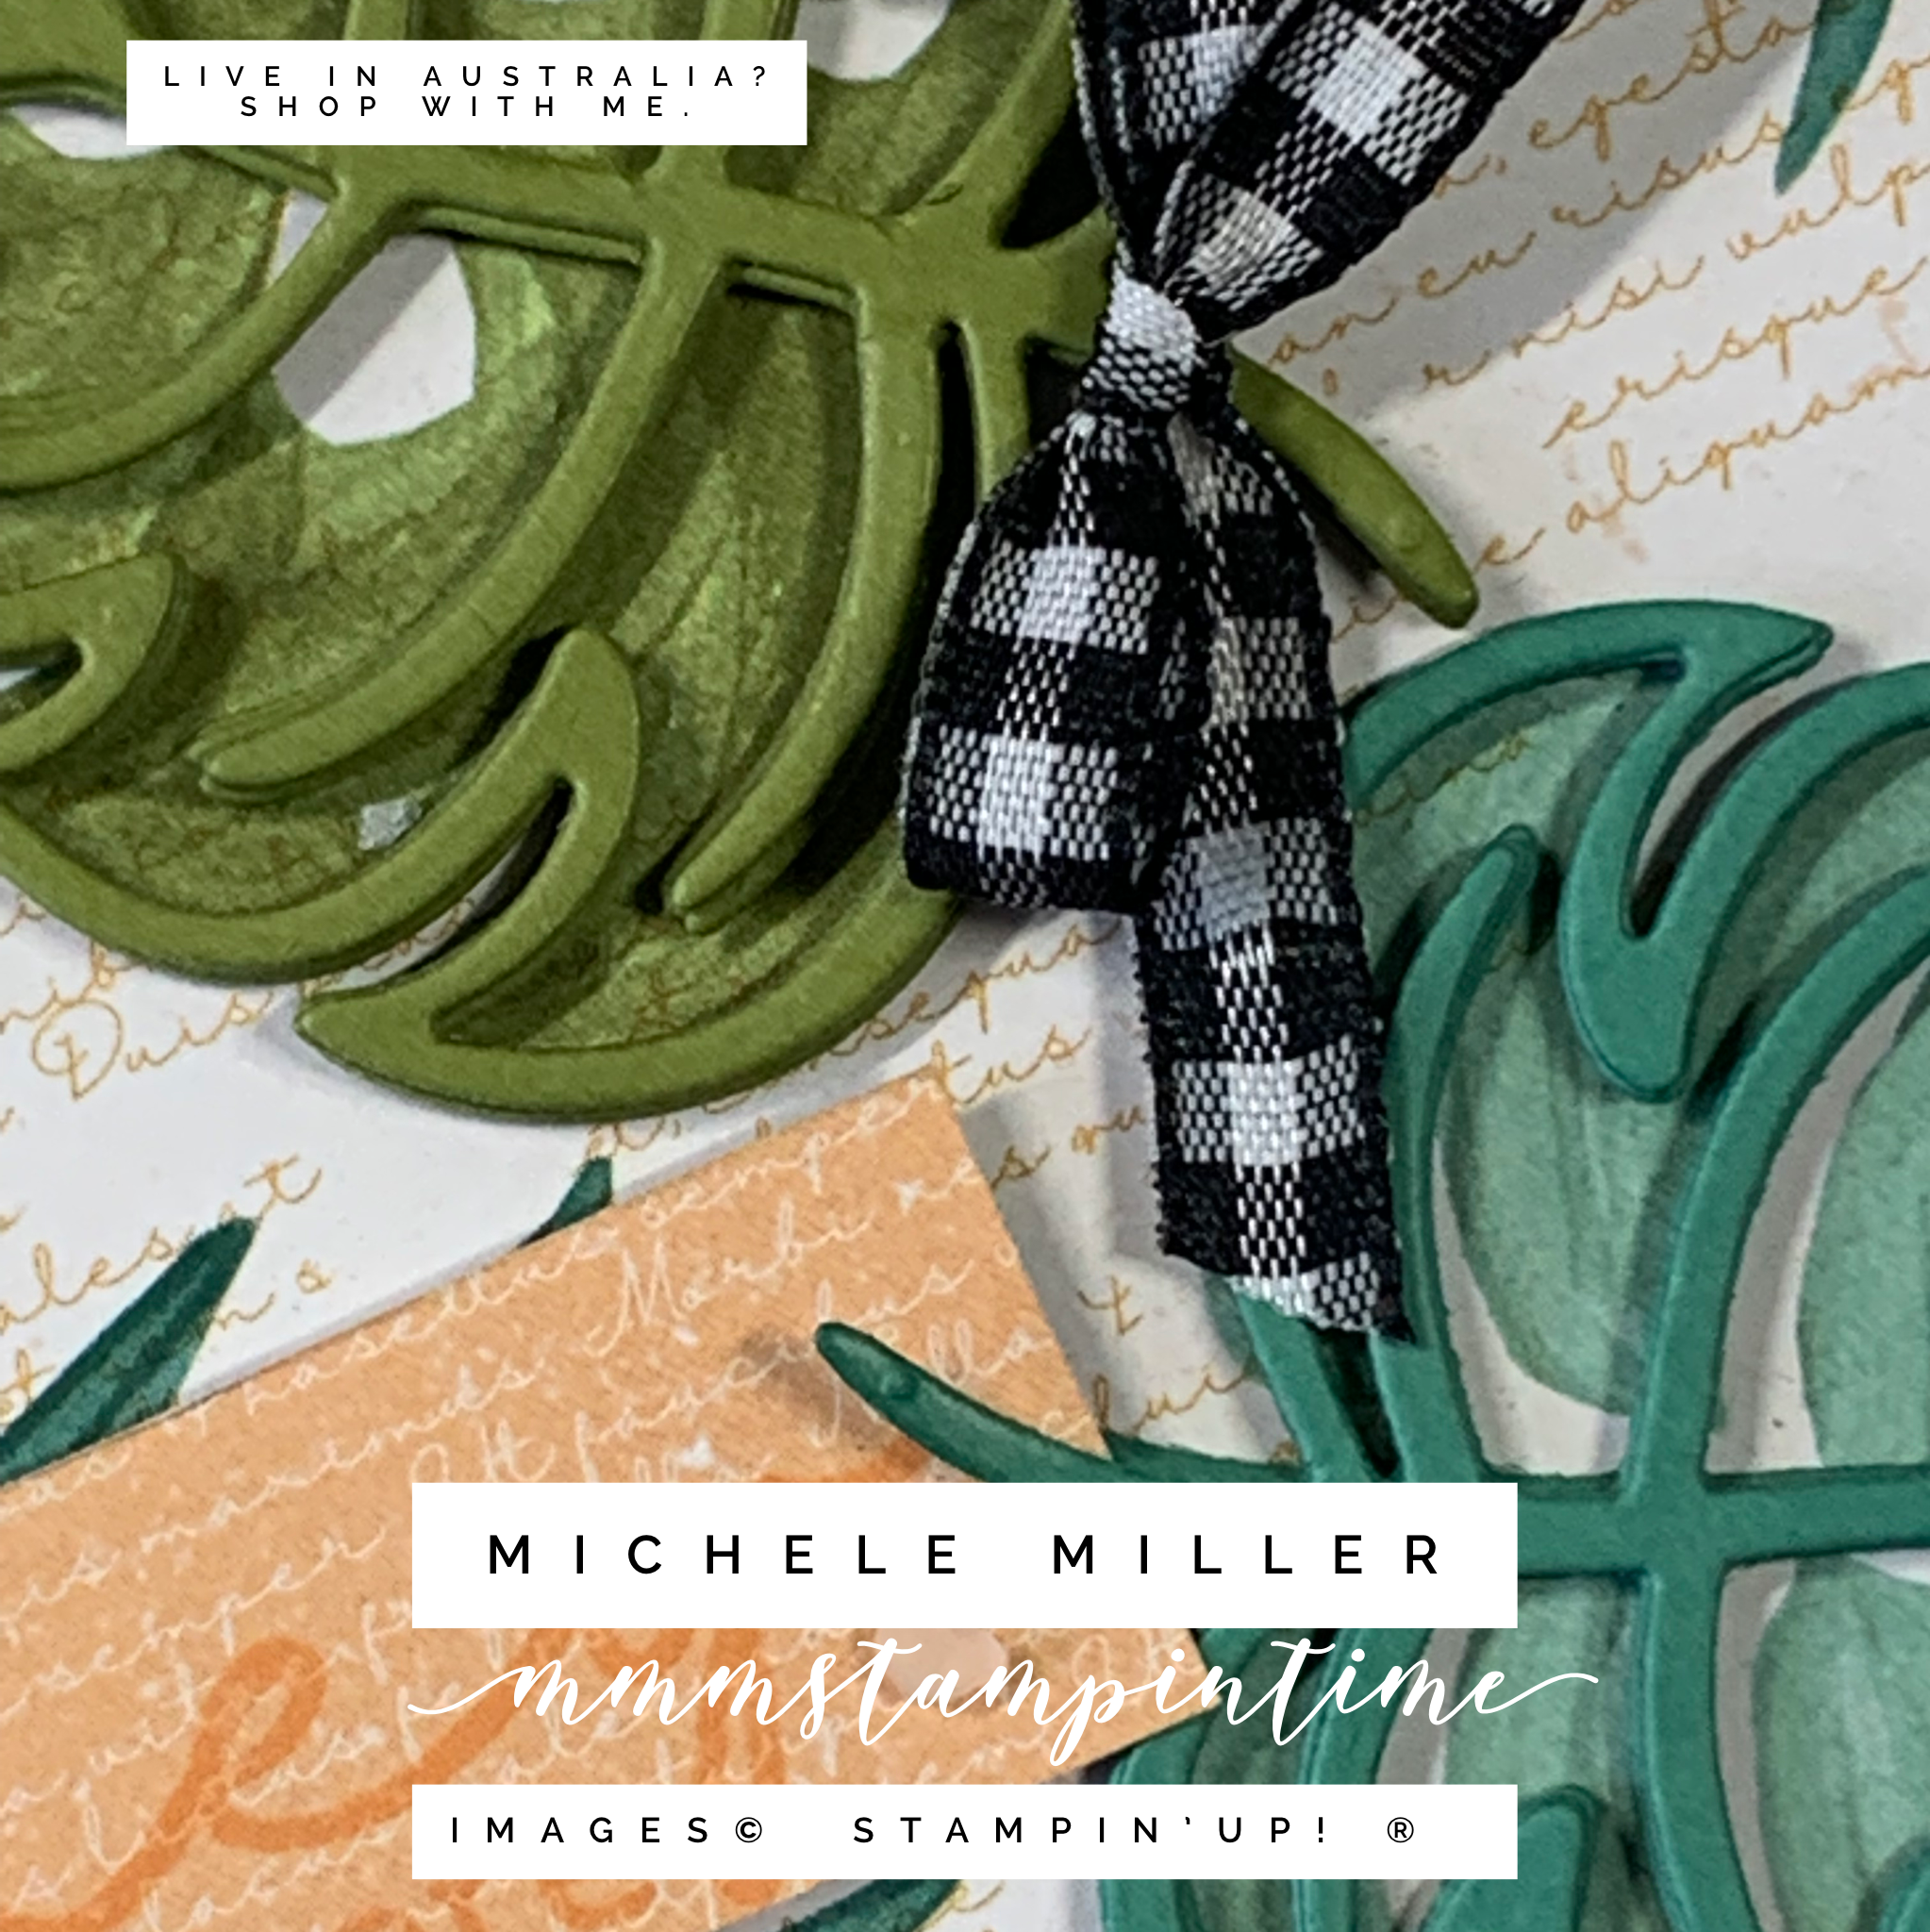
For the leaf embellishments I started by stamping a piece of Basic White cardstock with Calypso Coral, Just Jade and Pear Pizzazz. Then I cut out the solid leaf using one of the Tropical Layers Dies. I also cut one of the leaf shapes from a piece of Calypso Coral cardstock. Both of these shapes were then given added texture using the stripes folder from the Stripes & Splatters 3D Embossing Folders.

Then I cut a third leaf using a piece of Evening Evergreen cardstock. The leaves were overlapped and glued together before adding it to the front of the card.

I added a Basic White insert inside the card. It measures 4-7/8″x 4″ and it has a 1/2″ strip of the Calypso Coral DSP attached. A second strip was added to the front of the envelope.

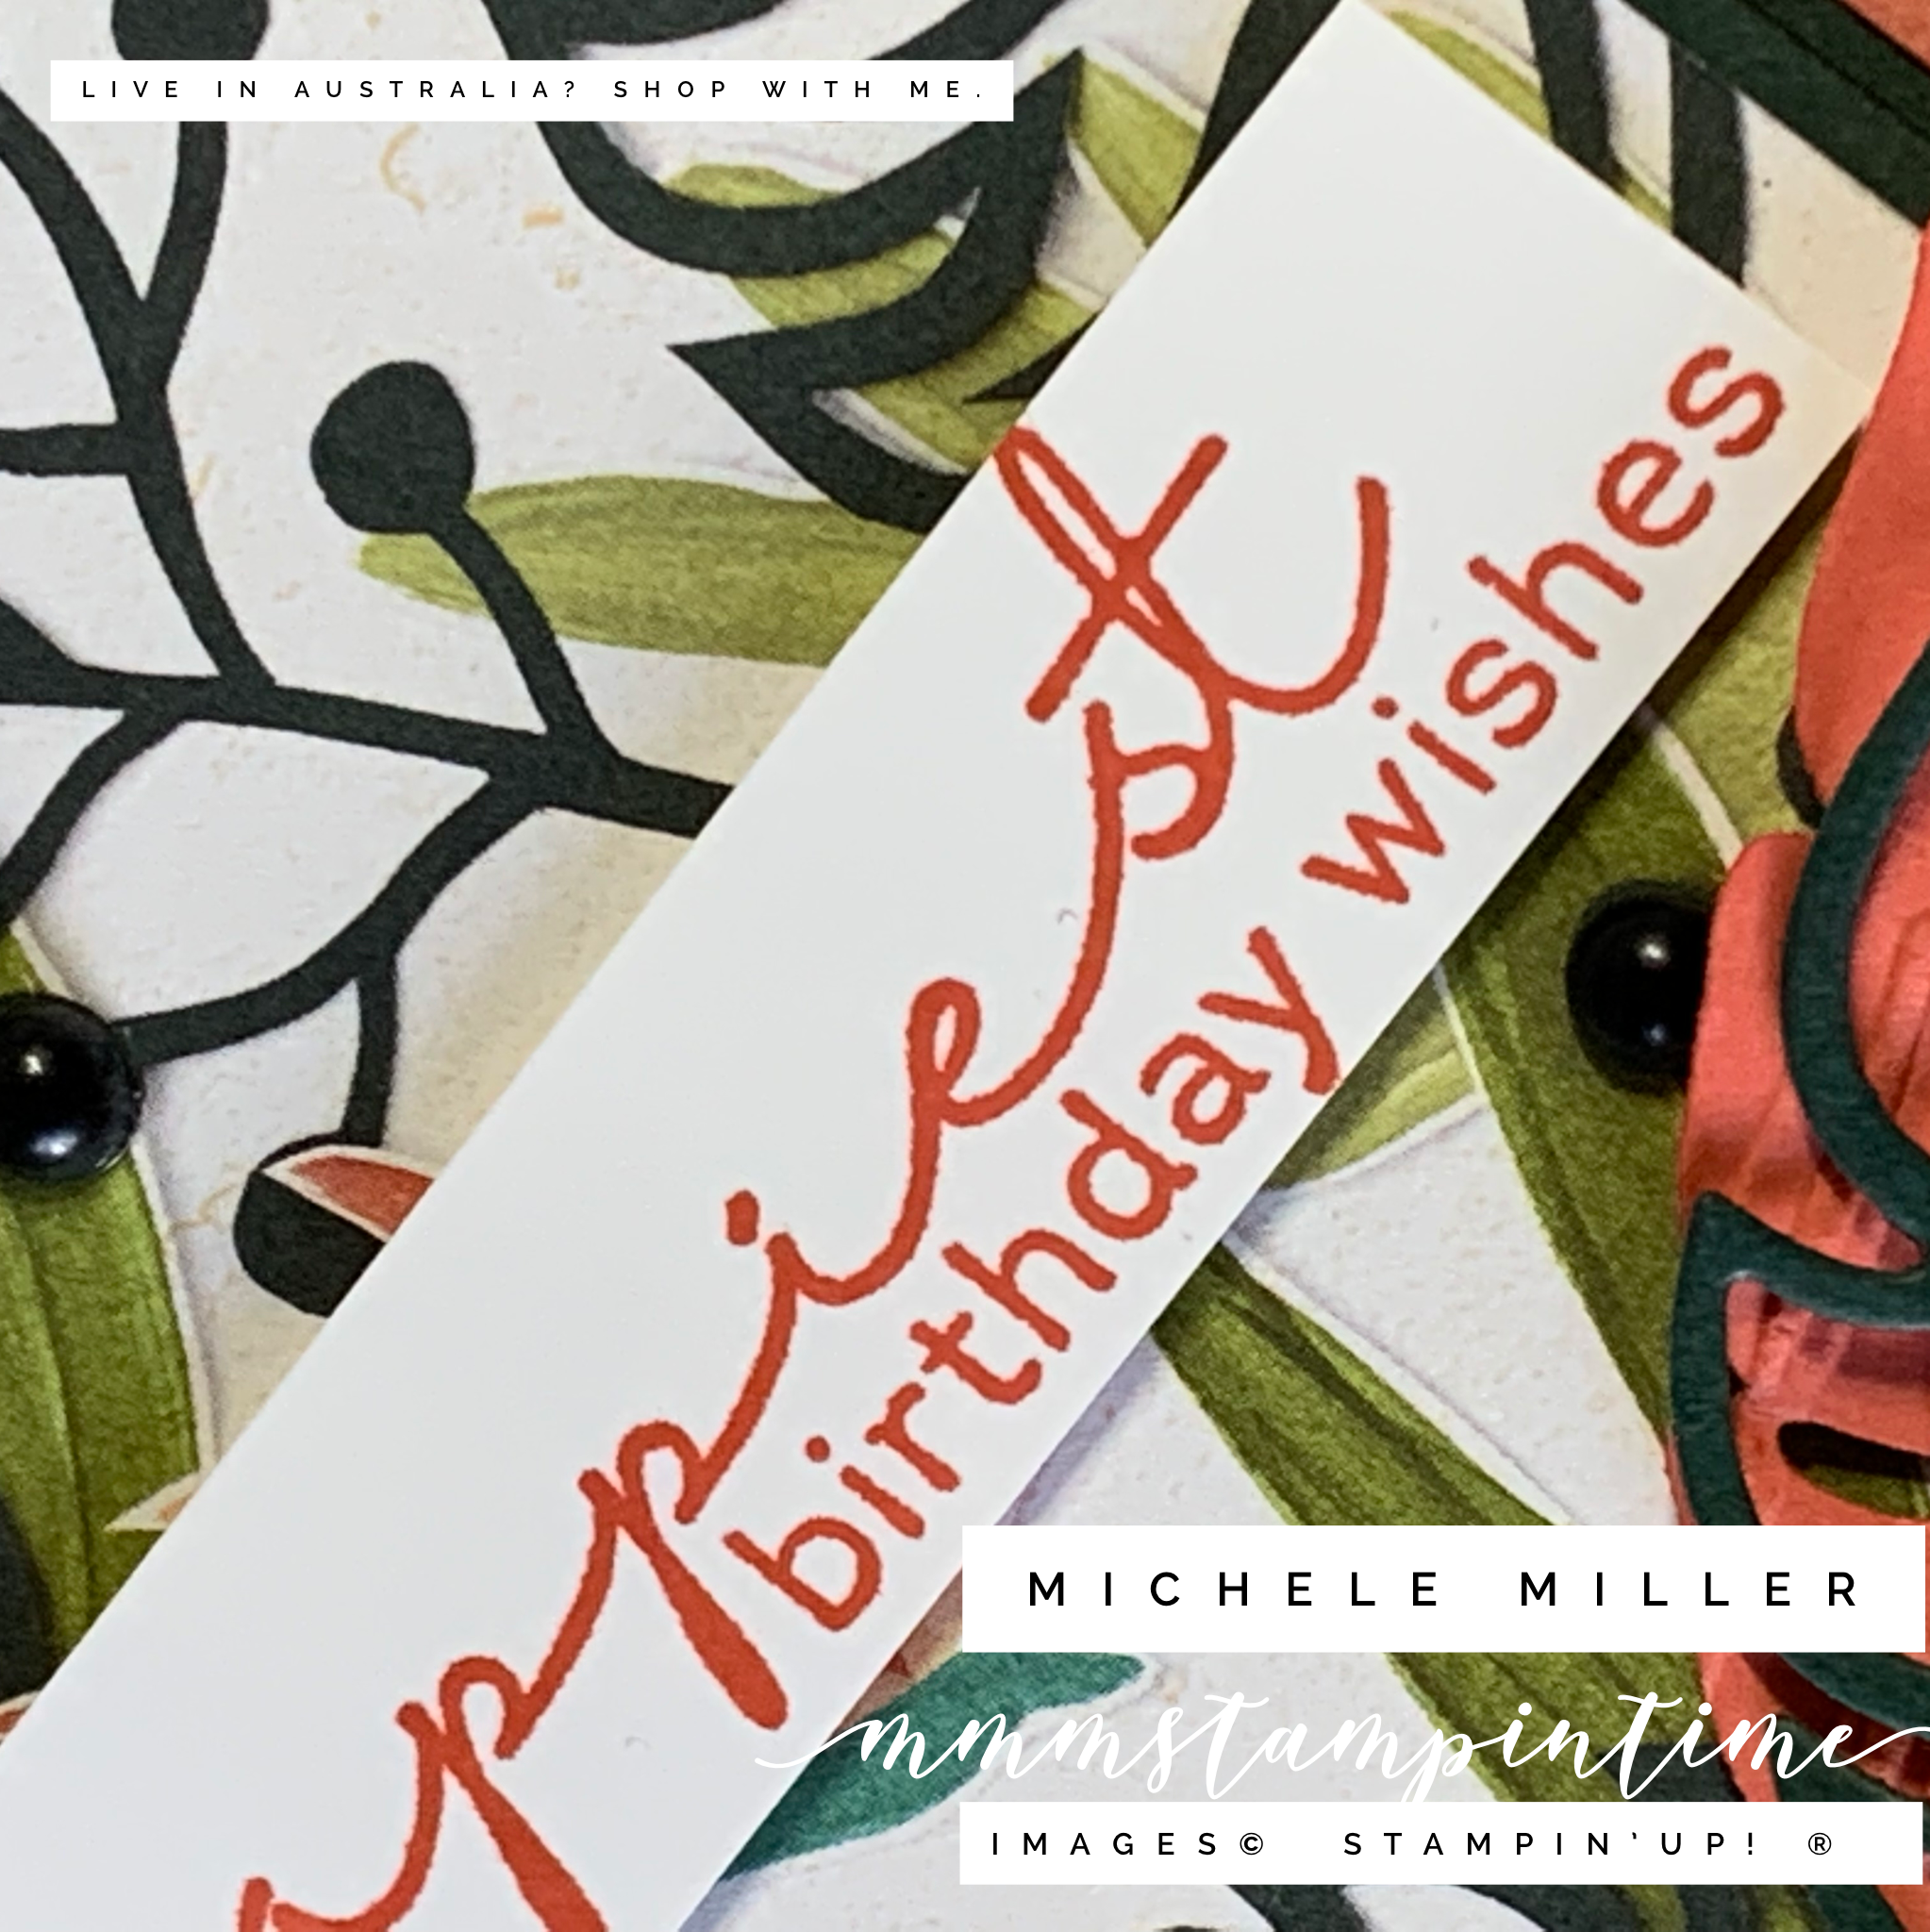
The birthday greeting, from the Artfully Layered Stamp Set, was stamped and trimmed down to add to the card front.

To finish off the card I added some Matte Black Dots across the front of the card.

I wonder if you have noticed that I have some new background sheets that I am using in my photos. What do you think of them?

This week I featured the Artfully Composed Suite and from tomorrow, I will showcase another suite.

Until tomorrow, happy stamping.

If you live in Australia, you can order any of the products I used to make this card by going to my online store. Just click on any of the images below.

Product List
Paper Snips
[103579]
$17.00
Posted on Leave a comment

3D THURSDAY – TIME TO MAKE A GIFT BOX

I really enjoy making 3D projects, especially gift boxes.

Today’s gift box is designed to hold 6 notecards and envelopes. It is also a’flat fold’ gift box. Let me show you what I mean.

This gift box holds the 6 notecards and envelopes that I shared last Saturday and Sunday.

The box has been made using the same Designer Series Paper and coordinating cardstock. It is a ‘flat fold’ box because no adhesive has been used to create a permanent 3D box structure. Once the Evening Evergreen OPen Weave Ribbon bow is untied, the box opens out completely.

There is enough space to position the notecards and envelopes, as you can see. The ‘side flaps’ of the front panel tuck in behind the cards. You could adhere these into position to make a more premanent construction.

For this project, I only added DSP panels to the central panels of the box. As you can see, I have ensured that the continuity of the design wraps continuously through the box panels.

Before I adhered the front DSP piece, I secured a length of Evening Evergreen Open Weave Ribbon so that it could be tied in a bow the hold the front flap down.

3D projects don’t always need ahuge number of products to createthe finished result.

Tomorrow is Fun Fold Friday and I’m not sure what I will create yet. Thank goodness for 24 hours!

UNtil tomorrow, happy stamping.

If you live in Australia, you can order any of the products I used to make this card by going to my online store. Just click on any of the images below.

Product List
Paper Snips
[103579]
$17.00
Posted on Leave a comment

IT’S TIME TO ECLIPSE TECHNIQUE TUESDAY

Tuesday = time to showcase a cardmaking or stamping technique. Today I want to share some ideas for using the ECLIPSE TECHNIQUE. There are several ways that you can use this technique.

Let me show you two and then I will describe a few others.

I am still featuring the Artfully Composed 12″x 12″ Designer Series Paper, as well as the Artfully Layered Bundle.

There are two DSP layers adhered to the Pale Papaya card base.

After attaching Adhesive Sheets to 3″ strips of Just Jade and Pear Pizzazz cardstock, I cut five of the leaf outline shapes. Then I removed the backing from the Adhesive Sheet and layered each of the shapes, one on top of the other. After removing the backing from the base layer, I positioned each of the die cut bundles over the corresponding DSP leaves.

The card insert and envelope have a strip of the DSP, used for the sentiment, attached.

I stamped the sentiment, from the Artfully Layered Stamp Set, onto a piece of the DSP. Then the DSP was trimmed down and had Stampin’ Dimensionals added so that it could be popped up on the card front.

A bow tied, using the Black & White Gingham Ribbon, and attached to the front of the card.

Finally, I added some Faux Sea Glass Shapes to the card.

This Eclipse Card used a die cut shape. The next card uses a die cut word (script) to overlay.

I started, this card, by die cutting the “just want to say” space on this Calypso Coral DSP piece. Then I adhered it to the Calypso Coral cardstock base. I kept the ‘inserts’ from the j (just), a (want), o (to), s (say) and y (say) to use as infills.

Adhesive Sheets were attached to the back of the leaf and floral DSP you can see. The same text die was used to cut the words. I carefully inserted each of the words in the spaces on the DSP layer. Then I used the infill pieces to complete the effect.

This is very close to being a reverse eclipse technique.

After attaching Adhesive Sheets to Calypso Coral cardstock, I cut ‘thanks’ five times. The ‘thanks’ comes from the new Amazing Thanks Dies. The top layer of the eclipse word was cut using the same design from the DSP. Each of the layers were stacked and the Adhesive Sheets did exactly what I wanted them to do.

I used the same leaf outline die that I did for the first card. The adhesive sheet-backed DSP was cut three times to provide the three shapes added to the card front.

The card insert and envelope have the leaf outline ‘cut aways’ added to decorate these areas of the card.

Finally, I added three of the small white embellishments from the new Classic Matte Dots.

(As an aftertought, I think that I would add more layers to the ‘just want to say’ and eclipse more of the card.)

What do think of these two versions of the eclipse technique?

Did you know that you can also use individual letter dies, layer lots of different coloured cardstock or a background die to create other styles of Eclipse Cards?

What do you think about this technique? Have you tried it before?

It is a week until my next Technique Tuesday post. Make sure that you let me know if there is a technique you want me to share.

Tomorrow is Wednesday and I am still working on what this day will be. So far I have tried ‘What’s New on Wednesday’ and ‘Wonderful Wednesday’. I’m not sure that I have this day locked down yet – it is definitely still being refined – stay tuned.

So until tomorrow – and, what it brings, happy stamping.

If you live in Australia, you can order any of the products I used to make this card by going to my online store. Just click on any of the images below.

Product List
Paper Snips
[103579]
$17.00