Posted on Leave a comment

TIME FOR TECHNIQUE TUESDAY

The technique I want to share with you today is a version of the SEPIA COLOURING TECHNIQUE.

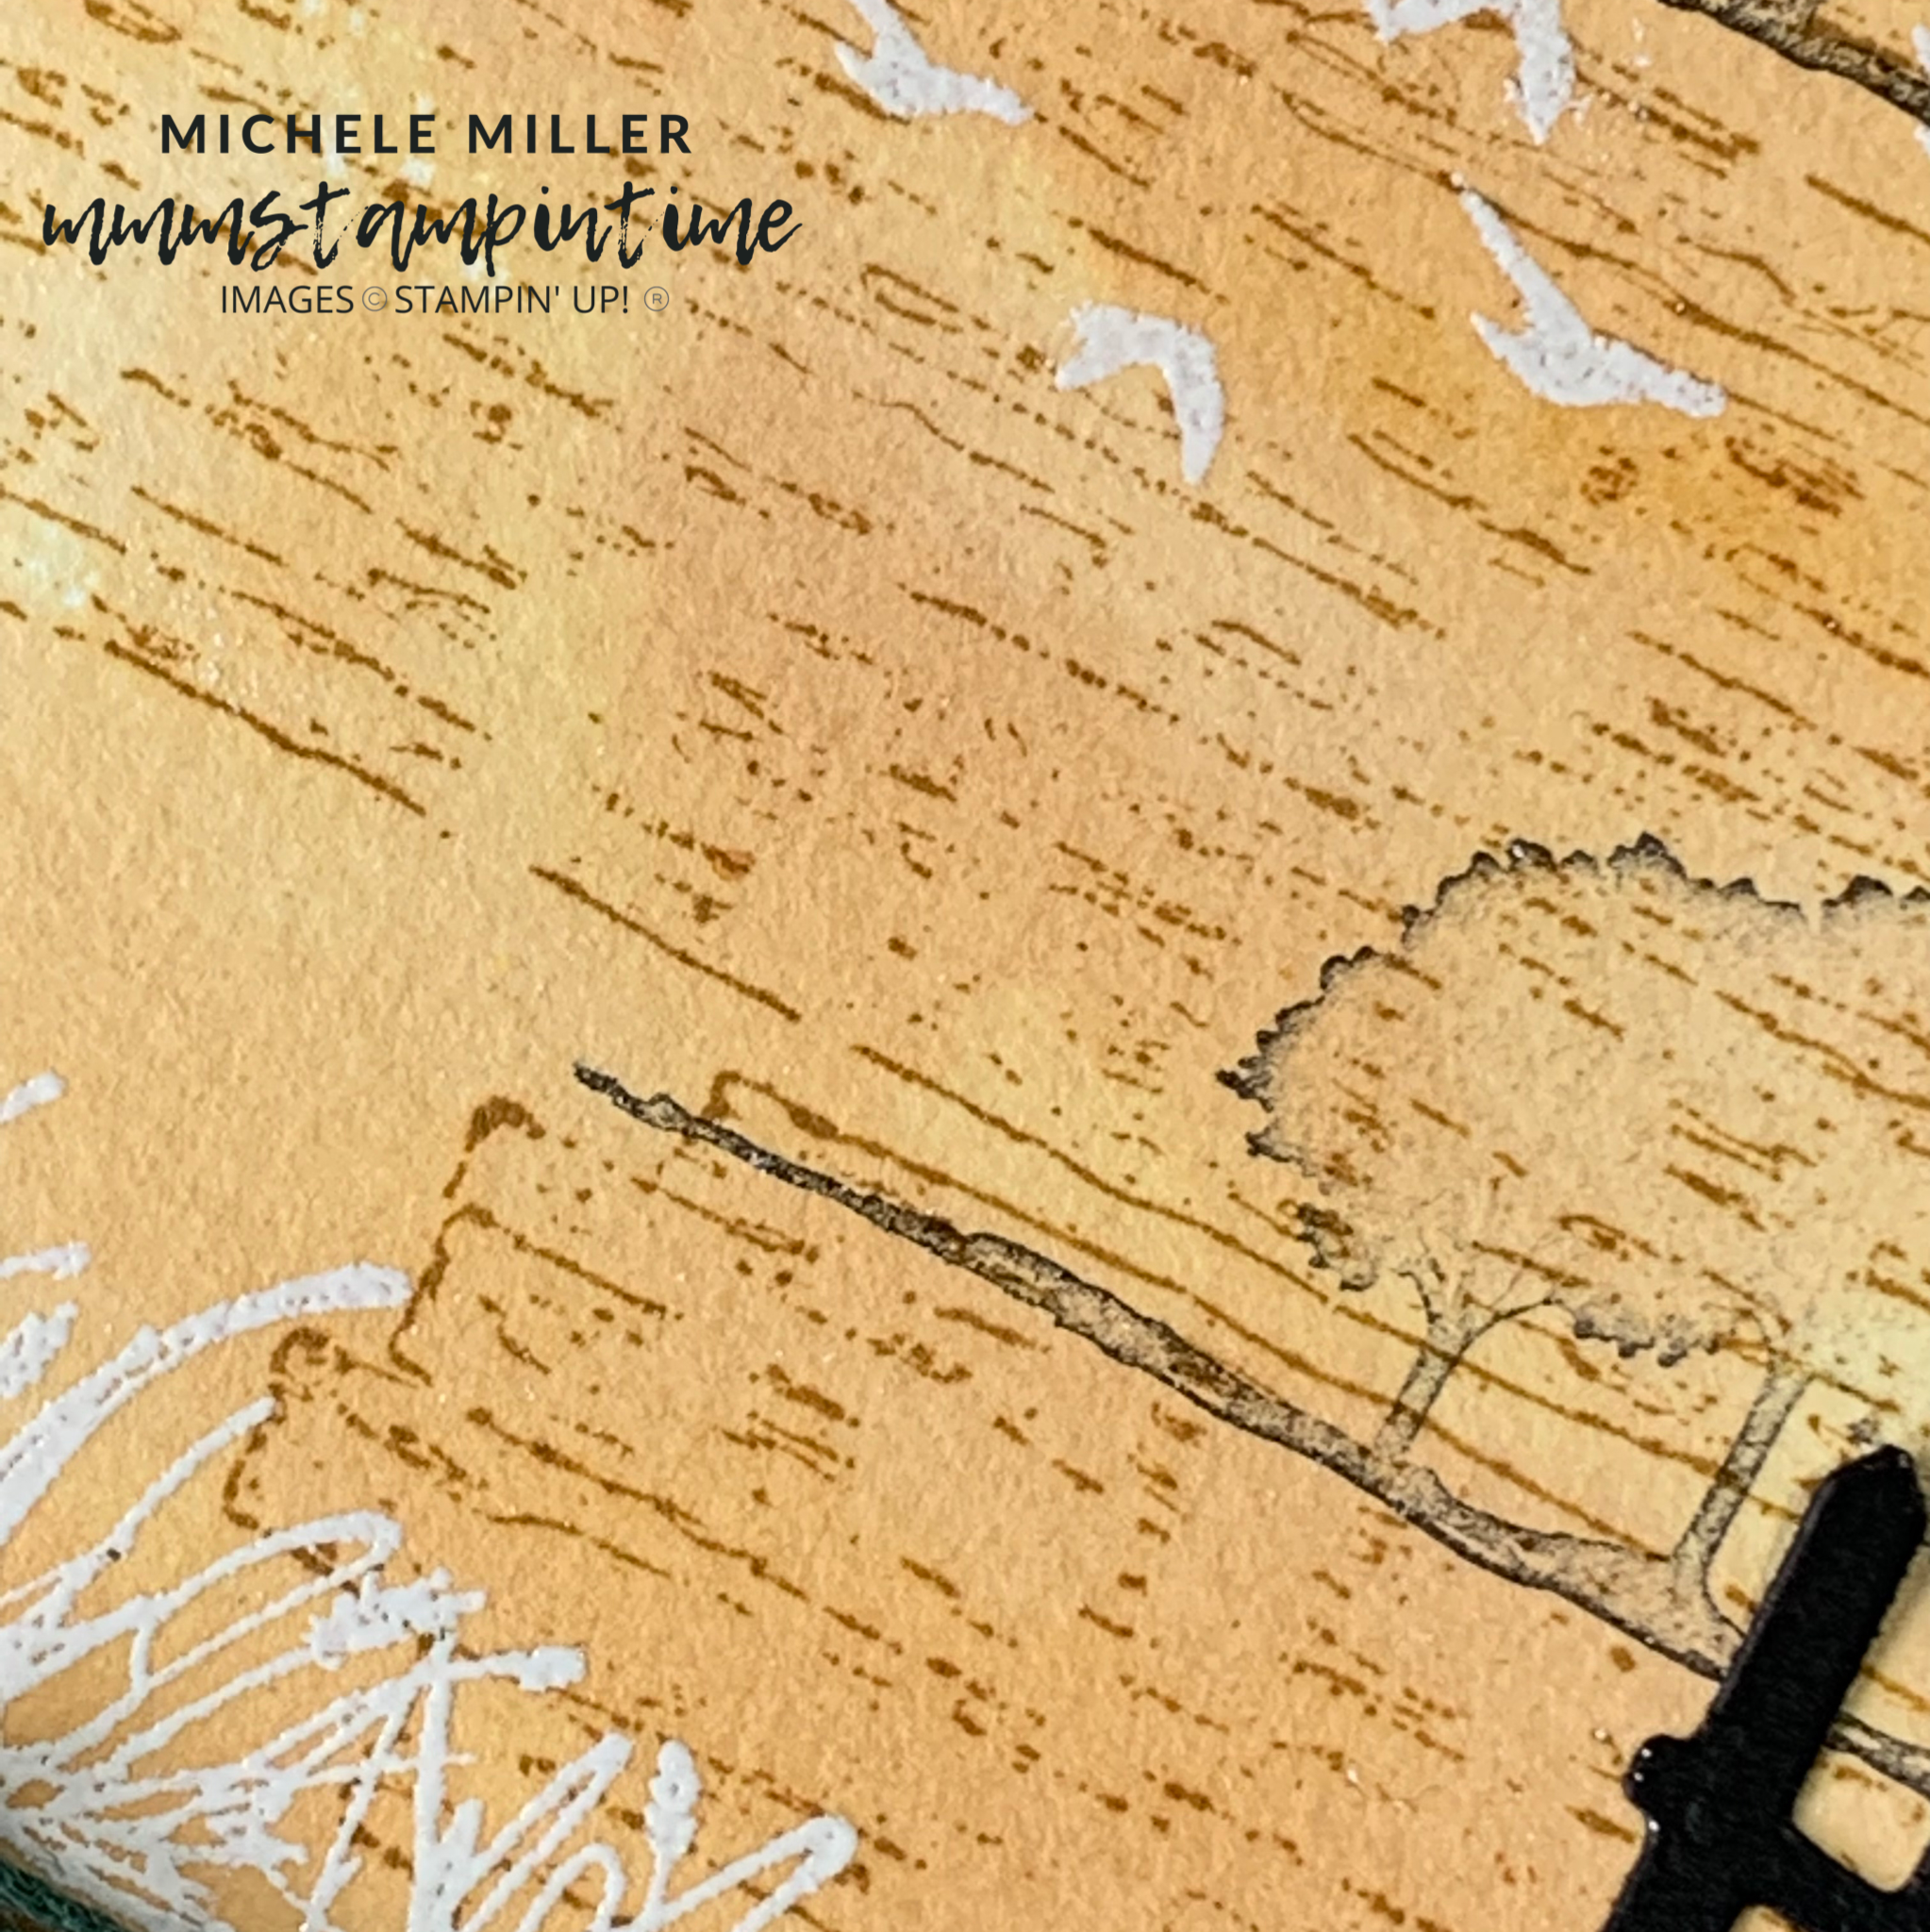
For this technique I decided to use Cinnamon Cider for the water colouring step.

The first step was to stamp the timber planks image from the On the Horizon Stamp Set using the Saddle Brown StazOn Ink. They were stamped onto a piece of Fluid 100 Water Colour Paper.

The water colour paper was then taped down onto a piece of cardboard. I painted water across the paper before water colouring it.

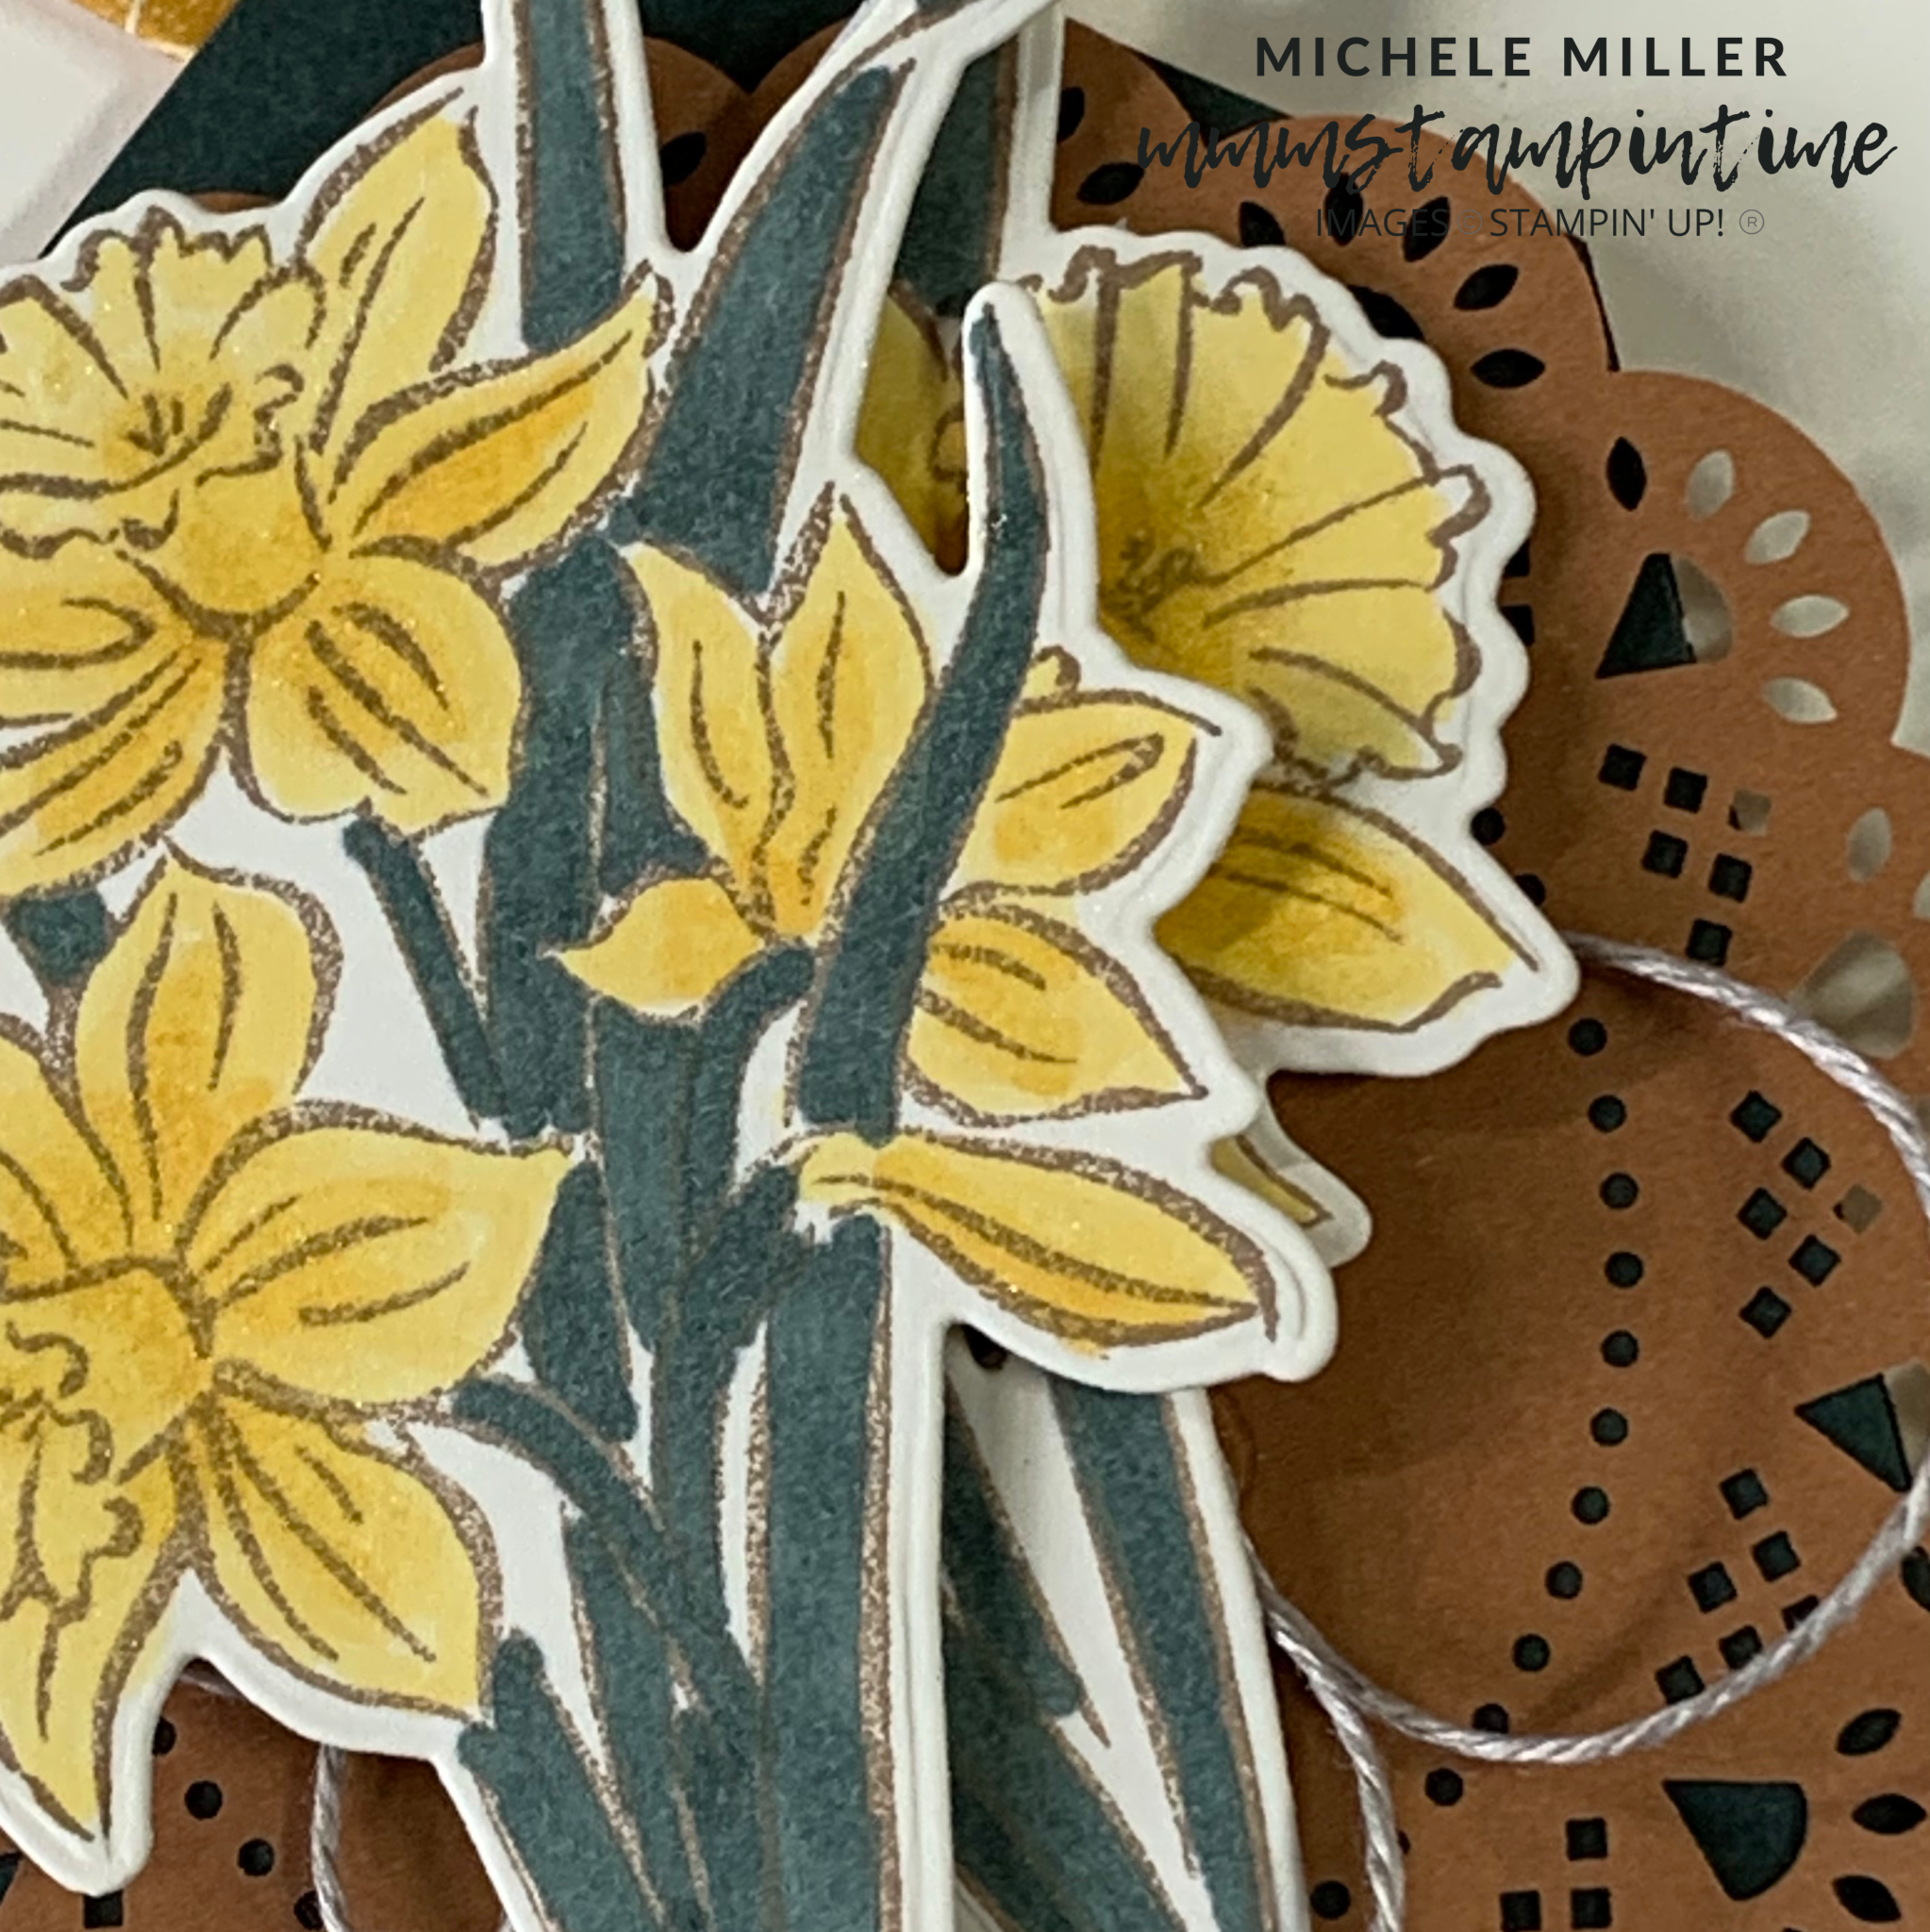
After it dried , I trimmed the paper down and started adding the other images and elements.

I stamped the tree image three times. Then I used Versamark and white embossing powder to add the grass and birds to the water coloured panel.

Before attaching this panel with Stampin’ Dimensionals to the card front, I wrapped and tied a length of Evening Evergreen twine from the Fan Baker’s Twine pack.

When the stamped panel was added to the card base, I cut one of the fence shapes using the Horizon Dies. The Basic Black gate had some Adhesive Sheet attached and this made it quite easy to attach it to the card.

The greeting, from the On the Horizon Stamp Set, was stamped in Cinnamon Cider on to a piece of Fluid 100 Water Colour Paper. I cut it down to 3/4″ and then used the Banners Pick a Punch to create a banner at one end.

THe final step was to add one of the Pebbles Enamel Shapes near the fence.

Phew – now I am back on schedule. Tomorrow I will have a project for this week’s Global Design Project.

Until then, happy stamping.

If you live in Australia, you can order any of the products I used to make this card by going to my online store. Just click on any of the images below.

Product List
Horizon Dies
[157778]
$57.00
Heat Tool
[129056]
$50.00
Paper Snips
[103579]
$17.00
Posted on Leave a comment

FUN FOLD FRIDAY

Thank goodness for all the fun fold cards that exist. It means that I can keep sharing a new one with each week for quite a while.

Today’s card is a Double Point Fold Card.

This is the last of my Daffodil Daydream Bundle projects this week.

The centre panel is cut from a piece of Evening Evergreen cardstock. I added Cinnamon Cider doily from the Heart & Home Doilies pack. Then I swirled some Linen Thread over the top of the doily.

The two daffodil images from the stamp set were stamped using Crumb Cake ink before being coloured with Daffodil Delight and Evening Evergreen Stampin’ Blends. After they were die cut, I added Stampin’ Dimensionals to the backs and popped them up over the thread.

The two points, at the top and bottom of the card front, open out to show the stamped sentiment. The sentiment is from the Flowering Tulips Stamp Set.

The back of the card has a Very Vanilla panel for a greeting to be written. It has been stamped with one of the flower images from the Daffodil Daydream Stamp Set. When my order of Very Vanilla C6 Envelopes arrive, I will stamp the front of it with the same image.

I used the Clear Wink of Stella to paint some glitter across the flowers.

Now it’s time to decide which products I will feature, from tomorrow, for a week.

So until then, happy stamping.

If you live in Australia, you can order any of the products I used to make this card by going to my online store. Just click on any of the images below.

Product List
Paper Snips
[103579]
$17.00
Posted on Leave a comment

THURSDAY IS ALL ABOUT 3D PROJECTS

I love creating 3D paper projects, whether they are gift boxes or bags or decor items, because they move beyond being a two dimensional card and can be used for so many occasions.

Another reason I love creating 3D projects is that it makes me use my brain … and my sometimes unreliable maths skills … followed by my problem solving skills.

Today, I have a triangular gift box to share. It will be perfect to hold lots of mini chocolate Easter eggs.

As I am featuring the Daffodil Daydream Bundle this week, these are the colours and products I have used for this gift box.

The gift box measures 3″x 2″x 2-1/4″. Unfortunately, I haven’t been able to use Creately to prepare a template yet – stay tuned.

I used this concept, that I found on the internet, and experimented with a variety of measurements.

After several ‘drafts’; I measured, marked, cut and scored the gift box base using Basing White cardstock – 10-1/2″x 7-1/4″.

I used this Crushed Curry daffodil design piece of Daffodil Afternoon DSP to cut panels for the rectangular and triangular outer sides of the gift box.

For the front panel, I made two daffodils from a piece of Simply Marbleous 6″x 6″ Designer Series Paper. The DSP was the Bumblebee piece and I added Crushed Curry ink using a Blending Brush. (thanks to Patty Bennett for this technique tip).

I attached the two daffodils to the front of the gift box and then stamped and die cut the Easter greeting. The greeting is from the Celebrating You Stamp Set and was cut with the smallest of the Scalloped Contours Dies. The butterflies were stamped and cut using the Daffodil Daydream Bundle.

After taking these photos I decided to add one small yellow Holiday Rhinestone Basic Jewel to the greeting panel. You can see this when I recreate this project during my Facebook Live.

I cannot wait to fill this gift bo with lots on mini Easter eggs. It will make a great gift for someone special.

Tomorrow is Fun Fold Firday and I have a few ideas floating around in my head. I hope you can pop back tomorrow to see what I have made.

Until then, happy stamping.

If you live in Australia, you can order any of the products I used to make this card by going to my online store. Just click on any of the images below.

Product List
Paper Snips
[103579]
$17.00