Posted on Leave a comment

IT’S FRIDAY & TIME FOR SOME FEATURES AND A FUN FOLD CARD

This week I have been showcasing the Beach Day Bundle.

The Photopolymer Stamp Set has 14 stamps – 4 different greetings and 10 awesome beach inspired images.

The greetings combine two different fonts and the images are outlined and perfect for colouring.

To coordinate with the stamps, there are 21 dies in the bundle.

Today’s card is a fun fold card that I made using a piece of 12″x 6″ that was scored at 4″ and 8″.

I also used the Bright & Beautiful 6″x 6″ DSP this week. Several of the designs were perfect for sky and ocean backgrounds.

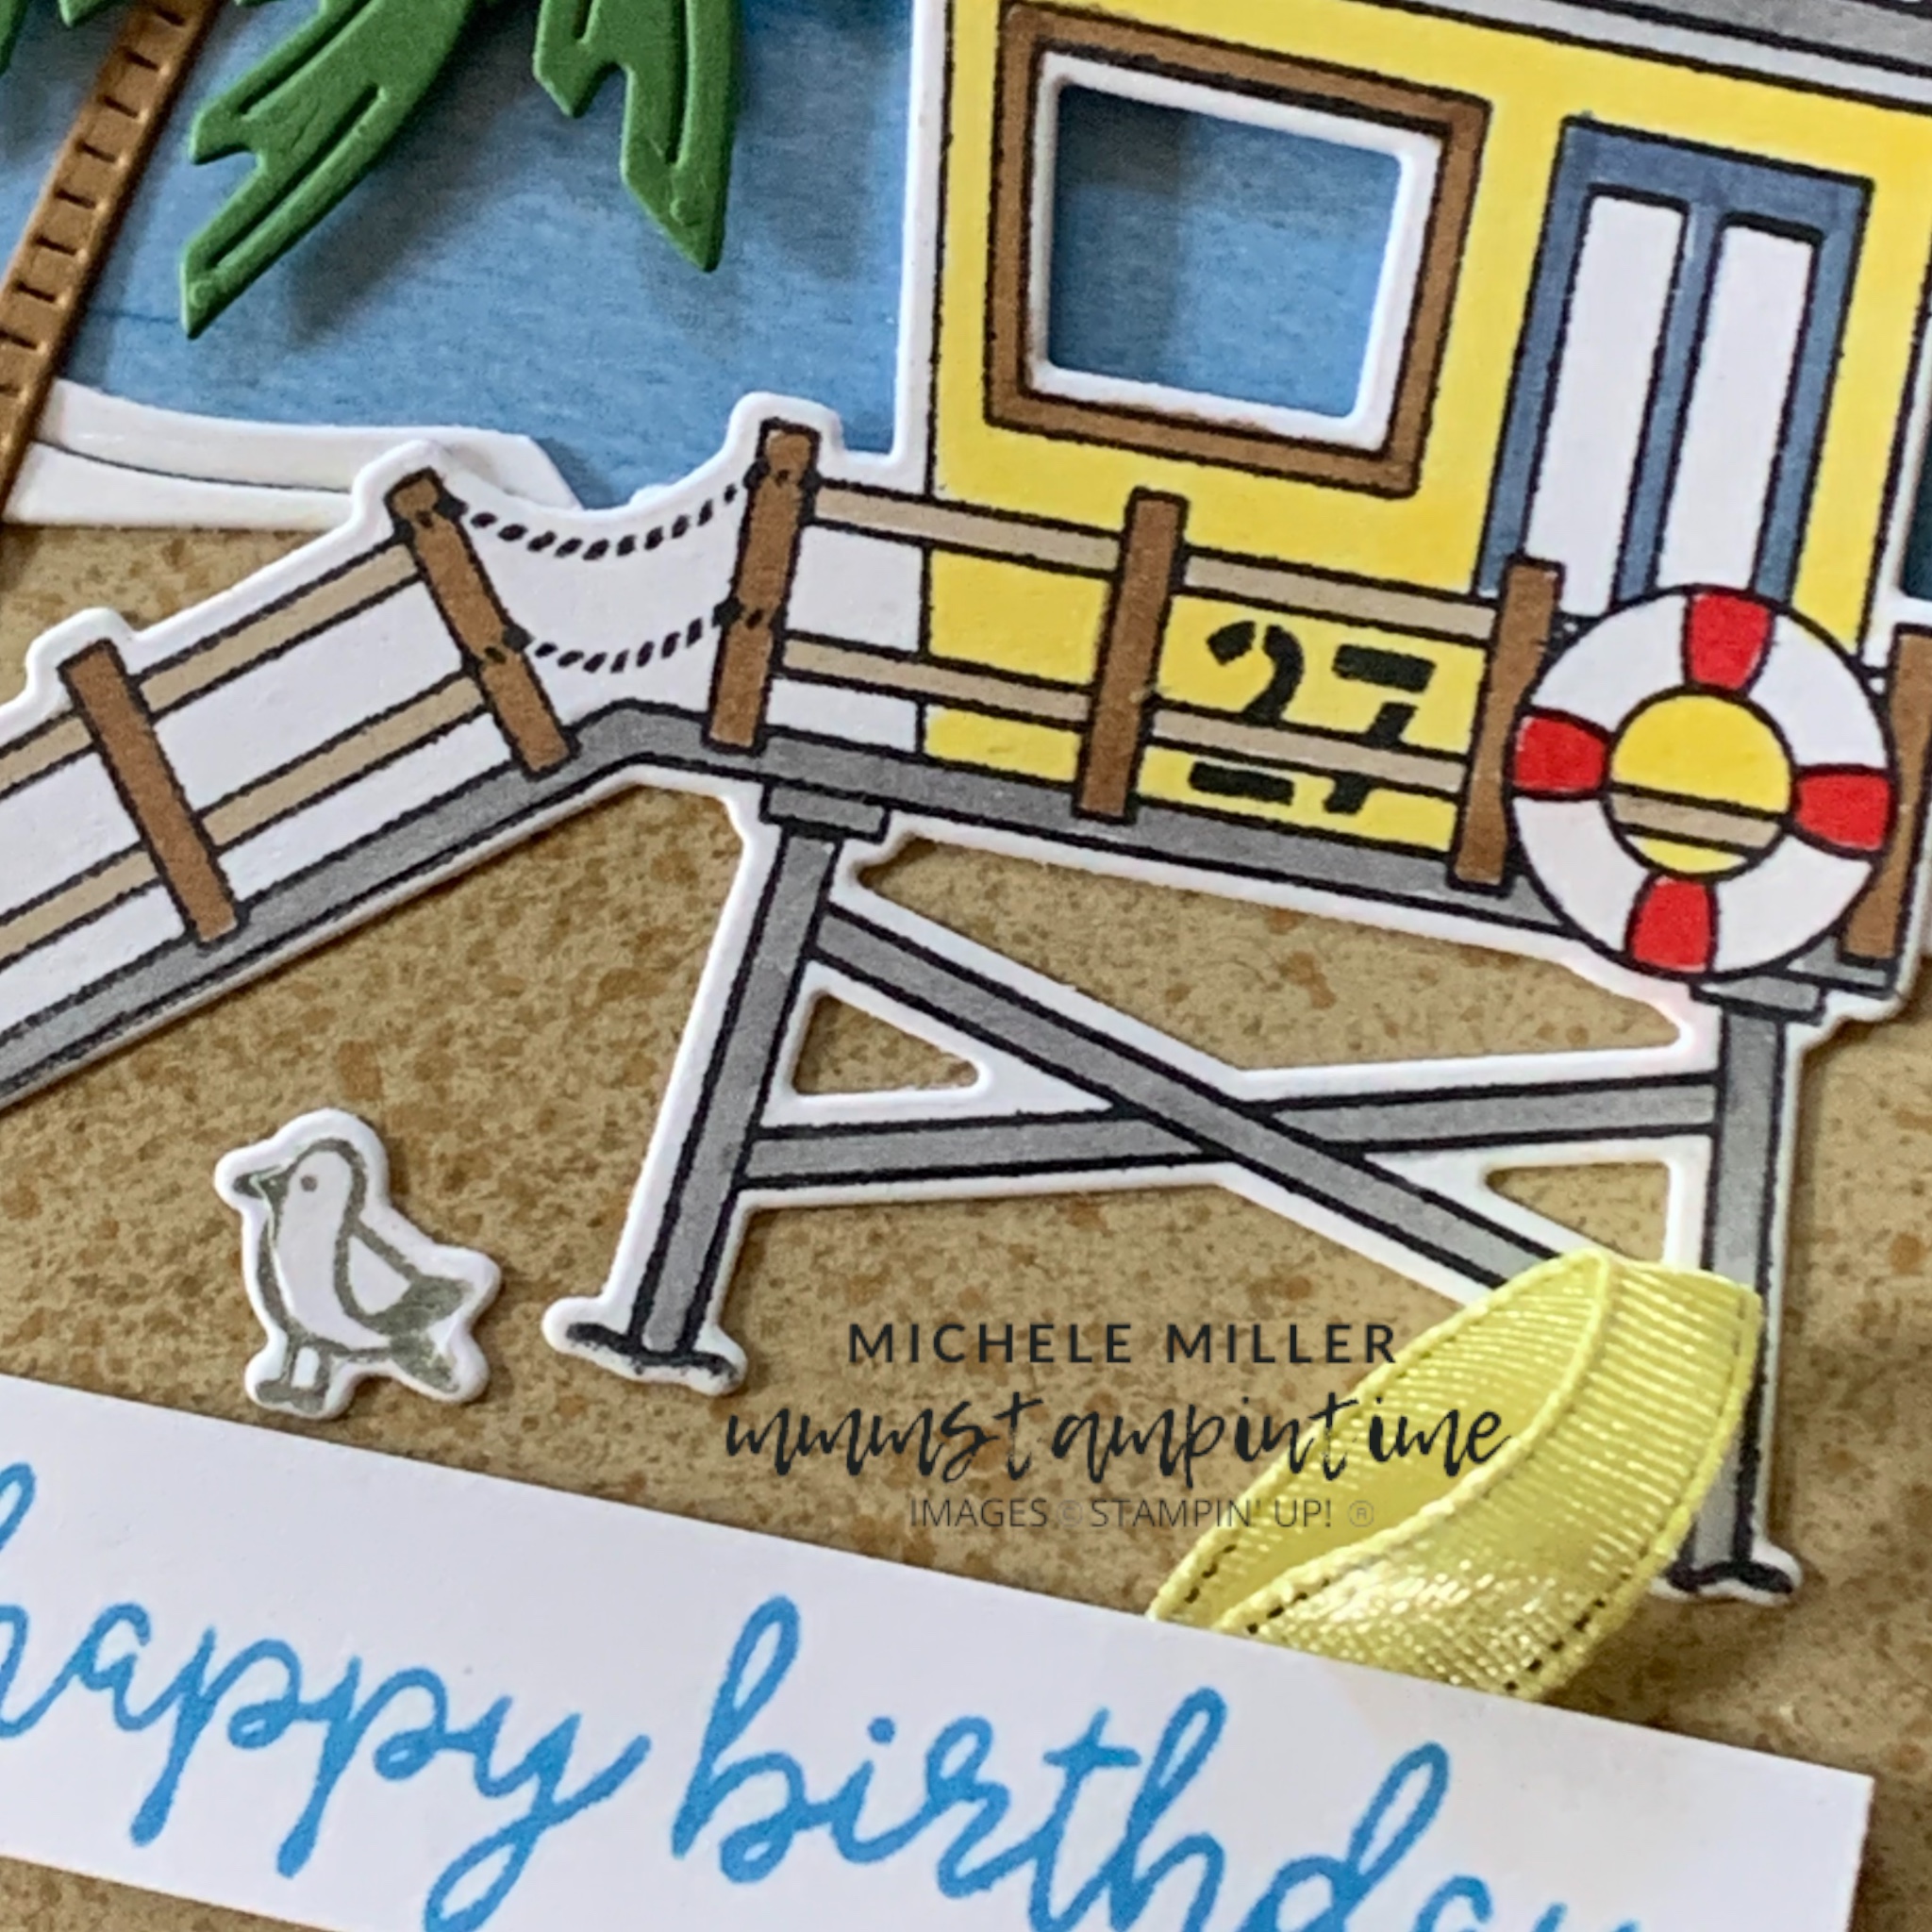
I am so pleased with the extended beach scene I was able to create.

After cutting, scoring and folding the card base, I began creating each of the beach scenes throughout the card.

For the front I placed a panel of the DSP for the sky and then added the die cut beach element. I used my Dark Pecan Pie Blender Pen to create the sandy flecks across the beach.

I cut the wave piece using one of the Beach Day Dies and adhered it between the beach and the sky.

The next step was to add the palm tree and then the life guard’s hut. The hut was coloured in the same day as the hut from Monday.

After stamping and trimming the greeting, I tucked a loop of Lemon Lolly Sheer Ribbon, from the Combo Pack, behind the greeting. The greeting was popped up on the card front using Stampin’ Dimensionals.

Then I stamped and die cut some seagulls to add to the card.

When the card is fully opened there are three 4″ wide panels. I added two DSP panels and a Basic White panel to the card.

Then I added a 12″ wide panel of Crumb Cake card that had been die cut using the wavy die to create a beach waterline. This panel was scored at 4″, 6″, 8″ and 10″. The waves were added to the two outer panels.

I added palm trees, umbrellas, beach chairs, sandcastles, shells, a beachball, surfboards and shells to the beach panel.

To the skyline I added clouds, from the Hot Air Balloon Dies, and a few seagulls.

I am so happy with the beach scenes I created for this card.

I’m just deciding whether I need to go back and add another wave to the centre panel. What do you think? Should I?

So many fun products to play with!

Tomorrow I will have a challenge project to share with you.

Until then, happy stamping.

If you live in Australia, you can order any of the products I used to make this card by going to my online store. Just click on any of the images below.

Product List
Paper Snips
[103579]
$19.25
Posted on Leave a comment

IT’S FRIDAY & TIME FOR SOME FEATURES & A FUN FOLD CARD

This week I have featured the Magnolia Mood Bundle.

The cling stamp set has four gorgeous magnolia images and three wonderful greetings.

The coordinating dies make it so easy to cut the floral shapes you want.

This week I have also used:

This set has six versatile greetings.

This bundle helps create amazing texture and shapes.

The perfect stamp set fir upcoming weddings.

I wanted to show just how perfectly different Stampin’ Up! products can work together.

Today I have a w-fold card to share.

When using this die I highly recommend attaching Adhesive Sheets to the back of the card stock before cutting it. This makes attaching the flower far less messy than using glue.

After stamping and trimming the greeting, I added a folded piece of Pecan Pie Centre Stripe Ribbon behind it. Then, with dimensionals behinfd it also, the greeting was popped up on the card front.

I added some Adhesive-backed Cork Rounds to the card front.

Inside the card, I attached an 11 1/2″ x 1″ strip of Pecan Pie card. This strip was folded into four equal panels.

I cut four Pecan Pie squares – 2 5/8″ and four Basic White squares – 2 1/2″.

A greeting was stamped on one white panel and the others were stamped with with the magnolia images and coloured with Stampin’ Blends.

These pieces were then adhered together and attached to the 1″ strip.

I also added some Adhesive-backed Cork Rounds inside the card.

I’m lookng forward to using this fun fold again.

Tomorrow I will have a challenge project to share with you.

Until then, happy stamping.

If you live in Australia, you can order any of the products I used to make this card by going to my online store. Just click on any of the images below.

Product List
Paper Snips
[103579]
$19.25
Posted on Leave a comment

IT’S FRIDAY & TIME FOR SOME FEATURES AND A FUN FOLD CARD

The Trusty Tools Bundle has been so much fun to play with this week.

It’s always great to have a masculine stamp set and dies to have on hand.

The 16 images and greetings are photopolymer making it so easy to accurately stamp images where you want them.

There are 20 dies in the Trusty Tools Dies set.

I have made a version of a Z fold card today.

I used a Poppy Parade card base to add panels of this screwdriver paper.

Then I used my new brayer to add colour to a 9″ x 3″ strip of Basic White card. I used Smoky Slate and Basic Gray to colour this piece.

I scored the Basic White piece at 3″ and 6″. Then I adhered it to the folded card base, as shown.

I attached adhesive sheet to some Lost Lagoon cardstock and used the Mini Alphabet Dies to cut the letters needed for the ‘man cave’ card title.

Once again, I picked through the die and fussy cut tools to choose a range of them to attach to the card.

Tomorrow I hope to have a challenge project to share with you.

Until then, happy stamping.

If you live in Australia, you can order any of the products I used to make this card by going to my online store. Just click on any of the images below.

Product List
Paper Snips
[103579]
$19.25