My new 2022 weekly schedule features Technuqie Tuesday. Each Tuesday I will share a project or two using featuring a specific technique – there are so many paper cratfing techniques, it may take me a year or two to showcase all of them.
Today I want to share how to make your own mask and then apply embossing paste to a card front.
I am still featuring the Sweet Talk Suite.
The mask was made using a piece of Thick Basic White cardstock and one of the Sweet Heart Dies. I created a pencil drawn frame around the outside of the card before positoning the 4 heart die and cutting out each layer, moving the die across one space to achieve this design.

After I finished the die cutting, I used an eraser to clean up the cardstock and managed to add these creases in the card. Fortunately, it did not have a negative effect on the next stage of the project.
I selected two of the Highland Heather pieces of Sweet Talk 12″x 12″ Designer Series Paper. The first of these was placed on my Stamparatus and the stencil placed over the top.

I used the Stamparatus to ensure the stencil stayed firmly on the DSP while I used a spatula to spread the Shimmery White Embossing Paste.
After I removed the mask layer I went on ot create the card.

The Shimmery Embossing Paste hearts dried very well. Then I added some die cut Highland Heather hearts and a silver Simply Elegant bow to the front of the card.
The Valentine’s Day sentiment was stamped onto a piece of Basic White cardstock and was trimmed down before popping it up using Stampin’ Dimensionals.
I stamped the ‘Luv U’ heart image on the card insert and envelope.

Then I added several Iridescent Rhinestone Basic Jewels to the DSP layer. These are going to quickly become some of my favourite embellishments.

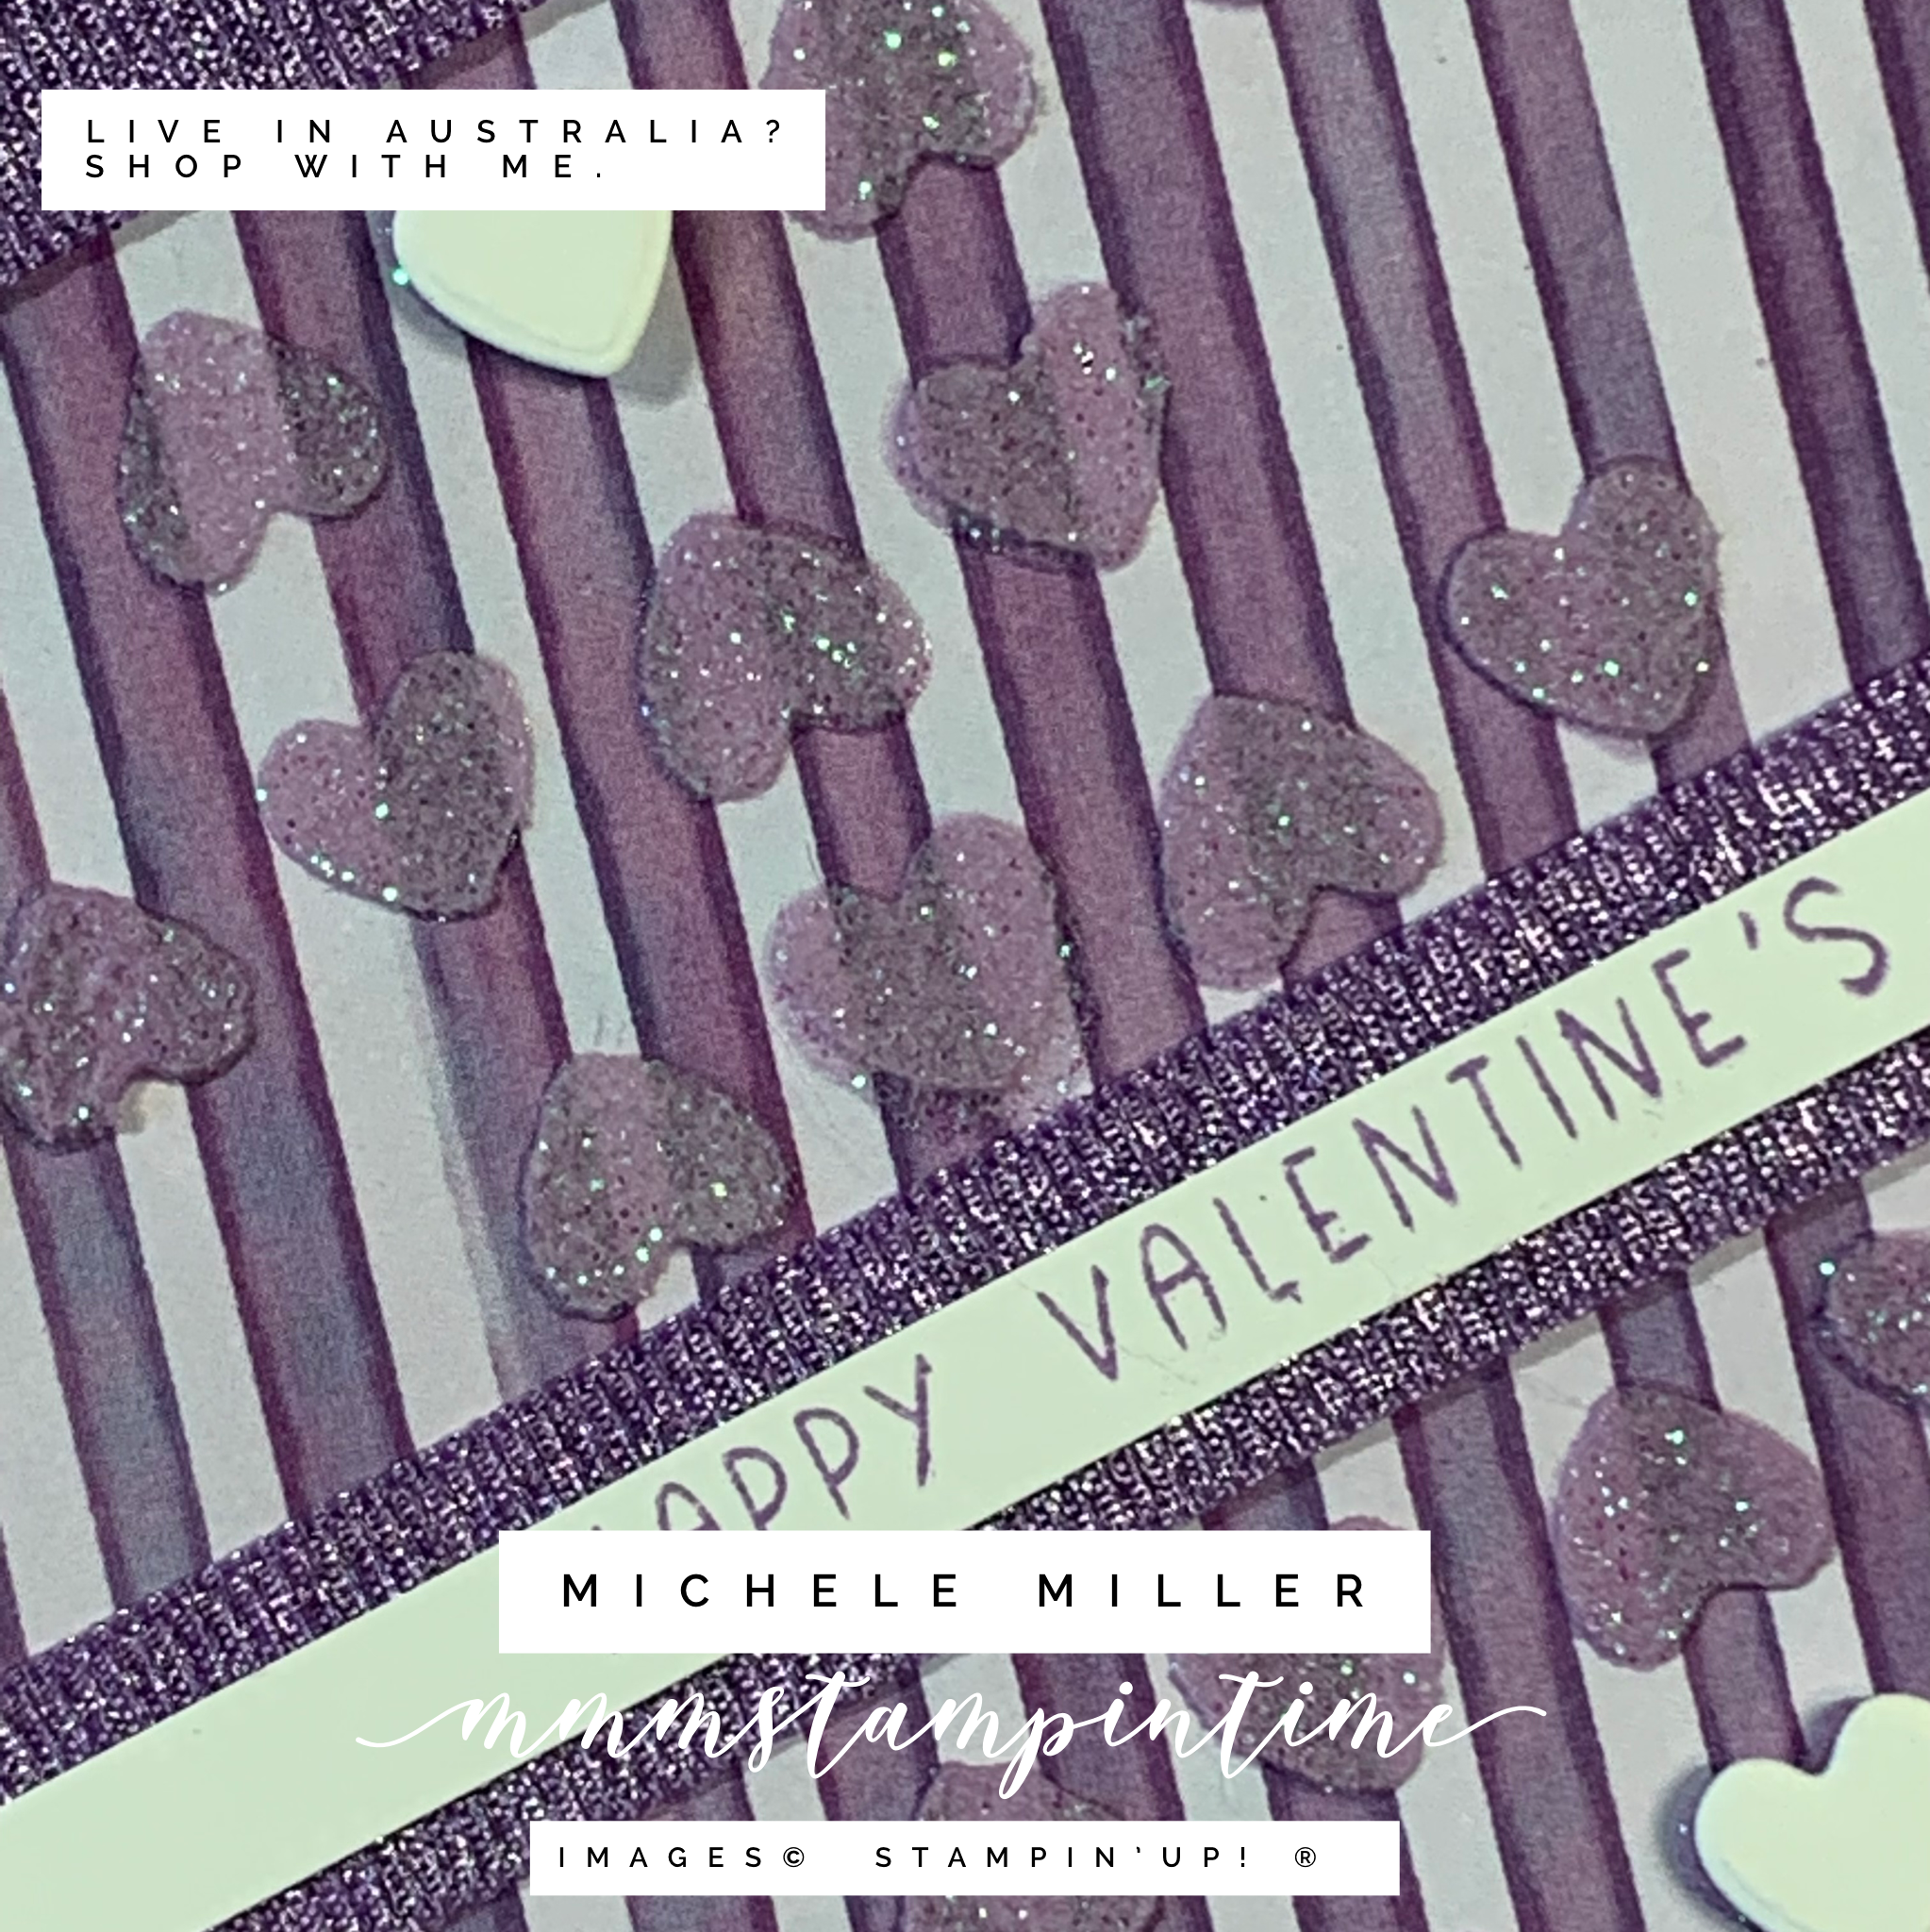
For the second card, I blended the Shimmery Embossing Paste with some drops of Highland Heather reinker on the largest Acrylic Block using the spatula. This time I used the Highland Heather striped DSP.

I wrapped two lengths of Highland Heather Grosgrain Ribbon diagonally around the DSP and secured it to the back of the DSP and Basic White cardstock using Tear and Tape.

The sentimet was stamped and cut before positioning it across the middle of the lower ribbon.

I used three of the Basic White hearts, from the original mask, to use as features on the card front.
The card inserts and envelopes both feature the ‘Luv U’ heart stamp.
This is how my mask looked after I had finished these cards. I could have used some Window Sheet and wiped it clean to use again – next time, perhaps.

What do you think about today’s Technique post? Make sure you let me know what techniques you would like me to share on a Tuesday.
Tomorrow is What’s New on Wednesday.
Until then, happy stamping.

If you live in Australia, you can order any of the products I used to make this card by going to my online store. Just click on any of the images below.
Because some of the products I have used to make this card are not yet available to customers, I am not able to show them at this time. As soon as product images go live, I will create this section.

 |  | ||
 |  |  |  |
 |  |  |  |

 Grosgrain Ribbon")


")


")


 Flax Ribbon")
 Ruched Ribbon")


 Circle Punch")


")


