Posted on Leave a comment

A TRADITIONAL CHRISTMAS CARD TODAY

The Freshly Brewed Projects Blog Hop theme this week is Traditional Christmas. So we will share projects for Christmas using traditional colours.

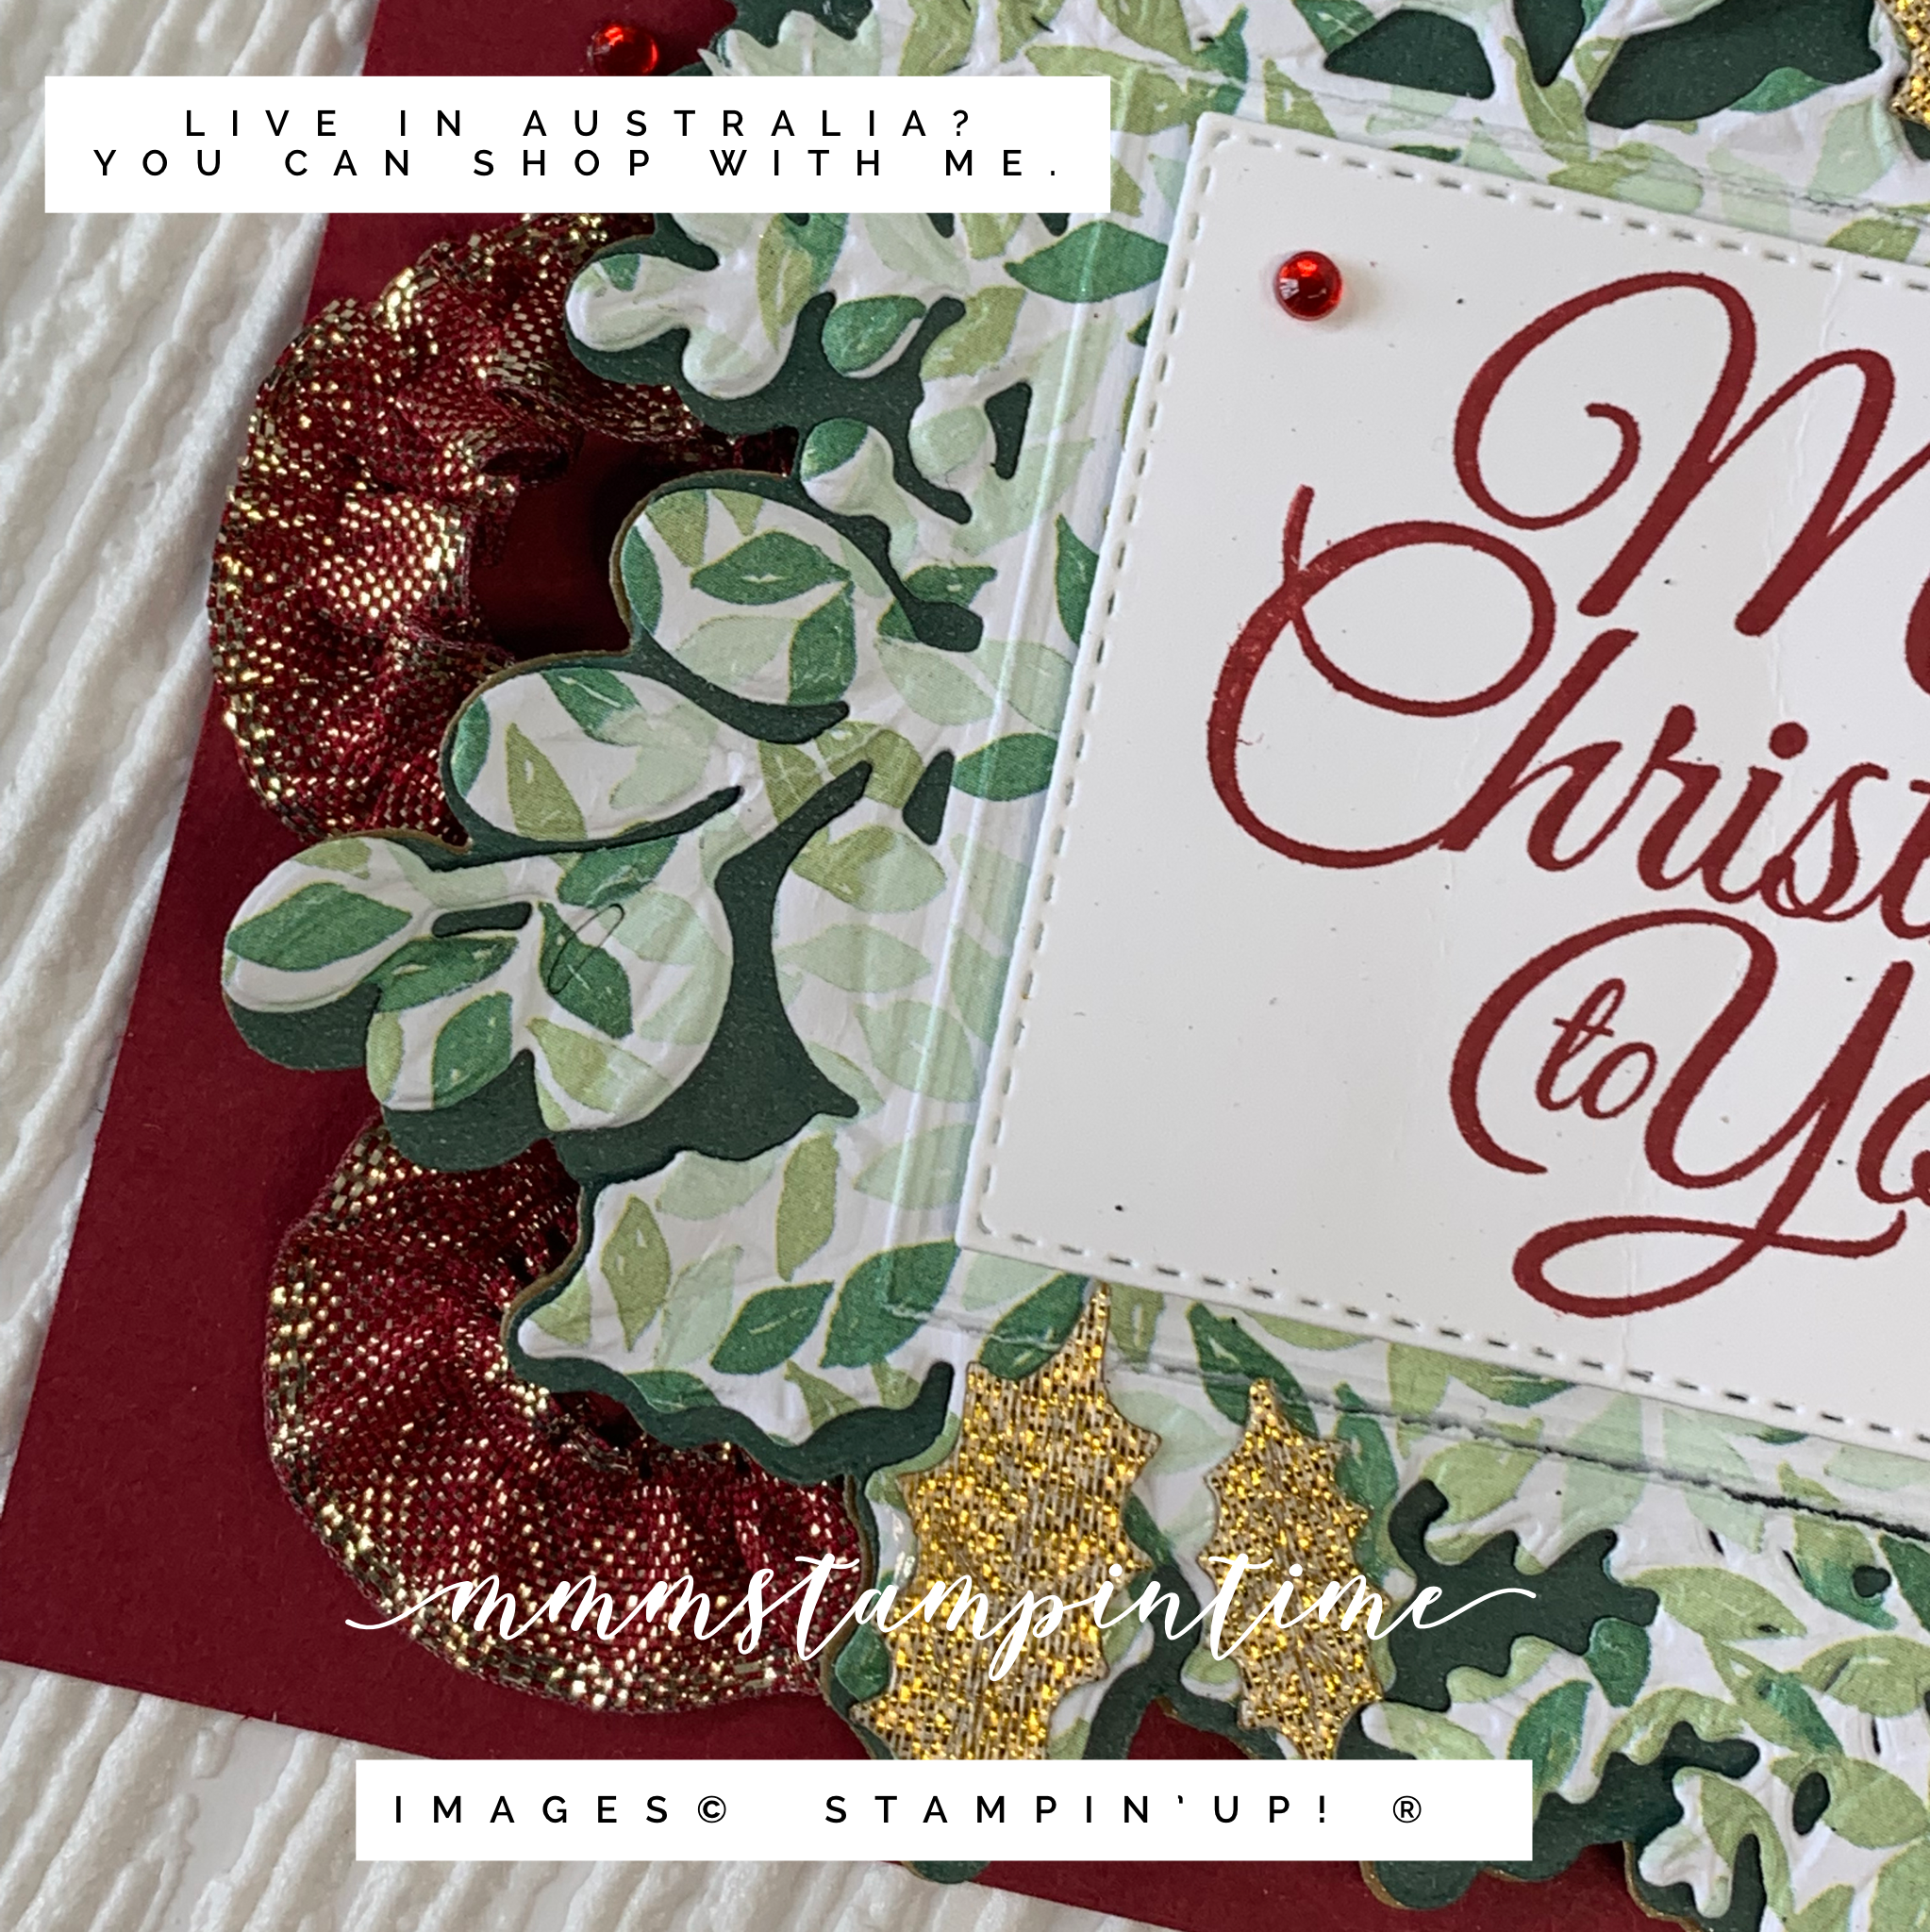
For my project I opted for Cherry Cobbler, Evening Evergreen and gold.

I used a few different products from the July – December Mini Catalogue – Holly Jolly Stamp Set, Merriest Frames Hybrid Embossing Folder, Painted Christmas 12″x 12″ Designer Series Paper, Gold Holly Leaves, Gold Shimmer Vellum and the Cherry Cobbler & Gold Metallic Ribbon. I also used some of the Evening Evergreen Cotton Paper from the Eden’s Garden Early Release Collection.

The piece of Designer Series Paper was embossed and cut using the Hybrid Embossing Folder and coordinating detailed die. I also cut two outline pieces using the Gold Shimmer Vellum and Evening Evergreen Cotton Paper. These three pieces were layered and then secured on the card front using Stampin’ Dimensionals.

I gathered up three lengths of the Cherry Cobbler and Gold Metallic Ribbon and created the three ribbon wreaths that I tucked in under the paper layers. The wreaths were secured using Mini Glue Dots.

The Christmas greeting is from the Holly Jolly Stamp Set and was stamped using Cherry Cobbler. The stitched rectangle, from the Hybrid Embossing Folder bundle, was used to cut the greeting.

I took several of the Gold Holly Leaves and placed them over some of the embossed and die cut leaves. One was also added to the envelope and inside the card.

The final step was to add some of the Red Rhinestone Basic Jewels to the card front and inside the card.

Don’t forget to hop arond and see what the rest of the Freshly Brewed crew have created to share with you.

Have you started making your Christmas cards yet? Are you a traditional or more contempory Christmas card maker?

Unti lnext time, happy stamping.

If you live in Australia, you can order any of the products I used to make this card by going to my online store. Just click on any of the images below.

Product List
Paper Snips
[103579]
$17.00
Posted on Leave a comment

INSPIRED BY PATTY BENNETT

Hello and welcome to my very late Saturday project share. I am so delighted that you have popped by!

I did not have a scheduled post for today and thought that I would have a project to share with you much sooner.

But then I was delightfully distracted! While I was enjoying breakfast, I was on my iPad and opened Facebook. I had missed a Facebook Live of Patty Bennett so I watched the replay. During her Live she was sharing details of her visit to the Stampin’ Up!® Head Office in Riverton, Utah in recognition of her 2 000 000 Career Sales Achievement (from February 2020).

One of the things she shared was her crafting session she enjoyed with Shelli and Sara. After she showed the fun fold card they made, I decided that would be the style of card I would make today. I started about 10.30am and after many interruptions I have finally finished and photographed it.

May be an image of 3 people and text that says 'Stamping with Sara and Shelli!! www.pattystamps.com stmps com patty'
May be an image of 3 people, flower and text that says 'Stamping fun with Sara and Shelli! $2M TRIP RECAP! LIVE 9-17-21 f LIVE JOIN ME! Facebook Live Crafting! 11am Paific Time, Fridays! with Patty Beunett www.facebook.com/pattystamps'

For my version of Patty’s card I decided to use the Merriest Moments Bundle in conjunction with the Whimsy & Wonder Suite. Here is my card – make sure that you leave a comment and tell me what you think.

I started by cutting and scoring a sheet of A4 Misty Moonlight cardstock into the three panels needed for this fun fold. Then I adhered the piece of Whimsy & Wonder Specialty Designer Sereis Paper to the front layer of the card.

Then I used the stitched rectangle die from the Merriest Frames Dies to accurately cut out the centre of the front layer.

The next step was to cut and emboss the Polished Pink Shimmer Vellum. This included the detailed leaves frame as well as the smaller layered floral and leaf elements that you can see in the top left hand corner of the frame.

The central raised layer comprises a Polished Pink Shimmer Vellum die cut element and the stamped sentiment and die cut Basic White layer. This was popped up using Stampin’ Dimensionals and positioned precisely on the DSP layer, as you can see.

When you see the card completely opened, you will know that I added another layer of the Specialty DSP (the baubles design) and a very simply stamped layer of Basic White card for someone to write their Christmas greeting.

The same image was also stamped on the envelope. My final step was to add some Subtle Shimmer Sequins to the card front.

I was so delighted to spend time today creating a card that was inspired by the stamping session Patty Bennett enjoyed with Shelli Gardner and Sara Douglass – wow, when it comes to inspiration, does it get any better than this?

Whoops, this image is a little blurry. I hope that it still gives you an idea of the way card looks when opened this way.

I am so pleased with the way this card has turned out. What do you think?

Until next time, happy stamping.

If you live in Australia, you can order any of the products I used to make this card by going to my online store. Just click on any of the images below.

Product List
Paper Snips
[103579]
$17.00
Posted on Leave a comment

JOY

Hello and happy Sunday. I’m so pleased that you have popped by.

It’s Father’s Day in Australia today – so happy Father’s Day to the men in your family.

Today I have a Christmas card to share with you.

For this project I have teamed the Merriest Moments Bundle with the Tidings of Christmas 6″x 6″ Designer Series Paper. The colours are Basic White, Cherry Cobbler, Evening Evergreen, Sahara Sand and Soft Succulent.

I also used the Seasonal Labels Dies, from the Christmas Season Bundle, to create the layers on the centre front of the card. A length of Evening Evergreen Chevron Weave Ribbon was folded under the Cherry Cobbler panel. I folded a narrow strip of DSP to create a paper ribbon and adhered it over the top die cut panel. The greeting, from the Merriest Moments Stamp Set, was stamped and trimmed.

The poinsettia shaped flowers and leaf were cut with the Merriest Frames Dies. I used the Snowy White and Red Velvet Sheets to cut these elements. The texture of these velvet sheets is lovely and soft.

I added die cut velvet flowers to the card insert and envelope before placing Cherry Cobbler Holiday Rhinestone Basic Jewels on the card.

The next time I make this card I will dry emboss the Cherry Cobbler and Soft Succulent panels.

Until next time, happy stamping.

If you live in Australia, you can order any of the products I used to make this card by going to my online store. Just click on any of the images below.

Product List
Paper Snips
[103579]
$17.00