Posted on Leave a comment

FRIDAY IS FUN FOLD DAY

It never ceases to amaze me how many different card folds there are and how many I am yet to make.

Today’s card is one that I can tick off my list of fun folds to try. It is a Floating Bridge Card. I adapted some templates I found so that the card I made so that it would fit perfectly in a C6 envelope.

The card base measures 6″x 4-1/8″ and is scored at 1-1/4″ and 2-1/2″ in from each narrow end. The score lines were burnished using a Bone Folder.

The four strips of Designer Series Paper that is glued to the scored panels were cut to 4″x 1-1/8″.

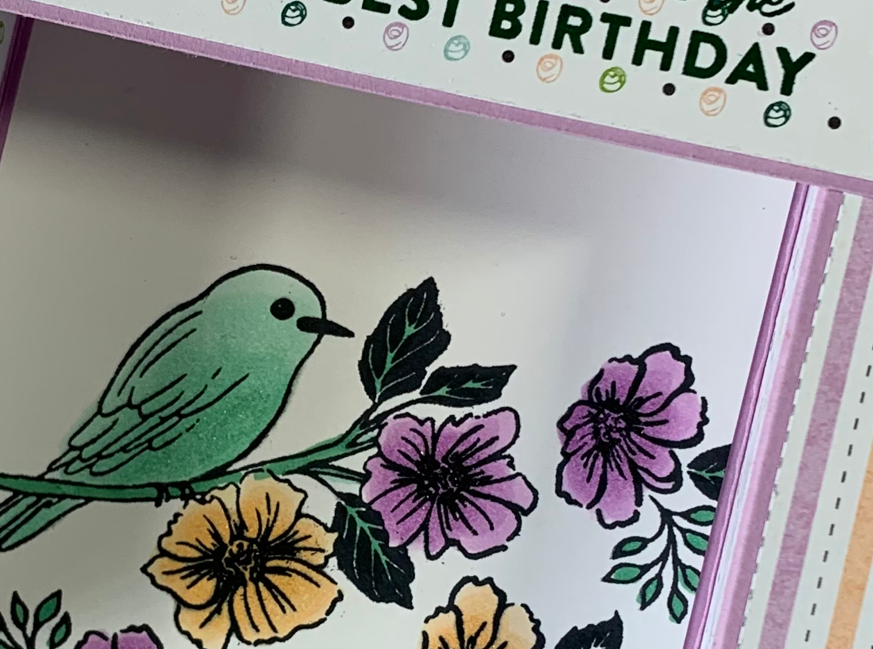
The Basic White panel with the stamped and coloured bird and flower images measures 4″x 3-3/8″. A second Basic White piece was cut, stamped and adhered to the back.

The piece of cardstock for the floating bridge measures 6″x 1-1/4″ and the DSP layer measures 5-7/8″x 1-1/8″. The birthday greeting was stamped, in Shaded Spruce, directly on the DSP.

The card folds flat to pop inside the envelope.

Both the back panel and the envelope were stamped with one of the smaller flower images.

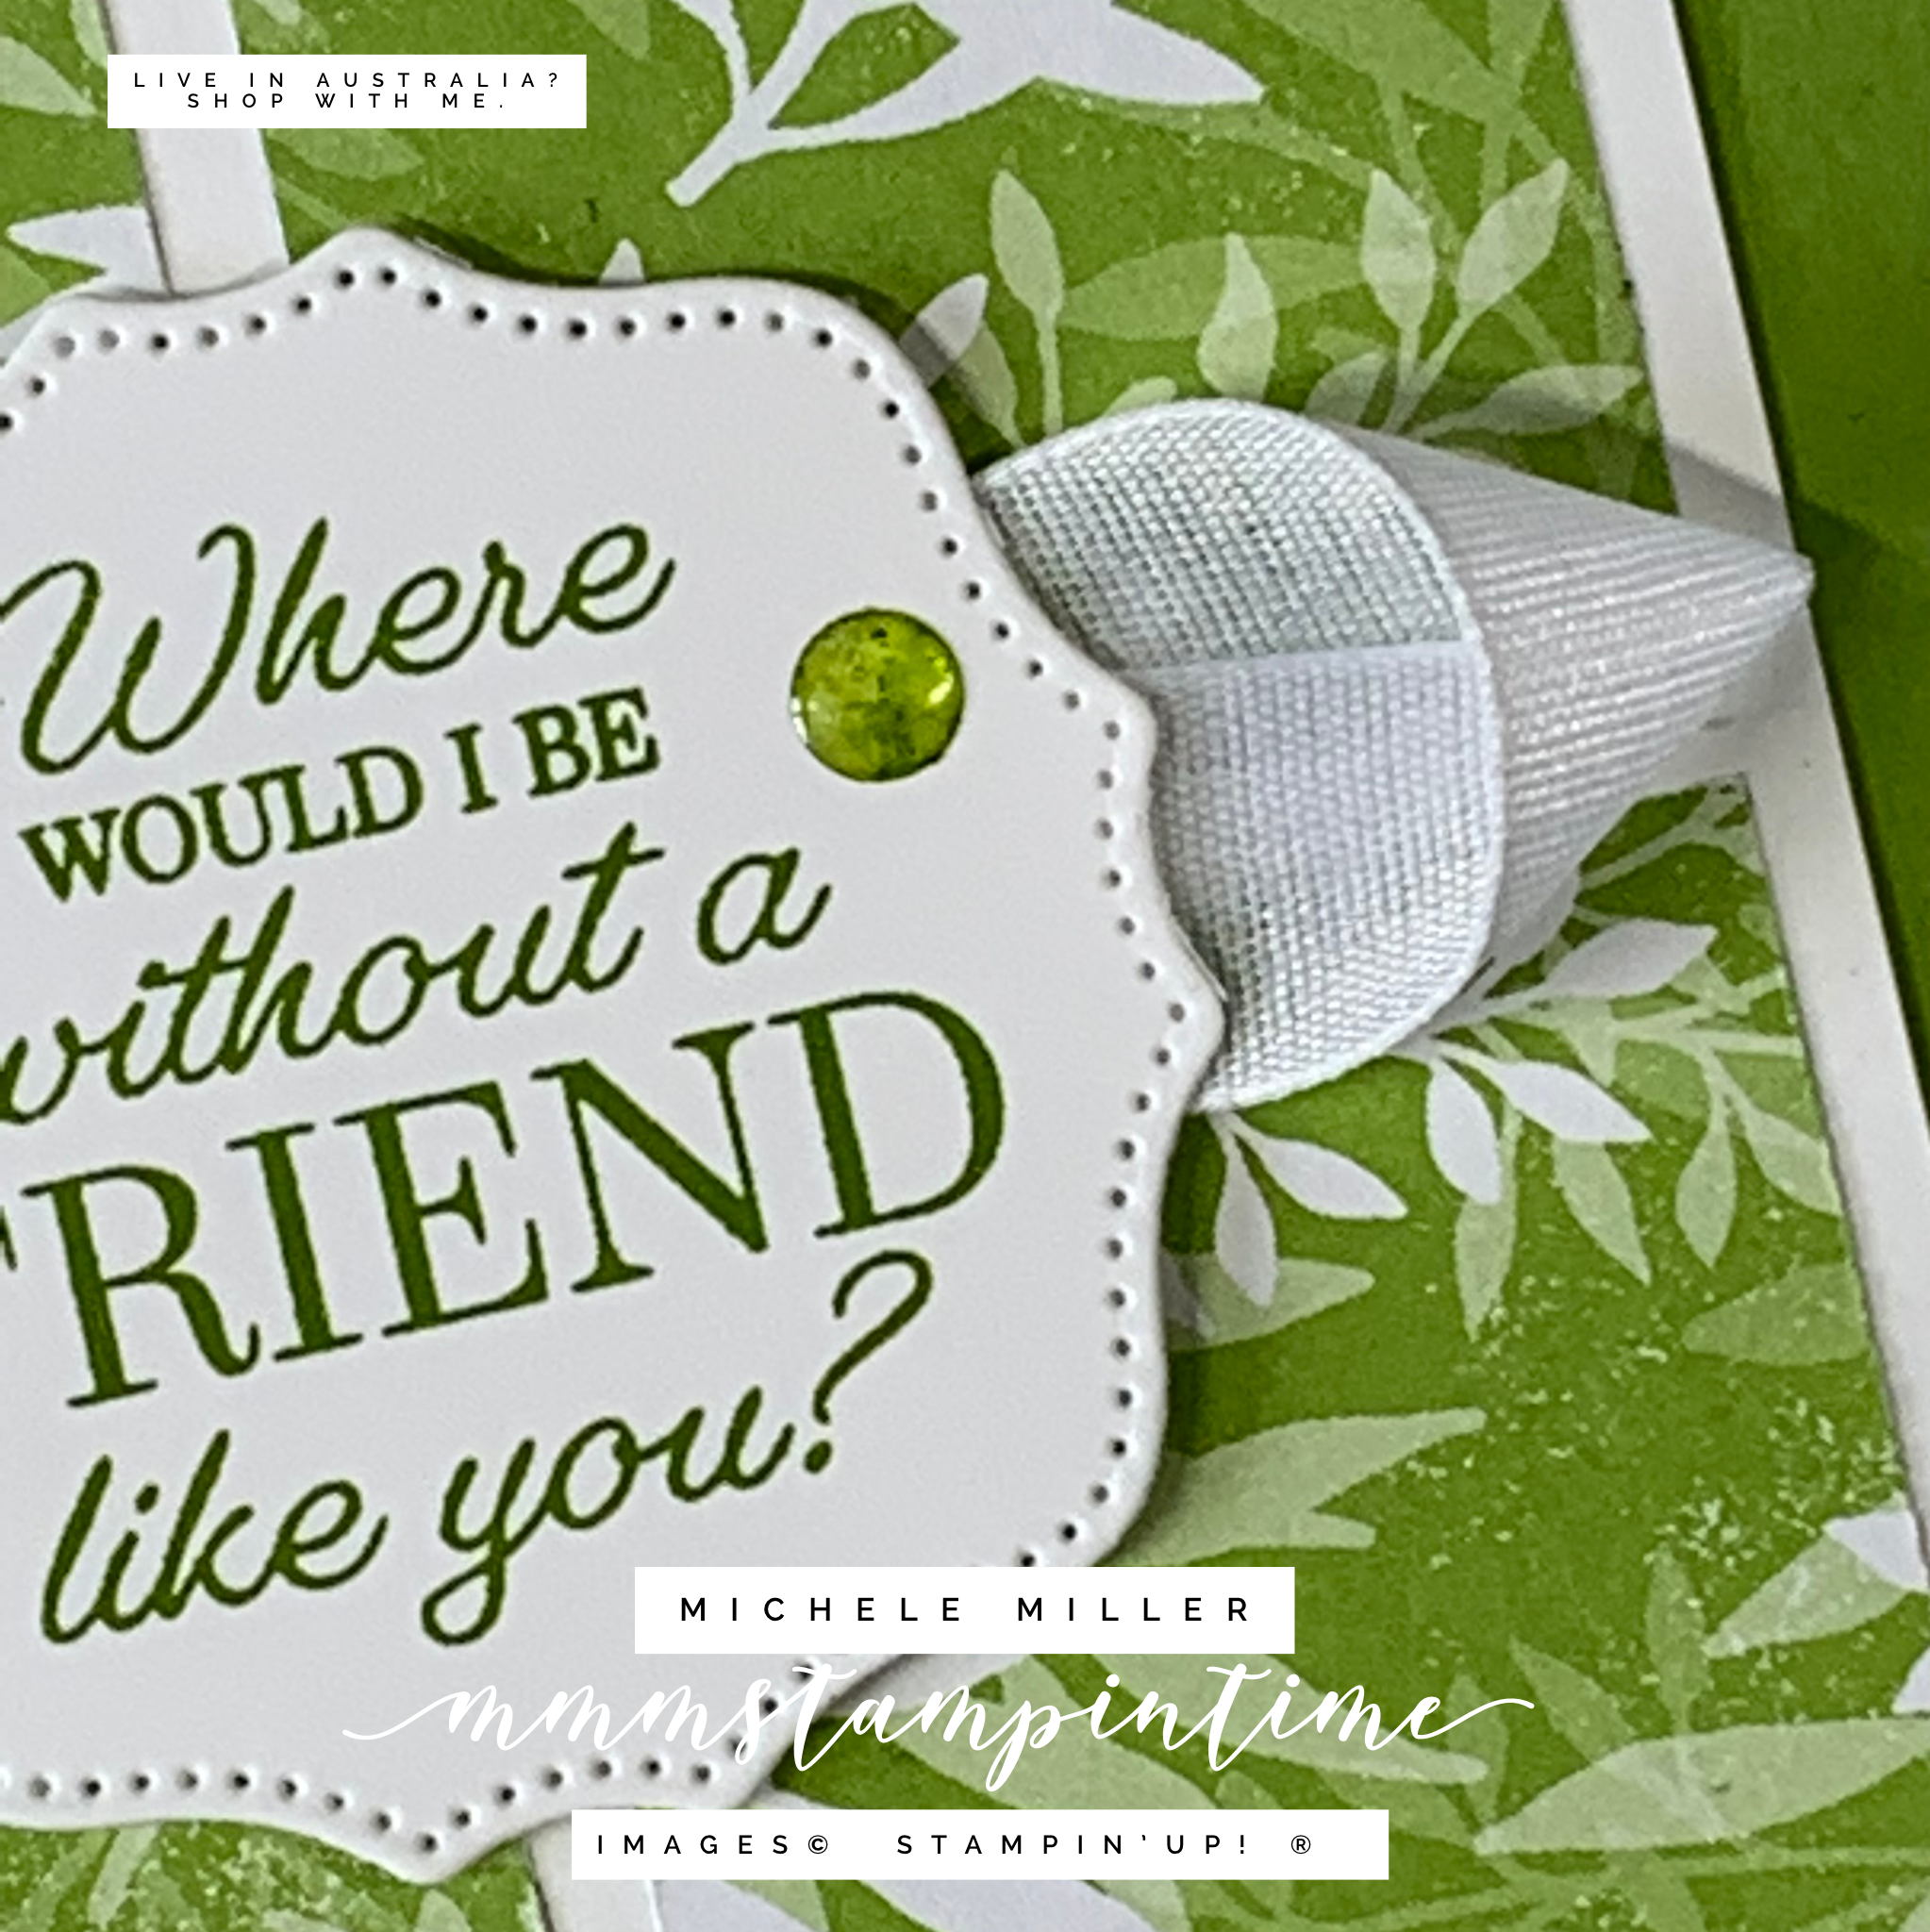
I used the Clear Wink of Stella to add some bling to the centre of each of the flowers.

This is a fabulous free bundle. Make sure you don’t miss the chance to earn it.

Tomorrow is Saturday and I will introduce a new product suite or bundle to feature for a week. I hope you are enjoying my new schedule of posts. Let me know what you think.

Until then, happy stamping.

If you live in Australia, you can order any of the products I used to make this card by going to my online store. Just click on any of the images below.

Product List
Paper Snips
[103579]
$17.00
Posted on Leave a comment

3D THURSDAY & IT’S TIME FOR A GIFTBOX

You have probably figured out that I am featuring one product suite or bundle each week, beginning on Saturday.

This week is all about the FREE Sale-a-bration Friendly Hello Bundle. This a product bundle you can choose with a minimum $180 AUD order.

FRIENDLY HELLO BUNDLE (ENGLISH)

I had a Basil, Lime and Mandarin scented cake of soap that needed a much nicer giftbox than the packaging it came in.

I cut piece of Pool Party cardstock to 7″x 5-1/2″ for the base and scored it at 1-1/2″ on all four sides.

The lid was cut to 6″x 4-1/2″ and scored at slightly less than 1″ on all sides. This ensured the lid was a touch larger than the base and would fit easily over the base. It also meant that part of the blue base would be seen and it would easier to lift the lid away.

The Designer Series Paper was cut from a piece measuring 5-5/8″x 4-1/8″. When I cut the DSP, as shown below, I was able to ensure the continuity of the paper’s design on the top and the four sides.

I adhered the DSP panels to the lid before assembling it.

To coordinate with the giftbox, I wrapped and secured a strip of the same DSP around the soap.

Then I took a length of Pool Party Sheer Ribbon and attached it to the bottom of the card base.

I stamped the birthday greeting onto a piece of cardstock and used the Lovely Labels Punch to decorate the end of the greeting tag. The Label Me Fancy Punch gave me the punched hole I needed to thread the ribbon ends through. The next step was to tie a bow.

The Garden Gems are a gorgeous way to finish the giftbox.

I really have fun when I make giftboxes and packaging. It’s the challenge of creating a 3D item from 2D paper – measuring, cutting and assembling.

Tomorrow is Fun Fold Friday. Until then, happy stamping.

If you live in Australia, you can order any of the products I used to make this card by going to my online store. Just click on any of the images below.

Product List
Garden Gems
[159277]
$12.25
Paper Snips
[103579]
$17.00
Posted on

WELCOME TO WONDERFUL WEDNESDAY

I have adapted my idea for my Wednesday posts. Rather than ‘What’s New’, I think Wonderful Wednesday will give me wider scope for things to share with you.

For my first Wonderful Wednesday post, I want to share some cards that I made using a 6″x 6″ One Sheet Wonder layout. I was inspired by Kelly Kent’s layout and adapted it to suit the card base measurements that I use.

I cut a piece of the FREE Sale-a-bration Friendly Hello 12″x 12″ Designer Series Paper to 6″x 6″. Then I cut each of the wonder layout pieces.

Each of the letters A to D indicate the four cards these cut pieces will be used on.

Here is Card A. It is a #simplestamping card – just stamp, ink and paper.

I have not embellished this card – it is so super quick and easy to make. The strip of DSP is 5-3/4″x 1-1/2″ and has been adhered ont oa piece of Basic White cardstock measuring 5-3/4″x 1-3/4″.

The sentiment, from the Friendly Hello Stamp Set was stamped onto a piece of Basic White cardstock before being trimmed down to the size you can see. This piece was then popped up onto the card front using Stampin’ Dimensionals.

Card B uses the 3″x 3″ square of DSP.

It has been adhered to a piece of Basic White cardstock measuring 4-1/4″x 3-1/4″. This makes it look like it is a Poloroid style image.

The greeting was stamped onto the ‘poloroid’ section. I used the dark Granny Apple Green Stampin’ Blend to colour some of the diamond shaped Silver & Clear Epoxy Essentials to add to the front of the card.

Card C uses the three 3″x 1″ DSP strips.

These three strips were adhered to a 3-3/8″x 3-3/8″ square of Basic White cardstock before being attached to the card front.

The sentiment was stamped and cut using one of the Hippo & Friends Dies. It was also popped up using dimensionals.

I used the dark Granny Apple Green Stampin’ Blend to colour some of the round shaped Silver & Clear Epoxy Essentials to add to the front of the card.

Card D uses the four 1-1/2″x 1-1/2″ DSP pieces and they were adhered to a piece of Basic White cardstock measuring 3-3/8″x 3-3/8″.

The sentiment, also from the Friendly Hello Stamp Set, was stamped and then cut using one of the Hippo & Friends Dies.

I added a twisted length of white Faux Linen Ribbon, from the Flowers for Every Season Ribbon Combo Pack, and attached it to the back of the sentiment panel. Another Blends coloured embellishment was added to the card front.

This is a super quick and easy One Sheet Wonder layout to use to create four amazing cards.

There are many more One Sheet Wonder layouts and I will share them with you over the coming months of Wednesdays.

Tomorrow is 3D Thursday and I have a great gift box to share with you.

Until then, happy stamping.

If you live in Australia, you can order any of the products I used to make this card by going to my online store. Just click on any of the images below.

Product List
Paper Snips
[103579]
$17.00