Posted on Leave a comment

THIS IS MY WEEKEND WRAP UP

As Monday rolls around again, I find myself a little behind again.

NOTE TO SELF: Time to get my schedule back on track!

On a Saturday and Sunday, I would normally post my #simplestamping Saturday projects and then my Step It Up Sunday cards. Monday is meant to be Memories on Monday. My goal is to return to program scheduling next week.

Today, I will share my weekend projects with you.

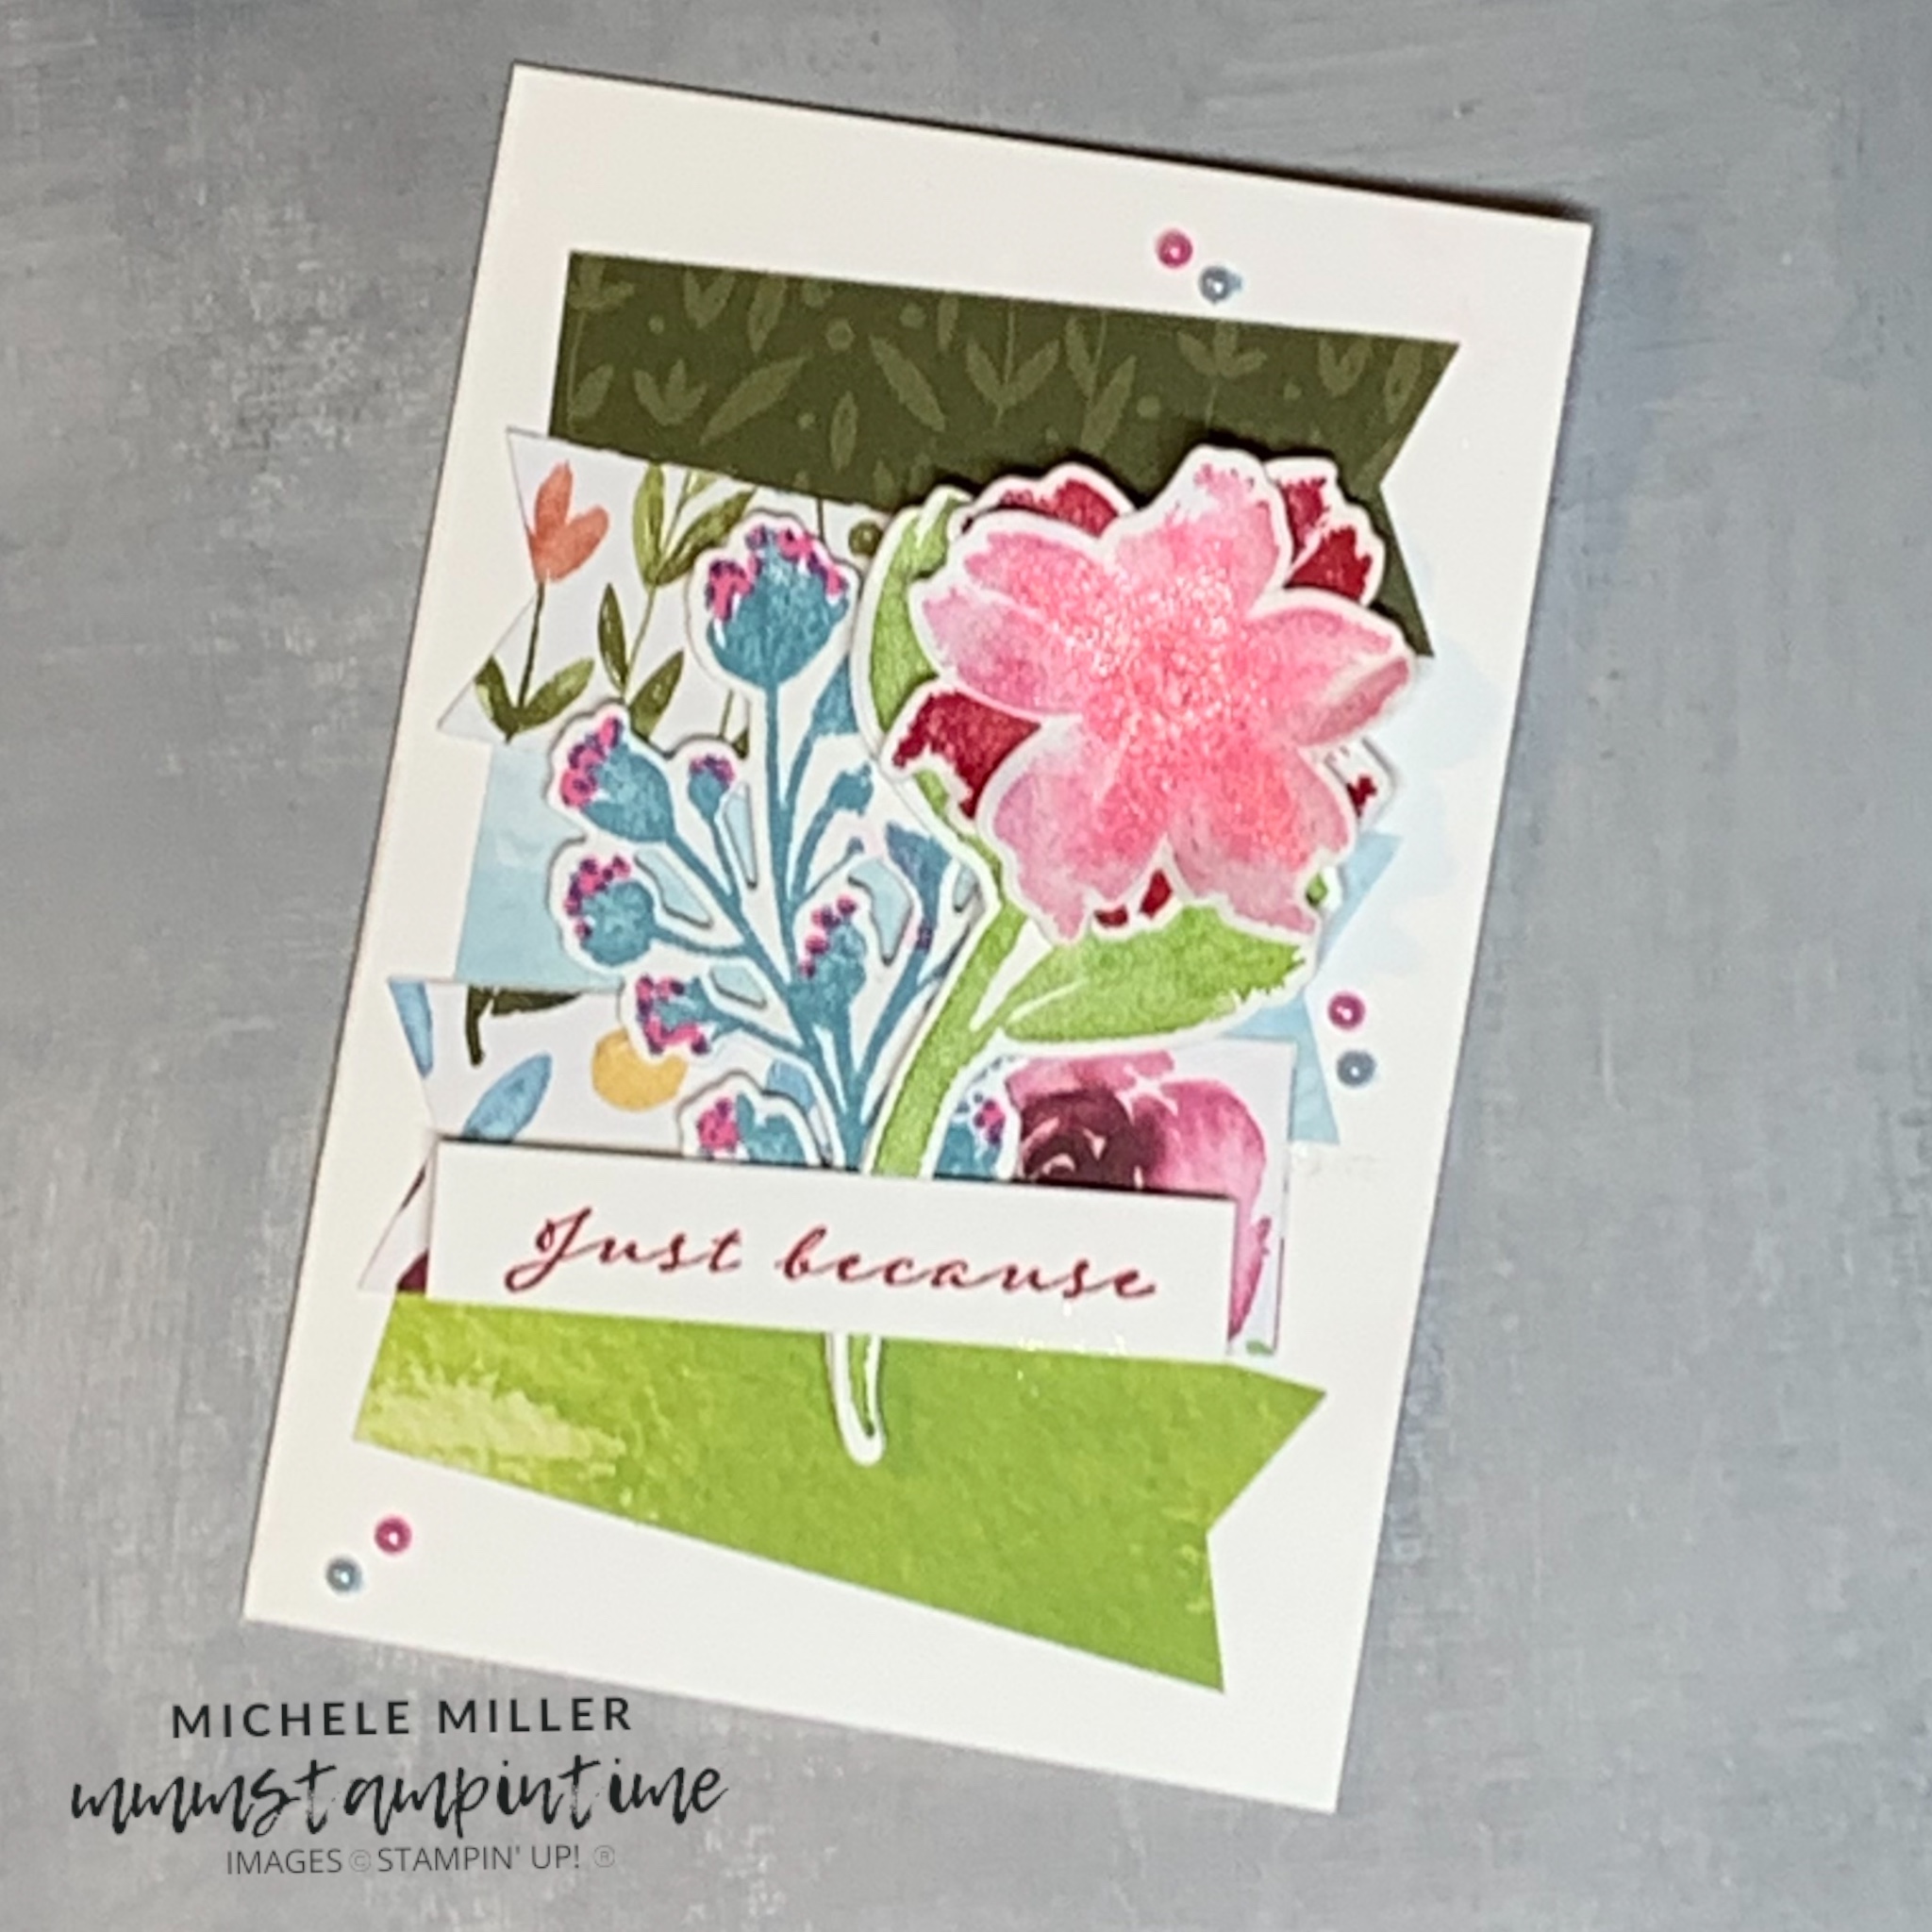
This week, I am featuring the Texture Chic Suite Collection.

Let’s start with the simple.

Oh yes – this one’s definitely an example of #simplestamping. Two stamps and one colour on a notecard and envelope.

For the second card, I used the shell die from the Chic Dies to cut out three of the two step stamped images. The lighter layer uses a stamped off Petal Pink image.

I used my Bone Folder to give each shell a little bend before placing Stampin’ Dimensionals on the back of each shell. The shells were layered and bent to create the curved shape.

The greeting was stamped directly on to the card front.

For the third card, I used some of the Texture Chic 12″x 12″ Specialty Designer Series Paper.

I introduced Soft Suede to the Petal Pink ink for the shells.

For all cards, I have been partially stamping the ridged shell image inside the card and on the envelope.

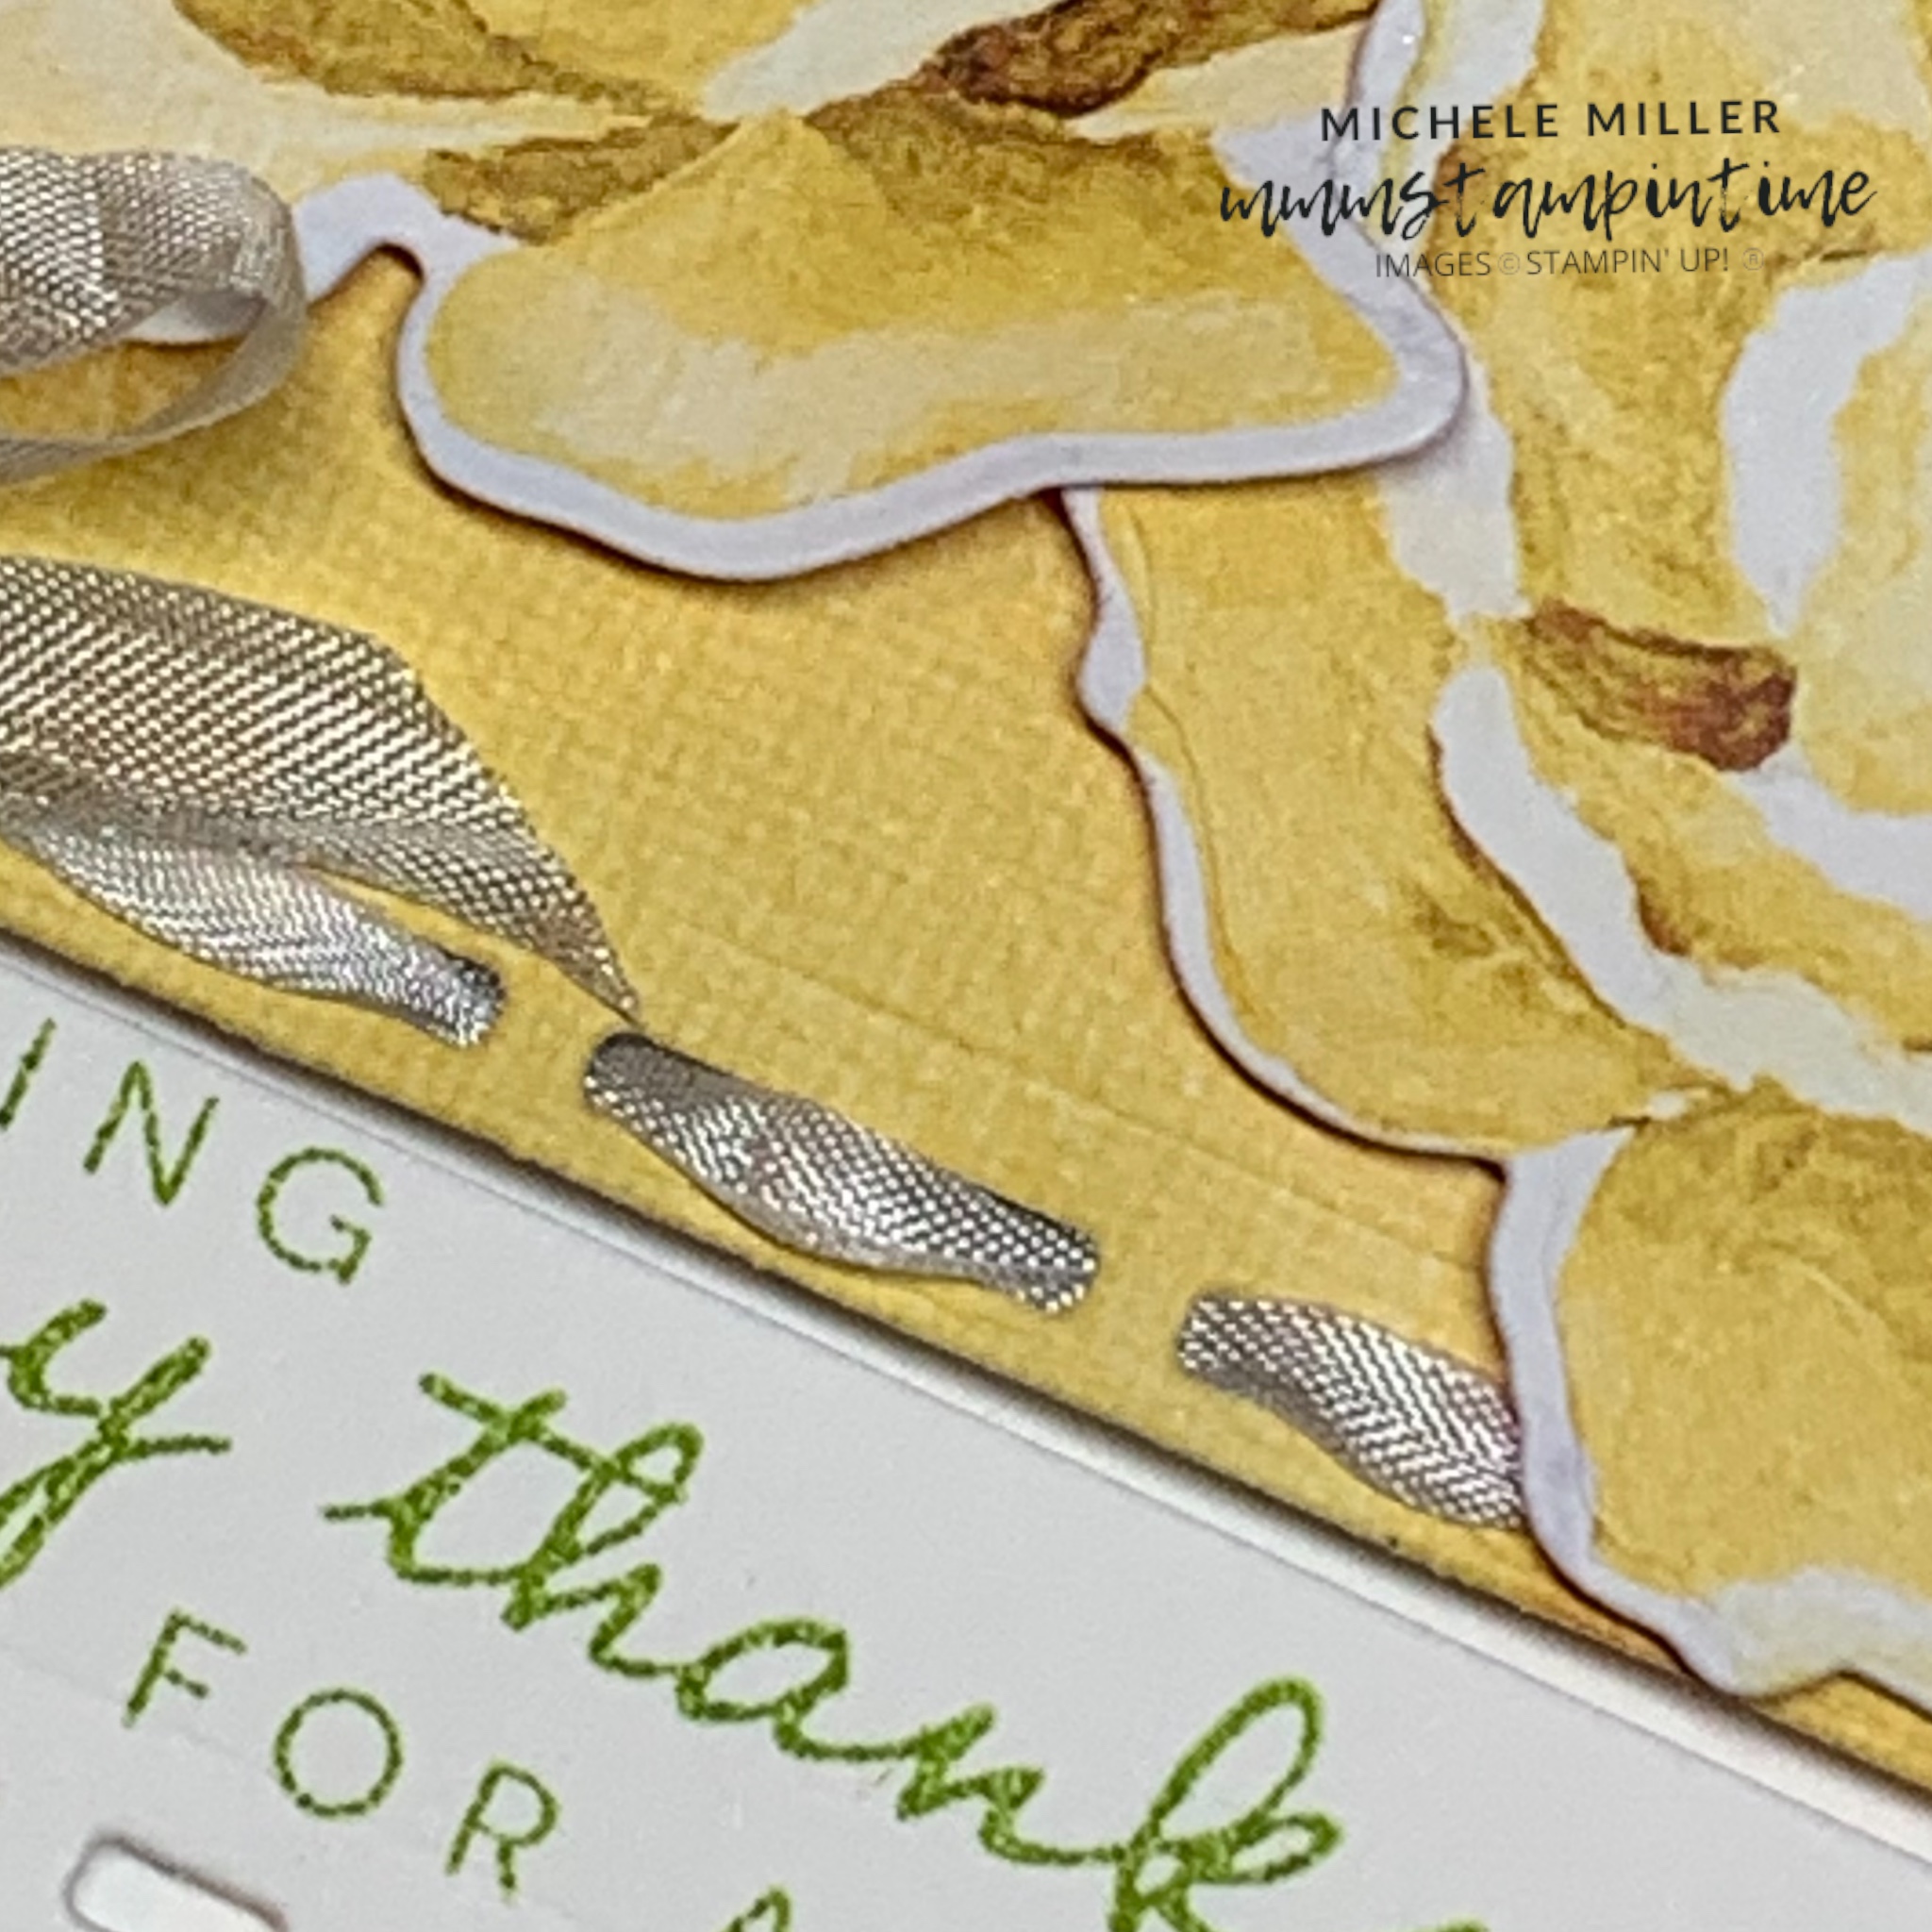
This card has loads of elements. The front of the card has a full panel of DSP and a layer of Distressed Gold 12″x 12″ Specialty Paper.

I added Adhesive Sheet to the back of some DSP before die cutting the lattice shape. After I removed the backing paper, the lattice was easily attached to the Distressed Gold panel.

A length of Petal Pink ribbon, from the Cotton Ribbon Combo Pack, was tied into a small, tight bow and then wrapped around the gold layer.

The shells were stamped using Soft Suede ink. Then I used Versamark to attach Heat & Stick Powder to small sections of the shells. After heating this powder, I was able to attach Gilded Leafing.

Each shell was given a little curve and the positioned on the front of the card.

A few more products and tools meant that I could step up my original cards.

I am so pleased with these cards. Let me know which one is your favourite.

Tomorrow is Technique Tuesday and I look forward to sharing one with you.

Until then, happy stamping.

If you live in Australia, you can order any of the products I used to make this card by going to my online store. Just click on any of the images below.

Product List
Chic Dies
[158815]
$65.00
Heat Tool
[129056]
$53.00
Paper Snips
[103579]
$19.25
Posted on Leave a comment

A WONDERFUL WEEKEND TO SHARE #simplestamping AND STEPPED UP CARDS

This week I am featuring the Awash in Beauty Suite from the 2022 – 2023 Annual Catalogue.

AWASH IN BEAUTY SUITE COLLECTION (ENGLISH)

So, let’s start with some #simplestamping samples. These are some the products used to make the first two cards.

I love the new Rose Gold & White Striped Ribbon.

Super simple – notecard and envelope, two inks and four stamps.

Add some ribbon, cut out the greeting, pop it on a piece of Designer Series Paper and use some Stampin’ Dimensionals.

To step things up a little – add some more colours, tools, ribbon and embellishments.

I used the stamps to create my own background paper. I tied a bow in a length of White Glittered Organdy Ribbon and wrapped it around the stamped base layer. Then I stamped and cut the flower and leaves that sit up from the card front thanks to Stampin’ Dimensionals.

The greeting was stamped, trimmed down and added to the front of the card. I coloured some Iridescent Pearls Basic Jewels using the Dark Granny Apple Green Stampin’ Blend pen.

I chose two of the DSP designs for this card. After adhering them to the card front, I stamped and cut three flowers and added them. I coloured a length of the Glittered Organdy Ribbon using the Dark Granny Apple Green Stampin’ Blend pen, tied it in a bow and used a Mini Glue Dot to secure it to the card.

The Dark Balmy Blue Stampin’ Blend pen was perfect to colour some Iridescent Pearl Basic Jewels to coordinate with the DSP.

Now for the final card.

This card features five of the DSP designs. They were cut into 1″ strips and had a banner end punched before they were adhered to the card.

I stamped and die cut the floral images to pop up on the card using dimensionals.

And, just like the last two cards, I coloured some of the Iridescent Pearls and added them to the card as three pairs.

Tomorrow is Monday Memories, so drop in a see what I have created.

Until then, happy stamping.

If you live in Australia, you can order any of the products I used to make this card by going to my online store. Just click on any of the images below.

Product List
Paper Snips
[103579]
$19.25
Posted on Leave a comment

TIME TO WRAP UP THIS WEEKEND – SATURDAY #simplestamping & STEP IT UP SUNDAY

As I posted a little while ago, I am working hard to get myself up to date with my blogging. It is early Sunday afternoon and these are my projects.

I am featuring the Hues of Happiness Suite this week.

HUES OF HAPPINESS SUITE COLLECTION (ENGLISH)
HUES OF HAPPINESS SUITE COLLECTION 158828 $122.25 (AUD)

When I make my projects each weekend I choose to use Notecards & Envelopes.

Let me show you the first #simplestamping project I made.

This project uses two ink colours and stamps from the Happiness Abounds Stamp Set. Daffodil Delight and Granny Apple Green are colours that coordinate with this Suite.

The same rose image was stamped inside the card and on the front of the envelope.

The second card has been taken up a wrung. I used some simple masking to stamp a second rose and some leaves to the card front.

The same greeting was stamped on a piece of Basic White cardstock and trimmed down to size. Stampin’ Dimensionals were placed under the sentiment and then placed on the card front.

Let me add another step to the creativity ladder.

For this card, I continued to use masking to layer the stamped floral images and I added a third colour – Poppy Parade.

I used a different flower image to stamp inside the card and envelope front.

The greeting was using Poppy Parade ink on a scrap of cardstock in the same colour. This was then trimmed down and popped up on the card front using Stampin’ Dimensionals.

Three Iridescent Basic Jewels were coloured with the Dark Granny Apple Green Stampin’ Blend pen and added to the card.

The flowers, for this card, were stamped in Daffodil Delight. Before I die cut them, I used a Blending Brush to add colour to the centre of each of them. A few light brushstrokes, using the Clear Wink of Stella, added a little shimmer to the centre of each flower.

I cut a base layer from the Hues of Happiness 12″x 12″ Designer Series Paper and used one of the Blossoming Happiness Dies to cut out the spaces and pop ups. After tying a bow and wrapping the ribbon ends around this piece, it was adhered to the card base clearly showing up the white spaces. I used the White Crinkled Seam Binding Ribbon for this bow.

The greeting was stamped, trimmed down and added to the front using Stampin’ Dimensionals.

Finally, a few Iridescent Basic Jewels were coloured using the Dark Granny Apple Green Blends pen and placed on the card front.

Here’s an up close look at the card.

And, finally.

For this card I cut a variety of flowers from the Hues of Happiness DSP.

I stamped the double leaf image several times across the top of the card base, using Granny Apple Green.

A piece of yellow/green DSP was cut and then die cut using the edge die with the small rectangular slots. Then I threaded some of the White Crinkled Seam Binding Ribbon through these spaces and finished with a bow. The ends of the ribbon were tucked under and secured in place with some Tear & Tape.

This DSP layer had Stampin’ Dimensionals added before positioning it up on the card front.

The flowers were then positioned and secured on the card.

After die cutting and trimming a piece of Basic White card, I stamped the greeting and added it to the card using dimensionals.

I coloured several Iridescent Basic Jewels using Daffodil Delight and Granny Apple Green Stampin’ Blends and attached them to the card.

Tomorrow I will a scrapbook/memory keeping layout to share with you.

Until then, happy stamping.

If you live in Australia, you can order any of the products I used to make this card by going to my online store. Just click on any of the images below.

Product List
Paper Snips
[103579]
$19.25