As I posted a little while ago, I am working hard to get myself up to date with my blogging. It is early Sunday afternoon and these are my projects.
I am featuring the Hues of Happiness Suite this week.

When I make my projects each weekend I choose to use Notecards & Envelopes.
Let me show you the first #simplestamping project I made.

This project uses two ink colours and stamps from the Happiness Abounds Stamp Set. Daffodil Delight and Granny Apple Green are colours that coordinate with this Suite.
The same rose image was stamped inside the card and on the front of the envelope.

The second card has been taken up a wrung. I used some simple masking to stamp a second rose and some leaves to the card front.
The same greeting was stamped on a piece of Basic White cardstock and trimmed down to size. Stampin’ Dimensionals were placed under the sentiment and then placed on the card front.
Let me add another step to the creativity ladder.

For this card, I continued to use masking to layer the stamped floral images and I added a third colour – Poppy Parade.
I used a different flower image to stamp inside the card and envelope front.
The greeting was using Poppy Parade ink on a scrap of cardstock in the same colour. This was then trimmed down and popped up on the card front using Stampin’ Dimensionals.
Three Iridescent Basic Jewels were coloured with the Dark Granny Apple Green Stampin’ Blend pen and added to the card.

The flowers, for this card, were stamped in Daffodil Delight. Before I die cut them, I used a Blending Brush to add colour to the centre of each of them. A few light brushstrokes, using the Clear Wink of Stella, added a little shimmer to the centre of each flower.
I cut a base layer from the Hues of Happiness 12″x 12″ Designer Series Paper and used one of the Blossoming Happiness Dies to cut out the spaces and pop ups. After tying a bow and wrapping the ribbon ends around this piece, it was adhered to the card base clearly showing up the white spaces. I used the White Crinkled Seam Binding Ribbon for this bow.
The greeting was stamped, trimmed down and added to the front using Stampin’ Dimensionals.
Finally, a few Iridescent Basic Jewels were coloured using the Dark Granny Apple Green Blends pen and placed on the card front.
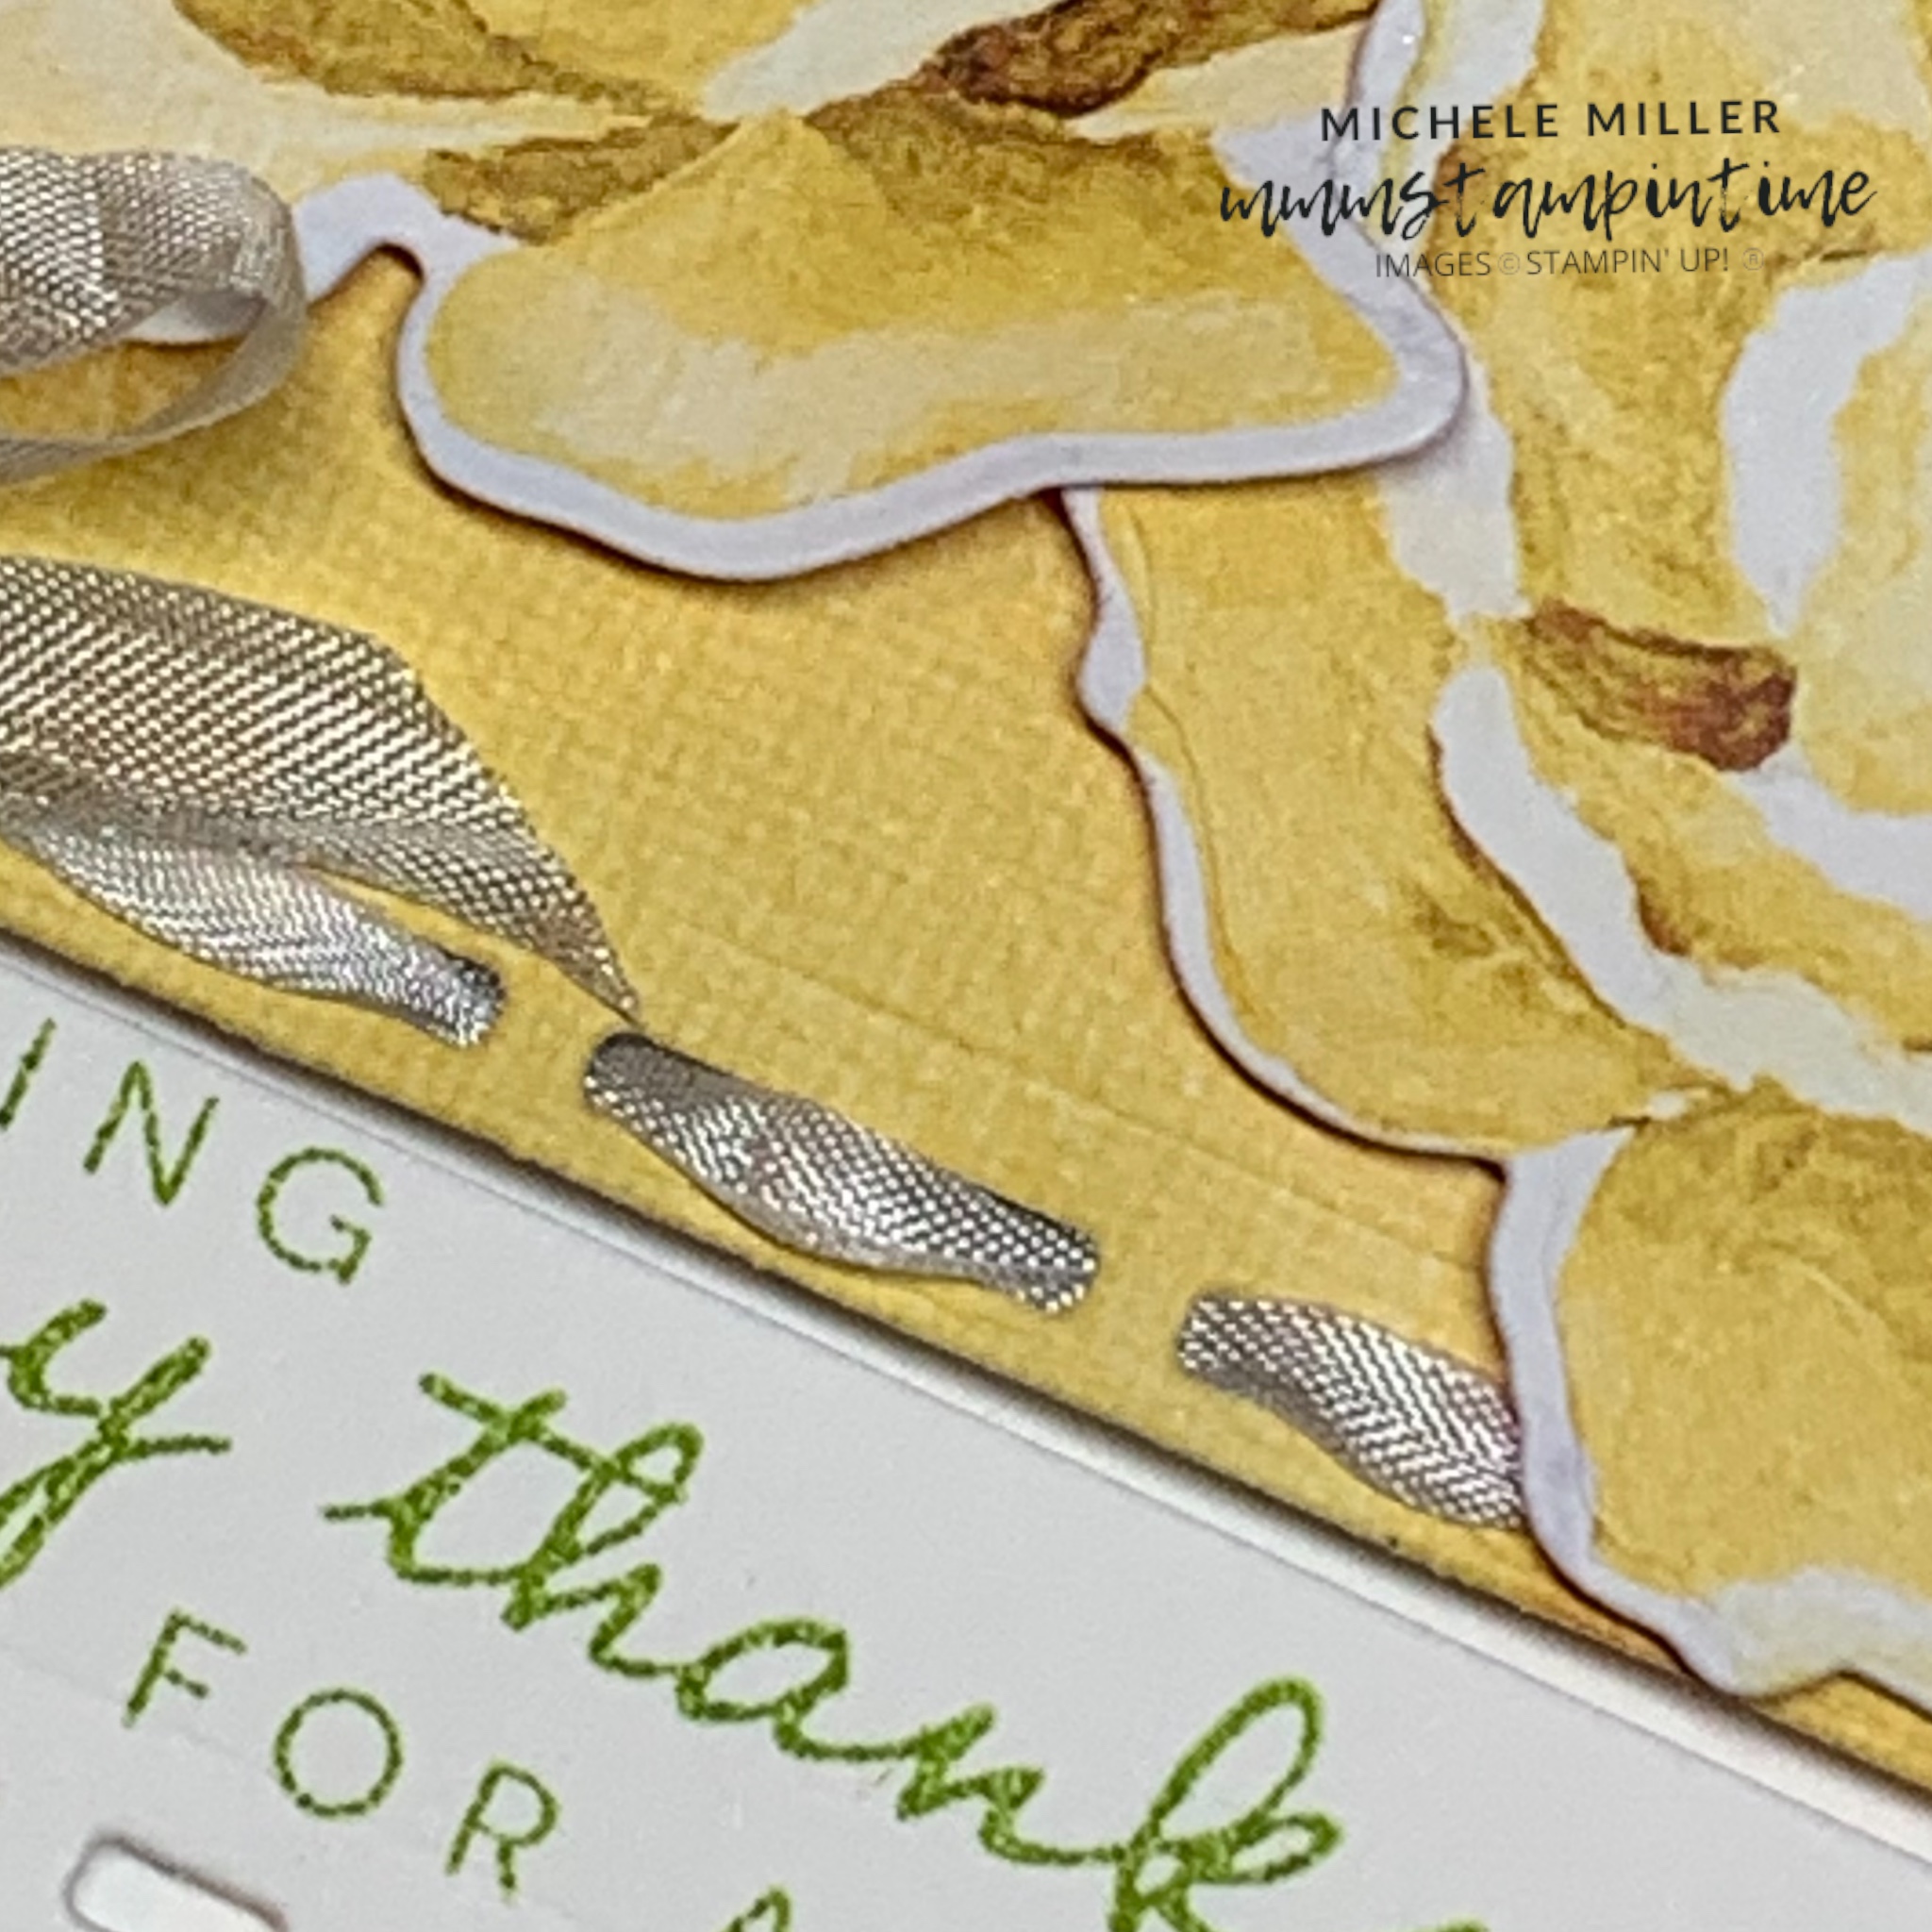
Here’s an up close look at the card.

And, finally.

For this card I cut a variety of flowers from the Hues of Happiness DSP.
I stamped the double leaf image several times across the top of the card base, using Granny Apple Green.
A piece of yellow/green DSP was cut and then die cut using the edge die with the small rectangular slots. Then I threaded some of the White Crinkled Seam Binding Ribbon through these spaces and finished with a bow. The ends of the ribbon were tucked under and secured in place with some Tear & Tape.
This DSP layer had Stampin’ Dimensionals added before positioning it up on the card front.
The flowers were then positioned and secured on the card.
After die cutting and trimming a piece of Basic White card, I stamped the greeting and added it to the card using dimensionals.
I coloured several Iridescent Basic Jewels using Daffodil Delight and Granny Apple Green Stampin’ Blends and attached them to the card.

Tomorrow I will a scrapbook/memory keeping layout to share with you.
Until then, happy stamping.

If you live in Australia, you can order any of the products I used to make this card by going to my online store. Just click on any of the images below.

") |  | |||
 |  |  | ||
 |  |  |  | |
 |  |  |
")

 Crinkled Seam Binding Ribbon")


