Posted on Leave a comment

IT’S FRIDAY & TIME FOR SOME FEATURES AND A FUN FOLD CARD

I can’t believe how quickly Friday has rolled around again.

Before I share the Fun Fold card, I want to highlight some of the features of the Stippled Roses Bundle – this is something I plan to do each Friday.

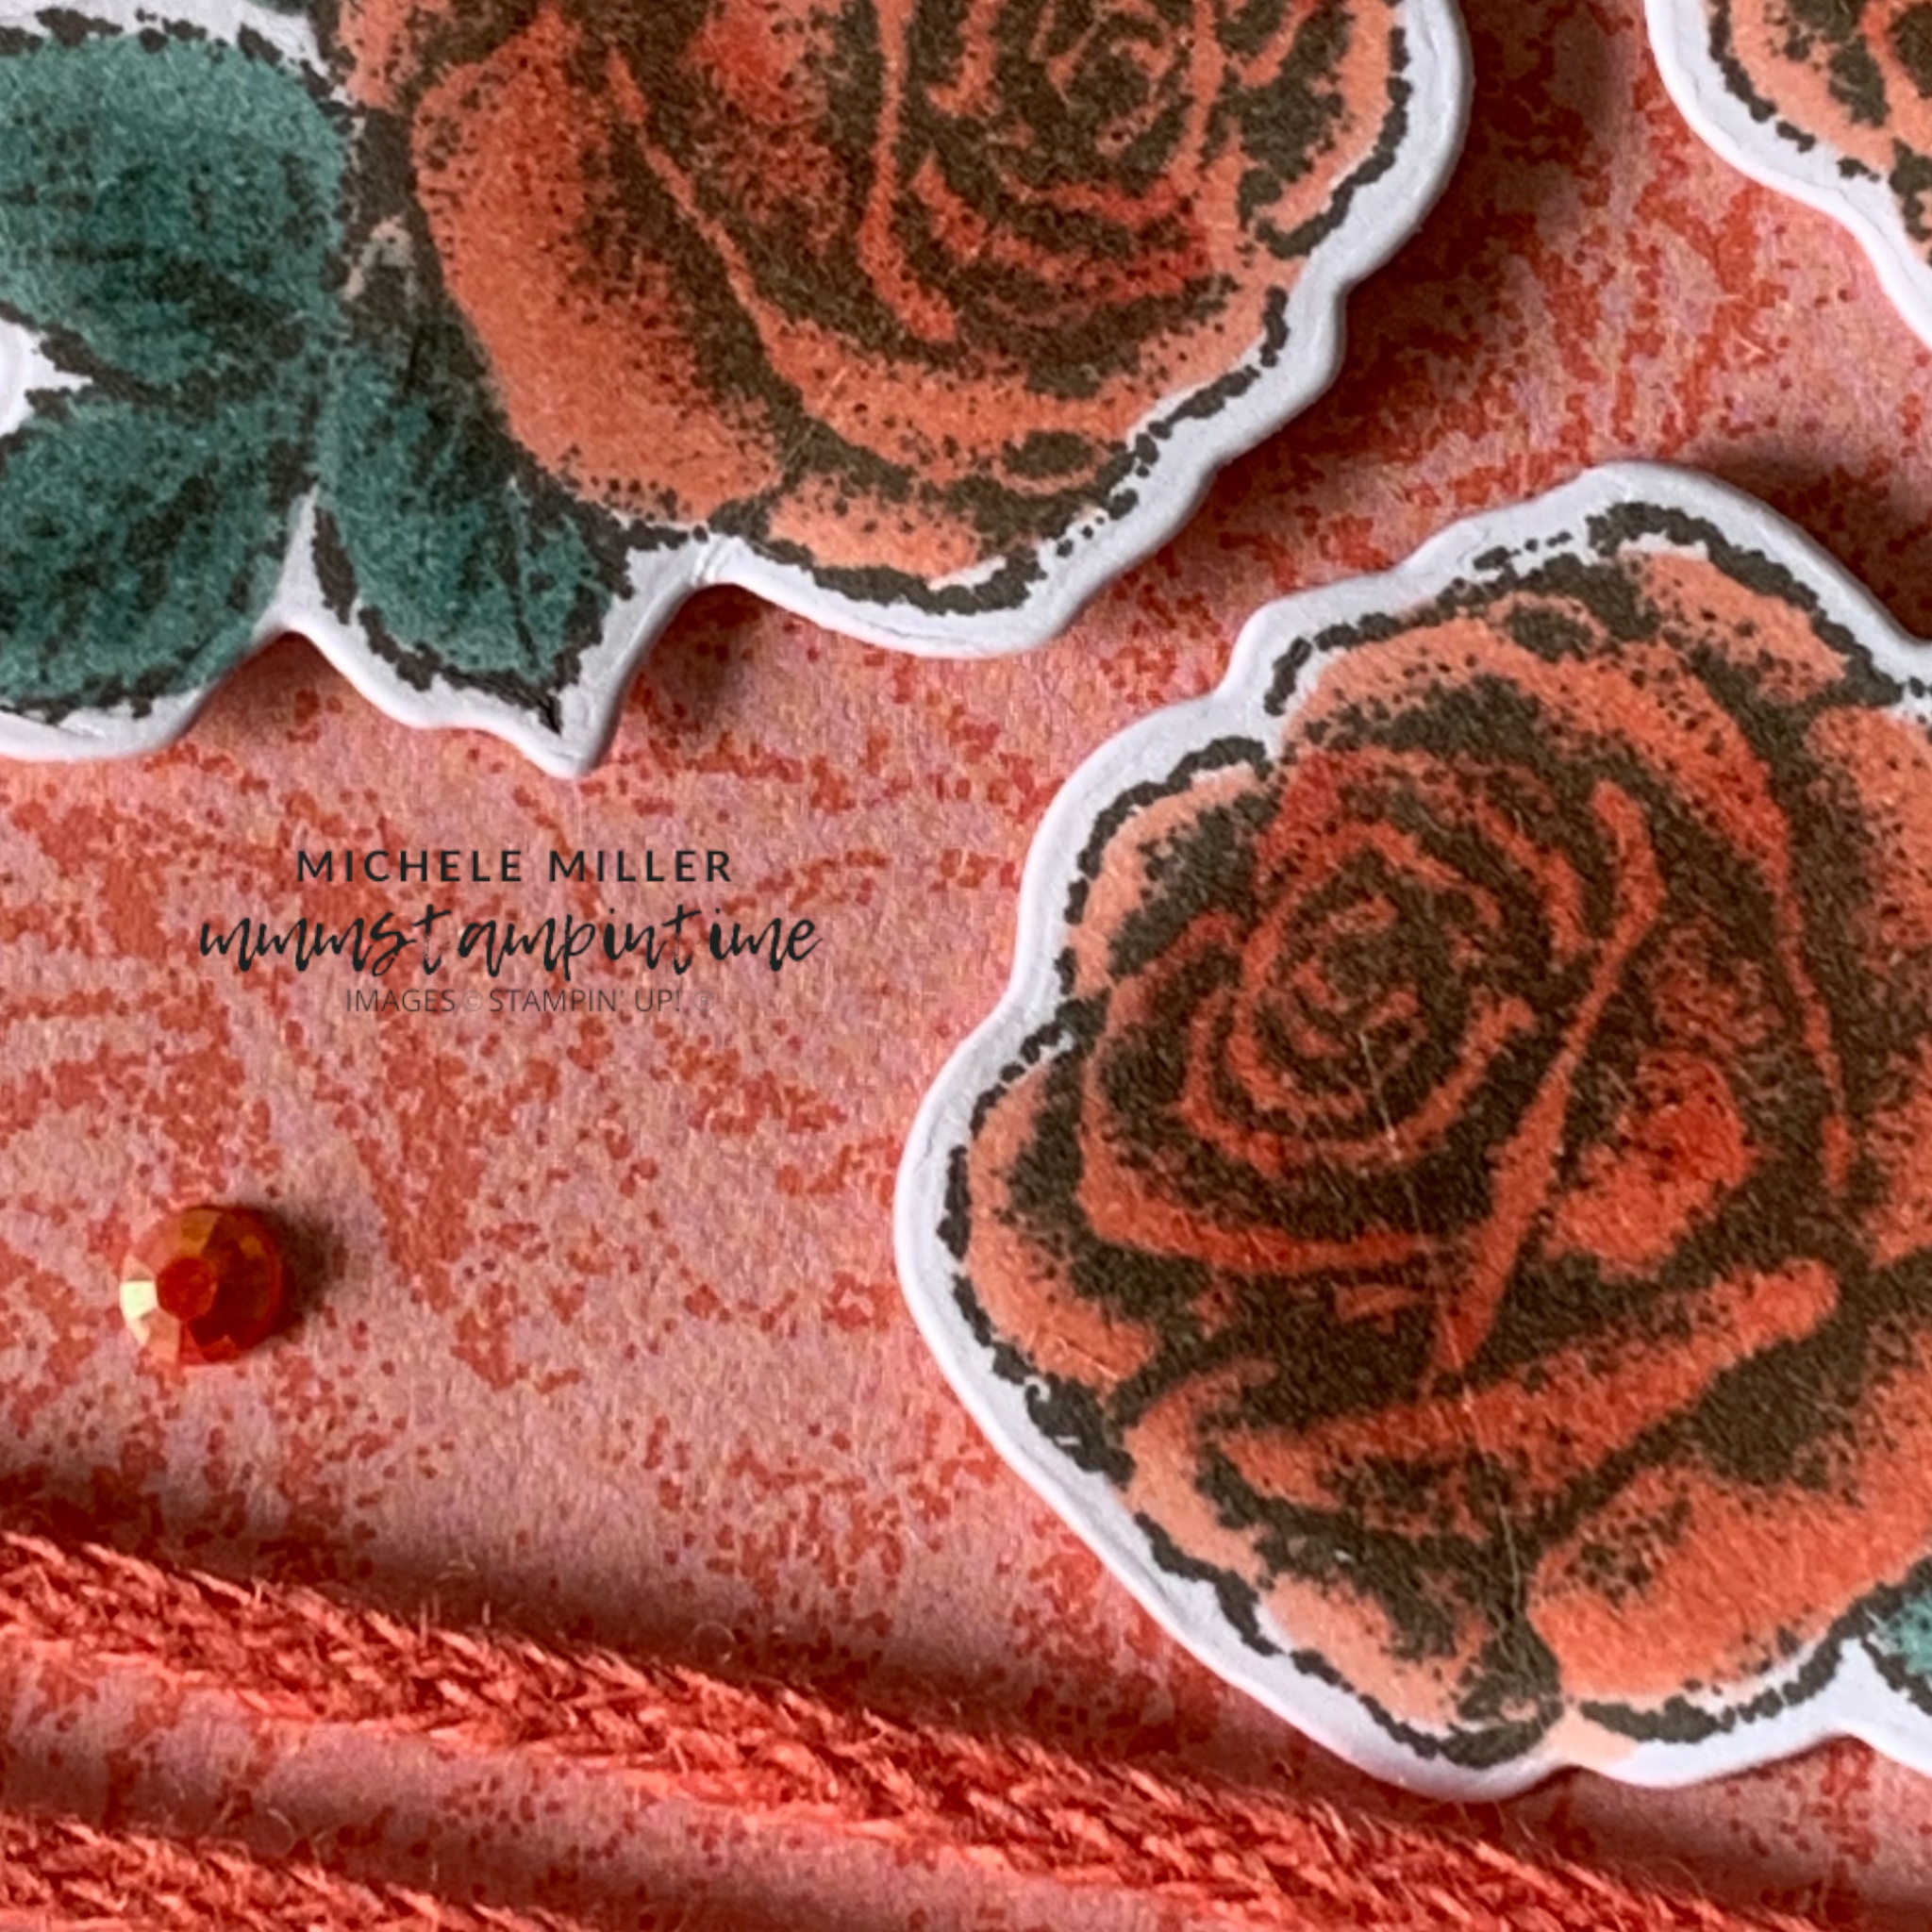
The Stippled Roses Cling Stamp Set includes three images and four greeitngs/sentiments. I have used all the images this week and they are a large double rose, a single, smaller rose and a long stem of leaves. There are four greetings for different occasions, making this a very versatile set. There a two distinct fonts used, with one greeting using both.

There are eight dies in the Stippled Roses Dies. Three of them coordinate with the stamp images while the others offer some alternate flower and leaf shapes.

And, of course, don’t forget that if you buy this bundle you can also select the coordinating FREE Designer Series Paper from the January – February Sale-a-bration Brochure (while stocks last).

As you have seen during the week, you can very easily use other products you have to enhance the versatility of this bundle.

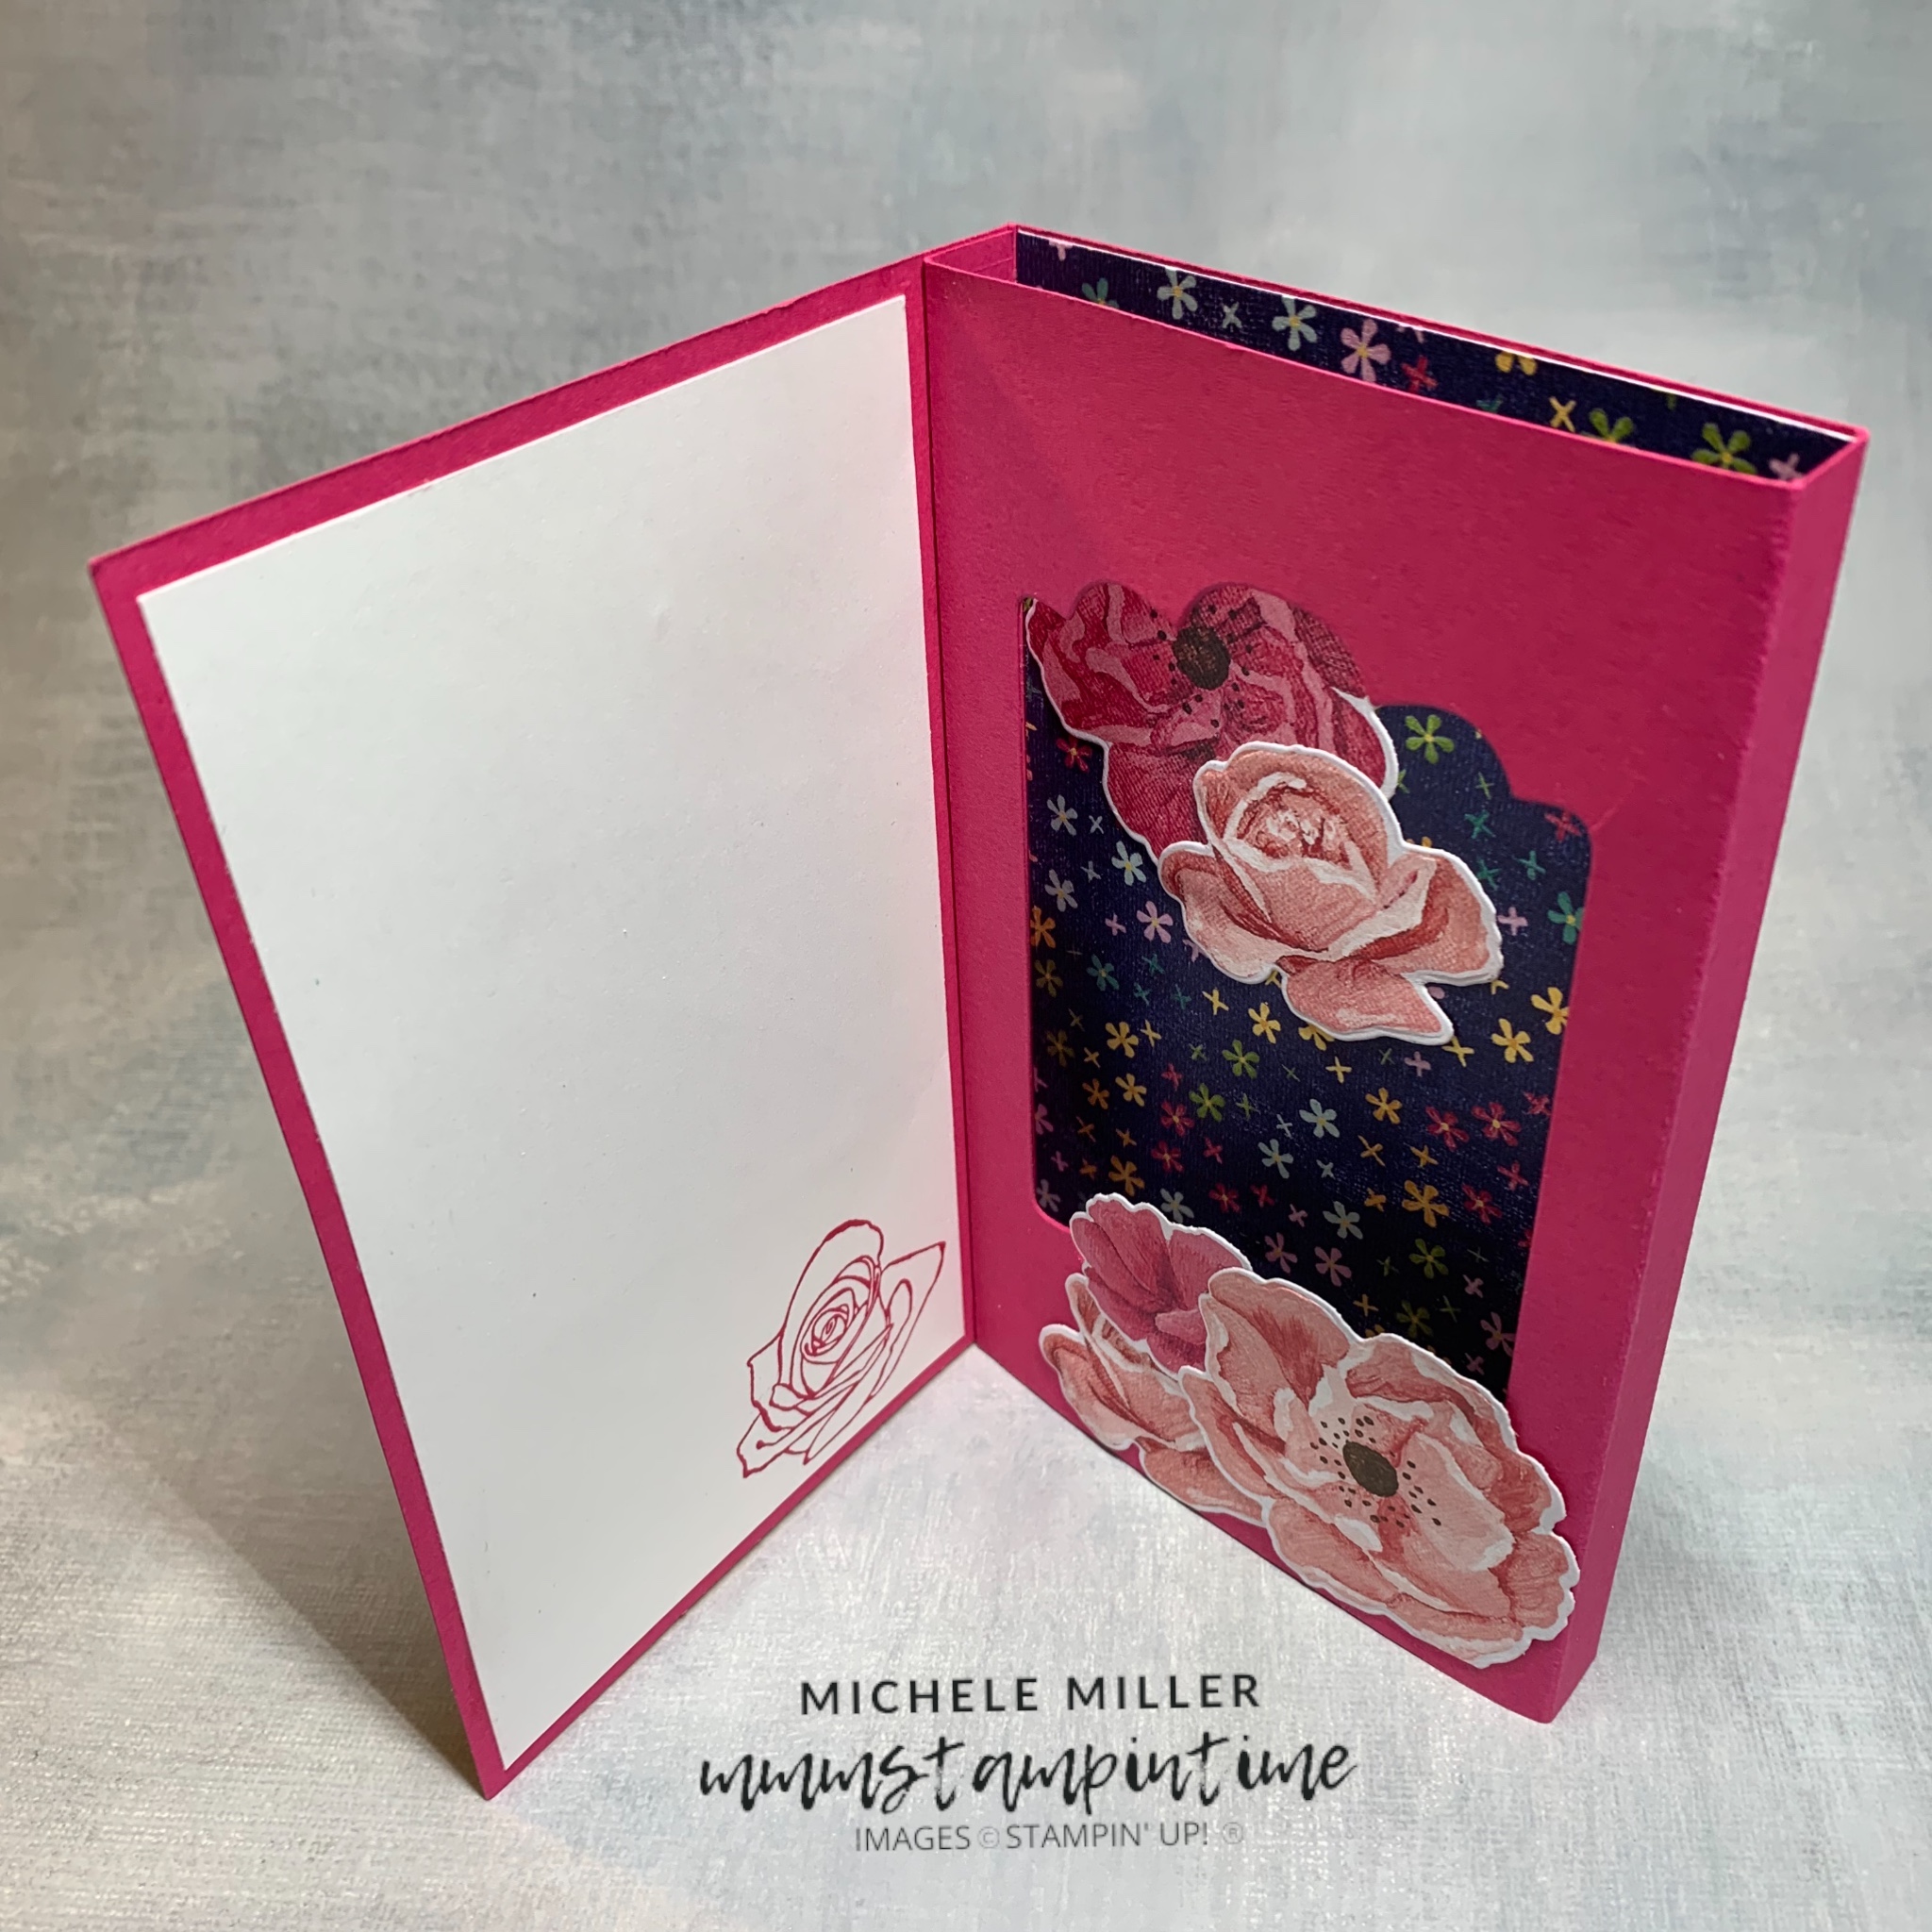
Today’s Fun Fold card is an oldie but a goodie. Easel cards are fabulous because the stand up so well when you want to display a card that you have received. You actually get 1 1/2 cards on show and a smaller section where that personal message has been written for you. And, of course, it folds down flat to slip inside the envelope.

For this card, I decided to focus on a Calypso Coral palette.

The DSP is gorgeous with its roses design.

For the main panel, I wrapped and secured three lengths of the Braided Linen Trim and had them evenly spaced. This was then adhered to the standing panel of the card base.

The inside of the card was made up of the DSP panel and greeting that you can see. The greeting is from the Softly Said Stamp Set. I added Stampin’ Dimensionals behind the greeting panel to create the ‘stopper’ for the standing panel.

The front of card was decorated with three single roses that were stamped, cut and coloured. Dimensionals ensured they could be popped up on the card to add some depth to the card.

I also added three small Calypso Coral Iridescent Pastel Gems to the card front.

The envelope had the same small rose image stamped on the back.

I will have another project to share with you tomorrow.

Until then, happy stamping.

If you live in Australia, you can order any of the products I used to make this card by going to my online store. Just click on any of the images below.

Product List
Paper Snips
[103579]
$19.25
Posted on Leave a comment

IT’S A FABULOUS DAY FOR A FUN FOLD FRIDAY

Today I have a W-fold card to share with you. I have seen many of these cards over the past year but it is the first time I have tried this fun fold.

For the front of the card, I featured a square of Daffodil Delight paper from the Brights 6″x 6″ Designer Series Paper and a 1″ wide strip of Pumpkin Pie cardstock that was banner cut using the Pick a Banner Punch.

The greeting is from the Charming Sentiments Stamp Set. After stamping it, using Bermuda Bay ink, I cut it using one of the Designer Tags Dies.

I stamped and coloured several budgerigars before die cutting them. This was the one I chose for the card front. I also cut several feathers from the same DSP and adhered them to the card.

Looking at this image now, I need to go back and add some Daffodil Delight embellishments from the Glossy Dots Assortment just to give it a little bling.

When the card is opened out fully, the four sections that create the “W” fold are revealed. The cardstock and DSP squares are adhered onto the Pumpkin Pie strip.

When partially opened, you can see the “W” quite clearly. There is one area that has some Basic White cardstock ready for a personal message.

I used all of these Stampin’ Blends to colour the birds for the card. My favourite is the light blue budgie.

This is the last project using the Pretty Birds Bundle for this week.

From tomorrow, I will have a new product suite to feature for a week of projects.

Until then, happy stamping.

If you live in Australia, you can order any of the products I used to make this card by going to my online store. Just click on any of the images below.

Product List
Paper Snips
[103579]
$19.25
Posted on Leave a comment

FUNFOLD FRIDAY

Today’s Funfold card is a Pop Up Diorama Card. This is the first time that I have made this type of card and I made two – I hope that you like them.

These are the last projects using the Hues of Happiness Collection for this week.

The first card features a Melon Mambo card base and a piece of Hues of Happiness Designer Series Paper.

The Melon Mambo frame is from the Fabulous Frames Dies set. I stamped the greeting, from the Happiness Abounds Stamp Set, onto a Basic White panel before wrapping the bow around it. The White Glittered Organdy Ribbon was coloured using the Dark Melon Mambo Stampin’ Blend. Then Stampin’ Dimensionals were added to the back of the panel and it was placed, at an angle, over the frame.

A few Iridescent Pearl Basic Jewels were colouredwith Stampin’ Blends and attached to the card front.

When the card is opened the pop up diarama is revealed.

Inside the card, I added several flowers that were die cut from the DSP.

I stamped a flower onto a piece of Basic White cardstock and adhered it inside the card. The same flower was stamped on the front of the envelope.

The depth of the diarama card is 1/2″.

The second card was created in the same way, using Night of Navy as an alternative colour.

Which card do you prefer – Melon Mambo or Night of Navy?

Tomorrow I will begin a new week of projects with a new bundle of products.

Until then, happy stamping.

If you live in Australia, you can order any of the products I used to make this card by going to my online store. Just click on any of the images below.

Product List
Paper Snips
[103579]
$19.25