As I mentioned yesterday, I am featuring the Harvest Home Garland Kit and ways to use it that do not result in a garland!
The technique today is BLACK ICE.
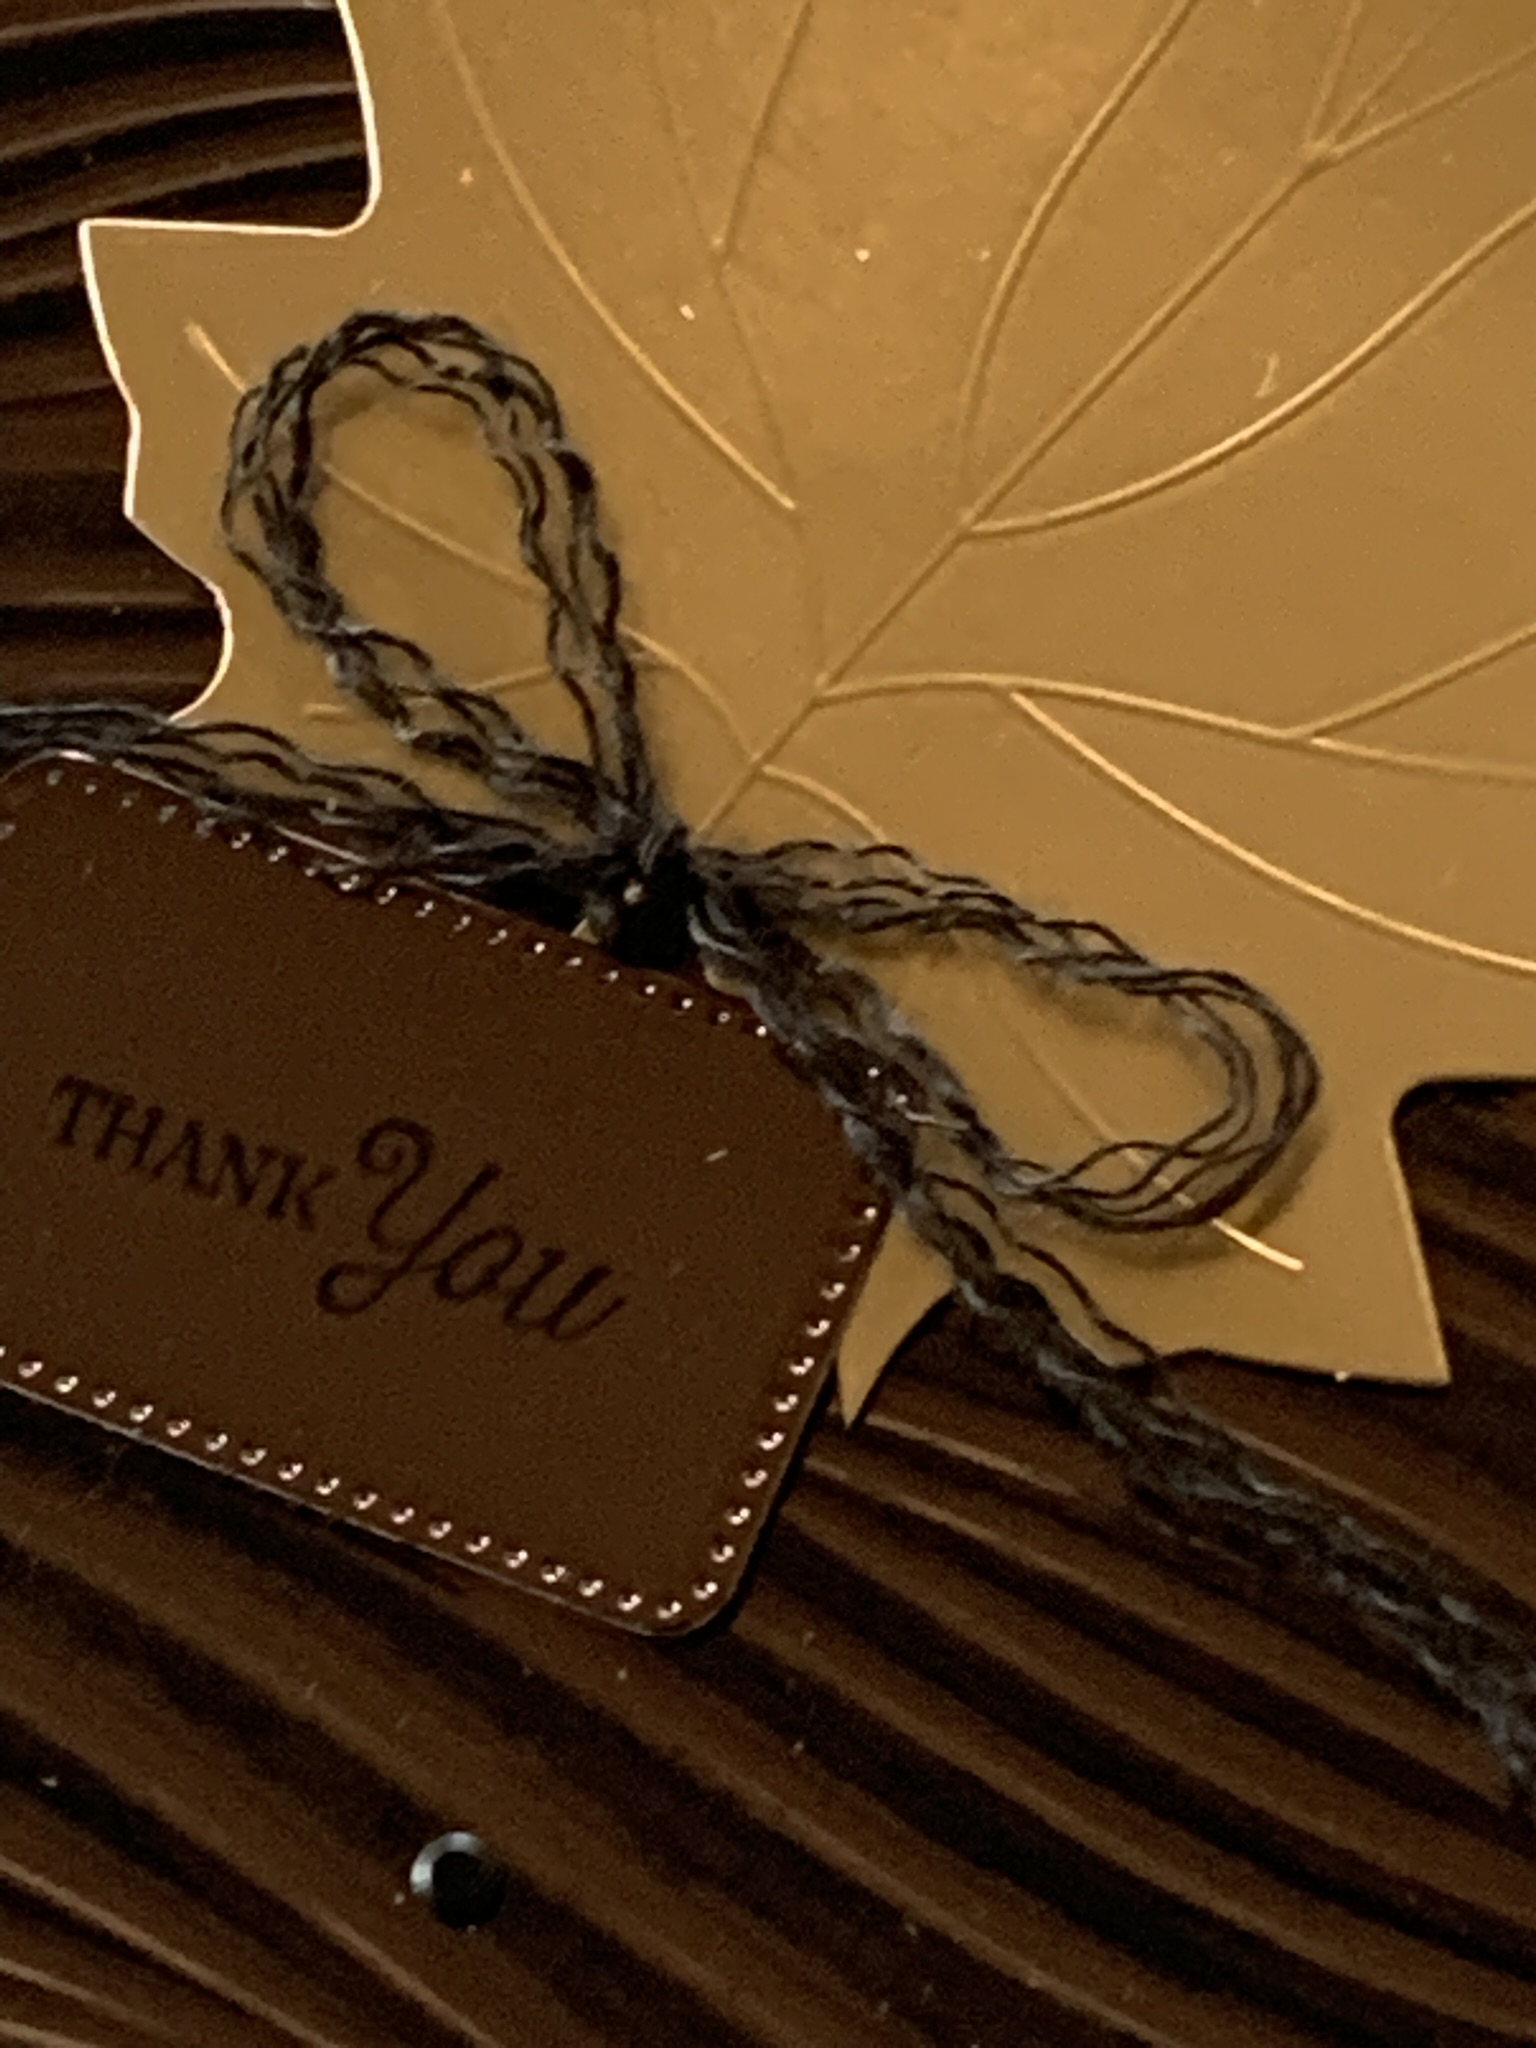
I cut two panels of the Earthen Toned Metallic 12’x 12″ Specialty paper and then embossed them – one using the Soft Waves 3D Embossing Folder and the other with the Exposed Brick 3D Embossing Foder.
Then I dragged the Jet Black StazOn ink pad across the embossed surfaces. This is the Black ice technique

TIP: If it has been a while since you have used your StazOn, make sure you reink the pad and make it nice and juicy.
After adhering the embossed and inked metallic panel, I took a length of Basic Black twine, from the Baker’s Twine Essentials Pack, and separatd the four strands. Then I wrapped the strands around the stem of one of the foil leaves and tied a bow. I used some Black Stampin’ Dimensionals to attach the leaf to the card.
The ‘thank you’ greeting, from the Loveliest Tree Stamp Set, was stamped onto a small piece of the Specialty Paper and cut with one of the Nested Essentials Dies. A few more dimensionals were used to add the greeting to the card front.

I added some black dots, from the Neutral Matte Dots pacl, to the front of the card.
Then some of the foil leaves were added to the card insert and back of the envelope.

The next card is a variation on the first one – it uses the Exposed Brick 3D Embossing Folder, more of the foil leaves and a different greeting, from the same stamp set.

TIP: Use a number of layered dimensionals to lift each leaf up higher than the one before.
Instead of using the separated twine to tie a bow around the leaf stem, I looped them behind the greeting panel.

Just like the first card, I added the Neutrl Matte Dots to the card front and foil leaves inside the card and on the back of the envelope.

It has been s long since I used the Black ics technique and I am so pleased that I have rediscovered it.
Have you used this technique before?
If you have please share your creations.
Tomorrow I have a new project to share with you, as well as some of the katest updates from Stampin’ Up!
Until then, happy stamping ad scrapbooking.

If you live in Australia, you can order any of the products I used to make this card by going to my online store. Just click on any of the images below.

![Harvest Home Garland Kit [ 166228 ]](https://i0.wp.com/assets1.tamsnetwork.com/images/EC042017NF/166228s.jpg?w=140&ssl=1 "Harvest Home Garland Kit [ 166228 ]") | ![Nested Essentials Dies [ 161597 ]](https://i0.wp.com/assets1.tamsnetwork.com/images/EC042017NF/161597s.jpg?w=140&ssl=1 "Nested Essentials Dies [ 161597 ]") | ![Neutral Matte Dots [ 165561 ]](https://i0.wp.com/assets1.tamsnetwork.com/images/EC042017NF/165561s.jpg?w=140&ssl=1 "Neutral Matte Dots [ 165561 ]") | ![Exposed Brick 3 D Embossing Folder [ 161600 ]](https://i0.wp.com/assets1.tamsnetwork.com/images/EC042017NF/161600s.jpg?w=140&ssl=1 "Exposed Brick 3 D Embossing Folder [ 161600 ]") | ![Soft Waves 3 D Embossing Folder [ 164695 ]](https://i0.wp.com/assets1.tamsnetwork.com/images/EC042017NF/164695s.jpg?w=140&ssl=1 "Soft Waves 3 D Embossing Folder [ 164695 ]") |
![Baker's Twine Essentials Pack [ 155475 ]](https://i0.wp.com/assets1.tamsnetwork.com/images/EC042017NF/155475s.jpg?w=140&ssl=1 "Baker's Twine Essentials Pack [ 155475 ]") | ![Basic Black A4 Card Stock [ 121688 ]](https://i0.wp.com/assets1.tamsnetwork.com/images/EC042017NF/121688s.jpg?w=140&ssl=1 "Basic Black A4 Card Stock [ 121688 ]") | ![Basic White A4 Cardstock [ 166781 ]](https://i0.wp.com/assets1.tamsnetwork.com/images/EC042017NF/166781s.jpg?w=140&ssl=1 "Basic White A4 Cardstock [ 166781 ]") | ![Jet Black Stāzon Ink Pad [ 101406 ]](https://i0.wp.com/assets1.tamsnetwork.com/images/EC042017NF/101406s.jpg?w=140&ssl=1 "Jet Black Stāzon Ink Pad [ 101406 ]") | ![Jet Black Stazon Ink Refill [ 102566 ]](https://i0.wp.com/assets1.tamsnetwork.com/images/EC042017NF/102566s.jpg?w=140&ssl=1 "Jet Black Stazon Ink Refill [ 102566 ]") |
![Multipurpose Liquid Glue [ 110755 ]](https://i0.wp.com/assets1.tamsnetwork.com/images/EC042017NF/110755s.jpg?w=140&ssl=1 "Multipurpose Liquid Glue [ 110755 ]") | ![Mini Glue Dots [ 103683 ]](https://i0.wp.com/assets1.tamsnetwork.com/images/EC042017NF/103683s.jpg?w=140&ssl=1 "Mini Glue Dots [ 103683 ]") | ![Paper Snips [ 103579 ]](https://i0.wp.com/assets1.tamsnetwork.com/images/EC042017NF/103579s.jpg?w=140&ssl=1 "Paper Snips [ 103579 ]") | ![Paper Trimmer [ 152392 ]](https://i0.wp.com/assets1.tamsnetwork.com/images/EC042017NF/152392s.jpg?w=140&ssl=1 "Paper Trimmer [ 152392 ]") | |
![Stampin' Cut & Emboss Machine [ 149653 ]](https://i0.wp.com/assets1.tamsnetwork.com/images/EC042017NF/149653s.jpg?w=140&ssl=1 "Stampin' Cut & Emboss Machine [ 149653 ]") | ![Basic White C6 Envelopes [ 159235 ]](https://i0.wp.com/assets1.tamsnetwork.com/images/EC042017NF/159235s.jpg?w=140&ssl=1 "Basic White C6 Envelopes [ 159235 ]") |
![Black Stampin' Dimensionals Combo Pack [ 150893 ]](https://i0.wp.com/assets1.tamsnetwork.com/images/EC042017NF/150893s.jpg?w=140&ssl=1 "Black Stampin' Dimensionals Combo Pack [ 150893 ]")


![Linen Thread [ 104199 ]](https://i0.wp.com/assets1.tamsnetwork.com/images/EC042017NF/104199s.jpg?w=140&ssl=1 "Linen Thread [ 104199 ]")
![Basic Gray A4 Card Stock [ 121689 ]](https://i0.wp.com/assets1.tamsnetwork.com/images/EC042017NF/121689s.jpg?w=140&ssl=1 "Basic Gray A4 Card Stock [ 121689 ]")
![Cajun Craze 12" X 12" (30.5 X 30.5 Cm) Two Tone Cardstock [ 166675 ]](https://i0.wp.com/assets1.tamsnetwork.com/images/EC042017NF/166675s.jpg?w=140&ssl=1 "Cajun Craze 12\" X 12\" (30.5 X 30.5 Cm) Two Tone Cardstock [ 166675 ]")
![Soft Sea Foam 12" X 12" (30.5 X 30.5 Cm) Two Tone Cardstock [ 166700 ]](https://i0.wp.com/assets1.tamsnetwork.com/images/EC042017NF/166700s.jpg?w=140&ssl=1 "Soft Sea Foam 12\" X 12\" (30.5 X 30.5 Cm) Two Tone Cardstock [ 166700 ]")
![Adhesive Sheets [ 152334 ]](https://i0.wp.com/assets1.tamsnetwork.com/images/EC042017NF/152334s.jpg?w=140&ssl=1 "Adhesive Sheets [ 152334 ]")