Welcome back and thank you for joining me as I share the Love & Courage projects I recently shared on a 10 minute video for Stampin’ Up! demonstrators.
This stamp set is the September – December 2025 Mini Catalogue Make a Difference set. For every one of this stamp set sold, STampin’ Up! will be donating a percentage of the purchase price to Breast Cancer Organisations in the quest for prevention.

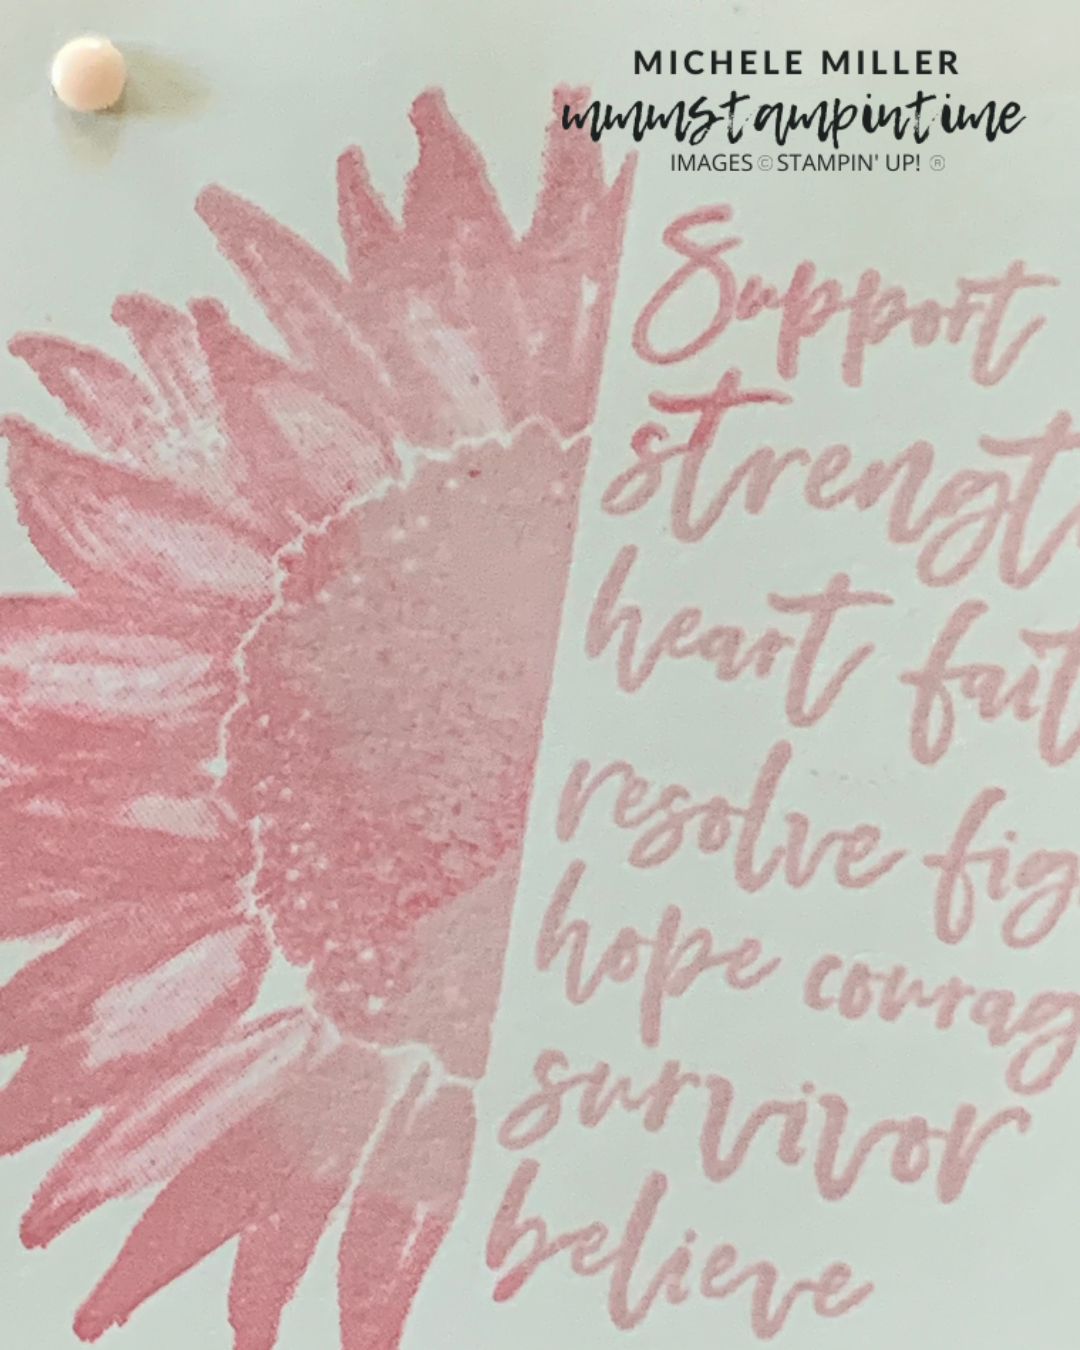
My second project features the sunflower and words of support stamp.
This time I am using Bubble Bath ink to represent breast cancer awareness in general.
I started by taking Block E so that I could use it to help guide me with some two-step stamping.
I placed the block over a piece of Basic White card and traced an outline of the block.
After attaching the stamp to this block, I inked it up with Bubble Bath and aligned the block to the pencil marks and stamped.
Then I cleaned the stamp and used one of my small blending brushes to add some Strawberry Slush ink to the sunflower.
Then I repeated the stamping process using the pencil marks as a guide.
After this I trimmed the stamped image down to a 3 1/2″x 3 1/2″ square and added it to my card.

The card base is made up of Bubble Bath with a Basic White panel and a slightly smaller panel of Bubble Bath paper from the 2024-2026 In Colour Designer Series Paper pack.

The card insert was stamped and had a strip of the DSP added. The back of the envelope also had paper adhered to the back flap.
The final task was to add some of the Bubble Bath Rainbow Dots to the front.

Tomorrow I have another card to share with you.
Until then, hapy stamping.

If you live in Australia, you can order any of the products I used to make this card by going to my online store. Just click on any of the images below.

![Rainbow Adhesive Backed Dots [ 162758 ]](https://i0.wp.com/assets1.tamsnetwork.com/images/EC042017NF/162758s.jpg?w=140&ssl=1 "Rainbow Adhesive Backed Dots [ 162758 ]") | ![Basic White A4 Cardstock [ 166781 ]](https://i0.wp.com/assets1.tamsnetwork.com/images/EC042017NF/166781s.jpg?w=140&ssl=1 "Basic White A4 Cardstock [ 166781 ]") | ![Bubble Bath A4 Cardstock [ 161727 ]](https://i0.wp.com/assets1.tamsnetwork.com/images/EC042017NF/161727s.jpg?w=140&ssl=1 "Bubble Bath A4 Cardstock [ 161727 ]") | ||
![Bubble Bath Classic Stampin' Pad [ 161664 ]](https://i0.wp.com/assets1.tamsnetwork.com/images/EC042017NF/161664s.jpg?w=140&ssl=1 "Bubble Bath Classic Stampin' Pad [ 161664 ]") | ![Small Blending Brushes [ 160518 ]](https://i0.wp.com/assets1.tamsnetwork.com/images/EC042017NF/160518s.jpg?w=140&ssl=1 "Small Blending Brushes [ 160518 ]") | ![Multipurpose Liquid Glue [ 110755 ]](https://i0.wp.com/assets1.tamsnetwork.com/images/EC042017NF/110755s.jpg?w=140&ssl=1 "Multipurpose Liquid Glue [ 110755 ]") | ![Stampin' Dimensionals [ 104430 ]](https://i0.wp.com/assets1.tamsnetwork.com/images/EC042017NF/104430s.jpg?w=140&ssl=1 "Stampin' Dimensionals [ 104430 ]") | |
![Paper Snips [ 103579 ]](https://i0.wp.com/assets1.tamsnetwork.com/images/EC042017NF/103579s.jpg?w=140&ssl=1 "Paper Snips [ 103579 ]") | ![Paper Trimmer [ 152392 ]](https://i0.wp.com/assets1.tamsnetwork.com/images/EC042017NF/152392s.jpg?w=140&ssl=1 "Paper Trimmer [ 152392 ]") | ![Basic White C6 Envelopes [ 159235 ]](https://i0.wp.com/assets1.tamsnetwork.com/images/EC042017NF/159235s.jpg?w=140&ssl=1 "Basic White C6 Envelopes [ 159235 ]") |
![Love & Courage Cling Stamp Set (English) [ 165935 ]](https://i0.wp.com/assets1.tamsnetwork.com/images/EC042017NF/165935s.jpg?w=140&ssl=1 "Love & Courage Cling Stamp Set (English) [ 165935 ]")
![2024–2026 In Color™ 6" X 6" (15.2 X 15.2 Cm) Designer Series Paper [ 165299 ]](https://i0.wp.com/assets1.tamsnetwork.com/images/EC042017NF/165299s.jpg?w=140&ssl=1 "2024–2026 In Color™ 6\" X 6\" (15.2 X 15.2 Cm) Designer Series Paper [ 165299 ]")
![Strawberry Slush Classic Stampin' Pad [ 165286 ]](https://i0.wp.com/assets1.tamsnetwork.com/images/EC042017NF/165286s.jpg?w=140&ssl=1 "Strawberry Slush Classic Stampin' Pad [ 165286 ]")


![So Swirly Embossing Folder [ 163791 ]](https://i0.wp.com/assets1.tamsnetwork.com/images/EC042017NF/163791s.jpg?w=140&ssl=1 "So Swirly Embossing Folder [ 163791 ]")
![2025–2027 In Color™ Flat Pearls [ 165192 ]](https://i0.wp.com/assets1.tamsnetwork.com/images/EC042017NF/165192s.jpg?w=140&ssl=1 "2025–2027 In Color™ Flat Pearls [ 165192 ]")
![Strawberry Slush A4 Cardstock [ 165297 ]](https://i0.wp.com/assets1.tamsnetwork.com/images/EC042017NF/165297s.jpg?w=140&ssl=1 "Strawberry Slush A4 Cardstock [ 165297 ]")
![Versamark Pad [ 102283 ]](https://i0.wp.com/assets1.tamsnetwork.com/images/EC042017NF/102283s.jpg?w=140&ssl=1 "Versamark Pad [ 102283 ]")
![Basics Wow! Embossing Powder [ 165679 ]](https://i0.wp.com/assets1.tamsnetwork.com/images/EC042017NF/165679s.jpg?w=140&ssl=1 "Basics Wow! Embossing Powder [ 165679 ]")
![Embossing Additions Tool Kit [ 159971 ]](https://i0.wp.com/assets1.tamsnetwork.com/images/EC042017NF/159971s.jpg?w=140&ssl=1 "Embossing Additions Tool Kit [ 159971 ]")
![Heat Tool [ 129056 ]](https://i0.wp.com/assets1.tamsnetwork.com/images/EC042017NF/129056s.jpg?w=140&ssl=1 "Heat Tool [ 129056 ]")
![Adhesive Sheets [ 152334 ]](https://i0.wp.com/assets1.tamsnetwork.com/images/EC042017NF/152334s.jpg?w=140&ssl=1 "Adhesive Sheets [ 152334 ]")
![Mini Stampin' Dimensionals [ 144108 ]](https://i0.wp.com/assets1.tamsnetwork.com/images/EC042017NF/144108s.jpg?w=140&ssl=1 "Mini Stampin' Dimensionals [ 144108 ]")
![Stampin' Cut & Emboss Machine [ 149653 ]](https://i0.wp.com/assets1.tamsnetwork.com/images/EC042017NF/149653s.jpg?w=140&ssl=1 "Stampin' Cut & Emboss Machine [ 149653 ]")



![Everyday You & Me Photopolymer Stamp Set (English) [ 166629 ]](https://i0.wp.com/assets1.tamsnetwork.com/images/EC042017NF/166629s.jpg?w=140&ssl=1 "Everyday You & Me Photopolymer Stamp Set (English) [ 166629 ]")
![Everyday Happiness 12" X 12" (30.5 X 30.5 Cm) Designer Series Paper [ 166632 ]](https://i0.wp.com/assets1.tamsnetwork.com/images/EC042017NF/166632s.jpg?w=140&ssl=1 "Everyday Happiness 12\" X 12\" (30.5 X 30.5 Cm) Designer Series Paper [ 166632 ]")
![Linen Thread [ 104199 ]](https://i0.wp.com/assets1.tamsnetwork.com/images/EC042017NF/104199s.jpg?w=140&ssl=1 "Linen Thread [ 104199 ]")
![Lost Lagoon A4 Cardstock [ 133686 ]](https://i0.wp.com/assets1.tamsnetwork.com/images/EC042017NF/133686s.jpg?w=140&ssl=1 "Lost Lagoon A4 Cardstock [ 133686 ]")
![Pretty Peacock A4 Cardstock [ 150886 ]](https://i0.wp.com/assets1.tamsnetwork.com/images/EC042017NF/150886s.jpg?w=140&ssl=1 "Pretty Peacock A4 Cardstock [ 150886 ]")
![Lost Lagoon Classic Stampin' Pad [ 161678 ]](https://i0.wp.com/assets1.tamsnetwork.com/images/EC042017NF/161678s.jpg?w=140&ssl=1 "Lost Lagoon Classic Stampin' Pad [ 161678 ]")
![Blending Brushes [ 153611 ]](https://i0.wp.com/assets1.tamsnetwork.com/images/EC042017NF/153611s.jpg?w=140&ssl=1 "Blending Brushes [ 153611 ]")
![Mini Glue Dots [ 103683 ]](https://i0.wp.com/assets1.tamsnetwork.com/images/EC042017NF/103683s.jpg?w=140&ssl=1 "Mini Glue Dots [ 103683 ]")




