
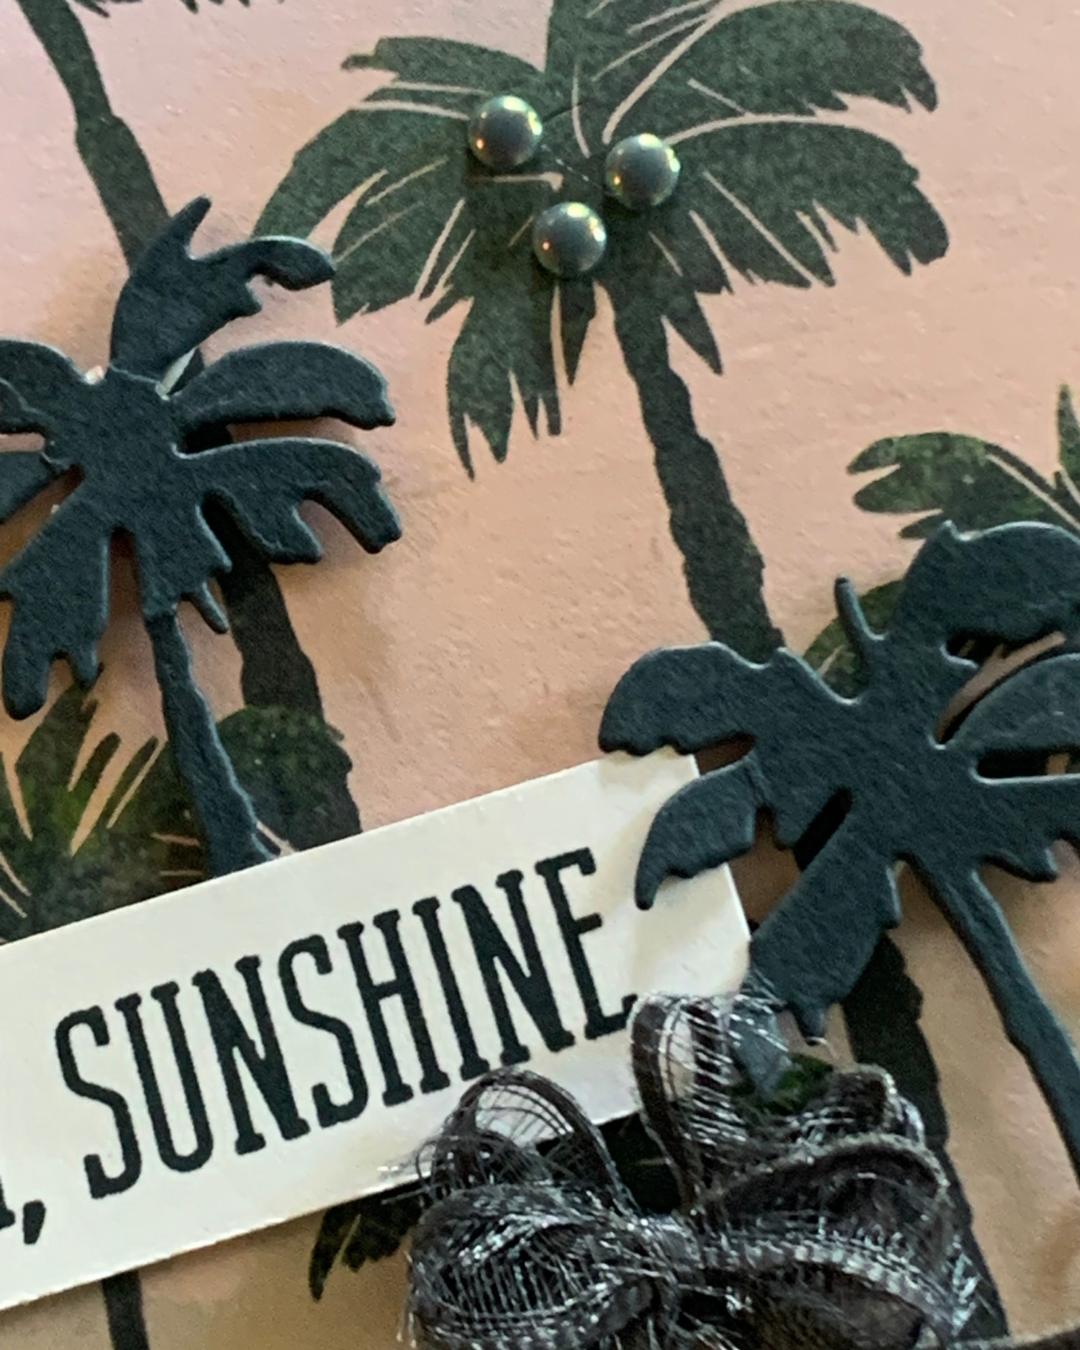
Welcome back for another Colour INKspiration challenge. This inspiration picture which has inspired our colour palette was chosen by Me! We welcome Sandra Strobel as our Guest Designer.

This photo was perfect to use as INKspiration to use the new Sunshine & Tulips Bundle.

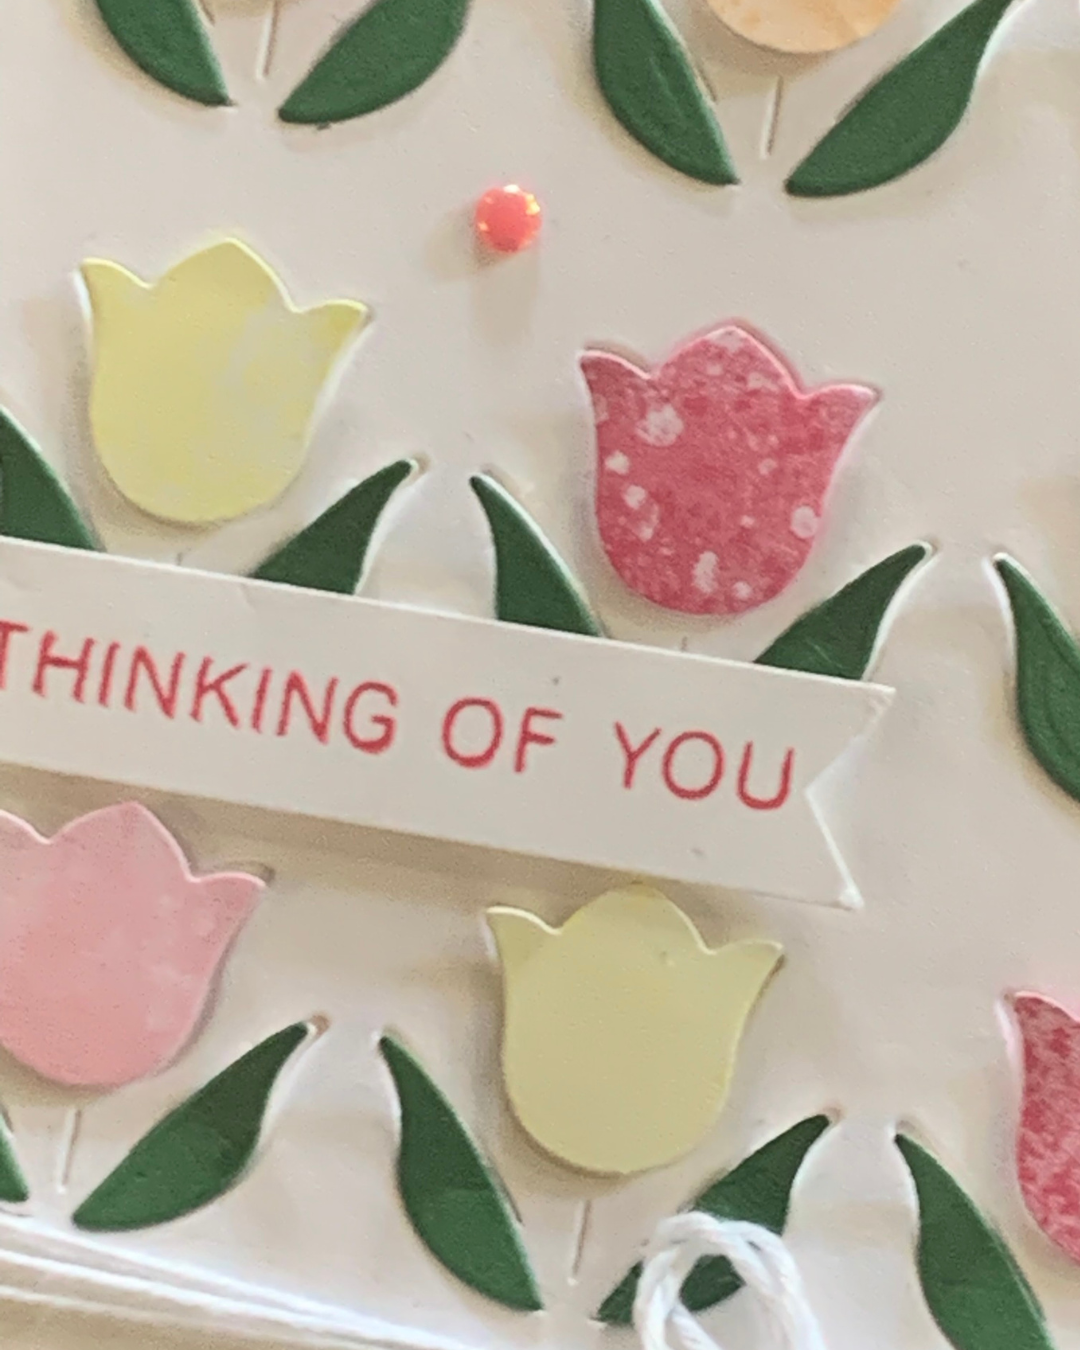
For this card I used a Basic White card base. After die cutting the tulips, I wrapped white Baker’s Twine around the panel and added a triple bow feature.
I die cut the tulip petals using a variety of 2025 6″x 6″ DSP and the leaves from Garden Green card.

The greeting was stamped and cut using the Three Banner Punch. Using Stampin’ Dimensionals I was able to lift the banner up on the card front.
I added some Strawberry Slush Flat Pearls to embellish the card front.

The back of the envelope and inside the card were stamped with the row of 5 small tulips.
INKspired to join the challenge? It’s so easy. Firstly, get some INKspiration by checking out all of the creations of the Colour INKspiration Crew in the challenge album on our Facebook page. Then you have just under 4 weeks from today to make and upload your creation to the Facebook Colour INKspiration Group. You don’t have to have a blog to participate but if you do you can link back to your post. Make sure you use all of the challenge colours. You can also use neutrals such as Basic White, Very Vanilla, Crumb Cake, Basic Beige and Basic Black as well as Metallics.
Not a member of the Colour INKspiration Facebook group yet? Just click here and ask to join Colour INKspiration, add the group to your favourites and share it with your crafty friends so they can join in the fun too. We can’t wait to see what you create with these gorgeous colours.
Thanks for popping by to check out the #202 Challenge.
Until next time, happy stamping.

If you live in Australia, you can order any of the products I used to make this card by going to my online store. Just click on any of the images below.

![Sunshine & Tulips Bundle (English) [ 166866 ]](https://i0.wp.com/assets1.tamsnetwork.com/images/EC042017NF/166866s.jpg?w=140&ssl=1 "Sunshine & Tulips Bundle (English) [ 166866 ]") | ![Sunshine & Tulips Dies [ 166865 ]](https://i0.wp.com/assets1.tamsnetwork.com/images/EC042017NF/166865s.jpg?w=140&ssl=1 "Sunshine & Tulips Dies [ 166865 ]") | ![Banner Triple Punch [ 138292 ]](https://i0.wp.com/assets1.tamsnetwork.com/images/EC042017NF/138292s.jpg?w=140&ssl=1 "Banner Triple Punch [ 138292 ]") | |
![Baker's Twine Essentials Pack [ 155475 ]](https://i0.wp.com/assets1.tamsnetwork.com/images/EC042017NF/155475s.jpg?w=140&ssl=1 "Baker's Twine Essentials Pack [ 155475 ]") | ![2025–2027 In Color™ Flat Pearls [ 165192 ]](https://i0.wp.com/assets1.tamsnetwork.com/images/EC042017NF/165192s.jpg?w=140&ssl=1 "2025–2027 In Color™ Flat Pearls [ 165192 ]") | ||
![Basic White A4 Cardstock [ 166781 ]](https://i0.wp.com/assets1.tamsnetwork.com/images/EC042017NF/166781s.jpg?w=140&ssl=1 "Basic White A4 Cardstock [ 166781 ]") | ![Garden Green A4 Card Stock [ 108605 ]](https://i0.wp.com/assets1.tamsnetwork.com/images/EC042017NF/108605s.jpg?w=140&ssl=1 "Garden Green A4 Card Stock [ 108605 ]") | ||
![Multipurpose Liquid Glue [ 110755 ]](https://i0.wp.com/assets1.tamsnetwork.com/images/EC042017NF/110755s.jpg?w=140&ssl=1 "Multipurpose Liquid Glue [ 110755 ]") | ![Stampin' Dimensionals [ 104430 ]](https://i0.wp.com/assets1.tamsnetwork.com/images/EC042017NF/104430s.jpg?w=140&ssl=1 "Stampin' Dimensionals [ 104430 ]") | ![Paper Snips [ 103579 ]](https://i0.wp.com/assets1.tamsnetwork.com/images/EC042017NF/103579s.jpg?w=140&ssl=1 "Paper Snips [ 103579 ]") | ![Paper Trimmer [ 152392 ]](https://i0.wp.com/assets1.tamsnetwork.com/images/EC042017NF/152392s.jpg?w=140&ssl=1 "Paper Trimmer [ 152392 ]") |
![Stampin' Cut & Emboss Machine [ 149653 ]](https://i0.wp.com/assets1.tamsnetwork.com/images/EC042017NF/149653s.jpg?w=140&ssl=1 "Stampin' Cut & Emboss Machine [ 149653 ]") | ![Basic White C6 Envelopes [ 159235 ]](https://i0.wp.com/assets1.tamsnetwork.com/images/EC042017NF/159235s.jpg?w=140&ssl=1 "Basic White C6 Envelopes [ 159235 ]") |
![Sunshine & Tulips Photopolymer Stamp Set (English) [ 166859 ]](https://i0.wp.com/assets1.tamsnetwork.com/images/EC042017NF/166859s.jpg?w=140&ssl=1 "Sunshine & Tulips Photopolymer Stamp Set (English) [ 166859 ]")
![2024–2026 In Color™ 6" X 6" (15.2 X 15.2 Cm) Designer Series Paper [ 165299 ]](https://i0.wp.com/assets1.tamsnetwork.com/images/EC042017NF/165299s.jpg?w=140&ssl=1 "2024–2026 In Color™ 6\" X 6\" (15.2 X 15.2 Cm) Designer Series Paper [ 165299 ]")
![2025–2027 In Color™ 6" X 6" (15.2 X 15.2 Cm) Designer Series Paper [ 165300 ]](https://i0.wp.com/assets1.tamsnetwork.com/images/EC042017NF/165300s.jpg?w=140&ssl=1 "2025–2027 In Color™ 6\" X 6\" (15.2 X 15.2 Cm) Designer Series Paper [ 165300 ]")
![Regals 6" X 6" (15.2 X 15.2 Cm) Designer Series Paper [ 165304 ]](https://i0.wp.com/assets1.tamsnetwork.com/images/EC042017NF/165304s.jpg?w=140&ssl=1 "Regals 6\" X 6\" (15.2 X 15.2 Cm) Designer Series Paper [ 165304 ]")
![Subtles 6" X 6" (15.2 X 15.2 Cm) Designer Series Paper [ 165306 ]](https://i0.wp.com/assets1.tamsnetwork.com/images/EC042017NF/165306s.jpg?w=140&ssl=1 "Subtles 6\" X 6\" (15.2 X 15.2 Cm) Designer Series Paper [ 165306 ]")


![Antique Pearls [ 164679 ]](https://i0.wp.com/assets1.tamsnetwork.com/images/EC042017NF/164679s.jpg?w=140&ssl=1 "Antique Pearls [ 164679 ]")
![Basic White A4 Thick Cardstock [ 159230 ]](https://i0.wp.com/assets1.tamsnetwork.com/images/EC042017NF/159230s.jpg?w=140&ssl=1 "Basic White A4 Thick Cardstock [ 159230 ]")
![Secret Sea A4 Cardstock [ 165296 ]](https://i0.wp.com/assets1.tamsnetwork.com/images/EC042017NF/165296s.jpg?w=140&ssl=1 "Secret Sea A4 Cardstock [ 165296 ]")
![Secret Sea Classic Stampin' Pad [ 165285 ]](https://i0.wp.com/assets1.tamsnetwork.com/images/EC042017NF/165285s.jpg?w=140&ssl=1 "Secret Sea Classic Stampin' Pad [ 165285 ]")
![Secret Sea Stampin’ Blends Combo Pack [ 165289 ]](https://i0.wp.com/assets1.tamsnetwork.com/images/EC042017NF/165289s.jpg?w=140&ssl=1 "Secret Sea Stampin’ Blends Combo Pack [ 165289 ]")
![Mini Glue Dots [ 103683 ]](https://i0.wp.com/assets1.tamsnetwork.com/images/EC042017NF/103683s.jpg?w=140&ssl=1 "Mini Glue Dots [ 103683 ]")
![Mini Stampin' Cut & Emboss Machine [ 150673 ]](https://i0.wp.com/assets1.tamsnetwork.com/images/EC042017NF/150673s.jpg?w=140&ssl=1 "Mini Stampin' Cut & Emboss Machine [ 150673 ]")


