My project today features three techniques – masking, heat embossing and water colouring.
For this project I used the Beatiful Butterflies Stamp Set & Dies Bundle.
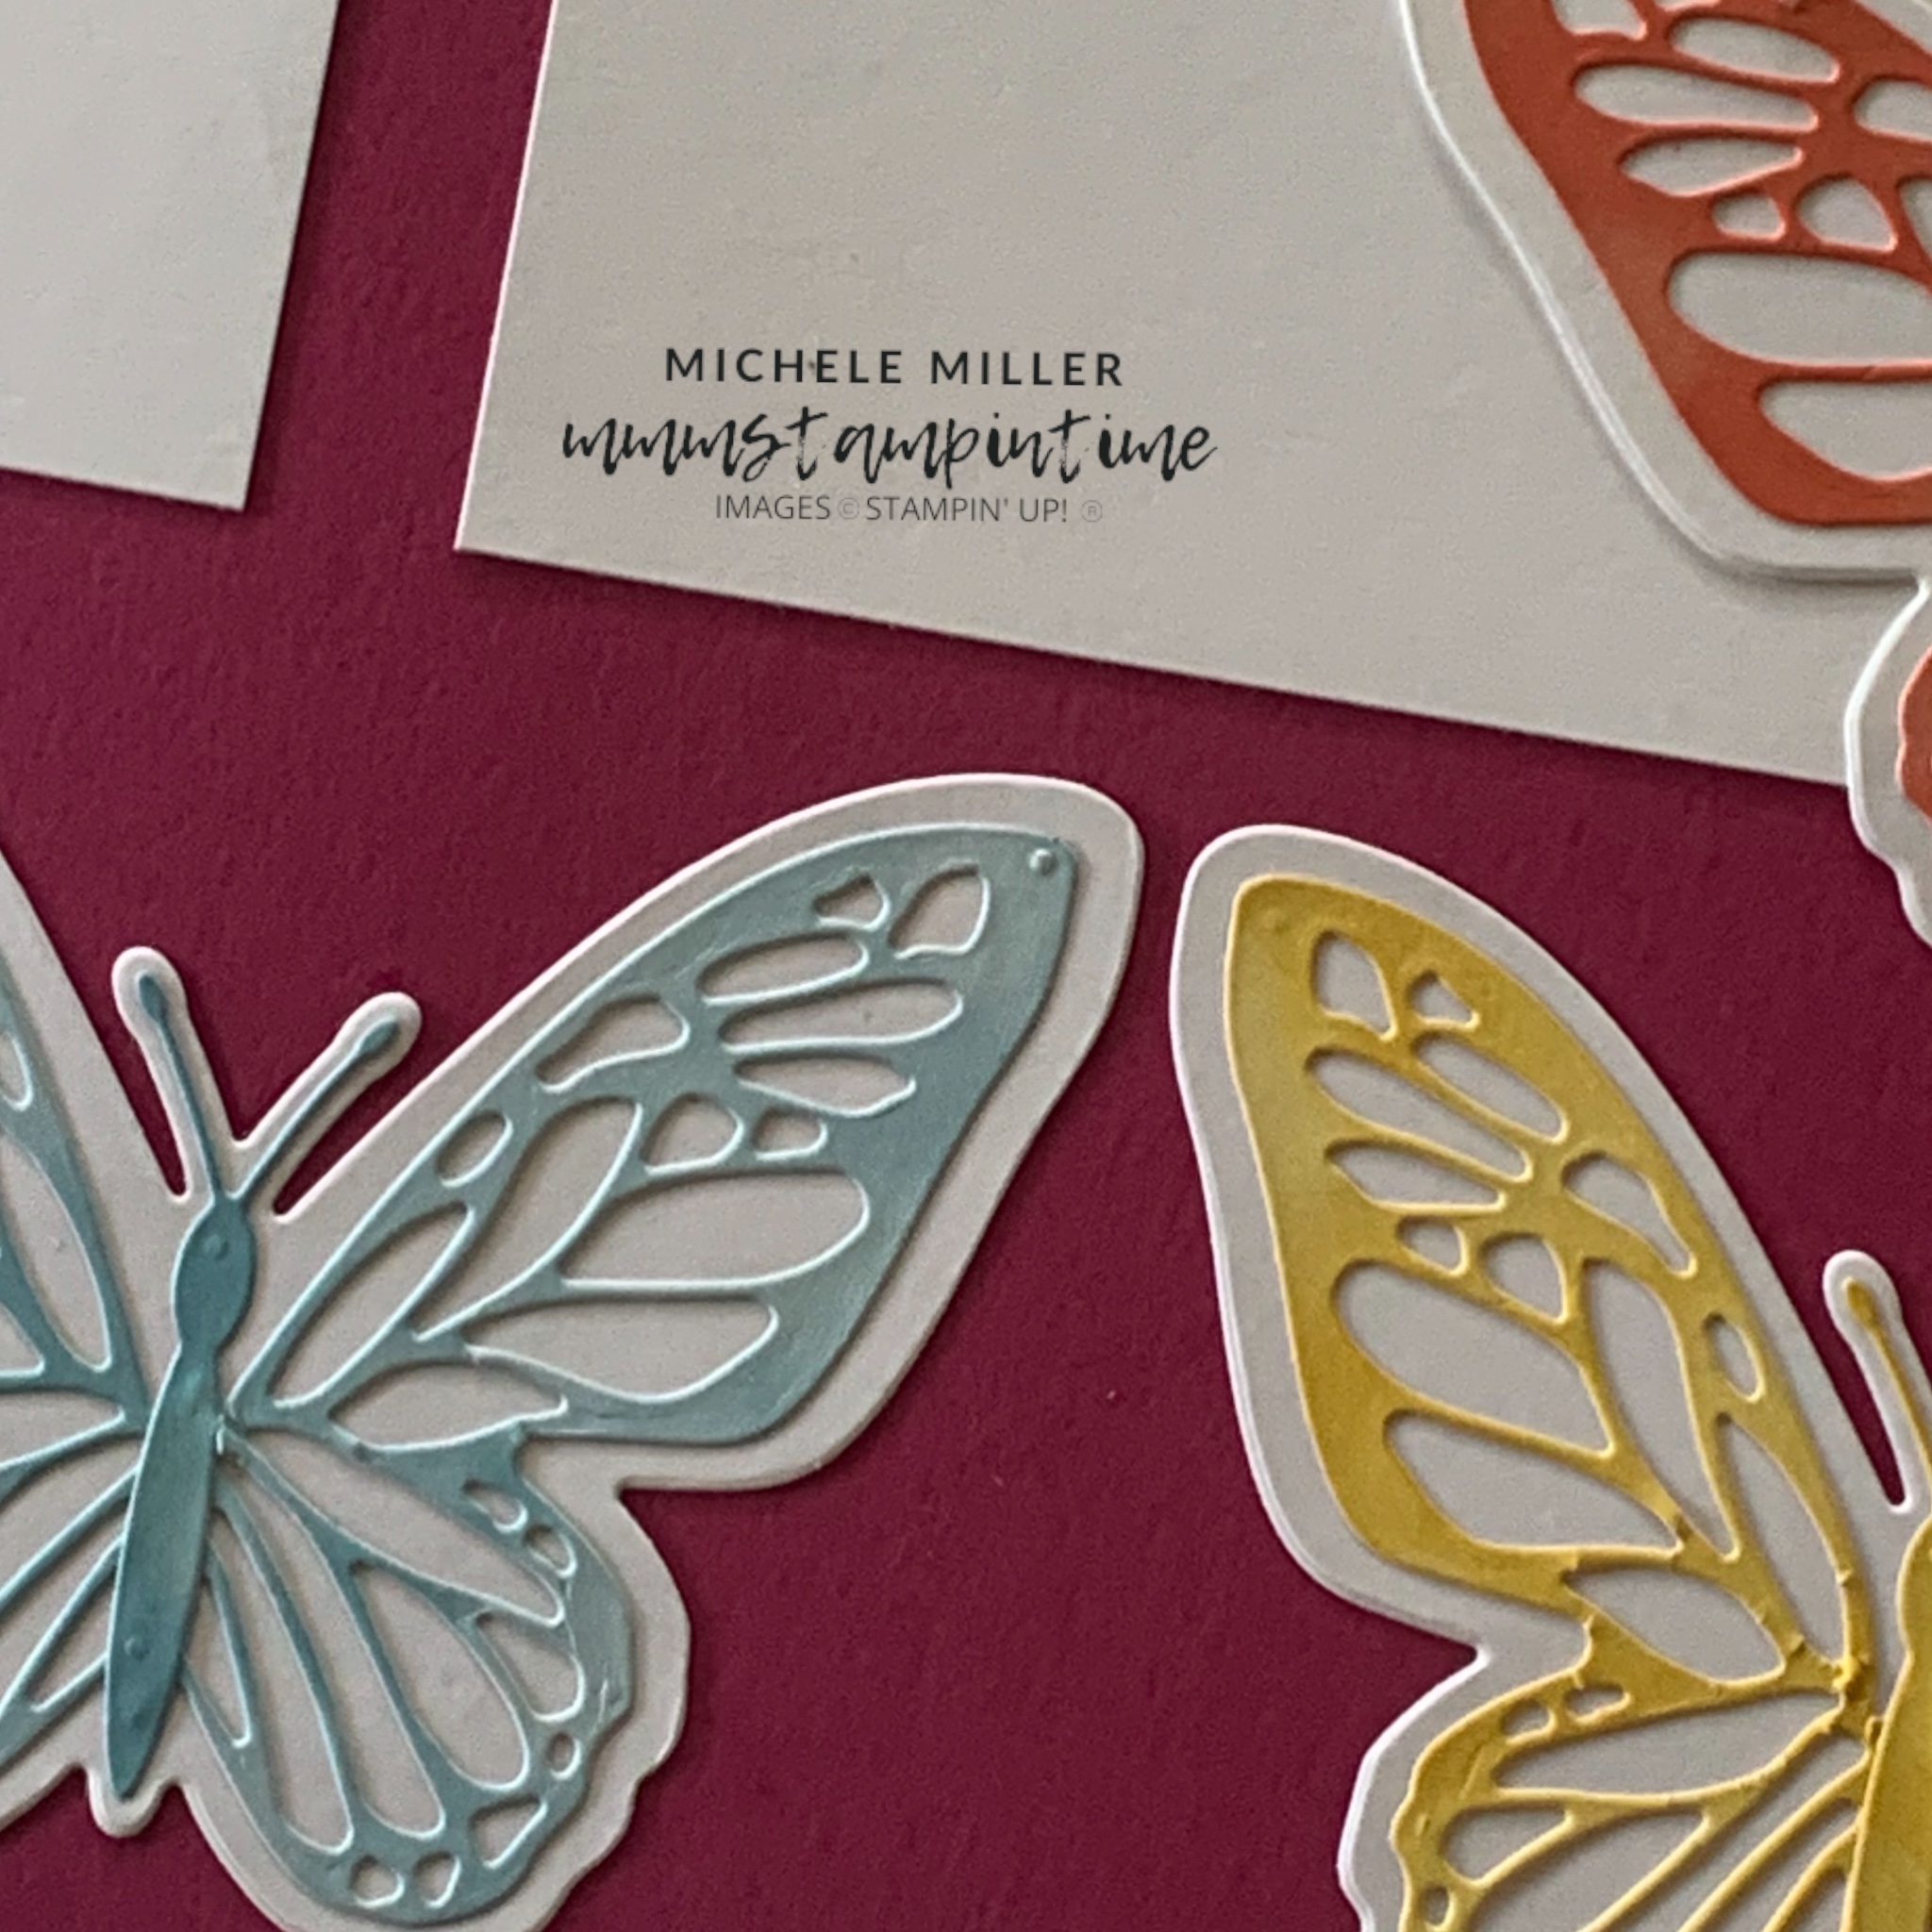
My first task was to die cut the two butterfly shapes, I planned to stamp, from a piece of Masking Paper.
TIP: It is so much easier to cut the shape on the centre ‘front’ of the paper (ensure the split that runs down the centre of the paper is used as the ‘back’). This will ensure that the cut shae will match your stamped image shape and that you will be able to peel away the backing paper more easily.
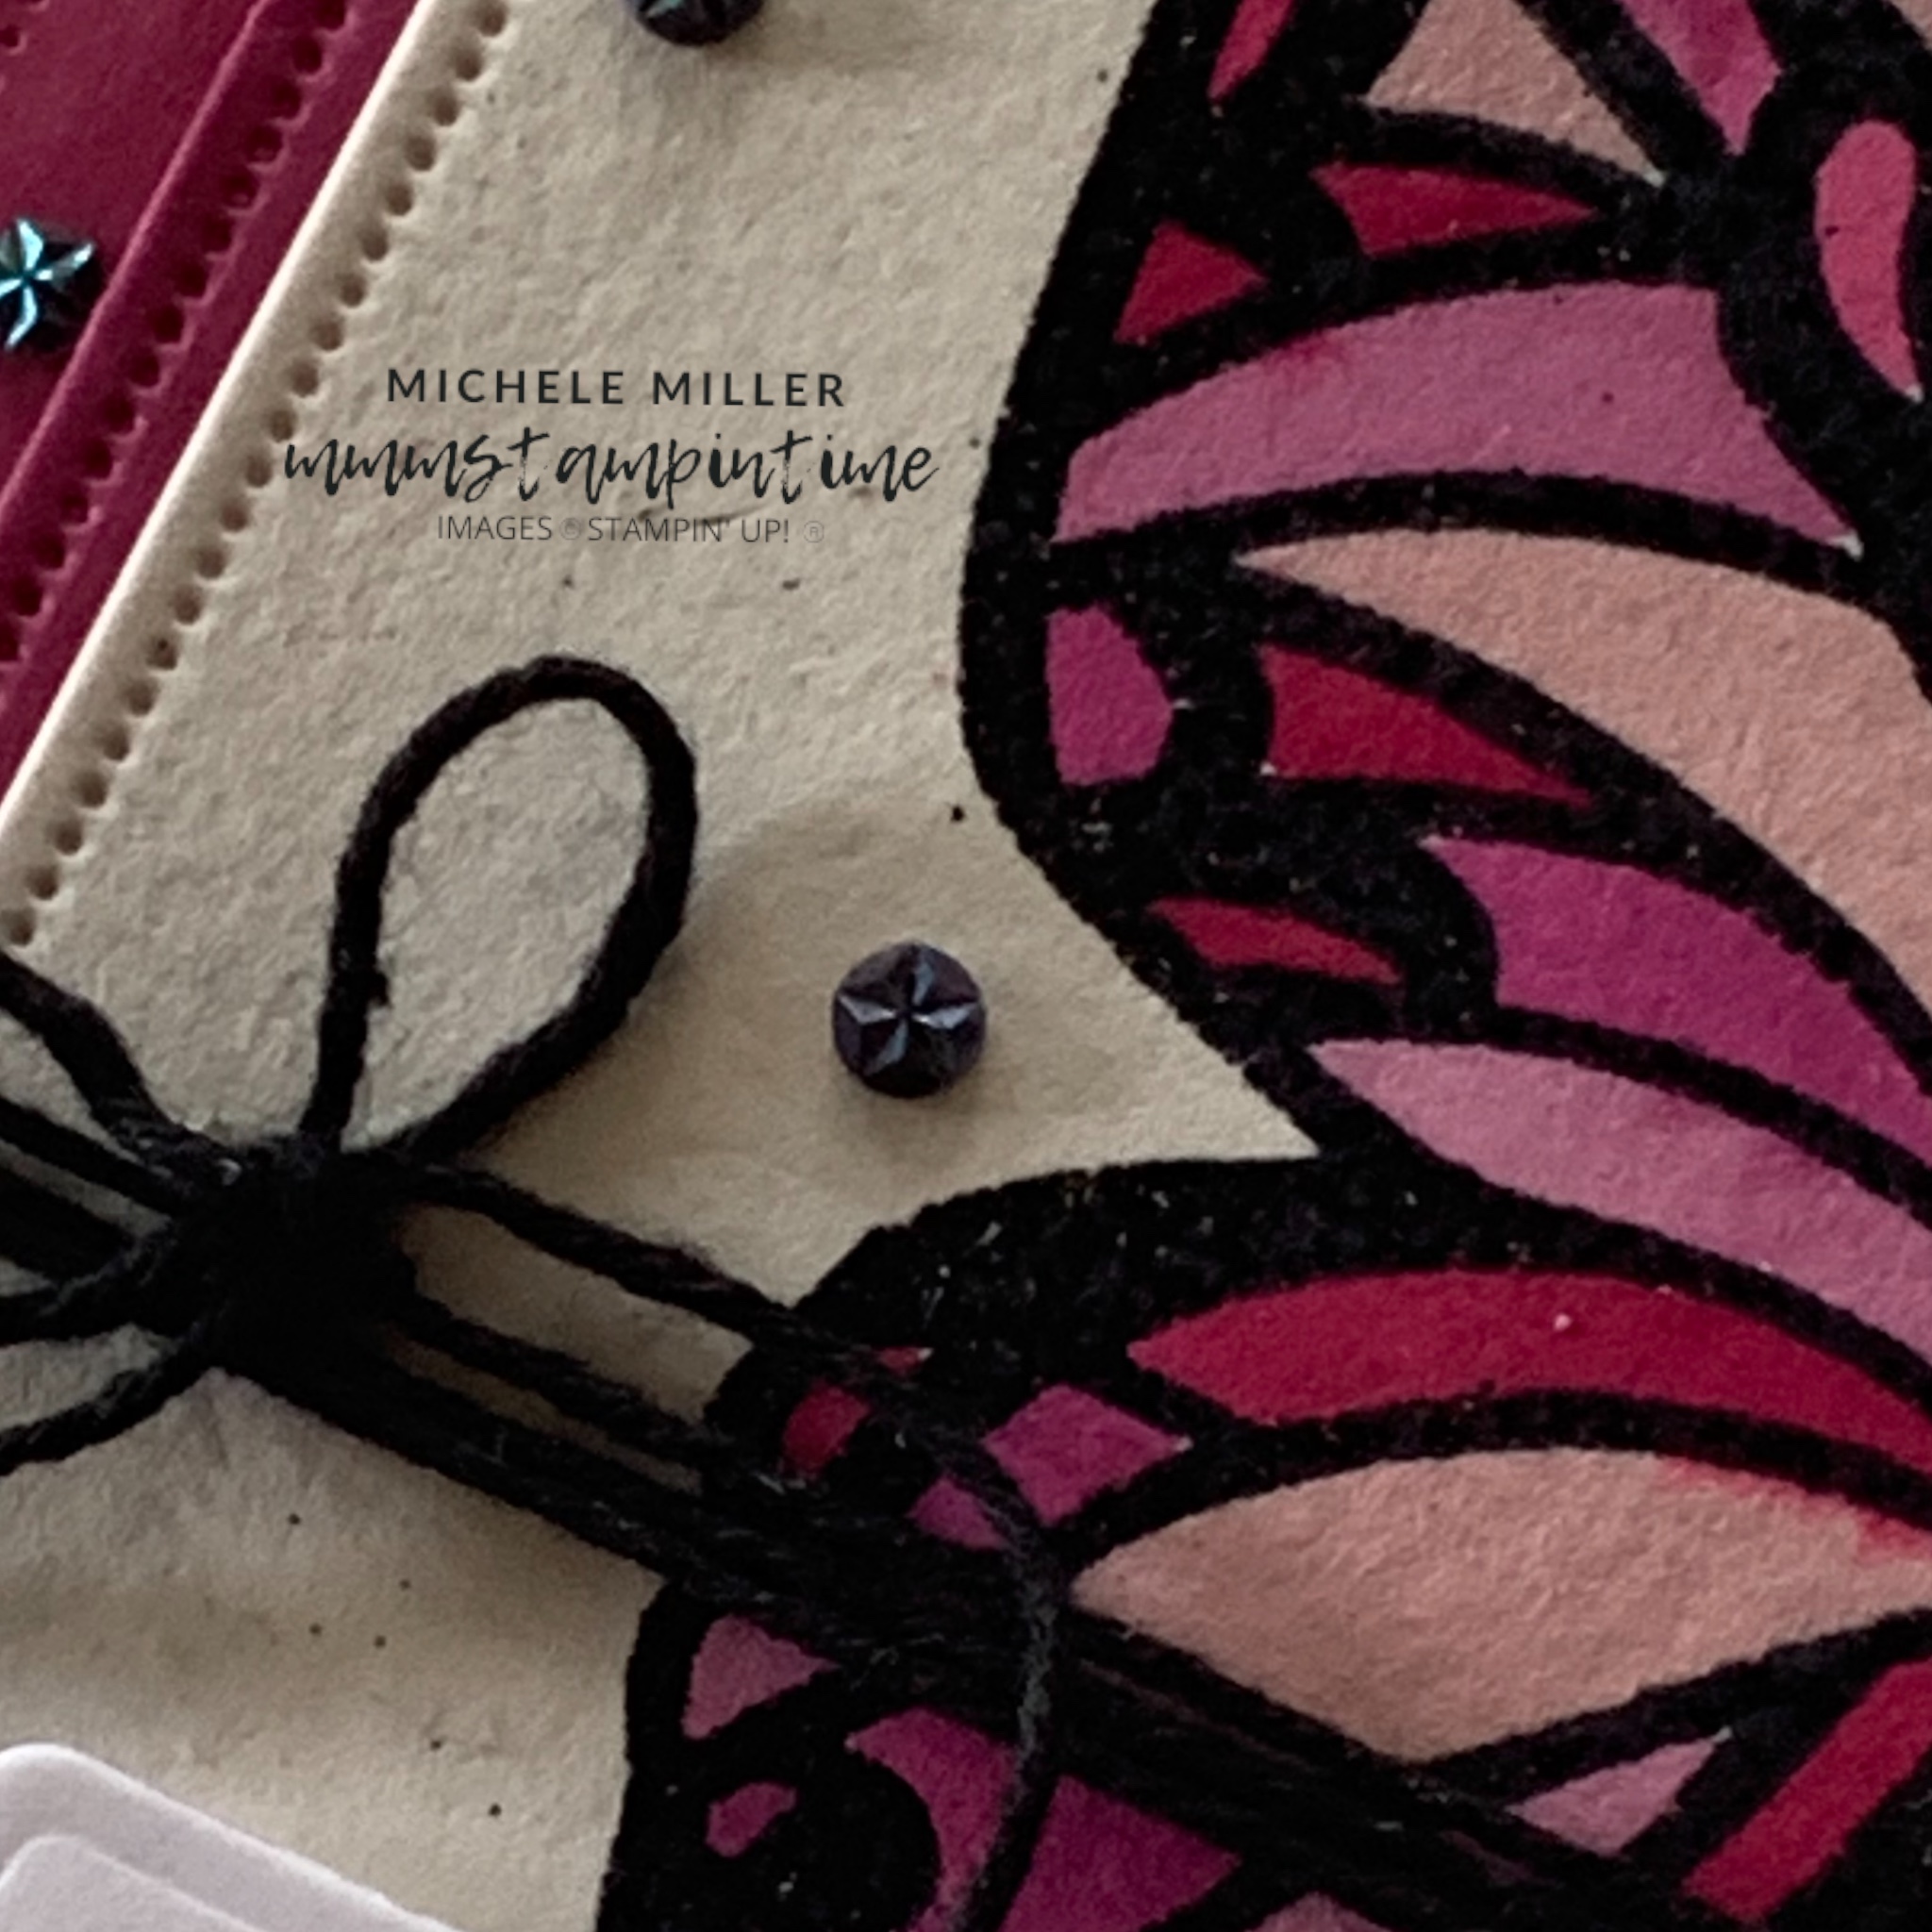
For the heat embossed images, I used Fluid 100 Water Colour Paper and lightly dusted it with the embossing ‘buddy’ from the Embossing Additions Tool Kit. Then I stamped the first image using Versamark and sprinkled WOW Black Embossing Powder before heat setting it.
I placed the matching Masking Paper butterfly shape over the first heat embossed image and then stamped three smaller butterfly shapes and repeated the process.
TIP: The WOW embossing powder leaves a clear and slightly raised outline. Avoid overheating the powder because it then flattens a little and loses its gloss.

After I finished heat embossing the masked images i took a water colour tool and applied colour to the butterflies.
To help select my colours for this project, I used the Stampin’ Up! Colour Coach. I spun the inner circle around to select an analogous colour scheme – Berry Burst, Petunia Pop, Fresh Freesia and Bubble Bath.

Once the watercoloured image was dry, I used the Everyday Arches Dies to cut the three layers you can see on the card front – the largest layer is from the Beautiful Bokeh DSP, the middle layer is Berry Burst card and then the Fluid 100 paper.
The two smaller layers were adhered together before I wrapped a length of Basic Black Baker’s Twine several times around them and tied a bow.
Then I added Stampin’ Dimensionals to the back of this double layer and positioned it on the DSP arch.

The card measures 5 1/4″x 12″. Iscored the card at 4″ and 8″ so that I would have a trifold card.
When the card front is opened out, you can then see the outer third panel.
For this panel I created a gift card pocket using the Fancy Borders Dies.

After cutting the Berry Burst edge, I cut a Basic White panel to use as a card insert. I stamped the small detailed butterfly on this panel before adhering it to the gift card pocket.

Whne the card is fully opened, you will see a second Basic White card insert and where the gift card pocket is.
The greeting is from the Beautiful Butterfly Stamp Set. It was stamped onto Basic White scrap before being die cut and added to the front of the card.

I adhered a die cut butterfly to the back of the envelope.
Finally, I coloured some Iridescent Faceted Gems with a dark Basic Black Stampin’ Blends Pen.

Tomorrow I will share any Stampin’ Up! updates and another butterfly card with you.
Until then , happy stamping and scrapbooking.

If you live in Australia, you can order any of the products I used to make this card by going to my online store. Just click on any of the images below.

![Beautiful Butterflies Bundle (English) [ 164615 ]](https://i0.wp.com/assets1.tamsnetwork.com/images/EC042017NF/164615s.jpg?w=140&ssl=1 "Beautiful Butterflies Bundle (English) [ 164615 ]") | ![Everyday Arches Dies [ 164629 ]](https://i0.wp.com/assets1.tamsnetwork.com/images/EC042017NF/164629s.jpg?w=140&ssl=1 "Everyday Arches Dies [ 164629 ]") | ![Fancy Borders Dies [ 165380 ]](https://i0.wp.com/assets1.tamsnetwork.com/images/EC042017NF/165380s.jpg?w=140&ssl=1 "Fancy Borders Dies [ 165380 ]") | ![Baker's Twine Essentials Pack [ 155475 ]](https://i0.wp.com/assets1.tamsnetwork.com/images/EC042017NF/155475s.jpg?w=140&ssl=1 "Baker's Twine Essentials Pack [ 155475 ]") | |
![Iridescent Faceted Gems [ 163368 ]](https://i0.wp.com/assets1.tamsnetwork.com/images/EC042017NF/163368s.jpg?w=140&ssl=1 "Iridescent Faceted Gems [ 163368 ]") | ![Basic White A4 Thick Cardstock [ 159230 ]](https://i0.wp.com/assets1.tamsnetwork.com/images/EC042017NF/159230s.jpg?w=140&ssl=1 "Basic White A4 Thick Cardstock [ 159230 ]") | ![Fluid 100 Watercolor Paper [ 149612 ]](https://i0.wp.com/assets1.tamsnetwork.com/images/EC042017NF/149612s.jpg?w=140&ssl=1 "Fluid 100 Watercolor Paper [ 149612 ]") | ||
![Berry Burst Classic Stampin' Pad [ 147143 ]](https://i0.wp.com/assets1.tamsnetwork.com/images/EC042017NF/147143s.jpg?w=140&ssl=1 "Berry Burst Classic Stampin' Pad [ 147143 ]") | ![Bubble Bath Classic Stampin' Pad [ 161664 ]](https://i0.wp.com/assets1.tamsnetwork.com/images/EC042017NF/161664s.jpg?w=140&ssl=1 "Bubble Bath Classic Stampin' Pad [ 161664 ]") | ![Fresh Freesia Classic Stampin' Pad [ 155611 ]](https://i0.wp.com/assets1.tamsnetwork.com/images/EC042017NF/155611s.jpg?w=140&ssl=1 "Fresh Freesia Classic Stampin' Pad [ 155611 ]") | ![Petunia Pop Classic Stampin Pad [ 163811 ]](https://i0.wp.com/assets1.tamsnetwork.com/images/EC042017NF/163811s.jpg?w=140&ssl=1 "Petunia Pop Classic Stampin Pad [ 163811 ]") | ![Versamark Pad [ 102283 ]](https://i0.wp.com/assets1.tamsnetwork.com/images/EC042017NF/102283s.jpg?w=140&ssl=1 "Versamark Pad [ 102283 ]") |
![Embossing Additions Tool Kit [ 159971 ]](https://i0.wp.com/assets1.tamsnetwork.com/images/EC042017NF/159971s.jpg?w=140&ssl=1 "Embossing Additions Tool Kit [ 159971 ]") | ![Basics Wow! Embossing Powder [ 165679 ]](https://i0.wp.com/assets1.tamsnetwork.com/images/EC042017NF/165679s.jpg?w=140&ssl=1 "Basics Wow! Embossing Powder [ 165679 ]") | ![Multipurpose Liquid Glue [ 110755 ]](https://i0.wp.com/assets1.tamsnetwork.com/images/EC042017NF/110755s.jpg?w=140&ssl=1 "Multipurpose Liquid Glue [ 110755 ]") | ![Stampin' Dimensionals [ 104430 ]](https://i0.wp.com/assets1.tamsnetwork.com/images/EC042017NF/104430s.jpg?w=140&ssl=1 "Stampin' Dimensionals [ 104430 ]") | |
![Mini Glue Dots [ 103683 ]](https://i0.wp.com/assets1.tamsnetwork.com/images/EC042017NF/103683s.jpg?w=140&ssl=1 "Mini Glue Dots [ 103683 ]") | ![Paper Trimmer [ 152392 ]](https://i0.wp.com/assets1.tamsnetwork.com/images/EC042017NF/152392s.jpg?w=140&ssl=1 "Paper Trimmer [ 152392 ]") | ![Stampin' Cut & Emboss Machine [ 149653 ]](https://i0.wp.com/assets1.tamsnetwork.com/images/EC042017NF/149653s.jpg?w=140&ssl=1 "Stampin' Cut & Emboss Machine [ 149653 ]") | ![Basic White C6 Envelopes [ 159235 ]](https://i0.wp.com/assets1.tamsnetwork.com/images/EC042017NF/159235s.jpg?w=140&ssl=1 "Basic White C6 Envelopes [ 159235 ]") |
![Beautiful Bokeh 6" X 6" (15.2 X 15.2 Cm) Designer Series Paper [ 164607 ]](https://i0.wp.com/assets1.tamsnetwork.com/images/EC042017NF/164607s.jpg?w=140&ssl=1 "Beautiful Bokeh 6\" X 6\" (15.2 X 15.2 Cm) Designer Series Paper [ 164607 ]")
![Basic Black Stampin' Blends Combo Pack [ 154843 ]](https://i0.wp.com/assets1.tamsnetwork.com/images/EC042017NF/154843s.jpg?w=140&ssl=1 "Basic Black Stampin' Blends Combo Pack [ 154843 ]")
![Brights 12" X 12" (30.5 X 30.5 Cm) Cardstock [ 161716 ]](https://i0.wp.com/assets1.tamsnetwork.com/images/EC042017NF/161716s.jpg?w=140&ssl=1 "Brights 12\" X 12\" (30.5 X 30.5 Cm) Cardstock [ 161716 ]")
![Heat Tool [ 129056 ]](https://i0.wp.com/assets1.tamsnetwork.com/images/EC042017NF/129056s.jpg?w=140&ssl=1 "Heat Tool [ 129056 ]")


![Basic White 12 X12 (30.5 X 30.5 Cm) Cardstock [ 159231 ]](https://i0.wp.com/assets1.tamsnetwork.com/images/EC042017NF/159231s.jpg?w=140&ssl=1 "Basic White 12 X12 (30.5 X 30.5 Cm) Cardstock [ 159231 ]")
![Adhesive Sheets [ 152334 ]](https://i0.wp.com/assets1.tamsnetwork.com/images/EC042017NF/152334s.jpg?w=140&ssl=1 "Adhesive Sheets [ 152334 ]")
![12" X 12" (30.5 X 30.5 Cm) Top Load Memory Protectors Value Pack [ 166504 ]](https://i0.wp.com/assets1.tamsnetwork.com/images/EC042017NF/166504s.jpg?w=140&ssl=1 "12\" X 12\" (30.5 X 30.5 Cm) Top Load Memory Protectors Value Pack [ 166504 ]")
![D Ring 12" X 12" (30.5 X 30.5 Cm) Album [ 166516 ]](https://i0.wp.com/assets1.tamsnetwork.com/images/EC042017NF/166516s.jpg?w=140&ssl=1 "D Ring 12\" X 12\" (30.5 X 30.5 Cm) Album [ 166516 ]")


![Stylish Shapes Dies [ 159183 ]](https://i0.wp.com/assets1.tamsnetwork.com/images/EC042017NF/159183s.jpg?w=140&ssl=1 "Stylish Shapes Dies [ 159183 ]")
![Mini Alphabet Dies [ 162934 ]](https://i0.wp.com/assets1.tamsnetwork.com/images/EC042017NF/162934s.jpg?w=140&ssl=1 "Mini Alphabet Dies [ 162934 ]")
![Bone Folder [ 102300 ]](https://i0.wp.com/assets1.tamsnetwork.com/images/EC042017NF/102300s.jpg?w=140&ssl=1 "Bone Folder [ 102300 ]")
![Paper Snips [ 103579 ]](https://i0.wp.com/assets1.tamsnetwork.com/images/EC042017NF/103579s.jpg?w=140&ssl=1 "Paper Snips [ 103579 ]")
![Mini Stampin' Cut & Emboss Machine [ 150673 ]](https://i0.wp.com/assets1.tamsnetwork.com/images/EC042017NF/150673s.jpg?w=140&ssl=1 "Mini Stampin' Cut & Emboss Machine [ 150673 ]")


