Posted on Leave a comment

GLOBAL DESIGN PROJECT SUCCESS!!!

I was delighted to check the Global Design Project website last night and discovered that my card design was a WINNER!

If you look at the GDP Design Team members, you will begin to understand why I am so thrilled to have my card design chosen as a winner this week. These women are totally amazing Stampin’ Up!® Demonstrators and card designers. Many of them are, or have been, Artisan Team members. This is such a creative and impressive group of paper crafters.

This is the card I ‘entered’.

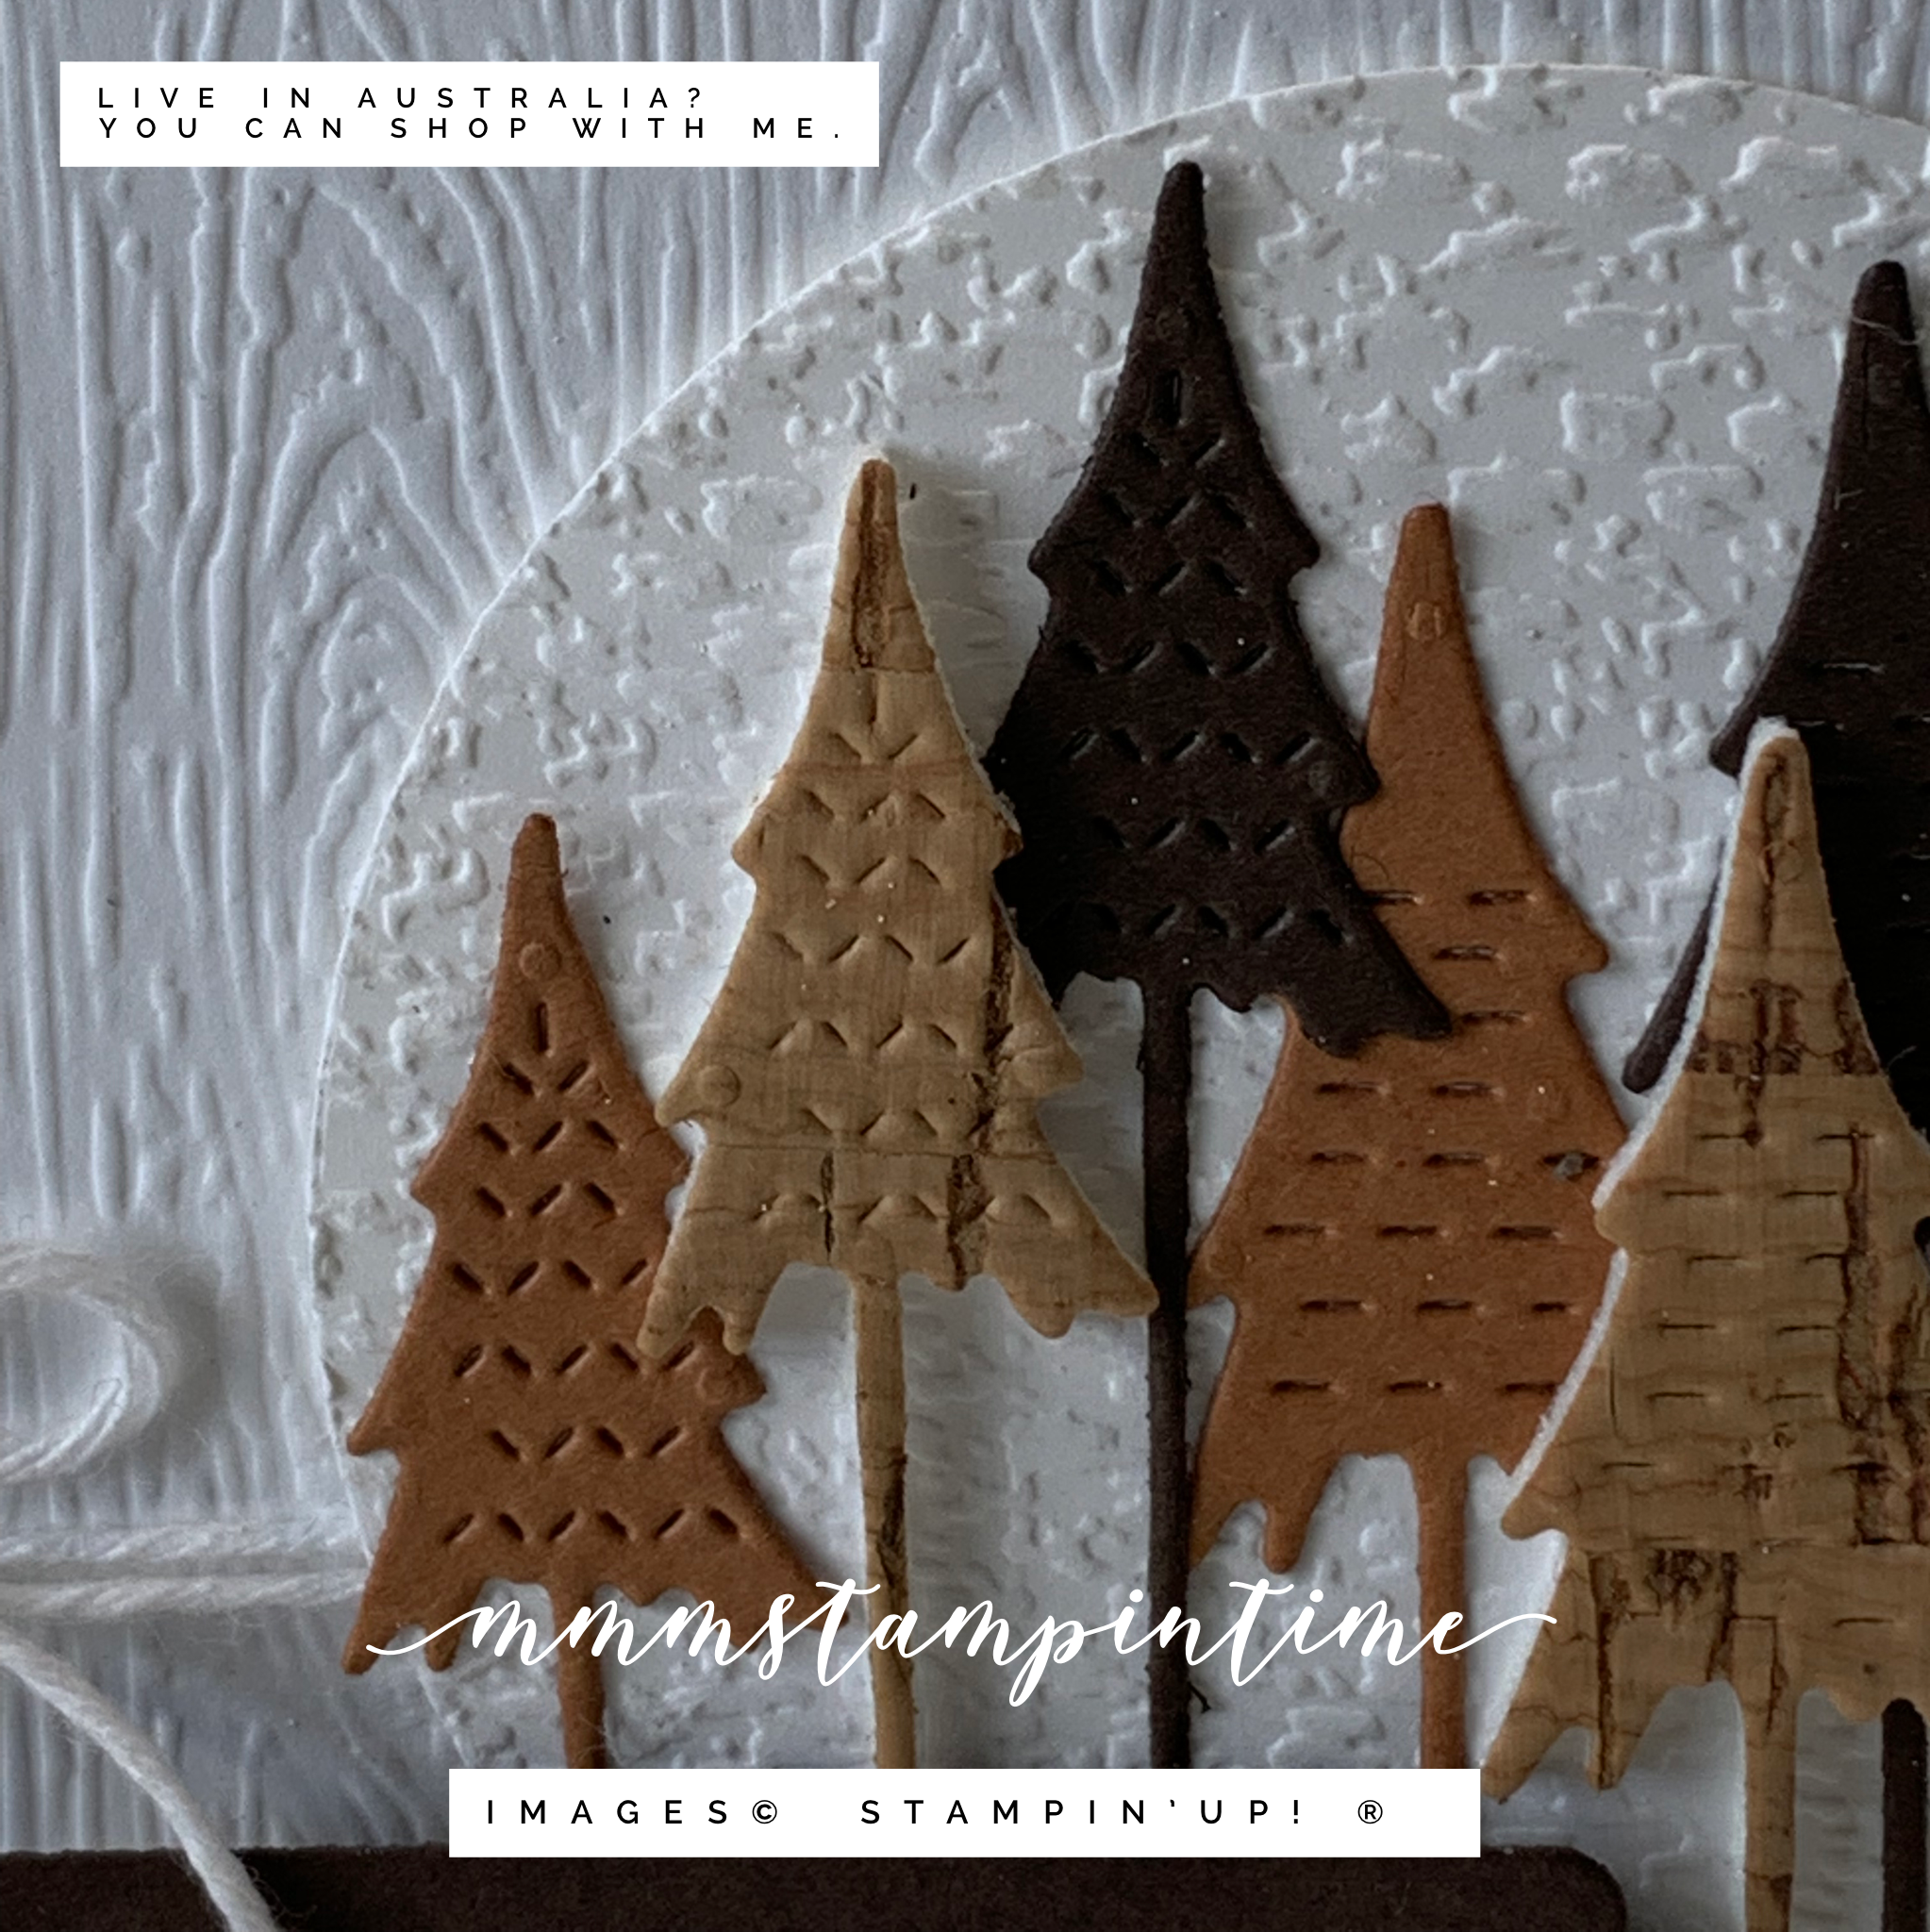
I do not often make predominently white cards but I am enjoying working outside my comfort zone. The little hint of Early Espresso popping out from behind the Timber 3D embossed and distressed layer of Basic White provides a subtle colour element.

Then. of course, there is the trimmed back circle of Tasteful Textile embossed Basic White circle that hosts the totally cute trees from the Christmas Tree Dies.

It was a total delight having my card chosen, from this broad array of card makers’ ‘entries’. as one of this week’s winners.

Until next time, happy stamping.

Posted on Leave a comment

GLOBAL DESIGN PROJECT CHALLENGE #316

Another week and another GDP Challenge. I look forward to these each week.

I think the GDP team has shared a great explanation for CASEing – Remember that when you CASE (Copy And Selectively Edit) a project you can take what you like from the design and make it your own. It might be the stamp set – the colors, the layout, the theme, the images – whatever you like that has inspired you to make a card of your own.

For my card I chose the layout and Christmas greeting theme as inspiration.

Using a Basic White card base, I then added an Early Espresso layer with the distressed and embossed Basic White feature panel. I used the Timber 3D Embossing Folder for this layer.

After wrapping and tying some white Baker’s Twine, from the Essentials Pack, I added a Basic White embossed circle. I used the Tasteful Textile 3D Embossing Folder and then one of the Layering Circles Dies to cut this layer.

The trees, from the Christmas Trees Dies, have been cut from Cinnamon Cider, Early Espresso and Cork Specialty Paper. The cork has Foam Adhesive Sheet attached and the other trees have Adhesive Sheet. This certainly makes securing the trees so easy.

The tree trunks were trimmed back to the edge of the circle to keep them within that focal point.

The greeting is from the Heartfelt Wishes Stamp Set and was heat embossed in white from the Basics Stampin’ Emboss Powders. It was cut using one of the Seasonal Labels Dies (I forgot to add this in my product photo).

I think that I have been a bit late to the lots of white trend but I do like the way this card looks.

Until next time, happy stamping.

If you live in Australia, you can order any of the products I used to make this card by going to my online store. Just click on any of the images below.

Product List
Heat Tool
[129056]
$50.00
Paper Snips
[103579]
$17.00
Posted on Leave a comment

GLOBAL DESIGN PROJECT #310

Hello and thank you for popping by.

It is Tuesday and time for this week’s Global Design Project card that I have made for the challenge.

The theme this week is a sketch challenge.

Although the sketch has a floral guide, I decided to make a masculine birthday card featuring the Whiskey Business Stamp Set. This is because I am running low of cards for men in my stash.

I started by adhering a panel of the Cork 12″x 12″ Specialty Paper to an Early Espresso card base.

Using the Timber 3D Embossing Folder I added texture to a 1-1/4″ strip of Early Espresso card. Stampin’ Dimensionals were added to the back of the embossed strip so that it would sit up off the cork layer.

The decanter and glasses were stamped in Memento Jet Black ink and coloured with the Cinnamon Cider Stampin’ Blends. I used the Colour Lifter Stampin’ Blend to lighten the colour of the ice cubes in the glass.

I brushed some Versamark onto the left hand corners of the glasses and the right hand corner of the decanter to add some Copper Stampin’ Emboss Powder to heat emboss. These fussy cut elements were then popped up on the card front using lots of Stampin’ Dimensionals.

I stamped the birthday greeting using Versamark and the copper embossing powder onto a piece of Early Espresso card and a piece of cork specialty paper. After they were heat embossed, I trimmed the pieces down as you can see.

I stamped the glass on the card insert and envelope. The glass on the insert was also coloured using the Blends. The final addition to the card were some Brushed Metallic Dots.

I thought that I had a spare packet of the Brushed Metallic Dots on hand to make this photo look better – oops, no. It has just been added to my shopping list. The Cork Specialty Paper also needs to be added to this list because I just love its texture and authentic appearance.

Until next time, happy stamping.

If you live in Australia, you can order any of the products I used to make this card by going to my online store. Just click on any of the images below.

Product List
Heat Tool
[129056]
$50.00
Paper Snips
[103579]
$17.00