Welcome to Wednesday’s updates and project.
Card sketches and templates are a great tool to inspire your creati
Click on the link below to discover a wide range of sketches that you can use in your crafting adventures.
NOW IS A GREAT TIME TO JOIN STAMPIN’ UP!
Crafting is even more fun with community, and there’s never been a better time to join and enjoy all the perks that come with that, like a 20–25% product discount, early access to the latest products and catalogues, the opportunity to earn a modest supplemental income, the chance to attend incredible training and crafting events, and so much more. If you join during this period you will receive our new Stampin’ Positioner tool FREE along with their Starter Kit!
This joining offer is available from 3 February to 2 March.
Click on the banner below to find out more!

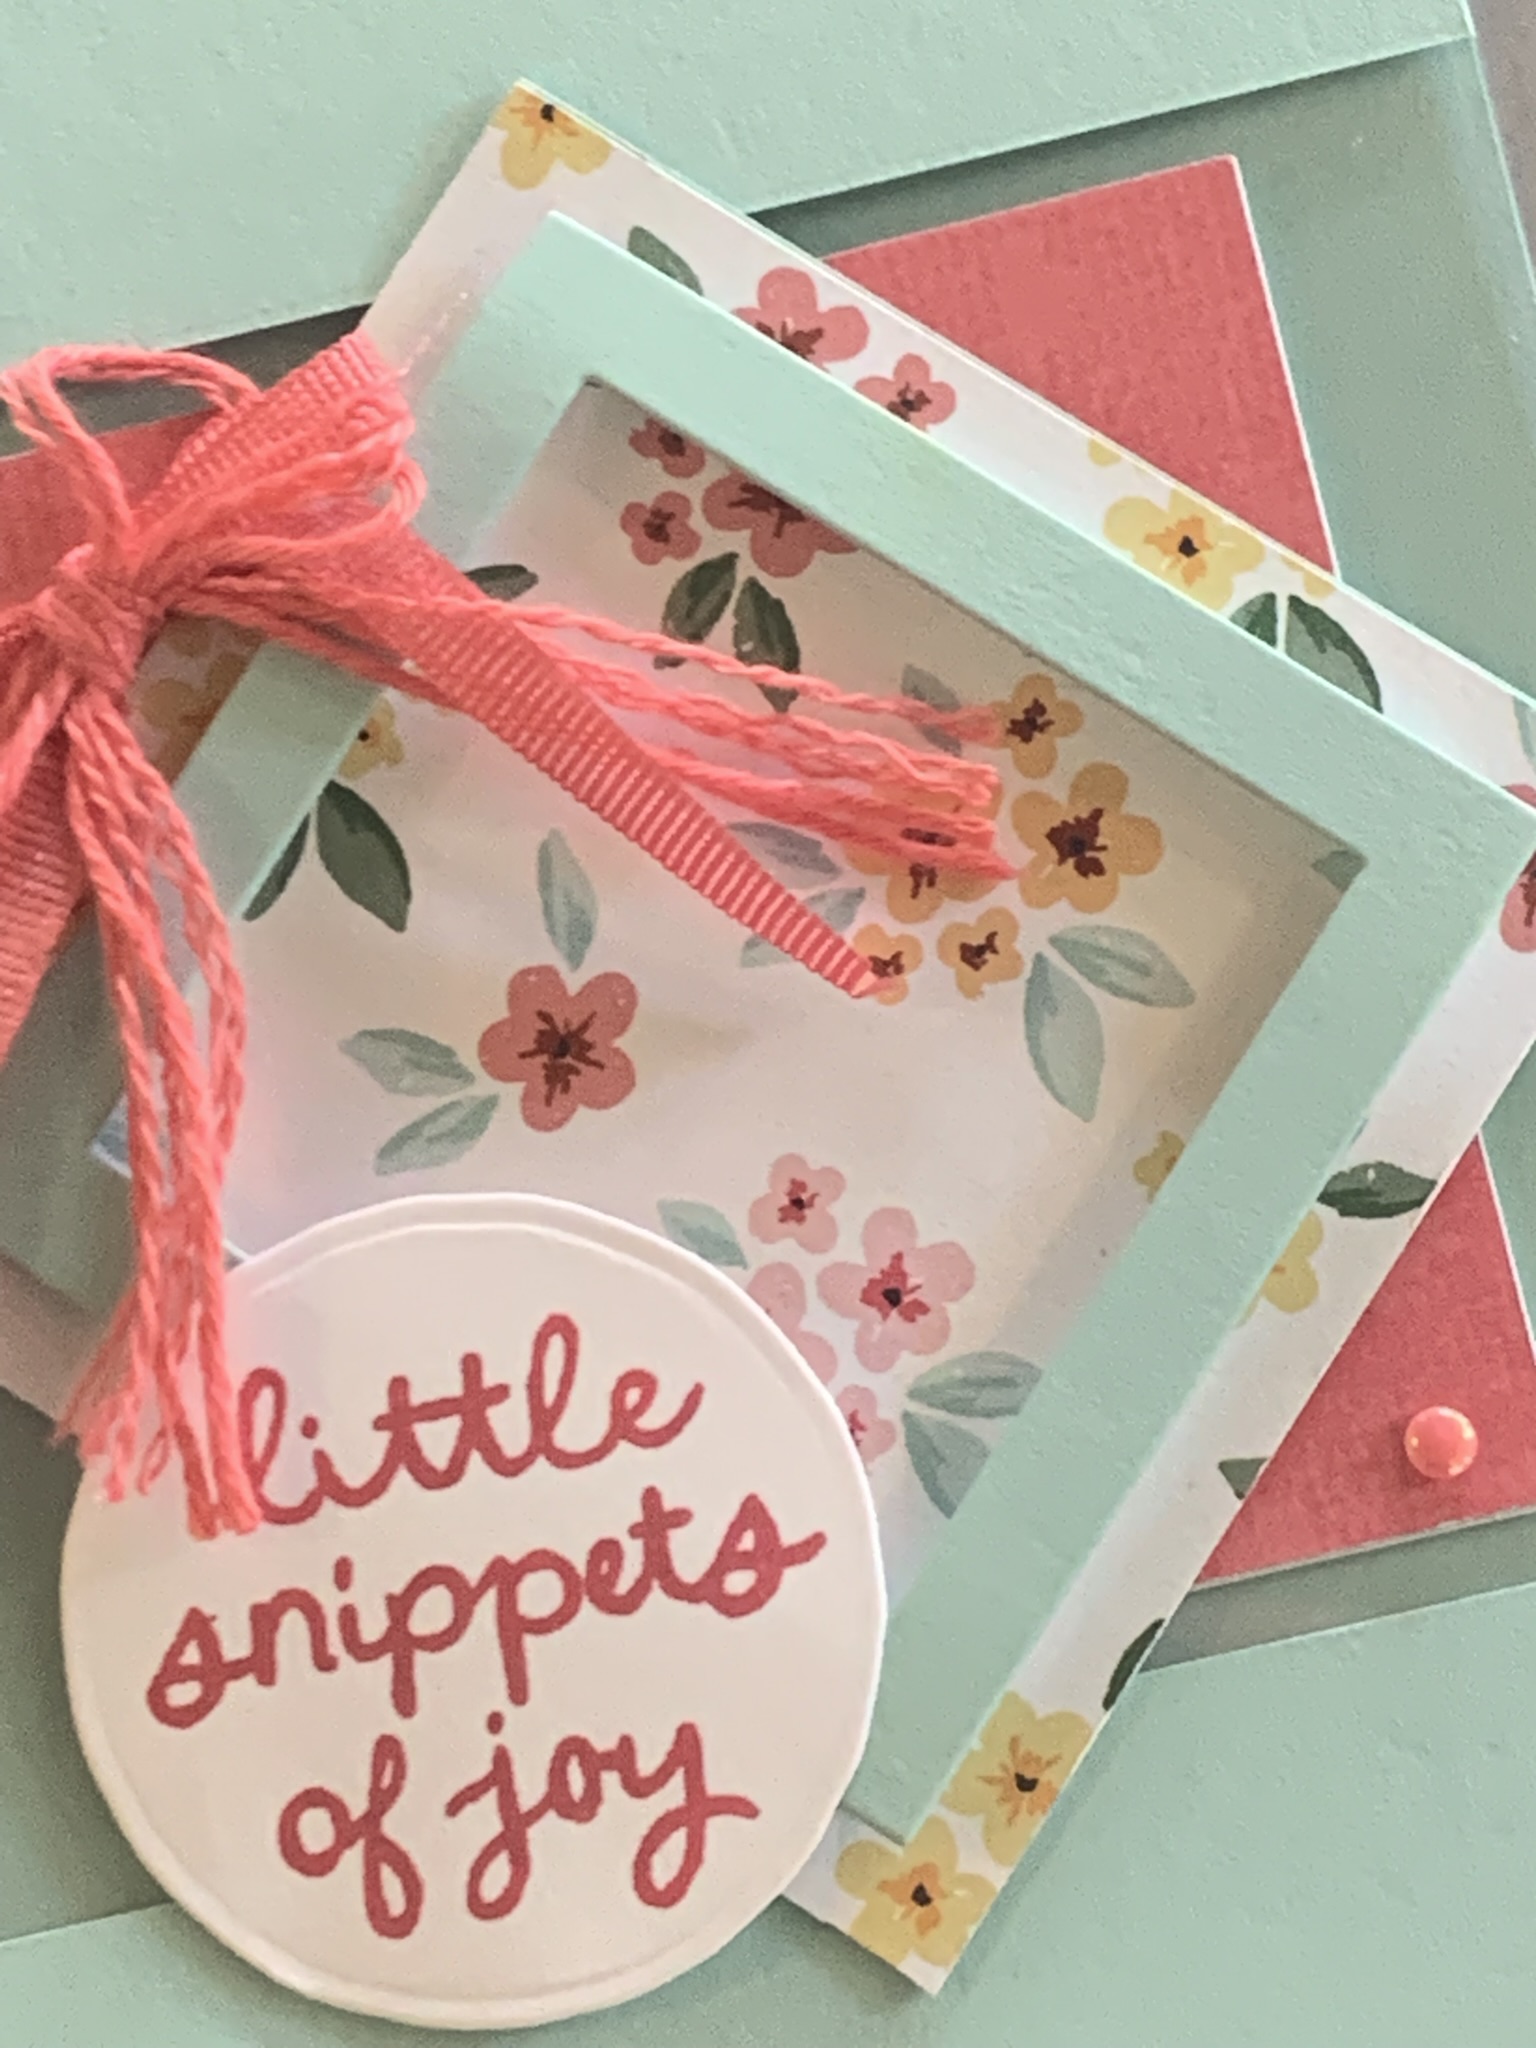
Today’s project is all about LAYERS and TEXTURE.
The Joyful Squares Bundle, Square Snippers DSP and the Lovely Stripes Embossing 3D Folder came together for this Peach Pie multi-level card.

What do you think?
I know that I am definitely going to use this die set many, many times!
Tomorrow I have a 3D project to share with you.
Until then, happy stamping and scrapbooking.

If you live in Australia, you can order any of the products I used to make this card by going to my online store. Just click on any of the images below.

![Joyful Squares Bundle (English) [ 166850 ]](https://i0.wp.com/assets1.tamsnetwork.com/images/EC042017NF/166850s.jpg?w=140&ssl=1 "Joyful Squares Bundle (English) [ 166850 ]") | ![Joyful Squares Dies [ 166849 ]](https://i0.wp.com/assets1.tamsnetwork.com/images/EC042017NF/166849s.jpg?w=140&ssl=1 "Joyful Squares Dies [ 166849 ]") | ||
![Irregular Weave 3/8" (1 Cm) Trim [ 165903 ]](https://i0.wp.com/assets1.tamsnetwork.com/images/EC042017NF/165903s.jpg?w=140&ssl=1 "Irregular Weave 3/8\" (1 Cm) Trim [ 165903 ]") | ![2025–2027 In Color™ Flat Pearls [ 165192 ]](https://i0.wp.com/assets1.tamsnetwork.com/images/EC042017NF/165192s.jpg?w=140&ssl=1 "2025–2027 In Color™ Flat Pearls [ 165192 ]") | ||
![Basic White A4 Cardstock [ 166781 ]](https://i0.wp.com/assets1.tamsnetwork.com/images/EC042017NF/166781s.jpg?w=140&ssl=1 "Basic White A4 Cardstock [ 166781 ]") | ![Multipurpose Liquid Glue [ 110755 ]](https://i0.wp.com/assets1.tamsnetwork.com/images/EC042017NF/110755s.jpg?w=140&ssl=1 "Multipurpose Liquid Glue [ 110755 ]") | ![Foam Adhesive Strips [ 141825 ]](https://i0.wp.com/assets1.tamsnetwork.com/images/EC042017NF/141825s.jpg?w=140&ssl=1 "Foam Adhesive Strips [ 141825 ]") | ![Stampin' Dimensionals [ 104430 ]](https://i0.wp.com/assets1.tamsnetwork.com/images/EC042017NF/104430s.jpg?w=140&ssl=1 "Stampin' Dimensionals [ 104430 ]") |
![Paper Snips [ 103579 ]](https://i0.wp.com/assets1.tamsnetwork.com/images/EC042017NF/103579s.jpg?w=140&ssl=1 "Paper Snips [ 103579 ]") | ![Paper Trimmer [ 152392 ]](https://i0.wp.com/assets1.tamsnetwork.com/images/EC042017NF/152392s.jpg?w=140&ssl=1 "Paper Trimmer [ 152392 ]") | ![Stampin' Cut & Emboss Machine [ 149653 ]](https://i0.wp.com/assets1.tamsnetwork.com/images/EC042017NF/149653s.jpg?w=140&ssl=1 "Stampin' Cut & Emboss Machine [ 149653 ]") | ![Basic White C6 Envelopes [ 159235 ]](https://i0.wp.com/assets1.tamsnetwork.com/images/EC042017NF/159235s.jpg?w=140&ssl=1 "Basic White C6 Envelopes [ 159235 ]") |
![Joyful Squares Photopolymer Stamp Set (English) [ 166847 ]](https://i0.wp.com/assets1.tamsnetwork.com/images/EC042017NF/166847s.jpg?w=140&ssl=1 "Joyful Squares Photopolymer Stamp Set (English) [ 166847 ]")
![Lovely Stripes 3 D Embossing Folder [ 167179 ]](https://i0.wp.com/assets1.tamsnetwork.com/images/EC042017NF/167179s.jpg?w=140&ssl=1 "Lovely Stripes 3 D Embossing Folder [ 167179 ]")
![Square Snippets 12" X 12" (30.5 X 30.5 Cm) Designer Series Paper [ 166993 ]](https://i0.wp.com/assets1.tamsnetwork.com/images/EC042017NF/166993s.jpg?w=140&ssl=1 "Square Snippets 12\" X 12\" (30.5 X 30.5 Cm) Designer Series Paper [ 166993 ]")
![Peach Pie Stampin’ Blends Combo Pack [ 163827 ]](https://i0.wp.com/assets1.tamsnetwork.com/images/EC042017NF/163827s.jpg?w=140&ssl=1 "Peach Pie Stampin’ Blends Combo Pack [ 163827 ]")



![Strawberry Slush 3/8" (1 Cm) Faux Linen Ribbon [ 165274 ]](https://i0.wp.com/assets1.tamsnetwork.com/images/EC042017NF/165274s.jpg?w=140&ssl=1 "Strawberry Slush 3/8\" (1 Cm) Faux Linen Ribbon [ 165274 ]")
![Baker's Twine Essentials Pack [ 155475 ]](https://i0.wp.com/assets1.tamsnetwork.com/images/EC042017NF/155475s.jpg?w=140&ssl=1 "Baker's Twine Essentials Pack [ 155475 ]")
![Strawberry Slush Stampin’ Blends Combo Pack [ 165290 ]](https://i0.wp.com/assets1.tamsnetwork.com/images/EC042017NF/165290s.jpg?w=140&ssl=1 "Strawberry Slush Stampin’ Blends Combo Pack [ 165290 ]")
![Pool Party A4 Card Stock [ 124391 ]](https://i0.wp.com/assets1.tamsnetwork.com/images/EC042017NF/124391s.jpg?w=140&ssl=1 "Pool Party A4 Card Stock [ 124391 ]")
![Window Sheets [ 142314 ]](https://i0.wp.com/assets1.tamsnetwork.com/images/EC042017NF/142314s.jpg?w=140&ssl=1 "Window Sheets [ 142314 ]")
![Strawberry Slush Classic Stampin' Pad [ 165286 ]](https://i0.wp.com/assets1.tamsnetwork.com/images/EC042017NF/165286s.jpg?w=140&ssl=1 "Strawberry Slush Classic Stampin' Pad [ 165286 ]")
![Stampin' Seal+ [ 149699 ]](https://i0.wp.com/assets1.tamsnetwork.com/images/EC042017NF/149699s.jpg?w=140&ssl=1 "Stampin' Seal+ [ 149699 ]")




