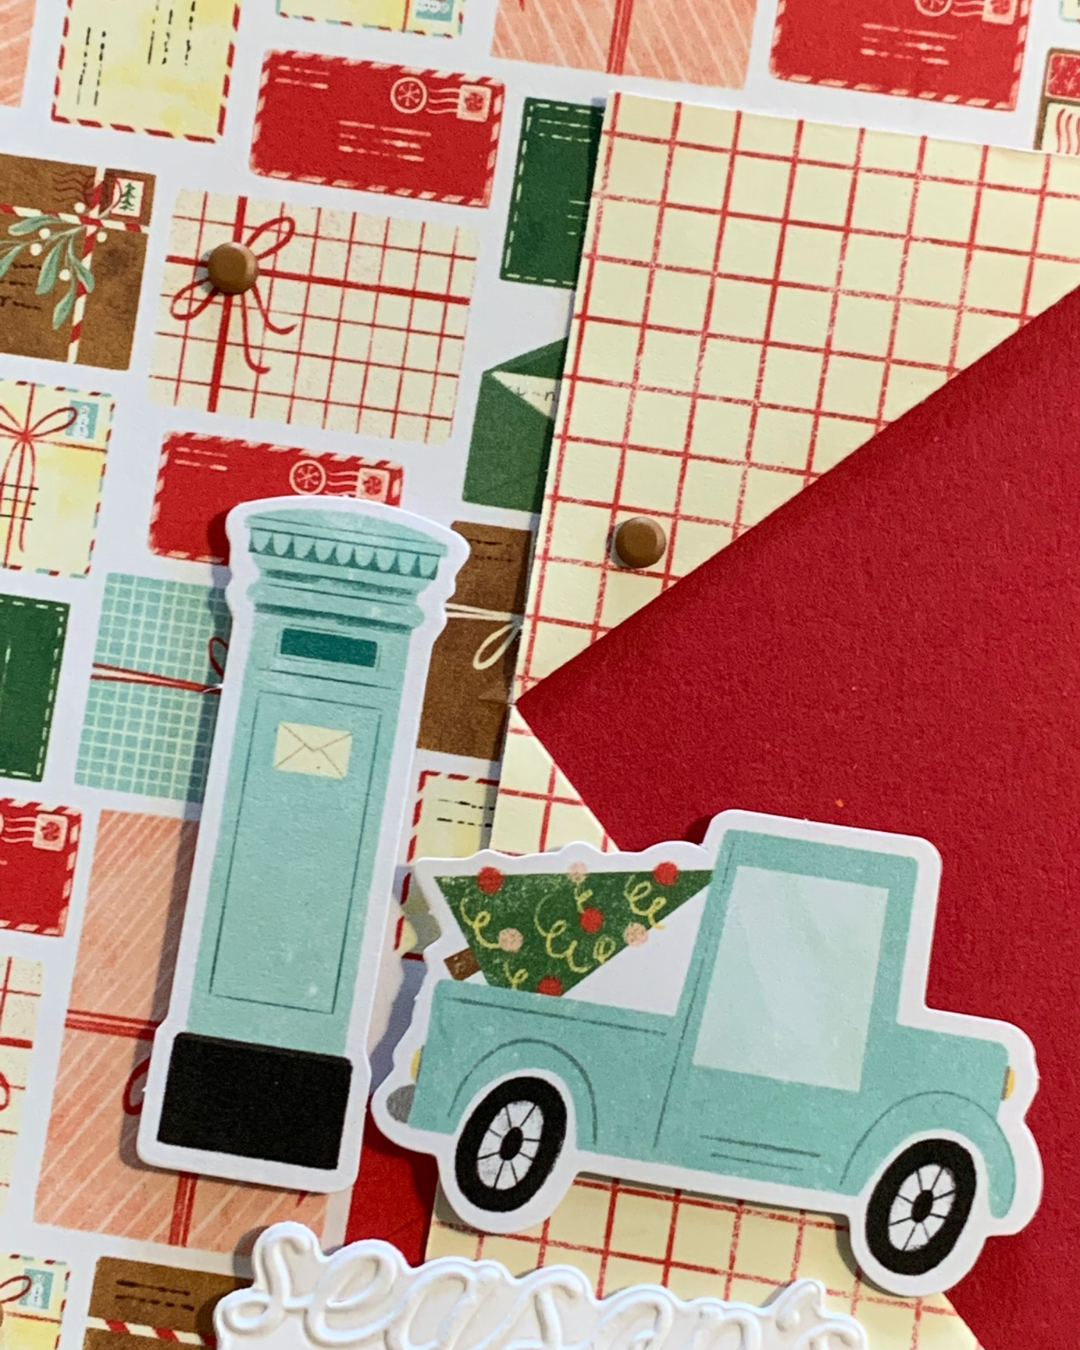
It often seems a ‘waste’ to only use one side of the double-sided designer papers.
This simple technique allows you to show both sides.

You can choose anywhere on a DSP panel to cut a straight line and fold each side back to reveal the other side.
Cards that have the cut line starting in top or bottom corner also look great.
TIP: Use your bone folder to create a clean, sharp fold in the paper.
I really liked the way the Poppy Parade and Very Vanilla DSP coordinated with some of the envelopes on the other side of the DSP>

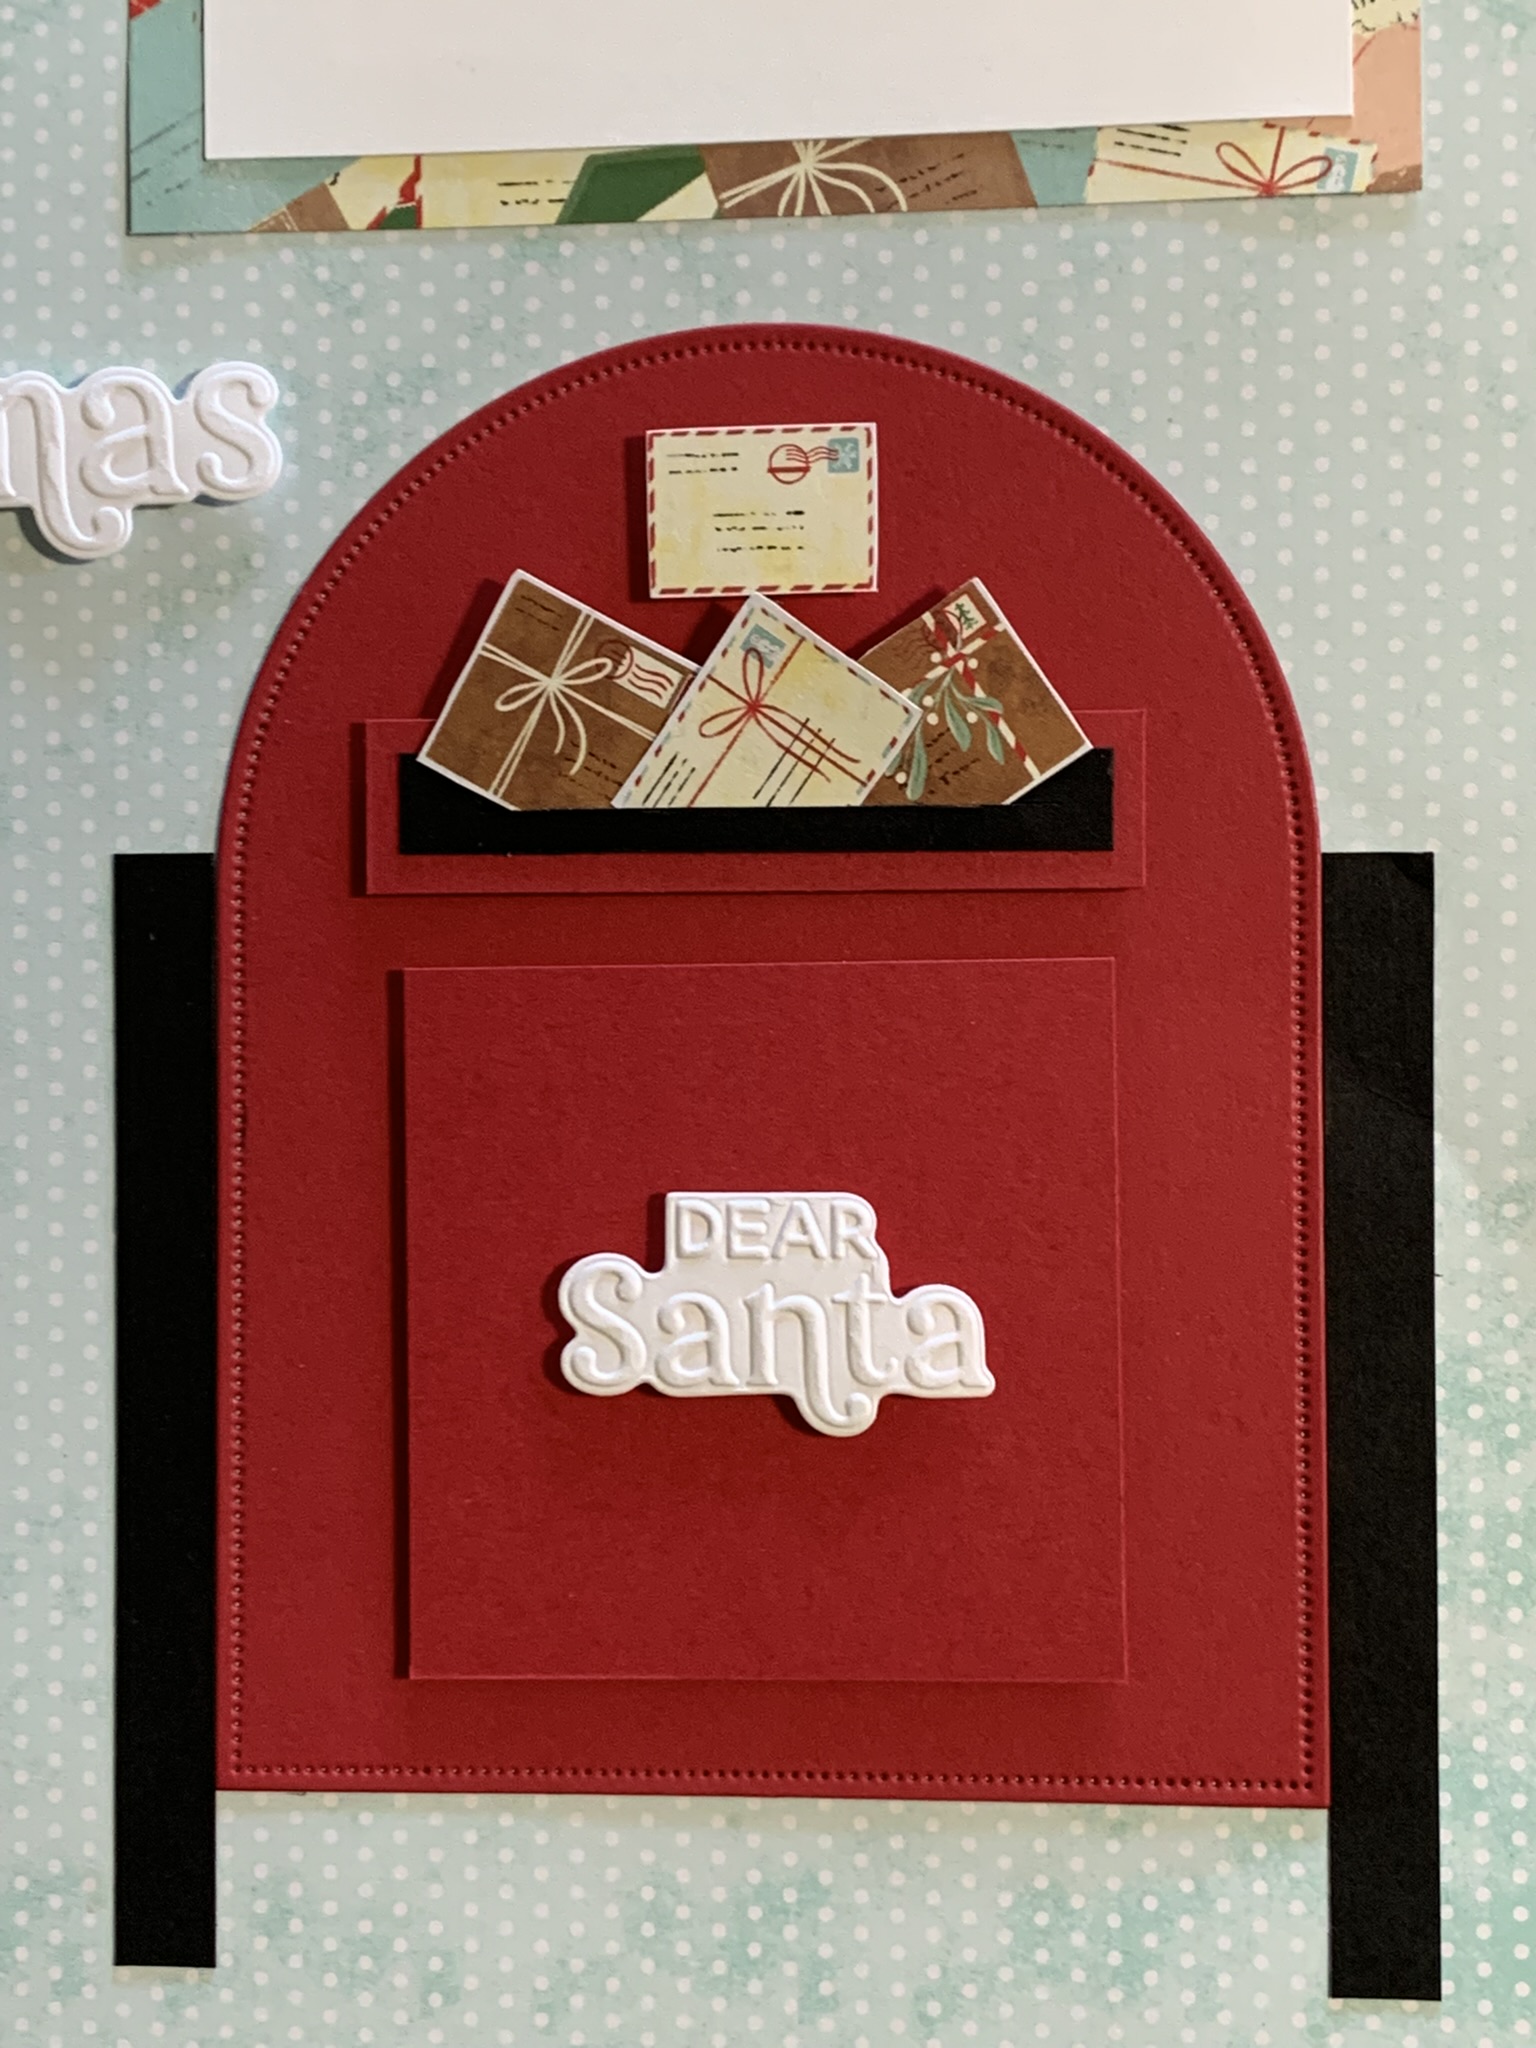
I used another one of the embossed and die cut greetings I created using the Christmas Words Collage Hybrid Embossing Folder.
The North Pole Delivery 12″x 12″ Specialty Designer Series Paper includes two sheets of precut designs. I used these to decorate the card.

The card insert and envelope were also decorated with the precut designs.
I added some of the Pecan Pie Earthy Matte Dots to the card front.
Tomorrow I will update you on the latest from Stampin’ Up! and also share another project.
Until then, happy stamping and scrapbooking.

If you live in Australia, you can order any of the products I used to make this card by going to my online store. Just click on any of the images below.

![Basic White A4 Thick Cardstock [ 159230 ]](https://i0.wp.com/assets1.tamsnetwork.com/images/EC042017NF/159230s.jpg?w=140&ssl=1 "Basic White A4 Thick Cardstock [ 159230 ]") | |||
![Poppy Parade A4 Cardstock [ 121694 ]](https://i0.wp.com/assets1.tamsnetwork.com/images/EC042017NF/121694s.jpg?w=140&ssl=1 "Poppy Parade A4 Cardstock [ 121694 ]") | ![Multipurpose Liquid Glue [ 110755 ]](https://i0.wp.com/assets1.tamsnetwork.com/images/EC042017NF/110755s.jpg?w=140&ssl=1 "Multipurpose Liquid Glue [ 110755 ]") | ![Stampin' Dimensionals [ 104430 ]](https://i0.wp.com/assets1.tamsnetwork.com/images/EC042017NF/104430s.jpg?w=140&ssl=1 "Stampin' Dimensionals [ 104430 ]") | ![Mini Stampin' Dimensionals [ 144108 ]](https://i0.wp.com/assets1.tamsnetwork.com/images/EC042017NF/144108s.jpg?w=140&ssl=1 "Mini Stampin' Dimensionals [ 144108 ]") |
![Paper Snips [ 103579 ]](https://i0.wp.com/assets1.tamsnetwork.com/images/EC042017NF/103579s.jpg?w=140&ssl=1 "Paper Snips [ 103579 ]") | ![Paper Trimmer [ 152392 ]](https://i0.wp.com/assets1.tamsnetwork.com/images/EC042017NF/152392s.jpg?w=140&ssl=1 "Paper Trimmer [ 152392 ]") | ![Stampin' Cut & Emboss Machine [ 149653 ]](https://i0.wp.com/assets1.tamsnetwork.com/images/EC042017NF/149653s.jpg?w=140&ssl=1 "Stampin' Cut & Emboss Machine [ 149653 ]") | ![Basic White C6 Envelopes [ 159235 ]](https://i0.wp.com/assets1.tamsnetwork.com/images/EC042017NF/159235s.jpg?w=140&ssl=1 "Basic White C6 Envelopes [ 159235 ]") |
![North Pole Delivery Suite Collection (English) [ 165850 ]](https://i0.wp.com/assets1.tamsnetwork.com/images/EC042017NF/165850s.jpg?w=140&ssl=1 "North Pole Delivery Suite Collection (English) [ 165850 ]")
![North Pole Delivery 12" X 12" (30.5 X 30.5 Cm) Specialty Designer Series Paper [ 165837 ]](https://i0.wp.com/assets1.tamsnetwork.com/images/EC042017NF/165837s.jpg?w=140&ssl=1 "North Pole Delivery 12\" X 12\" (30.5 X 30.5 Cm) Specialty Designer Series Paper [ 165837 ]")
![Christmas Words Collage Hybrid Embossing Folder (English) [ 165912 ]](https://i0.wp.com/assets1.tamsnetwork.com/images/EC042017NF/165912s.jpg?w=140&ssl=1 "Christmas Words Collage Hybrid Embossing Folder (English) [ 165912 ]")


![Everyday Arches Dies [ 164629 ]](https://i0.wp.com/assets1.tamsnetwork.com/images/EC042017NF/164629s.jpg?w=140&ssl=1 "Everyday Arches Dies [ 164629 ]")
![Basic Black A4 Card Stock [ 121688 ]](https://i0.wp.com/assets1.tamsnetwork.com/images/EC042017NF/121688s.jpg?w=140&ssl=1 "Basic Black A4 Card Stock [ 121688 ]")
![Real Red A4 Card Stock [ 106578 ]](https://i0.wp.com/assets1.tamsnetwork.com/images/EC042017NF/106578s.jpg?w=140&ssl=1 "Real Red A4 Card Stock [ 106578 ]")
![Take Your Pick Crafter Tips [ 161602 ]](https://i0.wp.com/assets1.tamsnetwork.com/images/EC042017NF/161602s.jpg?w=140&ssl=1 "Take Your Pick Crafter Tips [ 161602 ]")


![Traditions Of Christmas Suite Collection (English) [ 165877 ]](https://i0.wp.com/assets1.tamsnetwork.com/images/EC042017NF/165877s.jpg?w=140&ssl=1 "Traditions Of Christmas Suite Collection (English) [ 165877 ]")
![Traditions Of Christmas Specialty Designer Series Paper & Sticker Sheet (English) [ 167364 ]](https://i0.wp.com/assets1.tamsnetwork.com/images/EC042017NF/167364s.jpg?w=140&ssl=1 "Traditions Of Christmas Specialty Designer Series Paper & Sticker Sheet (English) [ 167364 ]")
![Traditional Labels Photopolymer Stamp Set (English) [ 165854 ]](https://i0.wp.com/assets1.tamsnetwork.com/images/EC042017NF/165854s.jpg?w=140&ssl=1 "Traditional Labels Photopolymer Stamp Set (English) [ 165854 ]")
![Damask Designs Embossing Folder [ 165214 ]](https://i0.wp.com/assets1.tamsnetwork.com/images/EC042017NF/165214s.jpg?w=140&ssl=1 "Damask Designs Embossing Folder [ 165214 ]")
![Christmas Greenery Dies [ 165872 ]](https://i0.wp.com/assets1.tamsnetwork.com/images/EC042017NF/165872s.jpg?w=140&ssl=1 "Christmas Greenery Dies [ 165872 ]")
![Traditional Labels Dies [ 165864 ]](https://i0.wp.com/assets1.tamsnetwork.com/images/EC042017NF/165864s.jpg?w=140&ssl=1 "Traditional Labels Dies [ 165864 ]")
![Opal Rounds Assortment [ 163298 ]](https://i0.wp.com/assets1.tamsnetwork.com/images/EC042017NF/163298s.jpg?w=140&ssl=1 "Opal Rounds Assortment [ 163298 ]")
![White 1/4" (6.4 Mm) Ribbon [ 165562 ]](https://i0.wp.com/assets1.tamsnetwork.com/images/EC042017NF/165562s.jpg?w=140&ssl=1 "White 1/4\" (6.4 Mm) Ribbon [ 165562 ]")
![Pool Party A4 Card Stock [ 124391 ]](https://i0.wp.com/assets1.tamsnetwork.com/images/EC042017NF/124391s.jpg?w=140&ssl=1 "Pool Party A4 Card Stock [ 124391 ]")
![Pool Party Classic Stampin' Pad [ 147107 ]](https://i0.wp.com/assets1.tamsnetwork.com/images/EC042017NF/147107s.jpg?w=140&ssl=1 "Pool Party Classic Stampin' Pad [ 147107 ]")
![Mini Stampin' Cut & Emboss Machine [ 150673 ]](https://i0.wp.com/assets1.tamsnetwork.com/images/EC042017NF/150673s.jpg?w=140&ssl=1 "Mini Stampin' Cut & Emboss Machine [ 150673 ]")


