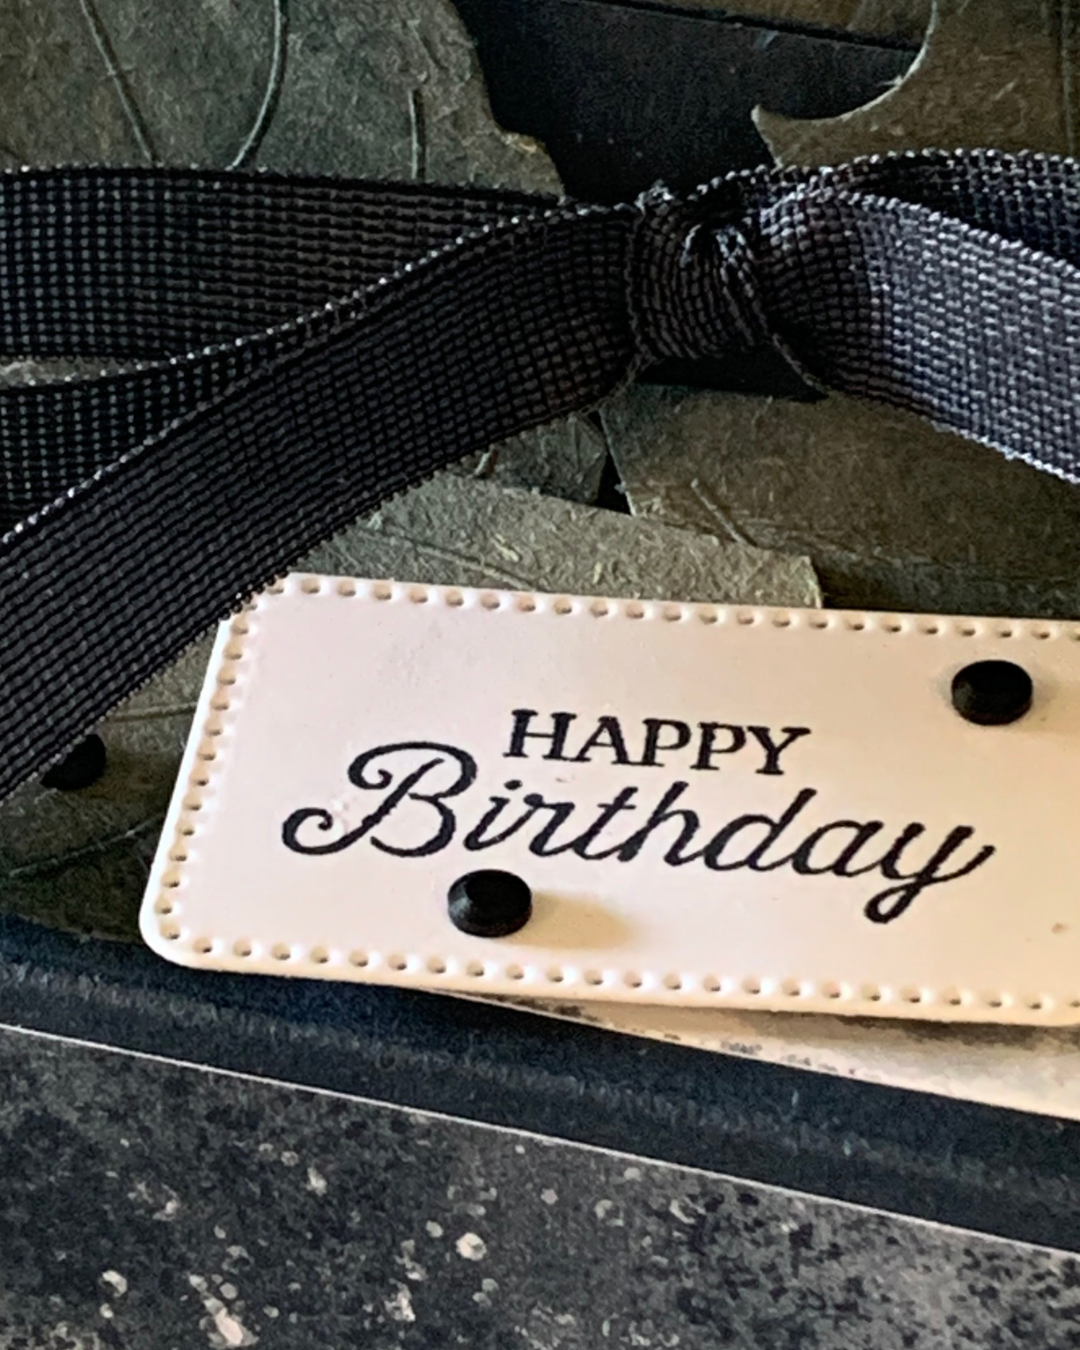
Today I have a great little 3’x 3″x 1 1/2″ gift box to share with you.
I have used Secret Sea A4 cardstock for the box and some 2025 – 2027 In Colour Designer Series Paper.
The box can be unfolded and laid flat using only ribbon to hold it closed and in shape.
I will make a vidoe showing how to make this box soon.
The Secret Sea box has been embellished using the Designer Series Paper.
When the box was formed and secured with Secret Sea Faux Linen Ribbon, I added some of the gray leaves from the Harvest Home Garland Kit.
I painted each leaf with some Clear Wink of Stella before adding them to the top of the box.
The top of the box has two halves, each with an additional 1″ vertical extension that has been punched to allow the ribbon to be threaded through.
The greeting, from the Loveliest Tree Stamp Set, was stamped and then cut using one of the Nested Essentials Dies. After adding Stampin’ Dimensionals to the back of the label I popped it on the box.
The final task was to add some of the Neutral Matte Dots to the box.
Untie the bow, open out the box and this is what it looks like.
Just a few crafting products can result in a great finished project.
Tomorrow I have one more project to share with you.
Until then, happy stamping and scrapbooking.
If you live in Australia, you can order any of the products I used to make this card by going to my online store. Just click on any of the images below.
Product List


![Basic White A4 Cardstock [ 166781 ]](https://i0.wp.com/assets1.tamsnetwork.com/images/EC042017NF/166781s.jpg?w=140&ssl=1 "Basic White A4 Cardstock [ 166781 ]")
![Irregular Weave 3/8" (1 Cm) Trim [ 165903 ]](https://i0.wp.com/assets1.tamsnetwork.com/images/EC042017NF/165903s.jpg?w=140&ssl=1 "Irregular Weave 3/8\" (1 Cm) Trim [ 165903 ]")
![Tear & Tape Adhesive [ 154031 ]](https://i0.wp.com/assets1.tamsnetwork.com/images/EC042017NF/154031s.jpg?w=140&ssl=1 "Tear & Tape Adhesive [ 154031 ]")
![Bone Folder [ 102300 ]](https://i0.wp.com/assets1.tamsnetwork.com/images/EC042017NF/102300s.jpg?w=140&ssl=1 "Bone Folder [ 102300 ]")
![Paper Snips [ 103579 ]](https://i0.wp.com/assets1.tamsnetwork.com/images/EC042017NF/103579s.jpg?w=140&ssl=1 "Paper Snips [ 103579 ]")
![Paper Trimmer [ 152392 ]](https://i0.wp.com/assets1.tamsnetwork.com/images/EC042017NF/152392s.jpg?w=140&ssl=1 "Paper Trimmer [ 152392 ]")
![Everyday You & Me Photopolymer Stamp Set (English) [ 166629 ]](https://i0.wp.com/assets1.tamsnetwork.com/images/EC042017NF/166629s.jpg?w=140&ssl=1 "Everyday You & Me Photopolymer Stamp Set (English) [ 166629 ]")
![Everyday Happiness 12" X 12" (30.5 X 30.5 Cm) Designer Series Paper [ 166632 ]](https://i0.wp.com/assets1.tamsnetwork.com/images/EC042017NF/166632s.jpg?w=140&ssl=1 "Everyday Happiness 12\" X 12\" (30.5 X 30.5 Cm) Designer Series Paper [ 166632 ]")
![Pretty Peacock Classic Stampin’ Pad [ 150083 ]](https://i0.wp.com/assets1.tamsnetwork.com/images/EC042017NF/150083s.jpg?w=140&ssl=1 "Pretty Peacock Classic Stampin’ Pad [ 150083 ]")


![Harvest Home Garland Kit [ 166228 ]](https://i0.wp.com/assets1.tamsnetwork.com/images/EC042017NF/166228s.jpg?w=140&ssl=1 "Harvest Home Garland Kit [ 166228 ]")
![Nested Essentials Dies [ 161597 ]](https://i0.wp.com/assets1.tamsnetwork.com/images/EC042017NF/161597s.jpg?w=140&ssl=1 "Nested Essentials Dies [ 161597 ]")
![Secret Sea 3/8" (1 Cm) Faux Linen Ribbon [ 165273 ]](https://i0.wp.com/assets1.tamsnetwork.com/images/EC042017NF/165273s.jpg?w=140&ssl=1 "Secret Sea 3/8\" (1 Cm) Faux Linen Ribbon [ 165273 ]")
![Neutral Matte Dots [ 165561 ]](https://i0.wp.com/assets1.tamsnetwork.com/images/EC042017NF/165561s.jpg?w=140&ssl=1 "Neutral Matte Dots [ 165561 ]")
![Clear Wink Of Stella Glitter Brush [ 141897 ]](https://i0.wp.com/assets1.tamsnetwork.com/images/EC042017NF/141897s.jpg?w=140&ssl=1 "Clear Wink Of Stella Glitter Brush [ 141897 ]")
![Secret Sea A4 Cardstock [ 165296 ]](https://i0.wp.com/assets1.tamsnetwork.com/images/EC042017NF/165296s.jpg?w=140&ssl=1 "Secret Sea A4 Cardstock [ 165296 ]")
![Multipurpose Liquid Glue [ 110755 ]](https://i0.wp.com/assets1.tamsnetwork.com/images/EC042017NF/110755s.jpg?w=140&ssl=1 "Multipurpose Liquid Glue [ 110755 ]")
![Mini Glue Dots [ 103683 ]](https://i0.wp.com/assets1.tamsnetwork.com/images/EC042017NF/103683s.jpg?w=140&ssl=1 "Mini Glue Dots [ 103683 ]")
![Black Stampin' Dimensionals Combo Pack [ 150893 ]](https://i0.wp.com/assets1.tamsnetwork.com/images/EC042017NF/150893s.jpg?w=140&ssl=1 "Black Stampin' Dimensionals Combo Pack [ 150893 ]")



![Encircled With Love Photopolymer Stamp Set (English) [ 165338 ]](https://i0.wp.com/assets1.tamsnetwork.com/images/EC042017NF/165338s.jpg?w=140&ssl=1 "Encircled With Love Photopolymer Stamp Set (English) [ 165338 ]")
![1-3/4" (4.4 Cm) Circle Punch [ 119850 ]](https://i0.wp.com/assets1.tamsnetwork.com/images/EC042017NF/119850s.jpg?w=140&ssl=1 "1-3/4\" (4.4 Cm) Circle Punch [ 119850 ]")
![1 7/8" (4.8 Cm) Circle Punch [ 165259 ]](https://i0.wp.com/assets1.tamsnetwork.com/images/EC042017NF/165259s.jpg?w=140&ssl=1 "1 7/8\" (4.8 Cm) Circle Punch [ 165259 ]")
![Daffodil Delight A4 Card Stock [ 121680 ]](https://i0.wp.com/assets1.tamsnetwork.com/images/EC042017NF/121680s.jpg?w=140&ssl=1 "Daffodil Delight A4 Card Stock [ 121680 ]")
![Melon Mambo A4 Card Stock [ 119980 ]](https://i0.wp.com/assets1.tamsnetwork.com/images/EC042017NF/119980s.jpg?w=140&ssl=1 "Melon Mambo A4 Card Stock [ 119980 ]")
![Secret Sea Classic Stampin' Pad [ 165285 ]](https://i0.wp.com/assets1.tamsnetwork.com/images/EC042017NF/165285s.jpg?w=140&ssl=1 "Secret Sea Classic Stampin' Pad [ 165285 ]")
![Daffodil Delight Stampin' Blends Combo Pack [ 154883 ]](https://i0.wp.com/assets1.tamsnetwork.com/images/EC042017NF/154883s.jpg?w=140&ssl=1 "Daffodil Delight Stampin' Blends Combo Pack [ 154883 ]")
![Stampin' Dimensionals [ 104430 ]](https://i0.wp.com/assets1.tamsnetwork.com/images/EC042017NF/104430s.jpg?w=140&ssl=1 "Stampin' Dimensionals [ 104430 ]")
![Basic White C6 Envelopes [ 159235 ]](https://i0.wp.com/assets1.tamsnetwork.com/images/EC042017NF/159235s.jpg?w=140&ssl=1 "Basic White C6 Envelopes [ 159235 ]")




