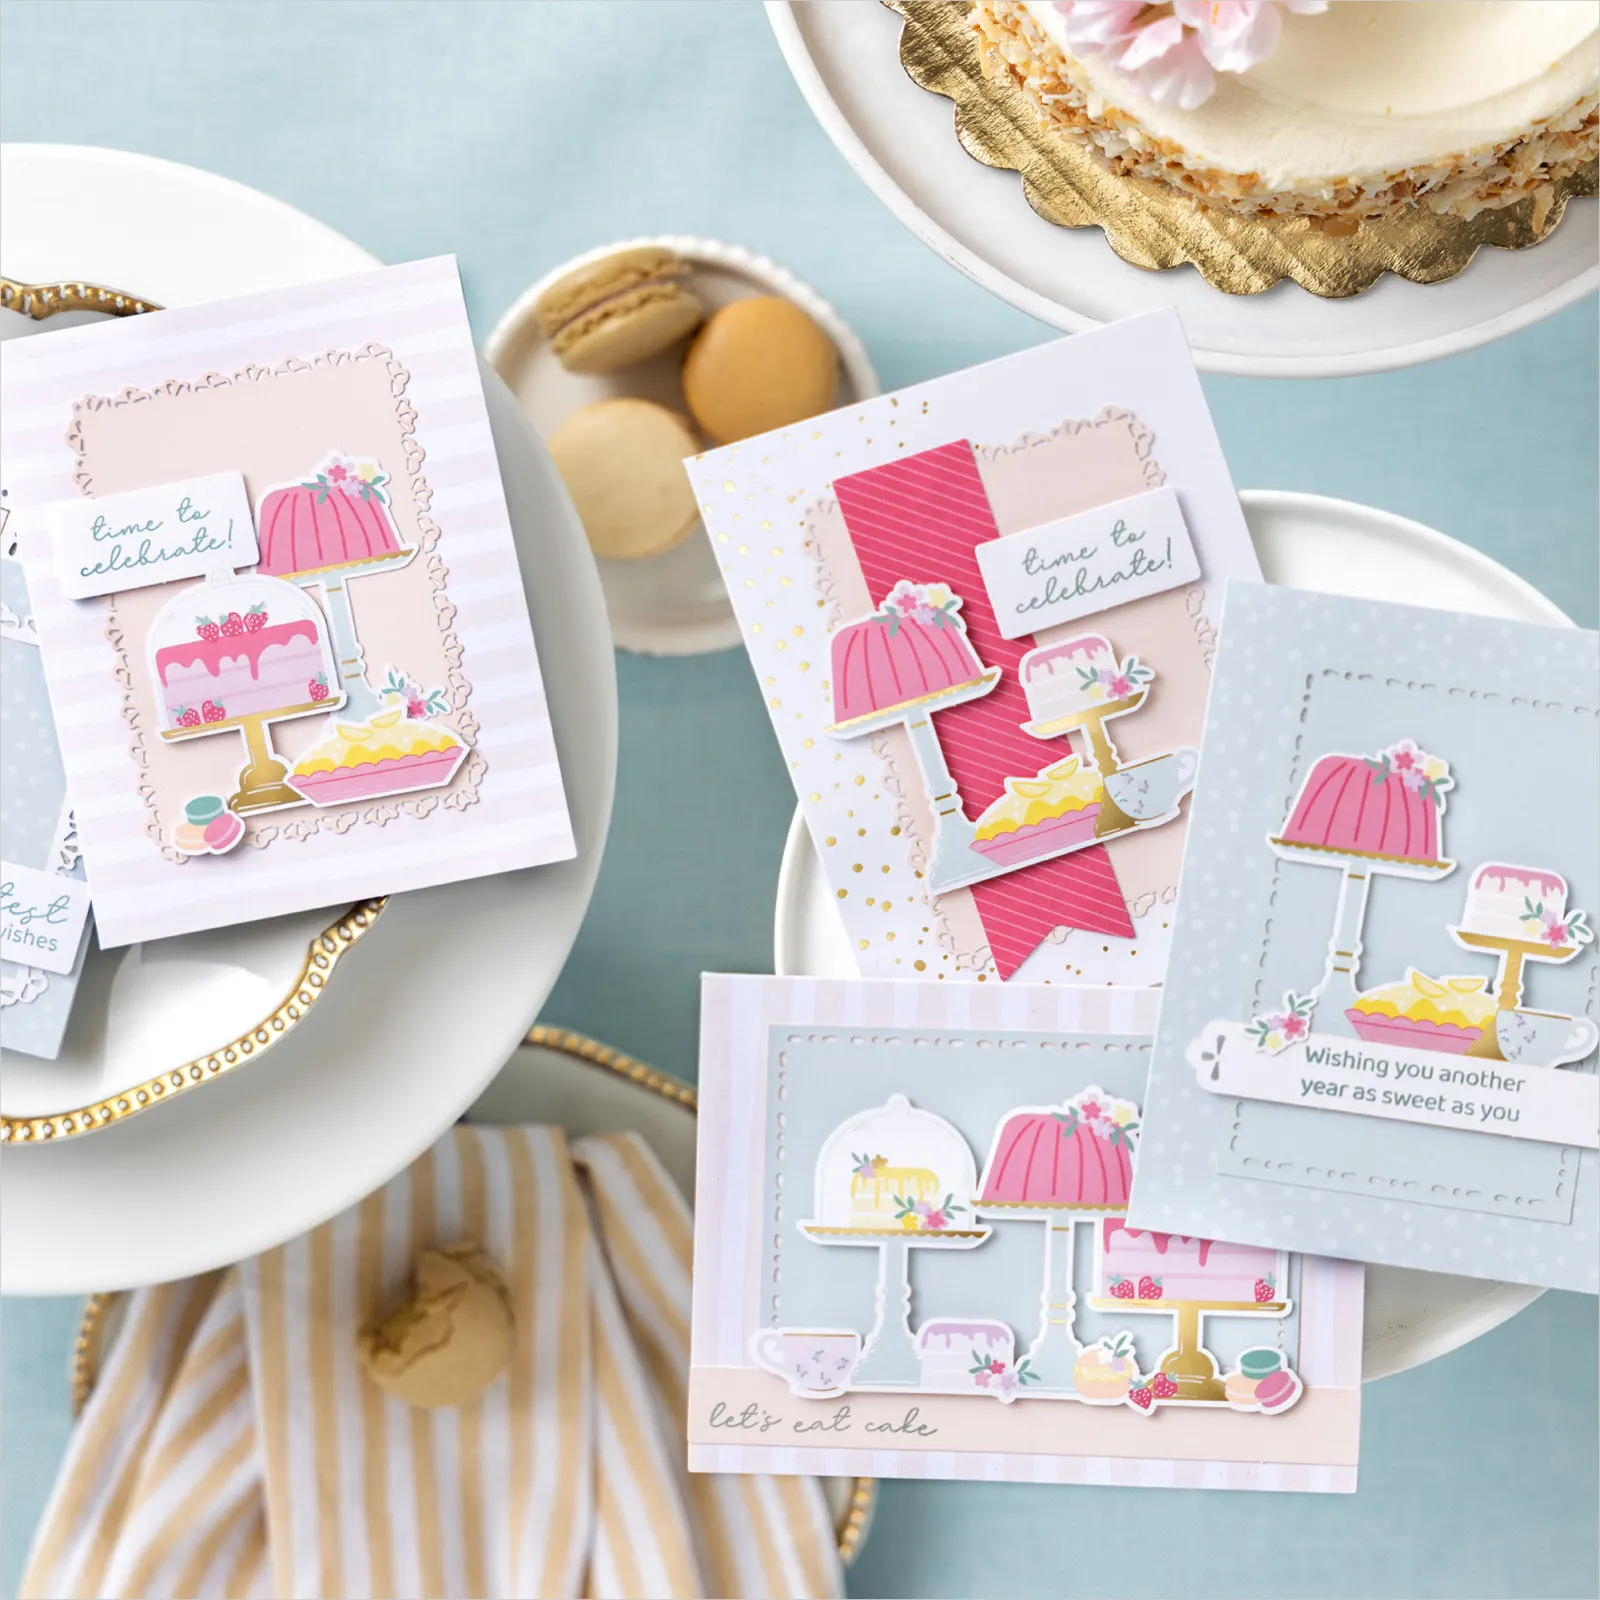
I’m back from my week away and looking forward to sharing some projects using the Birthday Fancy Kit ($44 166211).

The kit comes with everything you need to make these 12 individual cards.

My projects this week will use these kit items to make completely different projects.
I made a two page scrapbooking layout using some of the kit items but also added some other bits and pieces from my stash.

I started by adhering some strips of Cloud Cover and Lost Lagoon card on each of the pages.
The next step was to add a 6″x 4″ Basic White photo placecard onto a 1 1/2″x 4 1/2″ Cloud Cover matte.
The titles for each page were made by adding Adhesive Sheet to the back of the Lost Lagoon card and cutting the letters with the Playful Alphabet Dies.
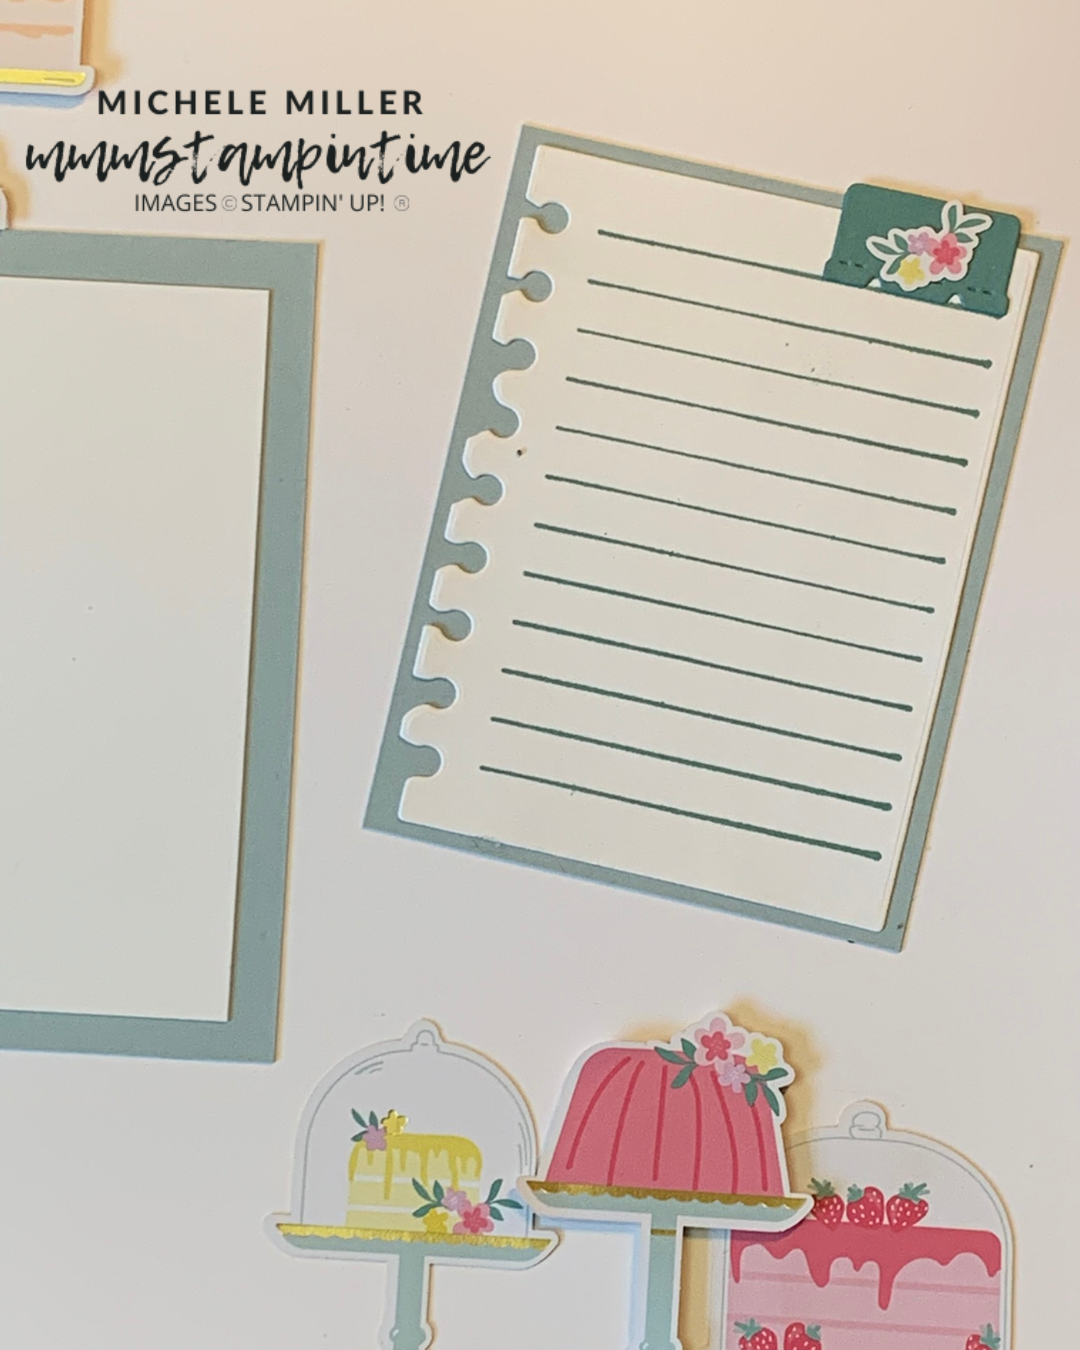
The journalling panels were made using the notebook Just a Note dies. I used the coordinating stamp set to add the Lost Lagoon lines on the notebook die cut. The notebook pages were then adhered to another Cloud Cover panel.
I used the tab and paperclip dies to cut these shapes and add them to the notebook page.
Then I decorated both pages using the decorative elements from the kit.

I think these pages would be great for photos from a birthday gathering or a high tea. What photos would you add to these pages?

Tomorrow I have a card to share with you.
Until then, happy stamping and scrapbboking.

If you live in Australia, you can order any of the products I used to make this card by going to my online store. Just click on any of the images below.

![Birthday Fancy Kit (English) [ 166211 ]](https://i0.wp.com/assets1.tamsnetwork.com/images/EC042017NF/166211s.jpg?w=140&ssl=1 "Birthday Fancy Kit (English) [ 166211 ]") | ![Playful Alphabet Dies [ 152706 ]](https://i0.wp.com/assets1.tamsnetwork.com/images/EC042017NF/152706s.jpg?w=140&ssl=1 "Playful Alphabet Dies [ 152706 ]") | ![Just A Note Bundle (English) [ 166102 ]](https://i0.wp.com/assets1.tamsnetwork.com/images/EC042017NF/166102s.jpg?w=140&ssl=1 "Just A Note Bundle (English) [ 166102 ]") | ![Just A Note Dies [ 166101 ]](https://i0.wp.com/assets1.tamsnetwork.com/images/EC042017NF/166101s.jpg?w=140&ssl=1 "Just A Note Dies [ 166101 ]") | |
![Multipurpose Liquid Glue [ 110755 ]](https://i0.wp.com/assets1.tamsnetwork.com/images/EC042017NF/110755s.jpg?w=140&ssl=1 "Multipurpose Liquid Glue [ 110755 ]") | ![Stampin' Dimensionals [ 104430 ]](https://i0.wp.com/assets1.tamsnetwork.com/images/EC042017NF/104430s.jpg?w=140&ssl=1 "Stampin' Dimensionals [ 104430 ]") | |||
![Adhesive Sheets [ 152334 ]](https://i0.wp.com/assets1.tamsnetwork.com/images/EC042017NF/152334s.jpg?w=140&ssl=1 "Adhesive Sheets [ 152334 ]") | ![Mini Stampin' Cut & Emboss Machine [ 150673 ]](https://i0.wp.com/assets1.tamsnetwork.com/images/EC042017NF/150673s.jpg?w=140&ssl=1 "Mini Stampin' Cut & Emboss Machine [ 150673 ]") | ![Paper Snips [ 103579 ]](https://i0.wp.com/assets1.tamsnetwork.com/images/EC042017NF/103579s.jpg?w=140&ssl=1 "Paper Snips [ 103579 ]") | ![Paper Trimmer [ 152392 ]](https://i0.wp.com/assets1.tamsnetwork.com/images/EC042017NF/152392s.jpg?w=140&ssl=1 "Paper Trimmer [ 152392 ]") |
![Just A Note Cling Stamp Set (English) [ 166098 ]](https://i0.wp.com/assets1.tamsnetwork.com/images/EC042017NF/166098s.jpg?w=140&ssl=1 "Just A Note Cling Stamp Set (English) [ 166098 ]")
![White Willow 12" X 12" (30.5 X 30.5 Cm) Cardstock [ 166703 ]](https://i0.wp.com/assets1.tamsnetwork.com/images/EC042017NF/166703s.jpg?w=140&ssl=1 "White Willow 12\" X 12\" (30.5 X 30.5 Cm) Cardstock [ 166703 ]")
![Cloud Cover 12" X 12" (30.5 X 30.5 Cm) Two Tone Cardstock [ 166708 ]](https://i0.wp.com/assets1.tamsnetwork.com/images/EC042017NF/166708s.jpg?w=140&ssl=1 "Cloud Cover 12\" X 12\" (30.5 X 30.5 Cm) Two Tone Cardstock [ 166708 ]")
![Lost Lagoon 12" X 12" (30.5 X 30.5 Cm) Two Tone Cardstock [ 166658 ]](https://i0.wp.com/assets1.tamsnetwork.com/images/EC042017NF/166658s.jpg?w=140&ssl=1 "Lost Lagoon 12\" X 12\" (30.5 X 30.5 Cm) Two Tone Cardstock [ 166658 ]")





![Drusy Adhesive Backed Embellishments [ 164223 ]](https://i0.wp.com/assets1.tamsnetwork.com/images/EC042017NF/164223s.jpg?w=140&ssl=1 "Drusy Adhesive Backed Embellishments [ 164223 ]")
![Purple Fine Shimmer Gems [ 162611 ]](https://i0.wp.com/assets1.tamsnetwork.com/images/EC042017NF/162611s.jpg?w=140&ssl=1 "Purple Fine Shimmer Gems [ 162611 ]")
![Gold & Silver 1/8" (3.2 Mm) Trim Combo Pack [ 161633 ]](https://i0.wp.com/assets1.tamsnetwork.com/images/EC042017NF/161633s.jpg?w=140&ssl=1 "Gold & Silver 1/8\" (3.2 Mm) Trim Combo Pack [ 161633 ]")
![Basic White A4 Cardstock [ 166781 ]](https://i0.wp.com/assets1.tamsnetwork.com/images/EC042017NF/166781s.jpg?w=140&ssl=1 "Basic White A4 Cardstock [ 166781 ]")
![Berry Burst A4 Cardstock [ 144249 ]](https://i0.wp.com/assets1.tamsnetwork.com/images/EC042017NF/144249s.jpg?w=140&ssl=1 "Berry Burst A4 Cardstock [ 144249 ]")
![Night Of Navy A4 Card Stock [ 106577 ]](https://i0.wp.com/assets1.tamsnetwork.com/images/EC042017NF/106577s.jpg?w=140&ssl=1 "Night Of Navy A4 Card Stock [ 106577 ]")
![Pretty Peacock A4 Cardstock [ 150886 ]](https://i0.wp.com/assets1.tamsnetwork.com/images/EC042017NF/150886s.jpg?w=140&ssl=1 "Pretty Peacock A4 Cardstock [ 150886 ]")
![Berry Burst Classic Stampin' Pad [ 147143 ]](https://i0.wp.com/assets1.tamsnetwork.com/images/EC042017NF/147143s.jpg?w=140&ssl=1 "Berry Burst Classic Stampin' Pad [ 147143 ]")
![Night Of Navy Classic Stampin' Pad [ 147110 ]](https://i0.wp.com/assets1.tamsnetwork.com/images/EC042017NF/147110s.jpg?w=140&ssl=1 "Night Of Navy Classic Stampin' Pad [ 147110 ]")
![Berry Burst Stampin’ Blends Combo Pack [ 161681 ]](https://i0.wp.com/assets1.tamsnetwork.com/images/EC042017NF/161681s.jpg?w=140&ssl=1 "Berry Burst Stampin’ Blends Combo Pack [ 161681 ]")
![Tear & Tape Adhesive [ 154031 ]](https://i0.wp.com/assets1.tamsnetwork.com/images/EC042017NF/154031s.jpg?w=140&ssl=1 "Tear & Tape Adhesive [ 154031 ]")
![1-3/4" (4.4 Cm) Circle Punch [ 119850 ]](https://i0.wp.com/assets1.tamsnetwork.com/images/EC042017NF/119850s.jpg?w=140&ssl=1 "1-3/4\" (4.4 Cm) Circle Punch [ 119850 ]")
![1 7/8" (4.8 Cm) Circle Punch [ 165259 ]](https://i0.wp.com/assets1.tamsnetwork.com/images/EC042017NF/165259s.jpg?w=140&ssl=1 "1 7/8\" (4.8 Cm) Circle Punch [ 165259 ]")




