Today have two versions of one technique to share with you – SPOTLIGHT AND REVERSE SPOTLIGHT TECHNIQUE.
This technique is designed to highlight a few areas on a card front, spotlighting them with colour against an uncoloured area.
For both cards, I stamped the large double rose image a number of times on a Basic White panel for the card front.
Then I stamped the same image several times to colour them and cut them as the spotlight pieces.

For this SPOTLIGHT card, I used a Pebble Path card base and embossed a Calypso Coral panel with the Basics 3D Crosshatch Embossing Folder.
The embossed layer was adhered to the card base.
I used Calypso Coral and Lost Lagoon Stampin’ Blends to colour some stamped double rose images. Then I used two circles from the Stylish Shapes Dies to cut the spotlights.
Using Multipurpose Adhesive, I was able to position the spotlight areas aligning them precisely to the image.

The greeting is from the Blueberry Bunches Cling Stamp Set. After stamping it onto a piece of Basic White card, I cut it using one of the dies from the Lovely & Sweey Dies.
The greeting had Stampin’ Dimensionals attached to the back before being popped up on the card front.
The card insert and envelope were stamped with the large, double rose image.
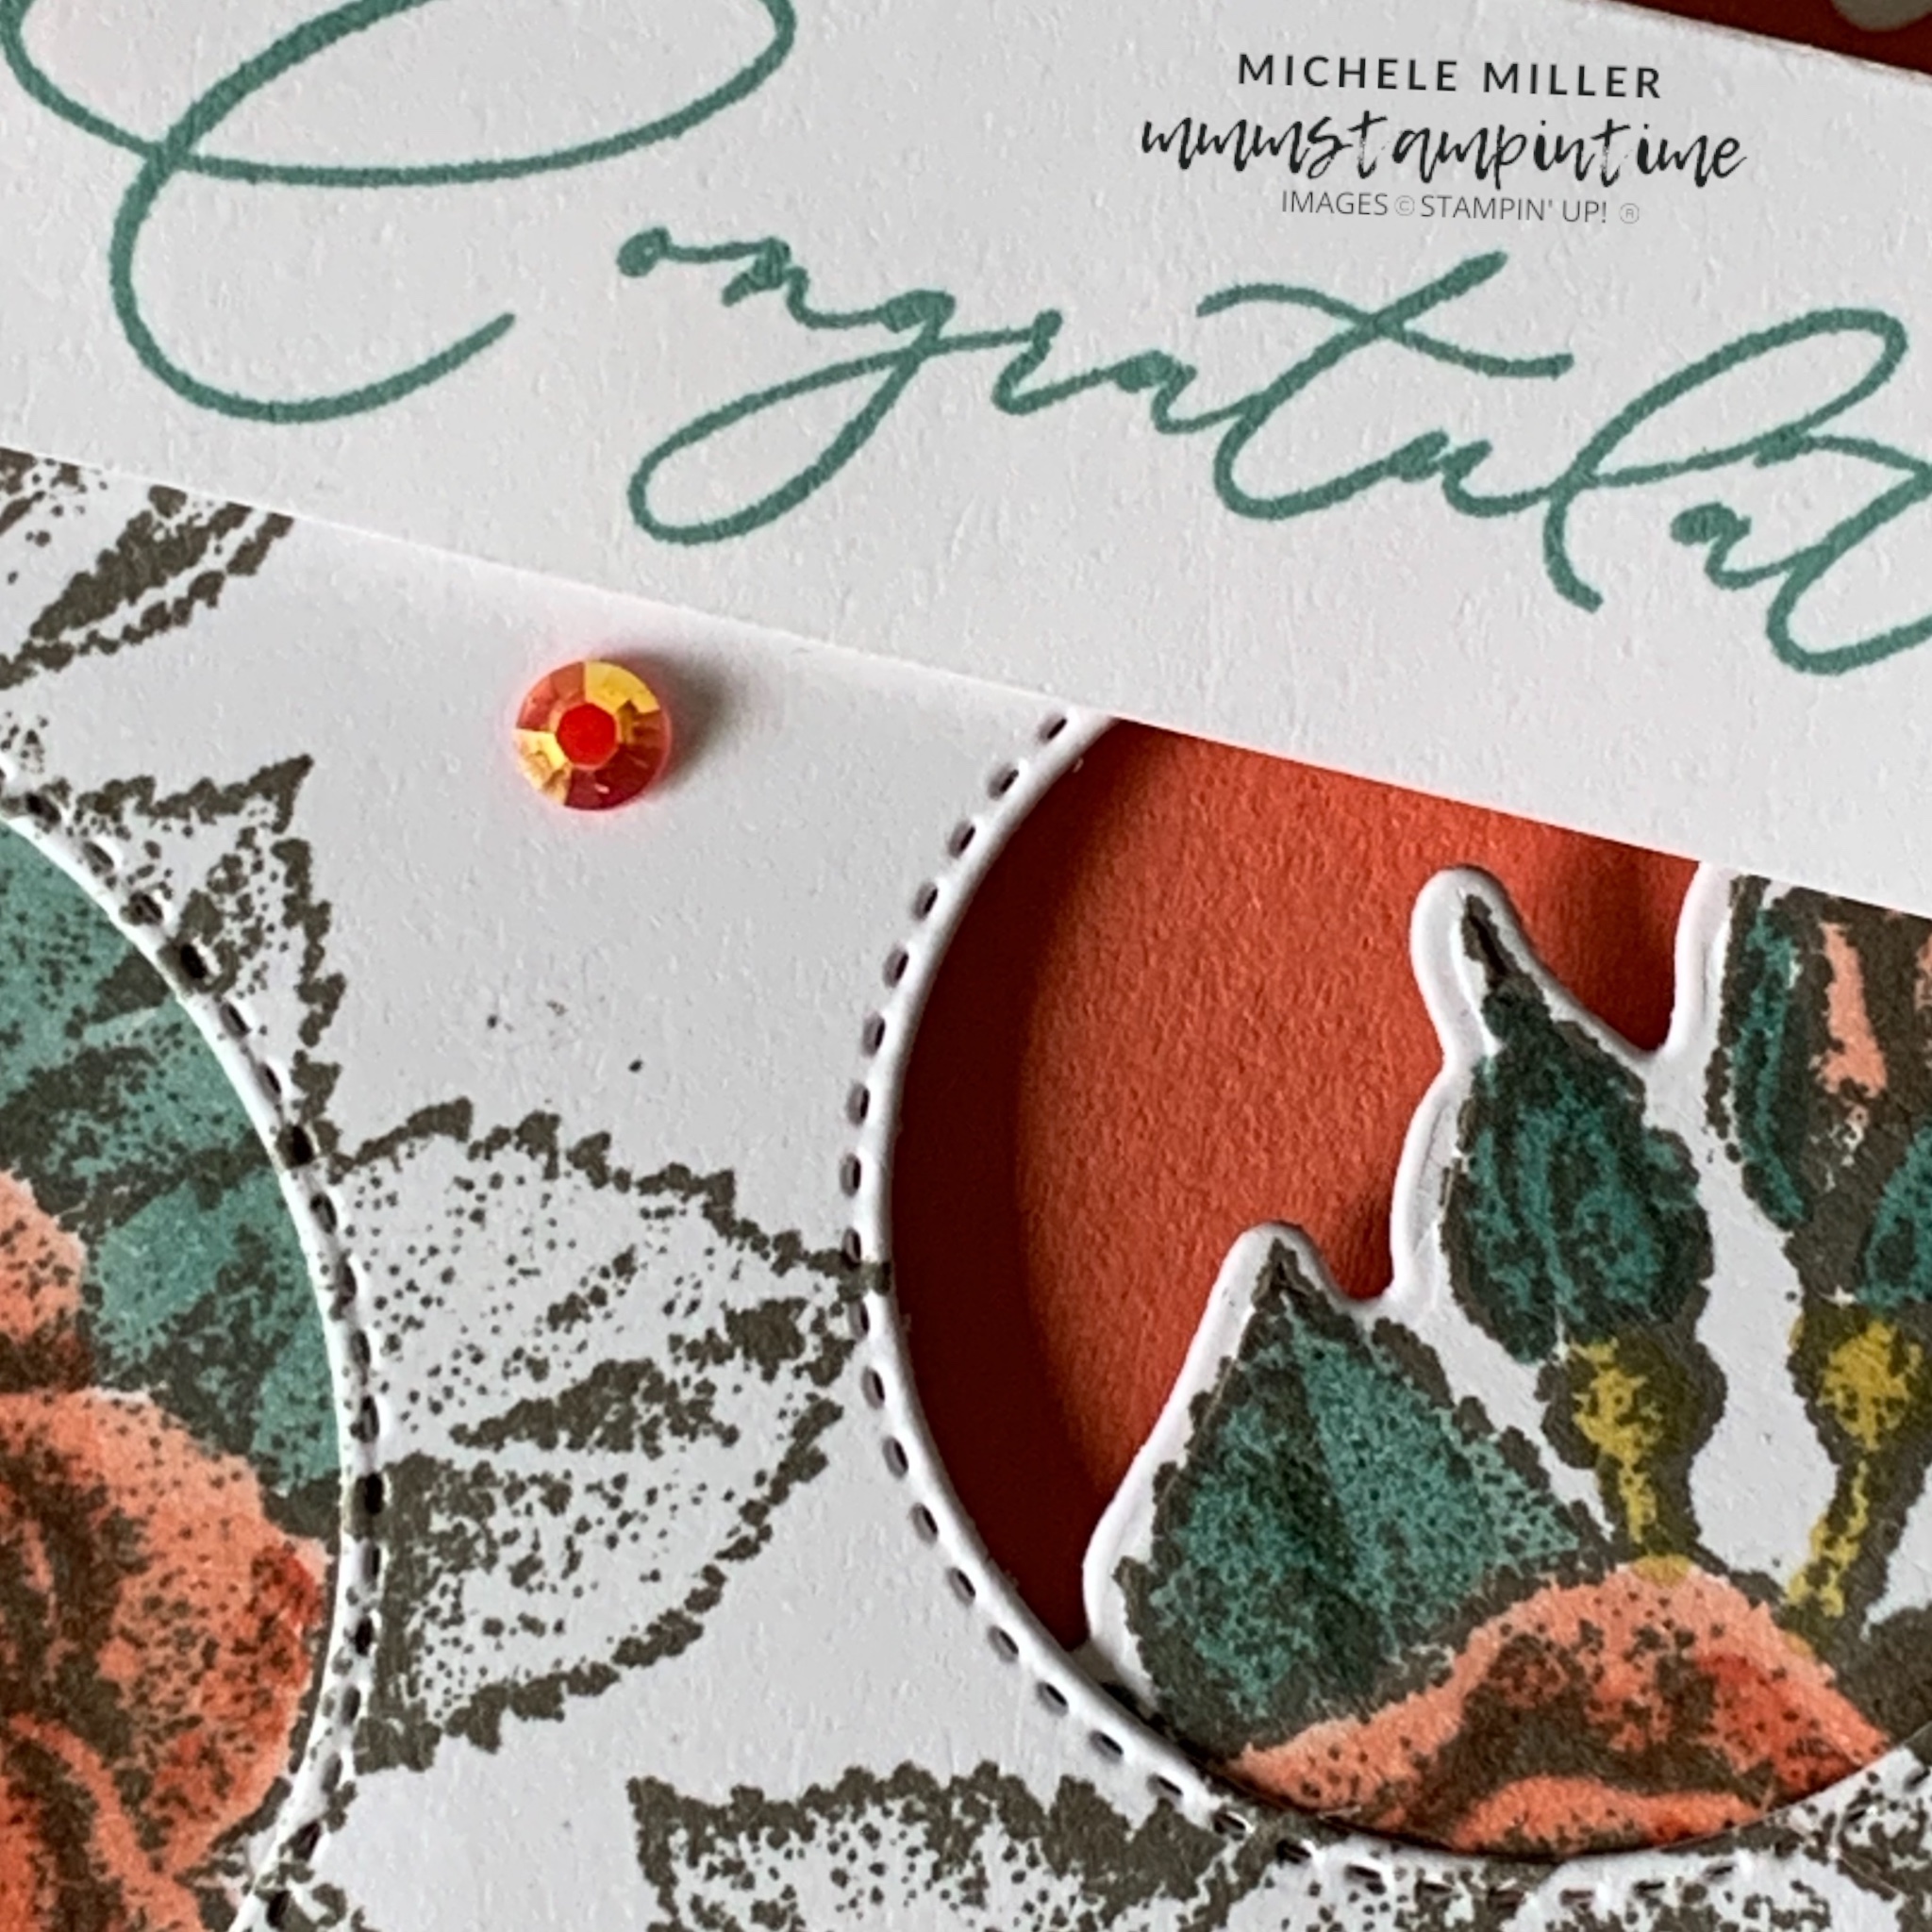
To finish the card, I added some Calypso Coral Iridescent Pastel Gems.

The REVERSE SPOTLIGHT card uses the same products.
EDIT: I decided to use this card for my Global Design Project submission this week.


For this card, I stamped the image on the stamped panel and then used two of the circle dies to create the spaces that would have the coloured images appear under.
To create the spotlight images, I stamped and coloured three of the double rose images. These were then die cut because I wanted two of them to allow the Capypso Coral card base to show through.

The spotlight pieces were adhered behind the circle openings.
A length of Calypso Coral Braided Linen Trim was wrapped around the stamped layer and tied in a bow. I used a Mini Glue Dot to hold it in place.
After placing several Stampin’ Dimensionals behind the white panel it was positioned on the card front.
The greeting was stamped, trimmed and placed on the card front using dimensionals.
The small, single rome image was stamped on the card insert and envelope.
Some small, Calypso Coral Iridescent Pastel Gems were added to the card.
Tomorrow I have another card to share with you.
Until then, happy stamping.

If you live in Australia, you can order any of the products I used to make this card by going to my online store. Just click on any of the images below.

") |  |  | ||
 |  |  | ||
 |  |  | ||
 |  |  |  |  |
 |
")
")
 Designer Series Paper")
 Braided Linen Trim")


