Posted on Leave a comment

WELL, WHAT’S HAPPENING THIS WEDNESDAY?

There are now 10 more products added to the Sale-a-bration options. They can be found in existing current catalogues. You can choose from 8 of them, each for a minimum $90 order and there are 2 that require a $180 order each. Click on the image below to see the flier.

If you look ONline, in the Stampin’ Up!, you will two new kits have been added. Click on each of the images to see a short unboxing video.

The first one is the Happy Houseplants Kit – 163873 $44AUD

The second new kit is the Birthday Sparkle Kit – 163865 $41AUD.

Finally, there is a new collection of Online Exclusives coming soon – of, course, if you join Stampin’ Up! this month you can order them in a preorder. PReordering new products is one of the benefits of joining Stampin’ Up!.

Now let’s check out today’s project share.

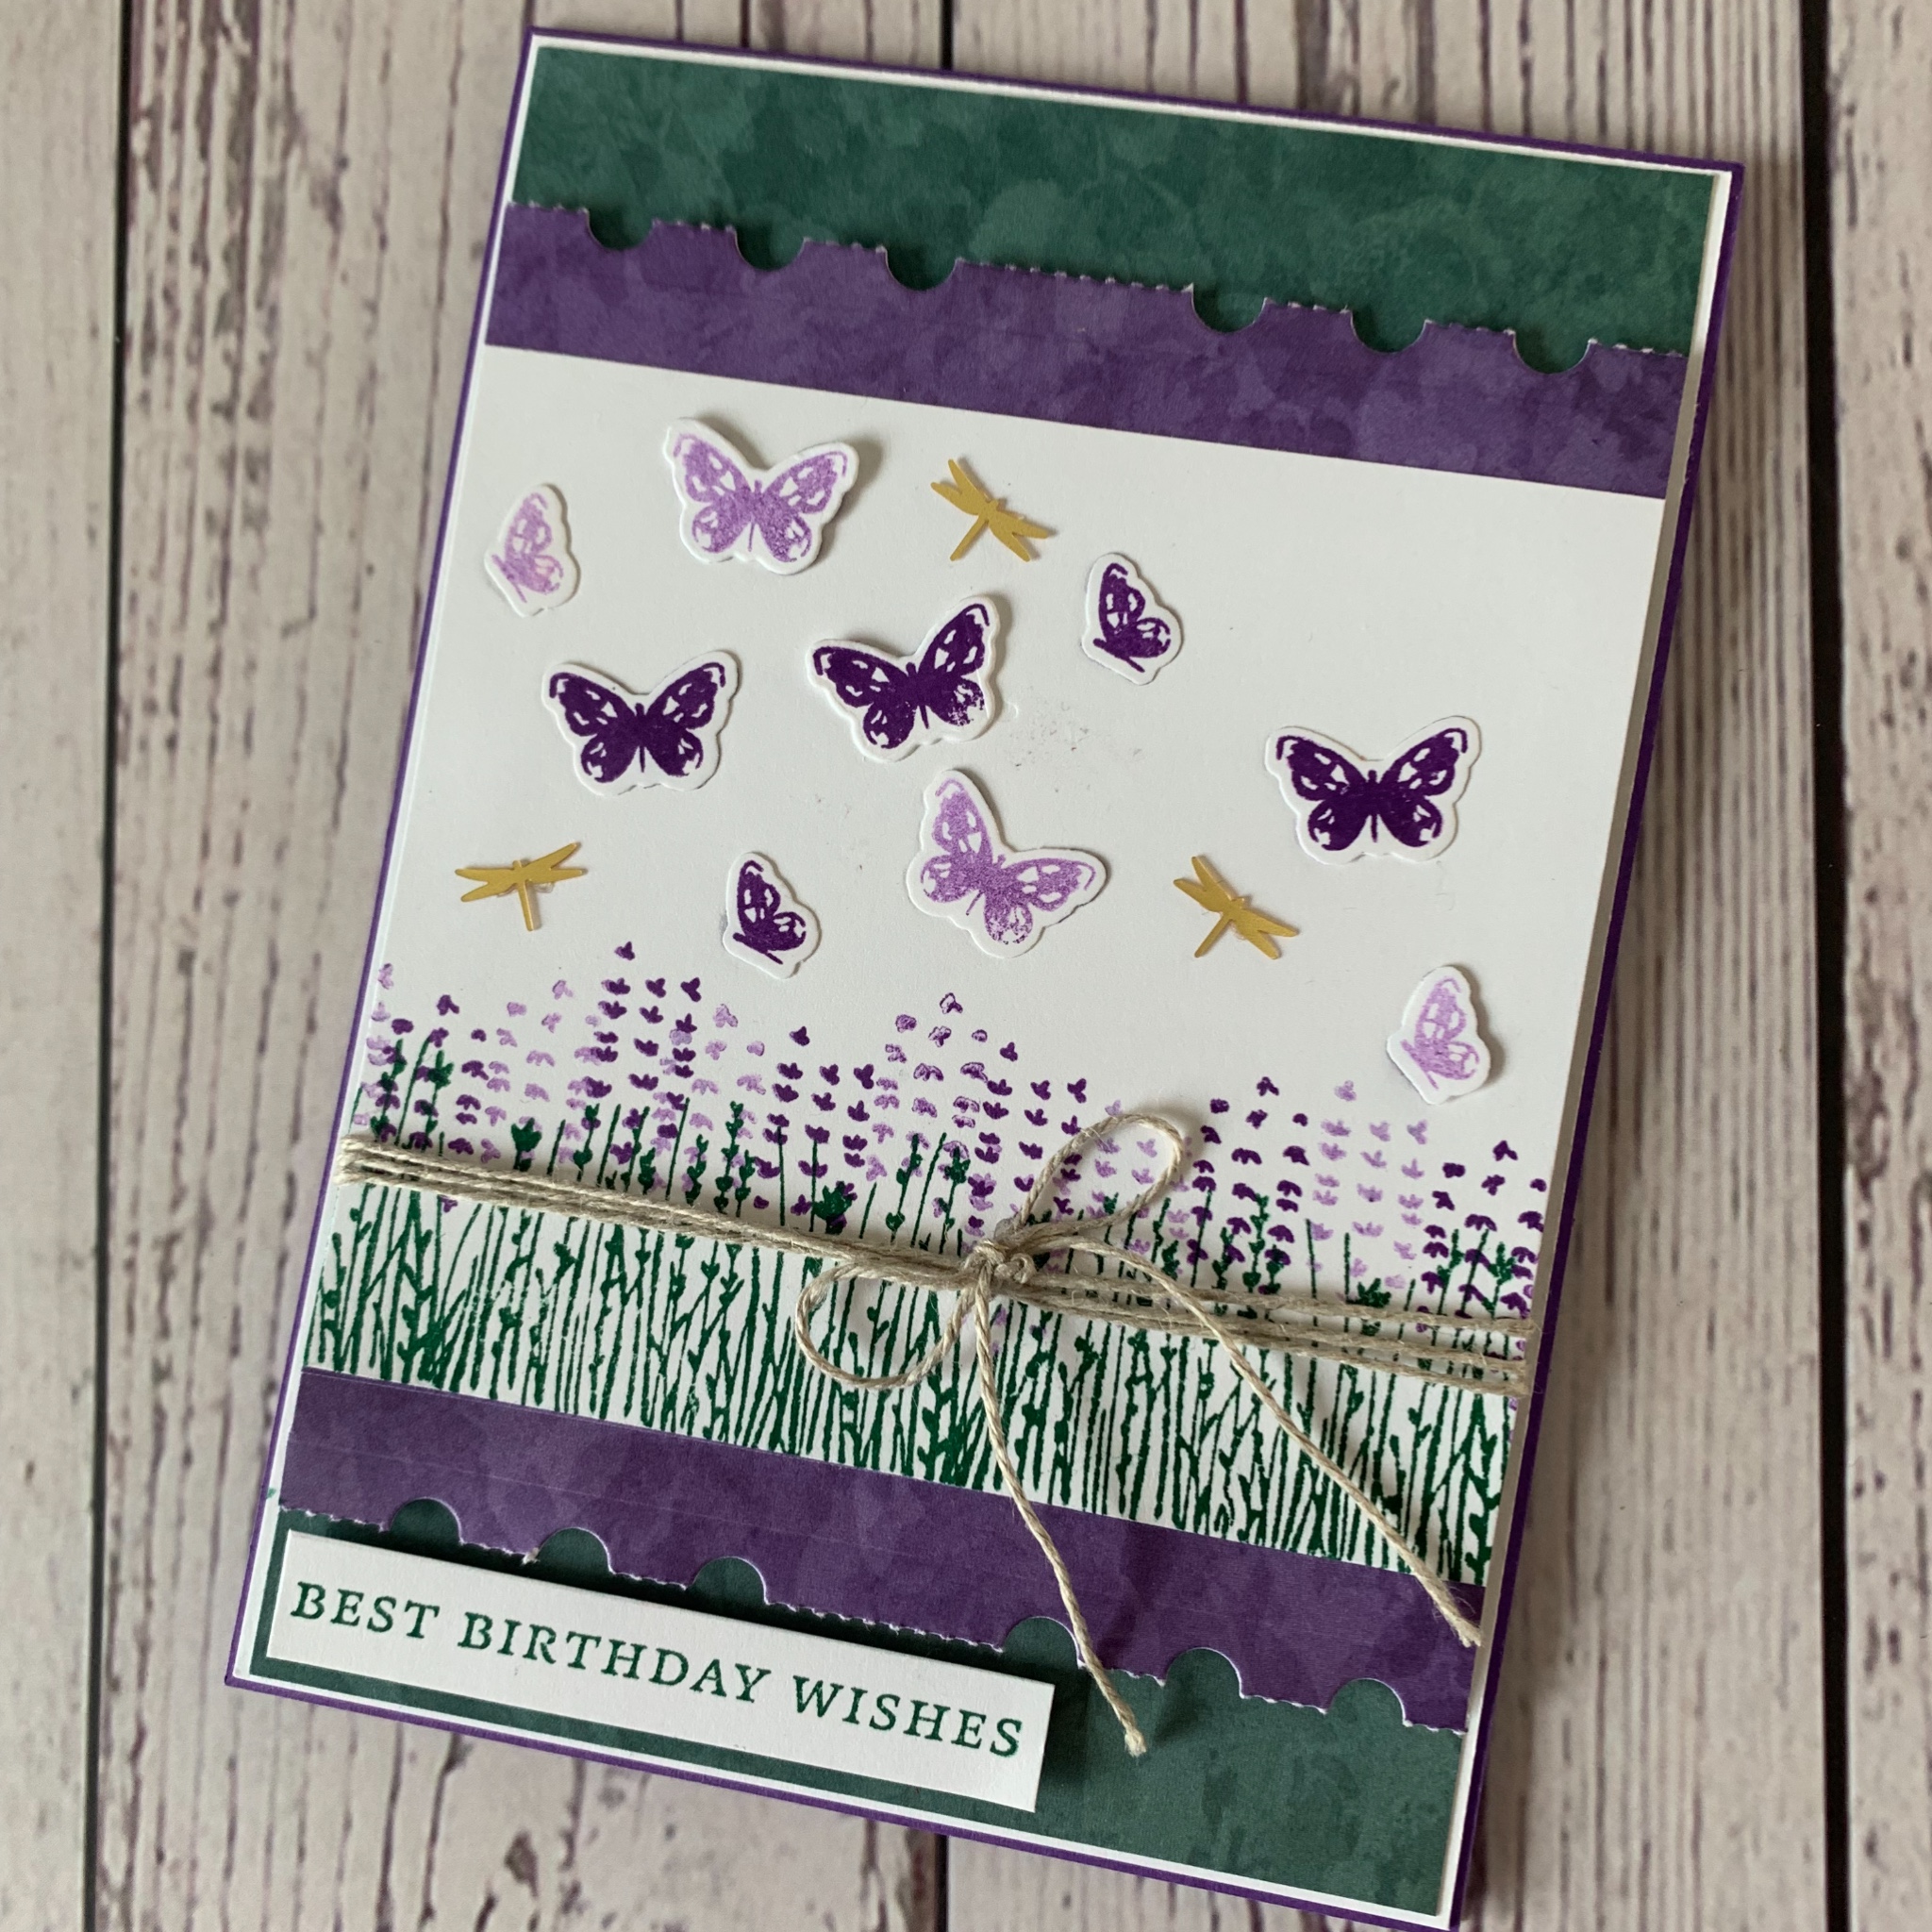
This project started with a Highland Heather card base and a slightly larger Basic White layer.

My next step was to stamp the Basic White panel so that could determine the size of the DSP layers that I also added to card front.

The stems were stamped in Shaded Spruce and the small flowers in Highland Heather. I used the stamp on/stamp off colouring technique for this.

Then I worked put what measurements I needed for the green and purple DSP panels.

I used one of the Notes of Nature Dies to create the torn edges on the purple DSP layer.

After I adhered the three layers together, I wrapped Linen Thread several times around the panels and tied a bow. The layers were then secured on the card front.

I stamped and die cut several butterflies, from the Painted Lavender Stamp Set, and attached them to the front of the card.The butterflies were stamped with Fresh Freesia and Highland Heather.

The greeting, from the Stippled Rose Stamp Set, was stamped in Shaded Spruce and trimmed down to a slender strip. I used Stampin’ Dimensionals to pop it up on the card front.

I stamped the same stems and flowers on the card insert and on the back of the envelope.

Finally, I added some dragonflies from the Adhesive-backed Dragonflies and Birds.

Tomorrow I have two gift boxes to share with you.

Until then, happy stamping.

If you live in Australia, you can order any of the products I used to make this card by going to my online store. Just click on any of the images belo

Product List
Paper Snips
[103579]
$19.25
Posted on Leave a comment

TODAY IS TUESDAY & IT’S TIME FOR SOME TIPS AND TECHNIQUES

My tip for today is to find other Stampin’ Up! products that you can team with a new collection. In this case, I used the Biggest Wish Stamp Set along with the Love This Moment Stamp Set to create the ‘happy birthday’ greeting.

For this card I have used only the Perennial Postage Dies and Perennial Lavender DSP.

I started with a Crumb Cake card base and a panel of Highland Heather cardstock. Then I added a layer of the DSP.

The ‘happy’ was stamped onto a small piece of the same DSP and onto the back of the envelope. I used Lost Lagoon ink for both.

Using one of the Perennial Postage Dies I cut out the greeting and added it to the front of the card using Stampin’ Dimensionals.

TODAY’S TECHNIQUE – I used Blending Brushesand Highland Heather ink to colour one of the Paper Butterfly Accents. The butterfly doubled as a mask to colour a piece of Basic White cardstock.

I used my Crafting Tweezers, from the Embossing Additions Tool Kit, to hold the laser cut butterfly in place. Take care to be gentle when colouring the antennae because they are quite fine.

The resulting reverse butterfly image was then fussy cut.

I layered the two butterflies on to the card front using Mini Glue Dots.

I tied a triple bow using Linen Thread and attached it with a Mini Glue Dot.

I stamped ‘birthday’, in Lost Lagoon, on the card insert.

A strip of DSP and a larger piece of the same DSP were added to the card insert and the back of the envelope.

Finally, I added some more of the Purple Fine Shimmer Gems to the front of the card.

Tomorrow I have another card to share with you.

Until the, happy stamping.

If you live in Australia, you can order any of the products I used to make this card by going to my online store. Just click on any of the images below.

Product List
Paper Snips
[103579]
$19.25
Posted on Leave a comment

IT’S MONDAY & THAT MEANS IT IS TIME TO HIGHLIGHT SOME NEW STAMPIN’ UP! PRODUCTS

As I shared with you yesterday, this week is all about the Perennial Lavender Suite Collection.

This amazing suite collection (162613 – $221.50AUD) comprises the Painted Lavender Stamp Set and Dies Bundle and the Perrenial Postage Stamp Set and Dies Bundle, Paper Butterfly Accents, Purple Fine Shimmer Gems and Perennial Lavender 12″ x 12″ Designer Series Paper.

The DSP colours are Berry Burst, Blackberry Bliss, Fresh Freesia, Gorgeous Grape, Highland Heather, Lost Lagoon, Orchid Oasis, Pretty Peacock, Shaded Spruce and Starry Sky. The Gems are Berry Burst, Gorgeous Grape and Highland Heather.

For today’s card, I CASEd a project from page 22 of the January – April 2024 Mini Catalogue. I created a card instead of a decor piece.

The decor piece is on the lefthand side of the image above.

I started with a Shaded Spruce cardbase and added a panel of the checked DSP.

After lots of stamping and die cutting, I assembled the bouquet for the card front. I used a stamp on/stamp off technique for the sprigs of lavender. The stems were stamped onto DSP. I cut the leaves using two of the dies and Shaded Spruce cardstock, Vellum and Lost Lagoon Soft Shimmer 12″ x 12″ paper Combo Pack.

The bouquet was attached to the card front with Stampin’ Dimensionals.

I tied a single bow using the Lost Lagoon Bordered Ribbon and a double bow with Linen Thread. They were secured to the front of the card with Mini Dimensionals.

Then I attached two overlapping small Paper Butterflies.

The greeting, from the Love the Moment Stamp Set, was stamped using Lost Lagoon ink and trimmed to fit across the butterflies.

I added a strip of the checked DSP to the card insert and a larger piece to the back of the envelope.

Finally, I used the Purple Fine Shimmer Gems to the card front.

Tomorrow I have some Tips and a Technique to share with you.

Until then, happy stamping.

If you live in Australia, you can order any of the products I used to make this card by going to my online store. Just click on any of the images below.

Product List
Paper Snips
[103579]
$19.25