Posted on Leave a comment

SATURDAY IS USUALLY MY DAY TO SHARE A CHALLENGE PROJECT

I save usually wait until Saturdays to share challenge projects that I have worked on. I finished this one quite early, so I thought that I would also share it early.

Today’s project is for this week’s Global Design Project #GDP432 challenge.

This week, the GDP team are CASEing a card by Elodie Ventroux, one of their team members from France. It is such a lovely project to CASE.

I am so pleased that it is a Fun Fold card.

I hope that you pop over and see all the creations made by the GDP Team and the projects submitted by other paper crafters from around the world. Every week there are so many awesome ideas to inspire us.

I decided to use the new Online Exclusive Simply Zinnia products because I have already made lots of new projects using this bundle for my posts, beginning February 26th.

The Flowering Zinnias Suite Collection is a stunning and vibrant paper crafting resource. When it becomes available, to customers on March 5, the order number is 163485 and costs $146.

i played around with measurments for this card a few times before I was happy with the dimensions. The Pumpkin Pie card base measures 11″ x 4 1/8″. Along the long side I scored the base at 1 1/2″, 3″ and 7″.

I cut two panels of Pumpkin Pie – 4″ x 7/8″ and 4″ x 3 7/8″. these two panels were then embossed using the Basics 3D Crosshatch Embossing Folder. These panels were adhered to the card base as you can see.

The long, vertical Pumpkin Pie panel measures 5 7/8″ x 2 1/8″. After I adhered it to bottom 1 1/2″ ‘step’, I added a piece of the gorgeous Designer Series Paper. This long panel was perfect to showcase the design of this paper.

I added two more Pumpkin Pie panels measuring 3 1/2″ x 2 1/8″ and 2 1/2″ x 2 1/8″. These panels also has DSP added to them.

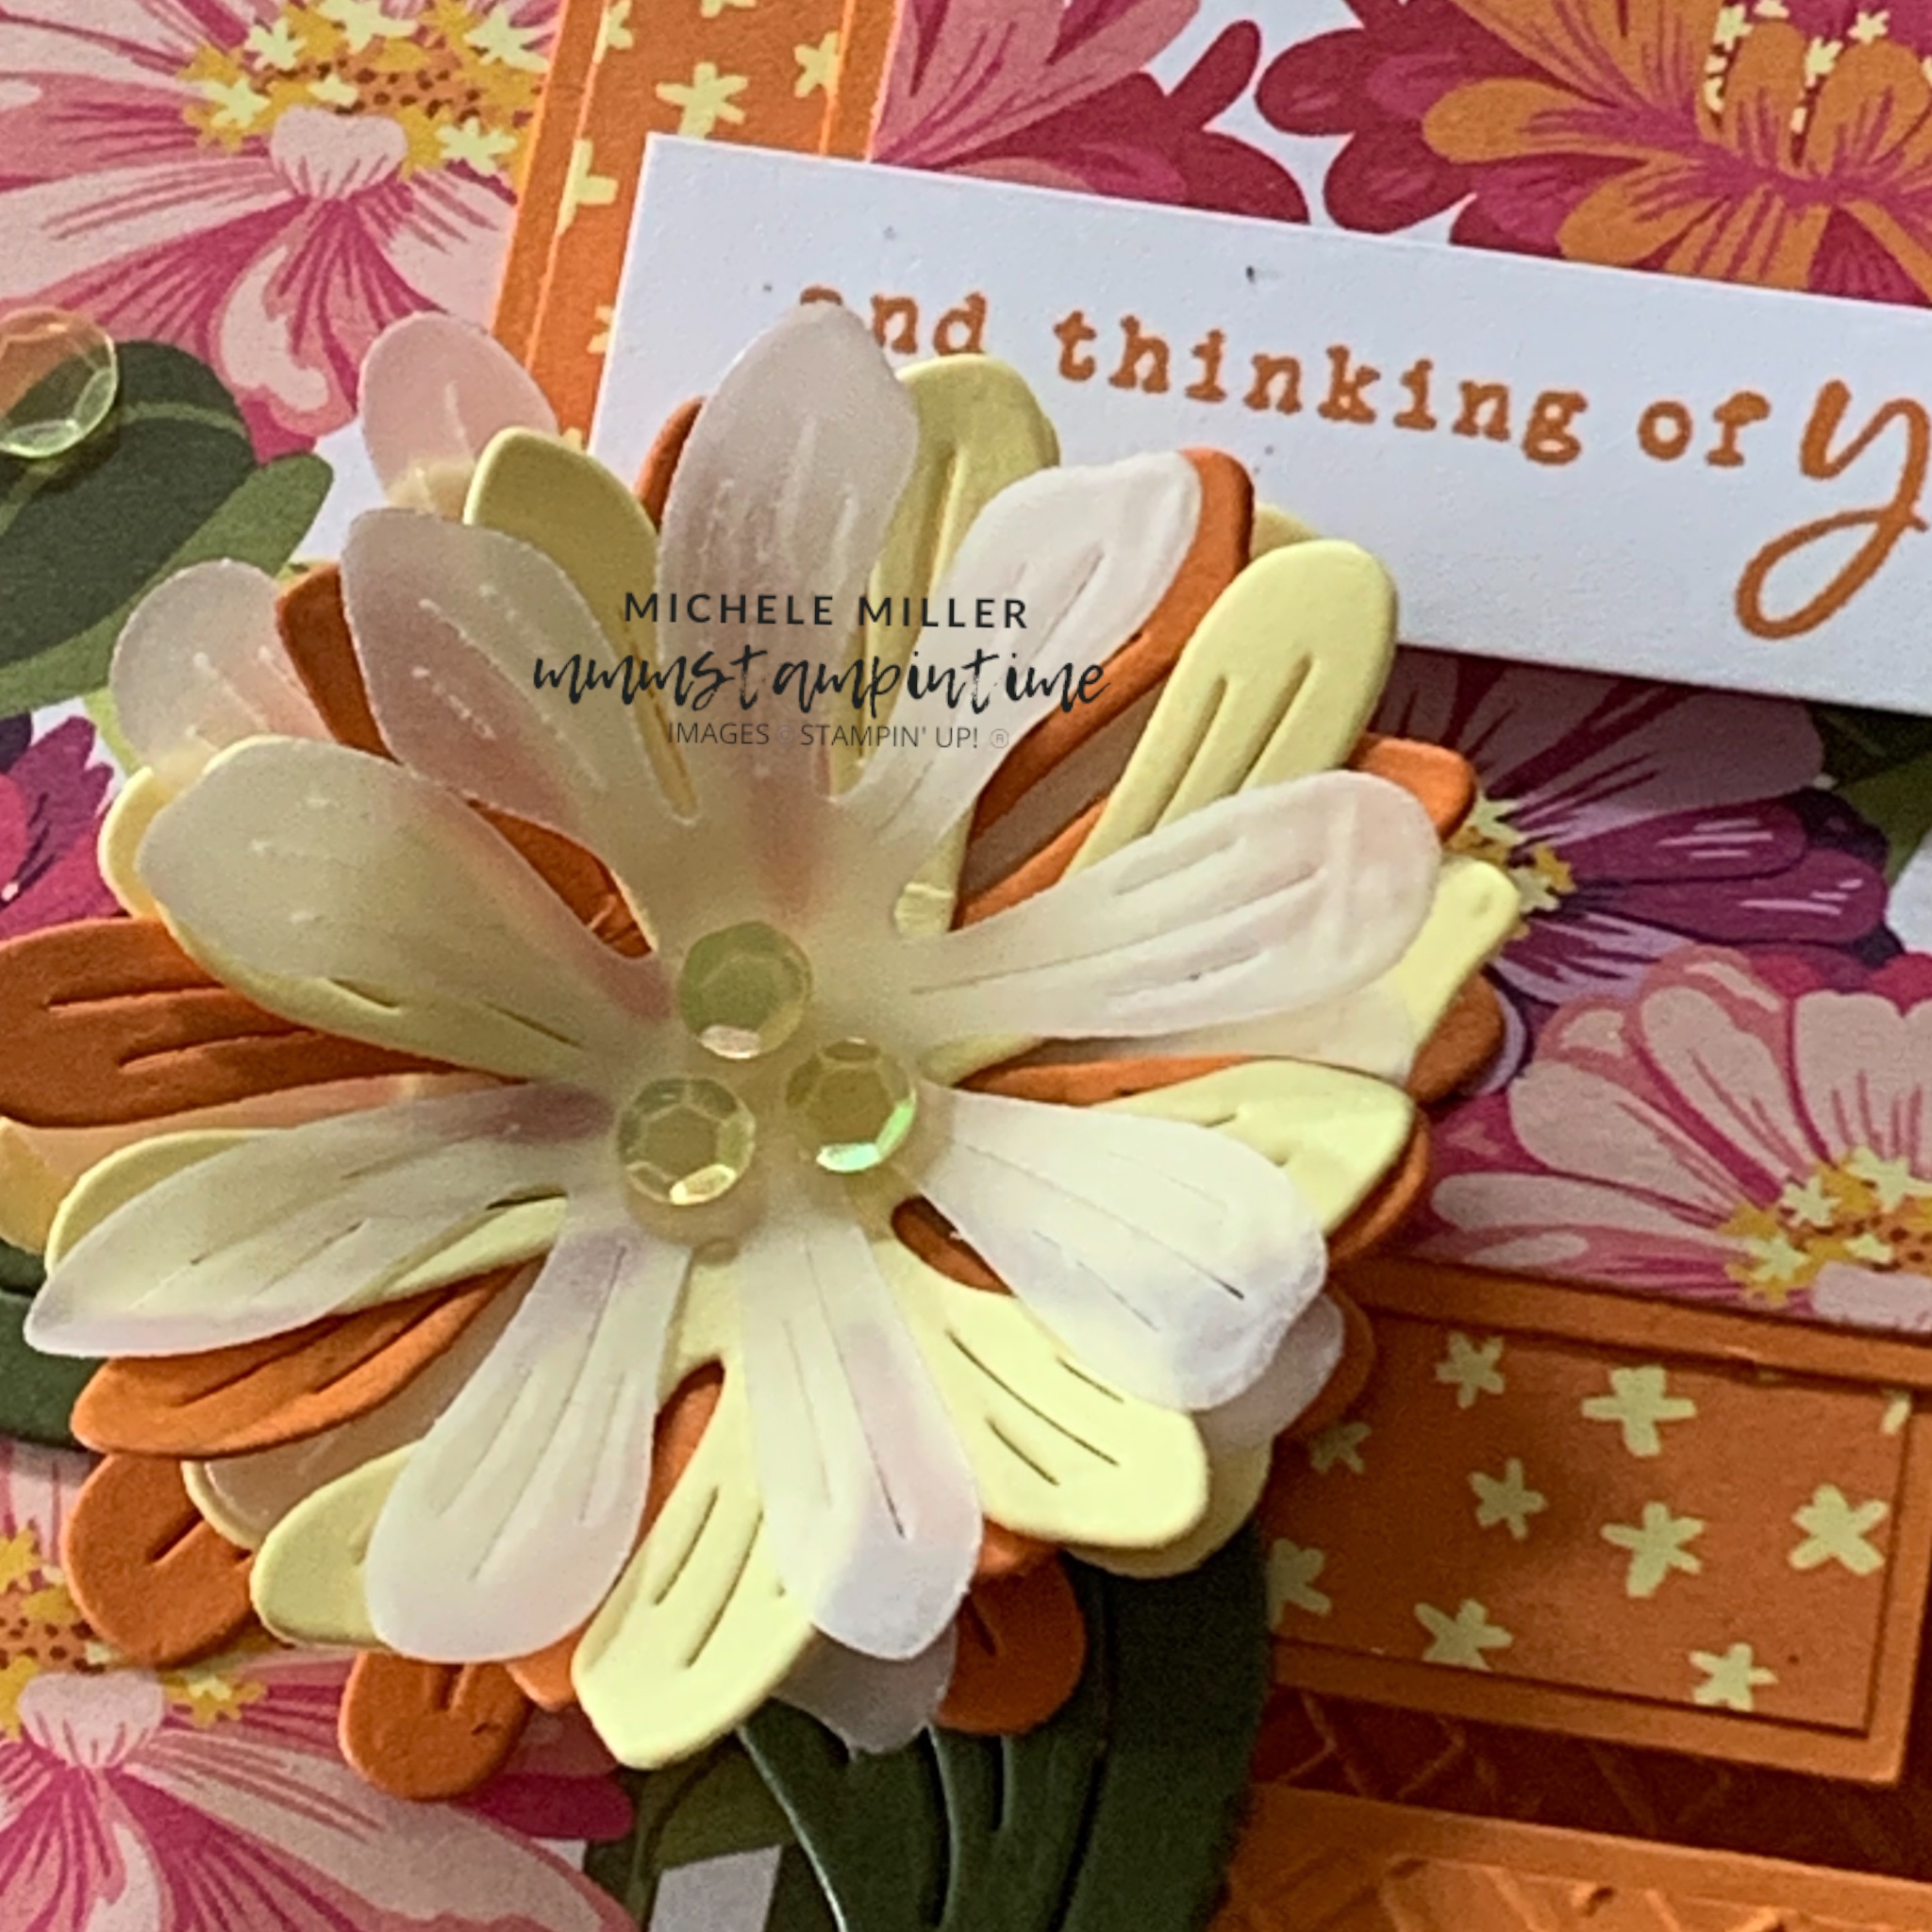
The 3D flower was created by die cutting the two floral dies in Lemon Lolly, Pumpkin Pie and Vellum. I layered these and secured them using Mini Glue Dots. The petals were curled up to add more dimension. I also cut two leaves, in Old Olive, and secured them under flower.

I stamped the greeting twice, masking the stamp to achieve the separation that I wanted. After trimming the greeting, I added Stampin’ Dimensionals so that the two strips would sit up from the card front.

The card insert and envelope both had some of the DSP adhered to them.

Finally, I added some Adhesive-Backed Shiny Sequins to the card front.

I am so happy with the card I have created. So many layers and texture.

So, in just over a week, I will have five more projects for you that I have made using this Online Exclusive collection of products.

Until then, happy stamping.

As the new Online Exclusive products won’t be available to cumstomers until the beginning of March, I can only add current products to the images below.

If you live in Australia, you can order any of the products I used to make this card by going to my online store. Just click on any of the images below.

Product List
Paper Snips
[103579]
$19.25
Posted on Leave a comment

TODAY IS TUESDAY AND IT’S TIME FOR SOME TIPS & TECHNIQUES

Today I have a combination fun fold and partial die cut card.

Partial die-cutting is a great way to mix it up when crafting with dies. This is where the metal die is placed on the cutting pad as usual but instead of being completely cut, the top cutting sheet is positioned so that an uncut area is left.

TIP: The trick is to use either a pencil line or fold line to let you know how far toroll the die and cutting platform and plates through your Stampin’ Cut & Emboss Machine.

For this card, I used a fold line to align the die I used from the Thoughtful Expressions Dies. Make sure that the top plate only goes up to the fold line before you run it through the machine. This way you will achieve a partially cut piece.

The Boho Blue card base was folded before partially cutting the label piece. Then I cut a Basic White label piece and adhered it over the Boho Blue.

I cut two more labels – one using one of the Designer Series Paper designs and another, slightly smaller one, in Basic White.

The sentiment was stamped on the Basic White label and I secured some folded Moody Mauve Textured Ribbon behind the panel.

I stamped, die cut and coloured three of the floral elemnts and wrapped around the left hand side of the card.

To finish the front of the card I added some Iridescent Rhinestones Basic Jewels, coloured with a dark Moody Mauve Stampin’ Blend pen.

When the card is opened out, there is a Basic White panel and a piece of coordinating DSP.

When folded back, I added half a Basic White label and another stamped, cut and coloured floral element.

I used the same DSP to finish the back of the envelope.

Tomorrow I have another card to share with you.

Until then, happy stamping.

If you live in Australia, you can order any of the products I used to make this card by going to my online store. Just click on any of the images below.

Product List
Paper Snips
[103579]
$19.25
Posted on Leave a comment

IT’S MONDAY & THAT MEANS IT IS TIME TO HIGHLIGHT SOME NEW STAMPIN’ UP! PRODUCTS

This week I am highlighting the Poetic Expressions Suite Collection.

I started by CASeing one of the projects from page 60 of the January – April 2024 Mini Catalogue.

I made the gift bag that you can see in the top left hand corner of the ima

I often forget about the 2023 – 2025 Im Colour Treat Bags so it was great to CASe this project.

What do you think of my version?

Next, I wanted to take the gift bag and convert it into a card.

I started by sliding off the belly band and cutting down the gift bag to create a panel to adhere to the front of a Boho Blue card base.

Then I cut down the belly band to add a second panel to the card.

Next, I stamped, cut and coloured a hummingbird and several flowers. I also die cut some leaves and small flowers.

The greeting was stamped on to a piece of Wild Wheat cardstock and then I cut the banner end. I also die cut the Basic White label using the largest of the label dies in the Throughtful Expressions Dies.

I assembled and adhered all of these elements into place using Multipurpose Glue, Stampin’ Dimensionals and Mini Glue Dots.

I used both the Designer Series Paper and gift bag remnant for inside the card and the back of the envelope.

To finish the card I added some Champagne Iridescent Dots to the front of the card.

Tomorrow I have another Poetic Expressions project to share with you.

Until then, happy stamping.

If you live in Australia, you can order any of the products I used to make this card by going to my online store. Just click on any of the images below.

Product List
Paper Snips
[103579]
$19.25