Posted on Leave a comment

WELCOME TO THE FIRST Colour INKspiration CHALLENGE OF 2024

2024 kicks off with Colour INKspiration’s #158 Challenge.

This challenge will run for 5 weeks, so you will have loads of time to create your own project and share it with us – https://www.facebook.com/groups/349642308720075

One of our team, Lou Kitzelman, chose this image for our challenge. (Picture credit – Trigg Beach, Perth, WA – https://www.instagram.com/p/BgjAffnFp7x)

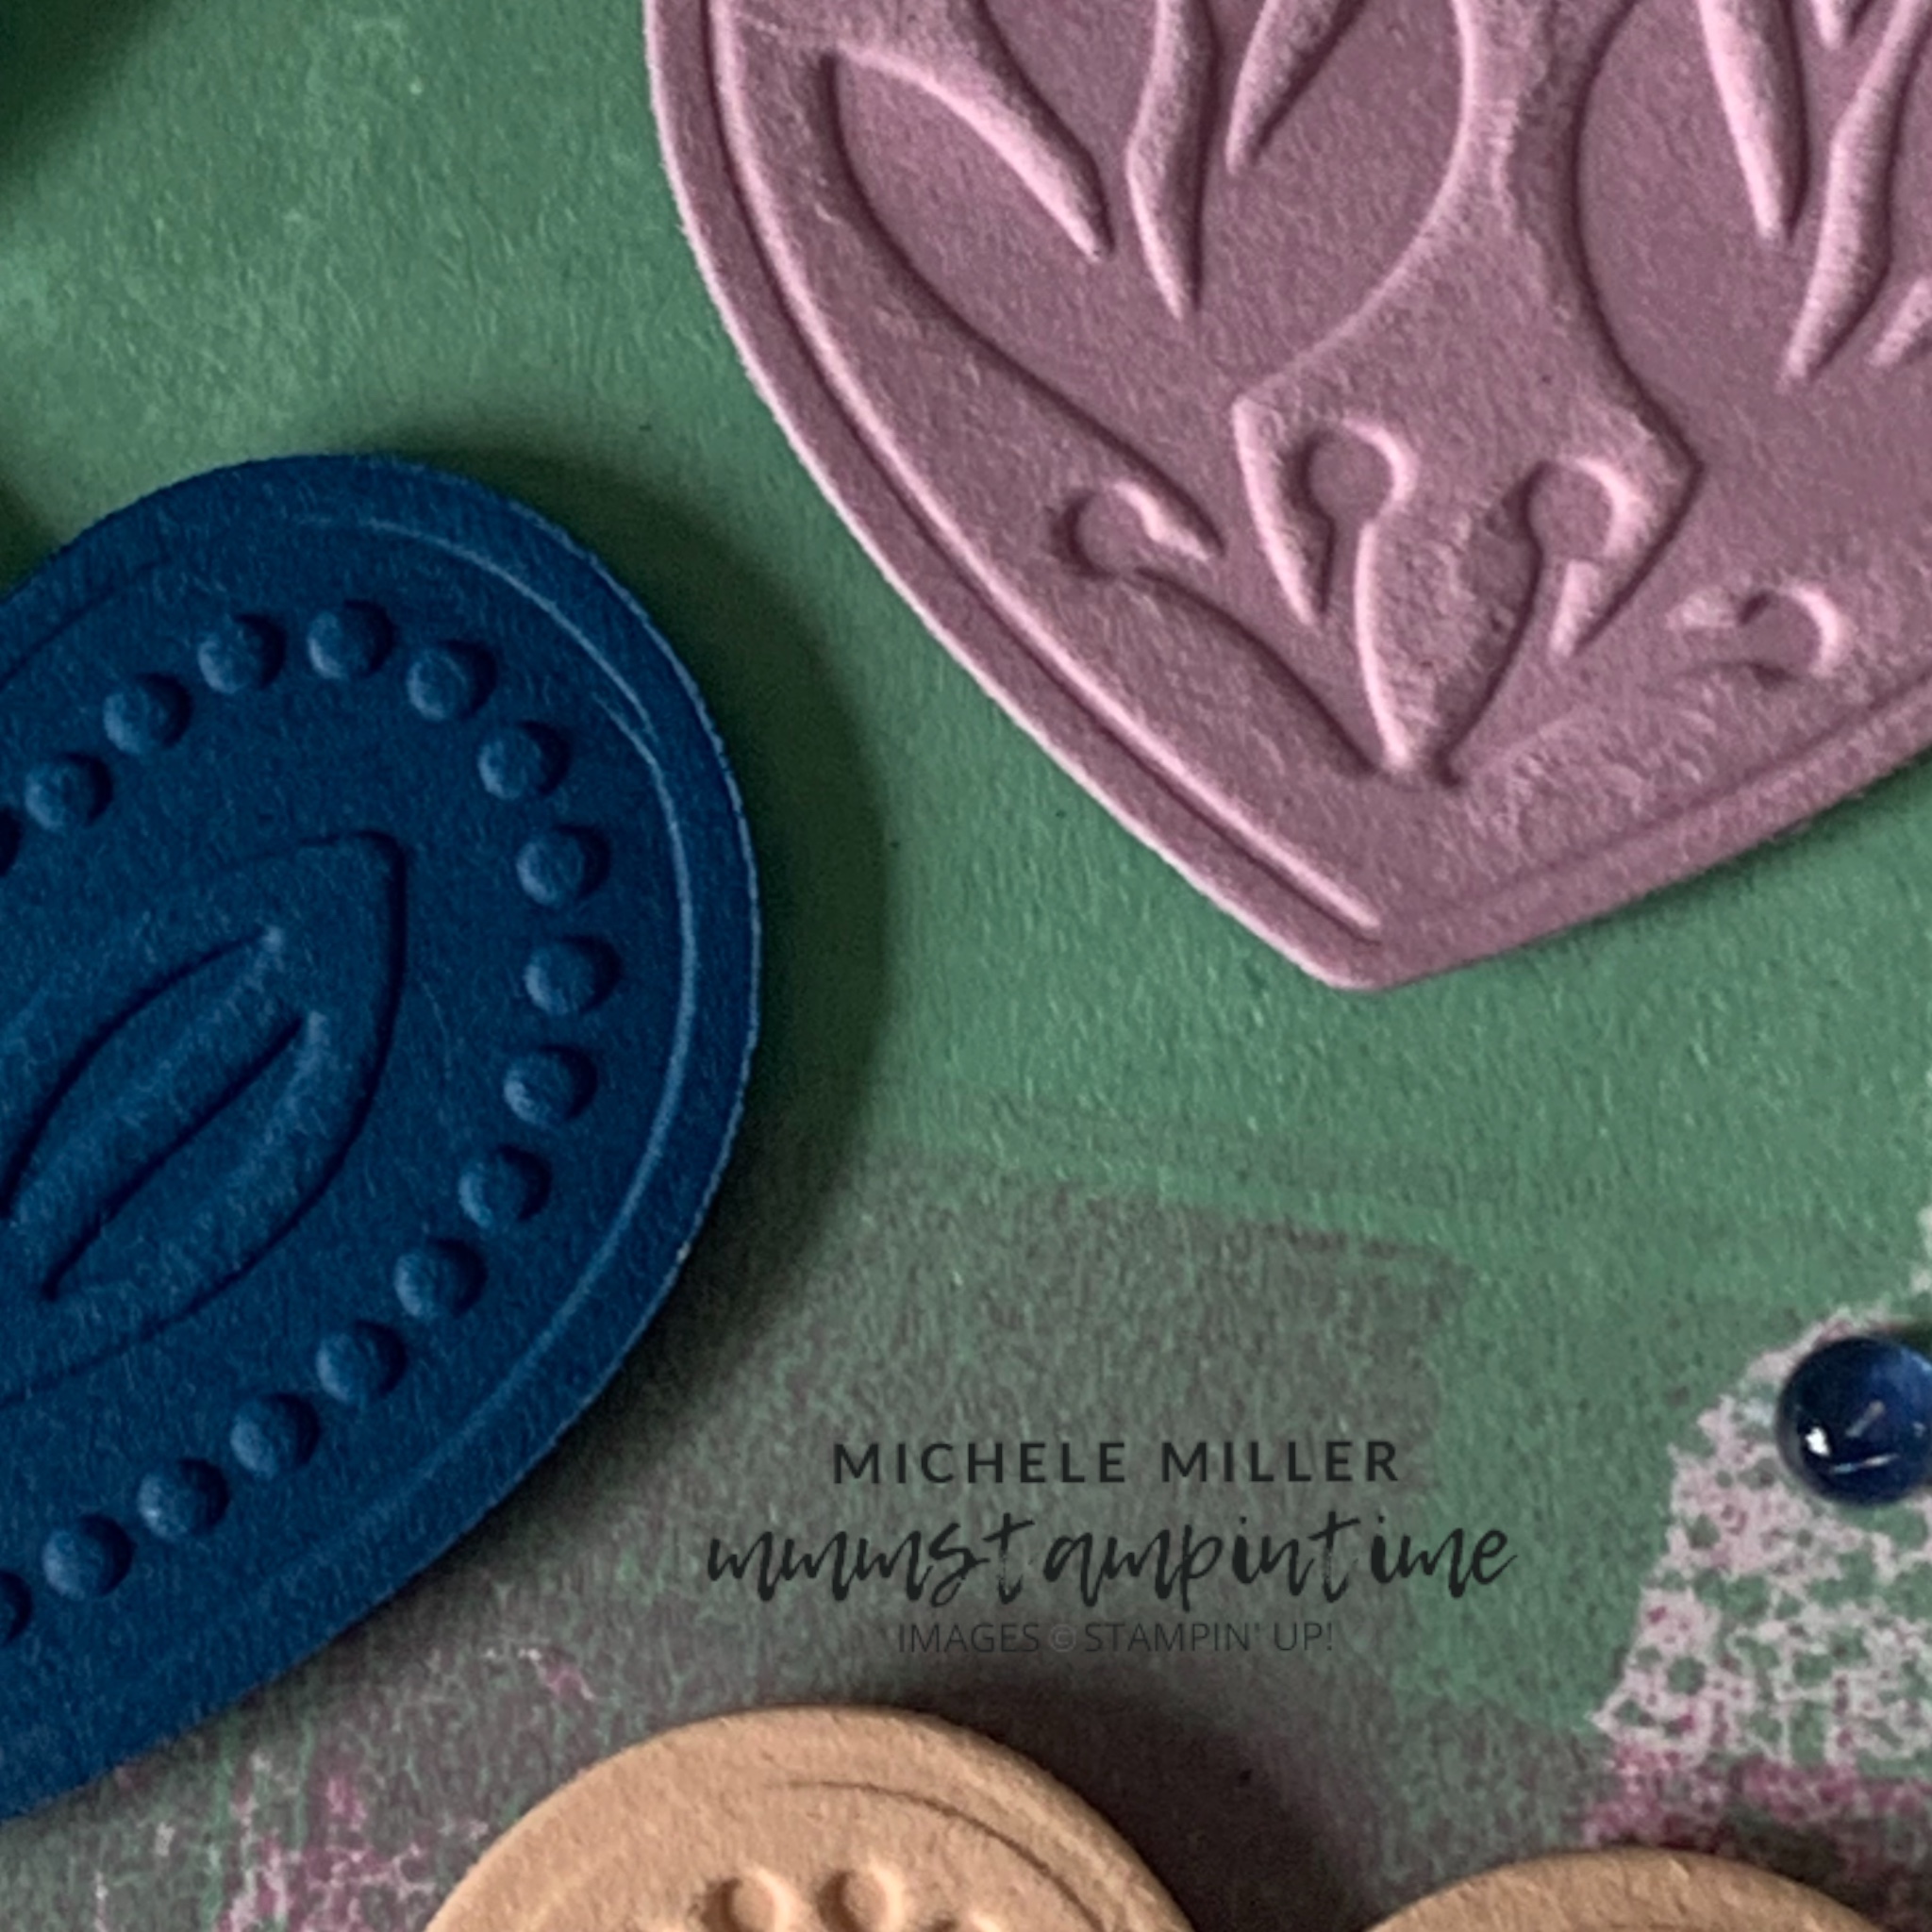
This week I am featuring the Adoring Hearts Bundle, Thoughtful Moments Hybrid Embossing Folder and Brayer. So I have used these products and the challenge colours to create this card.

I started by using the new Stampin’ Brayer to create the background panel, using three of the challenge colours. This is going to be one of my favourite techniques I think.

The next step was to adhere this to a Thick Basic White card base.

I used 6″ x 6″ pieces of card stock and embossed and die cut the hearts. These were then positioned on the front of the card and secured with Stampin’ Dimensionals.

The next step was to transfer Blueberry Bushl ink to the logo side of the embossing folder using the brayer. I carefully placed the coordinating die on the same side of the folder and positioned a 6″ x 6″ piece of Basic White card stock over the die.

After running the embossing folder throught the Stampin’ Cut & Emboss Machine, I had all of the greetings stamped and cut.

I used Mini Stampin’ Dimensionals to attach the ‘Love You’ greeting on the front of the card.

With 40 embossed and die cut hearts leftover, I chose one for the inside of the card and one for the envelope.

To finish the card I added some Blueberry Bushel gems, from the Tinsel Gems Four-Pack, to the card front.

Tomorrow is 3D Thursday and I have a cute little gift box to share with you.

Until then, happy stamping.

If you live in Australia, you can order any of the products I used to make this card by going to my online store. Just click on any of the images below.

Product List
Posted on Leave a comment

SATURDAY STAMPIN’ – TIME FOR SOME MORE SHARING

Today I have a card that I have created for this week’s Global Design Project and for Stampin’ Through the Catalogue.

Stampin’ Through the Catalogue is featuring the Bee Mine products and the Global Design Project is a layout challenge.

I played with the Bee Builder Punch to create a new shake for the greeting I chose to use.

I cut a strip of Basic White card stock that was 1 1/8″ wide. One end was inserted into the punch and then turned around a nd punched at the other end.

I was so pleased that this greeting panel turned out so well.

This is how the card came together.

I started by stamping the honeycomb image, in Daffodil Delight, onto the Daffodil Delight card base.

The checkered paper is one the designs in the Bee Mine Designer Series Paper. I wrapped some black twine, from the Baker’s Twine Essential Pack, around the DSP and tied a bow.

By adding Stampin’ Dimensionals to the back the DSP I was able to lift it up from the card front to achieve some height.

After punching out the white panel I stamped the greeting and secured it, above the twine, with dimensionals.

The bee was stamped, punched and assembled before adding it to the card.

The card insert and envelope also had the honeycomb image stamped.

The final touch was to add some large black Classic Matte Dots to the card.

This has been a fun week featuring the Bee Mine products from the new Mini Catalogue.

Starting on Monday, I will be introducing a new collection of products. I’ll also have some information about how you can earn coordinating paper from the Sale-a-bration Brochure.

Until then, happy stamping.

If you live in Australia, you can order any of the products I used to make this card by going to my online store. Just click on any of the images below.

Product List
Posted on Leave a comment

IT’S FRIDAY – TIME FOR FEATURES & A FUN FOLD CARD

Each Friday I will describing the features of the products I have focused on during the week.

The Bee My Valentine Stamp Set includes 24 photopolymer stamps – 17 images and 7 greetings.

There are four stamps that can be used for two step stamping – the bee body and the wings – and being photopolymer means it is so much easier to align the images when stamping. The remaining images can be used to enhance the bee image or to use to create floral elements.

The 7 greetings are designed with two different fonts. Some of these greetings have fun word play, such as ‘bee mine’. The great thing about these greetings is that they can be used for a range of occasions.

Some other features of this suite include the coordinating Bee Builder Punch (cut a strip of card stock to 1 3/8″ and you can feed it into the tail end of the bee body area of the punch, turn it around and create a ‘banner’ for greetings).

The Bee Mine Designer Series Paper 12 different designs and 12 sheets in total. these designs are also great for a variety of occasions.

And, as far as embellishments go, the Adhesive-backed Hearts & Flowers and Sweet Sorbet 1/4″ Bordered Ribbon are perfect for any project.

Finally, the Square Pillow Boxes are a new 3D stampable gift box. I haven’t featured them this week, but I will soon.

Now, for today’s project!

I actually made this card in the lead up to the OnStage @ Home event from a little while ago but it’s perfect to share here today.

This is my interpretation of a Bridge Fold Card.

The Thick Basic White card base measured 9 1/4″ x 4 1/2″. It was scored at 1 1/2″, 3″, 6 1/4″ and 7 3/4″.

I cut several panels of DSP to the card base panels – four measuring 1 3/8″ x 4 3/8″ and one measuring 3 1/8″ x 4 3/8″. If you take care when cutting the DSP the pattern will align perfectly across the card.

The ‘bridge’ piece measures 6 1/4″ x 1 1/4″ and is scored 1 1/2″ in from each side.

I stamped the honeycomb, using Tuxedo Black Memento ink, several times and fussy cut them all. They were then added to the ‘bridge’ piece with Multipurpose Glue and Stampin’ Dimensionals.

I stamped, punched and assembled three bees. Two were attached, with dimensionals, to the two side panels.

A length of white Baker’s Twine was threaded into the centre space of the card – I made a small hole on each side, threaded the twine through, secured it with adhesive and a small circle of cardstock.

The third bee was secured to the twine, so that it would ‘fly’ in the space.

The greeting was stamped and punched, using the Heartfelt Hexagon Punch, before being adhered behind the bridge panel.

I fussy cut some of the honey jars, from the DSP, and added them to the bridge panel using dimensionals. Some black Baker’s Twine was tied into bows and added to the jars.

Well, that is my first week of creations for 2024. I hope that you have liked what you have seen. Over the next few weeks, my posts will expand and evolve. If there is anything you would like to see, please let me know.

Until then, happy stamping.

If you live in Australia, you can order any of the products I used to make this card by going to my online store. Just click on any of the images below.

Product List
Product List