Posted on Leave a comment

THREE DIFFERENT CARDS

Today I want to share three cards using the early release Eden’s Garden Collection. As a demonstrator I have been able to pre-order it during October and customers can order it from November 2 until January 3.

The Stamp Set and Dies will continue in the January to June Mini Catalogue. The Designer Series Paper, Cotton Paper and Garden Gems will only be available during the early release promotion period.

I decided to use the Notecards and Envelopes for these three cards. All three cards have a same starting layout with extra elements added for the second and third cards.

The first card is an example of #simplestamping. It is perfect for beginner stampers and those who only have a few supplies. Simple stamping projects rely on stamps, ink and paper.

The image and sentiment have been stamped directly on the card front using Evening Evergreen and Soft Succulent ink. The image and sentiment are from the Eden’s Garden Stamp Set.

After stamping the small branch image on the card insert and envelope, I decided to sneak a few of the Garden Gems to the card as well.

The second card steps up the techniques and products used. It is ideal for someone who has been stamping more often and for longer and have a wider variety of tools and products on hand. Some describe this as a casual stamper.

The same stamp set and colours have been used. This card also incorporates Soft Succulent card, Ever Eden 12″x 12″ Specialty Designer Series Paper and Evening Evergreen Cotton Paper.

The trimmer and Mini Stampin’ Cut & Emboss Machine were used the cut the different paper layers. The layers were attached using both Multipurpose Glue and stampin’ Dimensionals.

The same sentiment was stamped onto a piece of Soft Succulent card this time and was trimmed down to a rectangle.

The leaf bouquet was stamped and fussy cut before being attached to the card front using dimensionals. I cut three small branches from Basic White card using the Eden Dies and ticked them behind the bouquet.

The small branch image was also stamped on the card insert and envelope. This card also has the Garden Gems added.

The third card follows the same process – adding more elements to the same card layout. This is more like the type of cards I make – lots of layers and elements. I find it challenging now to make ‘simple’ cards. I think it’s because I have been making cards and paper projects for a long time now and have lots of products and tools to use. This type of card maker is often referred to as an avid stamper.

I cut a layer of Gold Shimmer Vellum to attach to the card base. Then I used the Stitched Greenery Die to add this stitched effect to a piece of Evening Evergreeen card.

I used a strip of Ever Eden Specialty DSP and a strip of Gold Shimmer Vellum to add layers to the card front.

Before attaching the fussy cut bouquet I added some swirls of gold Simply Elegant Trim behind it and secured it with Tear & Tape. Then I die cut the small branches from a small scrap of the shimmer vellum.

For the sentiment I cut the banner piece first and, using my Stamparatus, I positioned the stamp and used the masking technique to stamp just the ‘dear friend’ part of the sentiment.

The small branch was stamped again on the inside of the card and the envelope. Then I added a few more of the Garden Gems to embellish the card.

Using the same starting layout and adding a few more elements and using a wider variety of tools and techniques, the three cards move from beginner to casual to avid. Which type of stamper do you think you are more like?

Unti lnext time, happy stamper.

If you live in Australia, you can order any of the products I used to make this card by going to my online store. Just click on any of the images below.

Because some of the products I have used to make this card are not yet available to customers, I am not able to show them at this time. As soon as product images go live, I will create this section.

Product List
Paper Snips
[103579]
$17.00
Posted on Leave a comment

LOVE, SANTA TAG KIT – MORE ALTERNATIVE PROJECTS

I had so much fun making the easel cards I shared with you yesterday. Today I have three more projects to show you – two cards and a gift bag/box.

These projects all started after I made the four Christmas gift tags designed for the Love Santa Tag Kit. I wanted to create alternative projects to show you what is possible.

The last card I shared yesterday was an easel card with Santa and a pile of gifts. I commented that I had trimmed the gift boxes from the top of the taxi tag. This is how I used the remaining taxi. The yellow taxis remind me of New York.

This Night of Navy gatefold card is a great background for the Christmas tree carrying yello taxi.

The tree has been fussy cut from a piece of Gingerbread & Peppermint 6″x 6″ Designer Series Paper. I placed the tree on top of the taxi then added the stamped panels and red strip.

The scalloped rectangles are cut using two of the Stitched So Sweetly Dies. These elements were layered together and attached the left half od the card front. TIP: If you use your bone folder and burnish the left hand fold very firmly that side will sit flat.

The gift box image was stamped on the card insert and envelope.

I thought the Red Rhinestone Basic Jewels was the perfect way to finish this card.

For this card I took a Basic White card base and teamed it with a panel of Polished Pink paper from the Whimsy &Wonder 12″x 12″ Specialty Designer Series Paper. Before attaching it to the card base I wrapped a length of the Basic White and Polished Pink Baker’s Twine around the DSP and tied a bow.

By adding Stampin’ Dimensionals I was able to lift the Christmas tree up adding height to the card.

The greeting is from the Tidings & Trimmings Stamp Set and was stamped using Polished Pink ink. I trimmed the stamped greeting down to this small rectangle.

A second greeting was stamped on the inside of the card and a gift box stamped on the envelope.

What is the last thing I usually comment on? You guessed it – I added some embellishments to the card to finish it off. These gems are supplied in the Love, Santa Tag Kit.

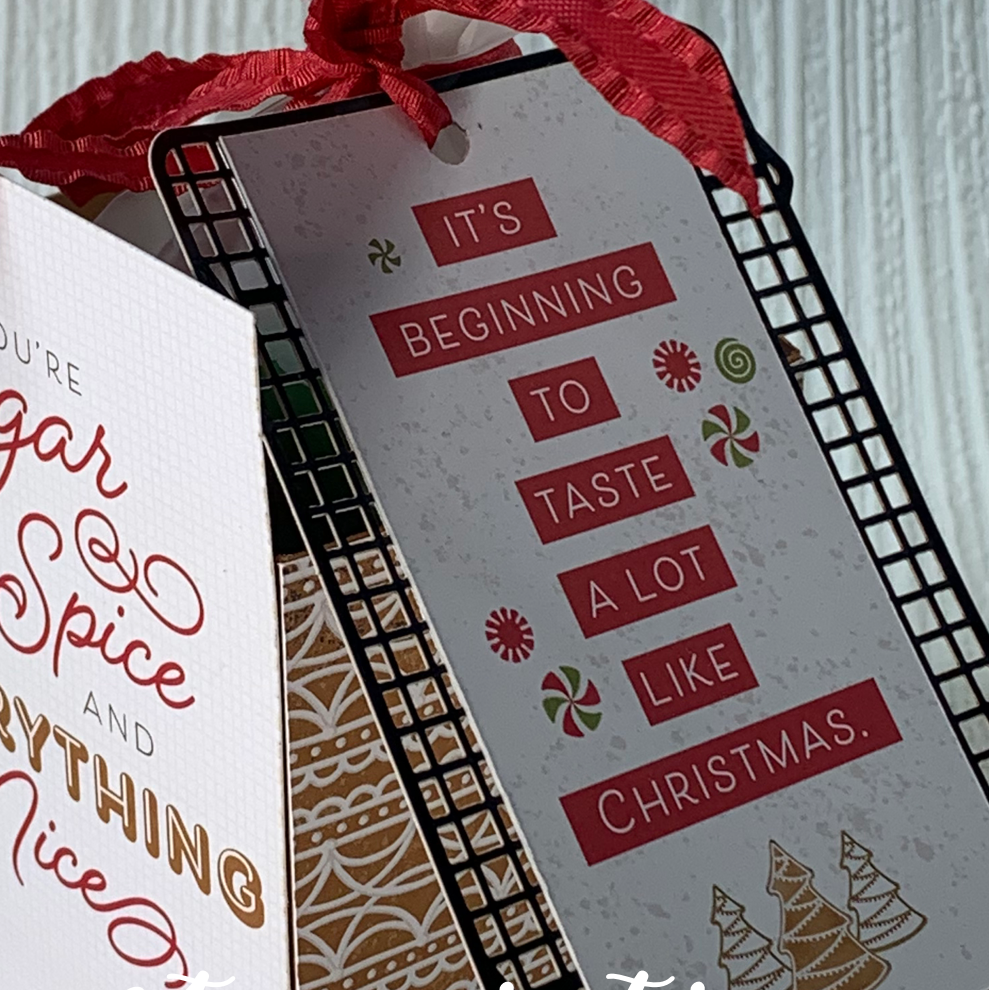
For this 3D project I used the last two tag shapes.

I created the Bumblebee box base to attach the two tag to each of the 3″ sides.

On this side I attached one of branches from the kit.

I stamped the greeting using the Love, Santa Stamp Set using the Night of Navy ink spot that is supplied in the kit, as well as Poppy Parade from my own Classic Stampin’ Pad collection. It was cut out using one the Tailor Made Tags Dies and tied it to gift box using a length of Bumble Gingham Ribbon.

With one Santa remaining it seemed a perfect way to finish off this Christmas gift box.

Another product that is available with the Tag Kit are the Love, Santa Treat Bags. There are four designs in this collection of food safe treat bags. I chose the one with the leaves that match this kit. When the bag is filled with Christmas treats it can also be tied using the same Bumblebee ribbon.

One tag kit – so many possibilities – tags, cards, gift bags/boxes and even scrapbooking is possible. You are only limited by your imagination.

Until next time, happy stamping.

If you live in Australia, you can order any of the products I used to make this card by going to my online store. Just click on any of the images below.

Product List
Paper Snips
[103579]
$17.00
Posted on Leave a comment

IT’S TIME TO MAKE SOME CHRISTMAS GIFT TAGS

I love the kits that Stampin’ Up! ® includes in its range of products. They are perfect if you don’t have lots of paper crafting supplies because everything you need is in the box (other than a pair of scissors). I also like them because they make great gifts to give to friends and family.

This kit – Love, Santa Tag Kit – has the supplies to make these 12 gift tags.

LOVE, SANTA TAG KIT (ENGLISH)

It would be lots of fun to have a couple of friends joins you for afternoon tea and make a set of four tags each.

LOVE, SANTA TAG KIT (ENGLISH)

I made one of each of the tags following the instructions that are included.

Then I decided that I would like to make some alternative projects using the remaining supplies. I hope these give you some ideas. I’ll share some today and the rest tomorrow.

Today’s projects are all easel cards and are perfect for displaying tag images.

For this first card I took a piece of Soft Suede card and embossed it with the Brick & Mortar 3D Embossing Folder. To lighten areas of the brickwork I swiped the Whisper White Craft Stampin’ Pad across the card.

I added Stampin’ Dimensionals to the back of the tree and popped it on the front panel. There are lots of coordinating gems in the kit so I was able to embellish the card.

The greeting is from the Tidings & Trimmings Stamp Set and I stamped it with Just Jade ink.

The gift box is such a cute image expecially stamped in Polished Pink. I tucked a short length of Polished Pink Open Weave Ribbon under the scalloped circle. By placing these layered circles up on Stampin’ Dimensionals this provides the anchor point to hold the easel card upright.

For this easel card I embossed a layer of Basic White card using the Merry Melody 3D Embossing Folder.

This Christmas greeting is from the Merriest Moments Stamp Set. It was stamped using the Night of Navy Ink Spot that was supplied in the kit. I cut the greeting using one of the Stitched So Sweetly Dies.

I used coordinating Holiday Rhinestone Basic Jewels to embellish the card.

This is the third easel card I made. I trimmed the gift boxes away from the top of the remaining taxi tags to add to this card so that Santa had some gifts to deliver.

I embossed a piece of Just Jade card using the snowflakes from the pair of Wintry 3D Embossing Folders. A Basic White piece of card was also embossed.

The Holly Jolly Wishes Stamp Set was where I found the greeting for this card. After stamping it with Bumblebee ink I cut the layers using the Stitched So Sweetly Dies.

The final touch was to add some of the Holiday Rhinestone Basic Jewels for a biy of Christmas bling.

Tomorrow I wi;; have two more cards and a gift box to share with you.

Until then, happy stamping.

If you live in Australia, you can order any of the products I used to make this card by going to my online store. Just click on any of the images below.

Product List
Whisper White Craft Stampin' Pad
Whisper White Craft Stampin’ Pad
[101731]
$14.00
Paper Snips
[103579]
$17.00