Posted on Leave a comment

TODAY I HAVE THE FIRST OF TWO FUN FOLD CARDS FOR YOU THIS WEEK

It is always fun to find a new Fun Fold Card to make.

Today I have an Interlocking Card.

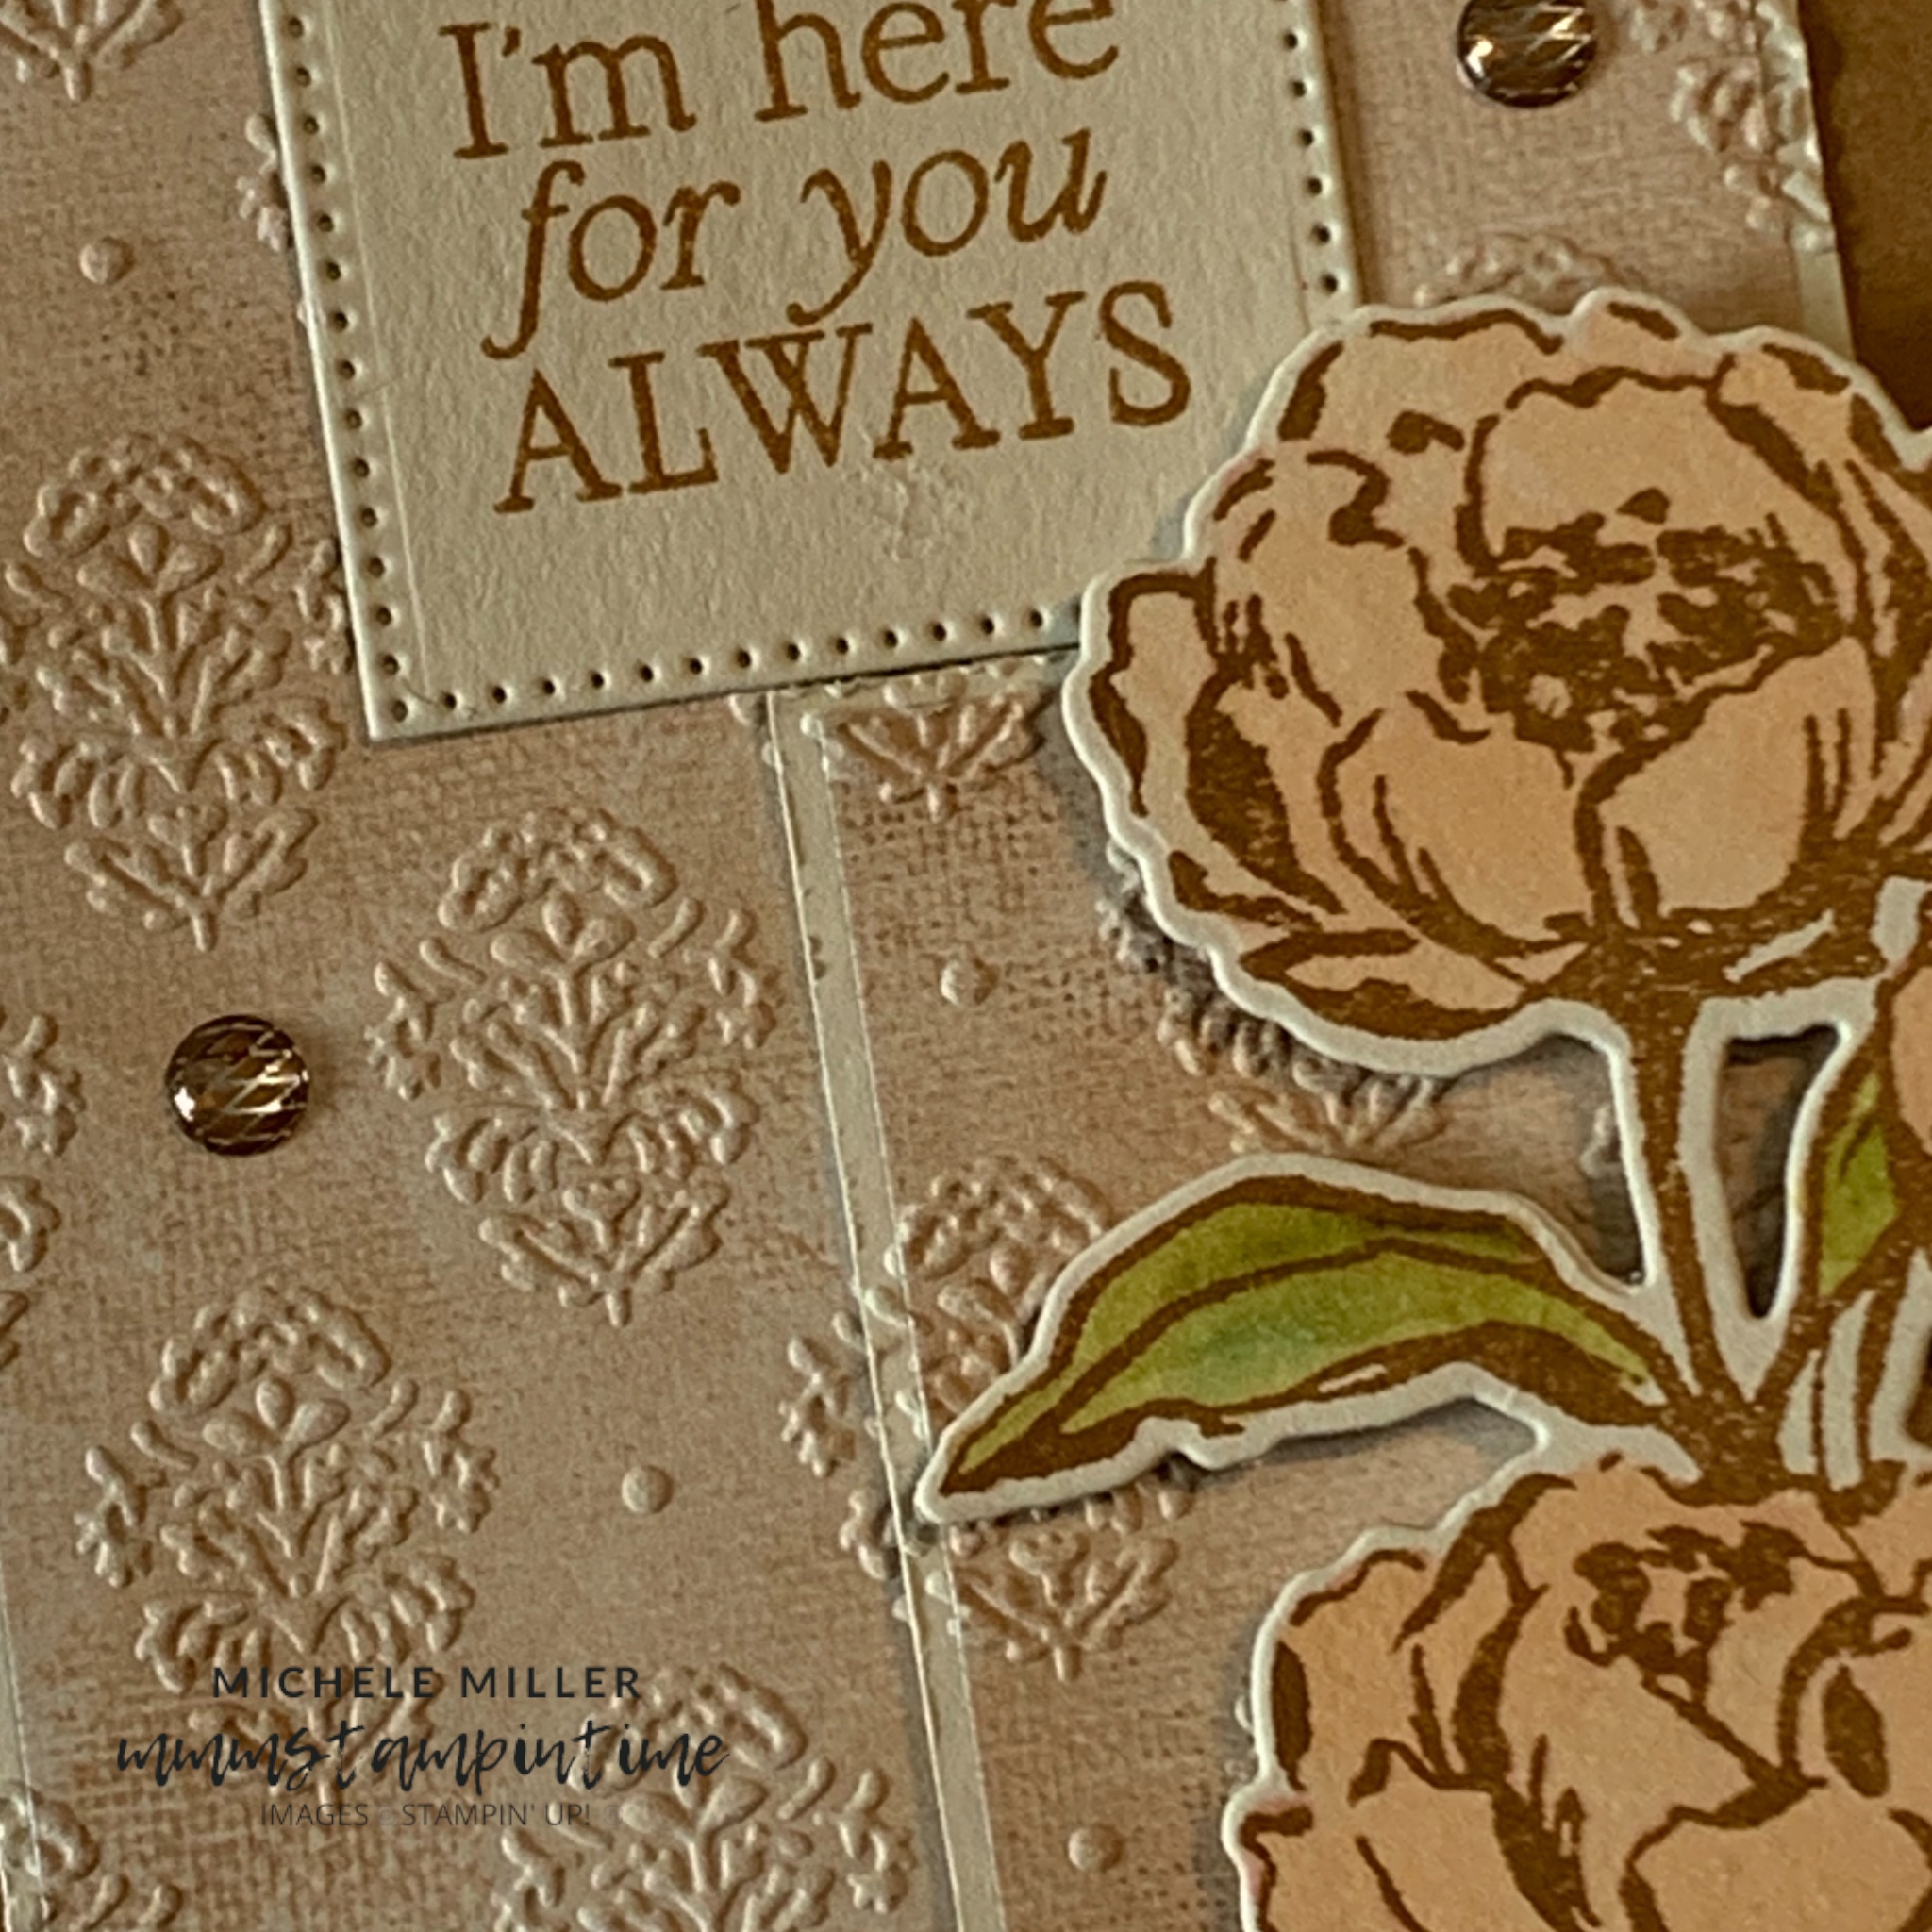
The card base measures 10 3/4″x 5 3/4″ and is scored at 1 5/8″, 3 1/4″, 7 1/2″ and 9 1/8″.

The two panels, that create the interlocking mechanism, measure 3 7/8″x 2 7/8″ and 3 3/8″x 2 3/8″. The smaller DSP panels measure # 3/4″x 2 3/4″ and 3 1/4″x 2 1/4″.

After these panels were adhered together they were then embossed using the Damask Designs Embossing Folder.

Each of the embossed panels were then adhered to the sides of the card.

I stamped the peony image in Pecan Pie onto Basic Beige card. The flower was then coloured with Petal Pink and Old Olive Stampin’ Blends. After die cutting it I positioned on the card front using Stampin’ Dimensionals.

The Beautiful Motifs greeting was stamped and cut using one of the Stylish Shapes Dies.

The card insert and back of the envelope had strips of DSP added to them.

Some Pecan Pie Ribboned Dots were then added to the card front.

Join me again tomorrow for another fun fold card.

Until then. happy stamping and scrapbooking.

If you live in Australia, you can order any of the products I used to make this card by going to my online store. As you read through this post, you will see the products I used for this project. The new items are available from May 5th.

Posted on Leave a comment

BEING INSPIRED BY THE COLOUR InkSPIRATION CHALLENGE

Welcome to COLOUR InkSPIRATION CHALLENGE #184.

Today’s picture which has inspired our colour palette was chosen by Colour INKspiration Crew Member, Alisa Tilsner.

As well as the chosen colour combination for #CI184 Daffodil Delight, Poppy Parade, Azure Afternoon. Garden Green and Mossy Meadow, you may also add Basic White, Very Vanilla, Crumb Cake, Basic Beige, Basic Black and metallics to your project. We also allow ‘Ivory’, ‘Bronze’ and ‘Natural Tones’ in the Stampin’ Blends. If you don’t have the colours in our palette, feel free to use the closest Stampin’ Up! (or any other brand) substitute – Boho Blue instead of Balmy Blue for example.

To get your creative ideas flowing, make sure you check out the Crew’s Project in the CI#183 Album – https://www.facebook.com/media/set/?set=oa.1003303625064294&type=3

Challenge Guidelines:

· Create a NEW project made specifically for this challenge.

· Use all of the challenge colours (or close substitutions) unless stated.

· Upload only ONE picture per entry straight to the discussion wall and NOT in an album.

We hope you can participate this round and look forward to seeing a variety of projects using the challenge colours. Happy stamping!

Picture credit – https://l.facebook.com/l.php?u=https%3A%2F%2Fwww.canva.com%2Fai-image-generator%2F%3Ffbclid%3DIwZXh0bgNhZW0CMTAAAR3JCbVYv5fioG3qjZTw-YZ9XU4mOT3PJEsn7zwEN1cuI6ZLjBzCWgUVCNI_aem_DlNwtSmK7iFDOrAFEPMUOQ&h=AT0AdvgpnrTkb0erzUKS_iYMjZux1AdfJ7g44HWMS2oWRUduRg2NLoRGyHtLlfXad_CnuNvM0oknGNh_9HRpPTdBQ1rrvI1H4bmSCPordTIPLPTQd3Ue1LaM4hlmC7e6xT3evV3tmpbKQCf0-Yo7A_ktsqKKG7Yy&__tn__=-UK

My youngest daughter recently told me that shw and a friend were teaching themselves to crochet.

For me, that brought back memories of Year 8 Home Economics and learning the same skill. I was totally useless at knitting but crochet was a better option.

I knew that I wanted to use the Cute Crochet 3D Embossing Folder to make a card for her.

I used the CI#184 Colour INKspiration colours for this project – Azure Afternoon, Daffodil Delight, Garden Green, Mossy Meadow and Poppy Parade. I cut each of these colours into 1.5″x 1.5″ squares and adhered them to a piece of Basic White Card.

Then I ran this card throught the Stampin’ Cut & Emboss Machine using the Cute Crochet 3D Embossing Folder.

The greeting was created using the Mini Alphabet Die and Azure Afternoon card with Adhesive Sheet attached.

I used the Basic White Baker’s Twine and a small crochet hook to create a length of chain to tie a bow.

Finally, I added an individual embossed square to the card insert and envelope back.

If you live in Australia, you can order any of the products I used to make this card by going to my online store. Just click on any of the images below.

Product List
Paper Snips
[103579]
$21.00
Posted on Leave a comment

I AM REALLY ENJOYING CREATING MEMORY KEEPING PROJECTS EACH MONDAY

As I mentioned last week, returning to scrapbooking has been a long overdue papercrafting joy.

This week I have chosen one of the amazing new product suites that will be found in the forthcoming 2025-2026 Annual Catalogue. So welcome to a week long sneak peek!

The Beautiful Gallery Suite Collection is made up of two stamp sets and coordinating dies packs. There is also a gorgeous 6″x 6″ Designer Series Paper pack called Beautiful Gallery with 48 pages – 4 each of 12 double-sided designs. The collection also has a Damask Designs Embossing Folder, Pressed Flower Motifs embellishments and a roll of Basic Beige 3/8″ (1cm) Classic Ribbon.

For my scrapbooking page I used some of the DSP and the the Beautiful Motifs Dies from the soon to be available Suite Collection.

There are five dies in the pack. The three on the right only partially cut cardstock while the other two cut complete floral/foliage shapes.

When the three dies that only partially cut card they can reveal an different coloured card underneath.

For my scrapbooking page, I used the corner fleur de lis inspired die to create photo and journaling corners.

I used a Pretty Peacock 12″x 12″ sheet for the scrapbooking page and then added two of the damask inspired DSP sheets.

The Beautiful Motifs Stamp Set has a stunning damask image that I stamped, in Basic Gray, directly onto the page.

Then I cut and die cut the photo and journaling panels using the corner die. The die cut photo panel then had a slightly larger Basic Gray card panel adhered behind it.

I have added a 6″x 4″ piece of Basic White card to show you where the photo could be positioned.

I haven’t added a title for the page yet because I have yet to find the perfect photo for this page. Then, I will add some journaling to ensure the memory survives.

Tomorrow I have a card to share with you.

Until then, happy stamping and scrapbooking.

If you live in Australia, you can order any of the products I used to make this card by going to my online store. As you read through this post, you will see the products I used for this project. The new items are available from May 5th.