Posted on Leave a comment

GLOBAL DESIGN PROJECT #310

Hello and thank you for popping by.

It is Tuesday and time for this week’s Global Design Project card that I have made for the challenge.

The theme this week is a sketch challenge.

Although the sketch has a floral guide, I decided to make a masculine birthday card featuring the Whiskey Business Stamp Set. This is because I am running low of cards for men in my stash.

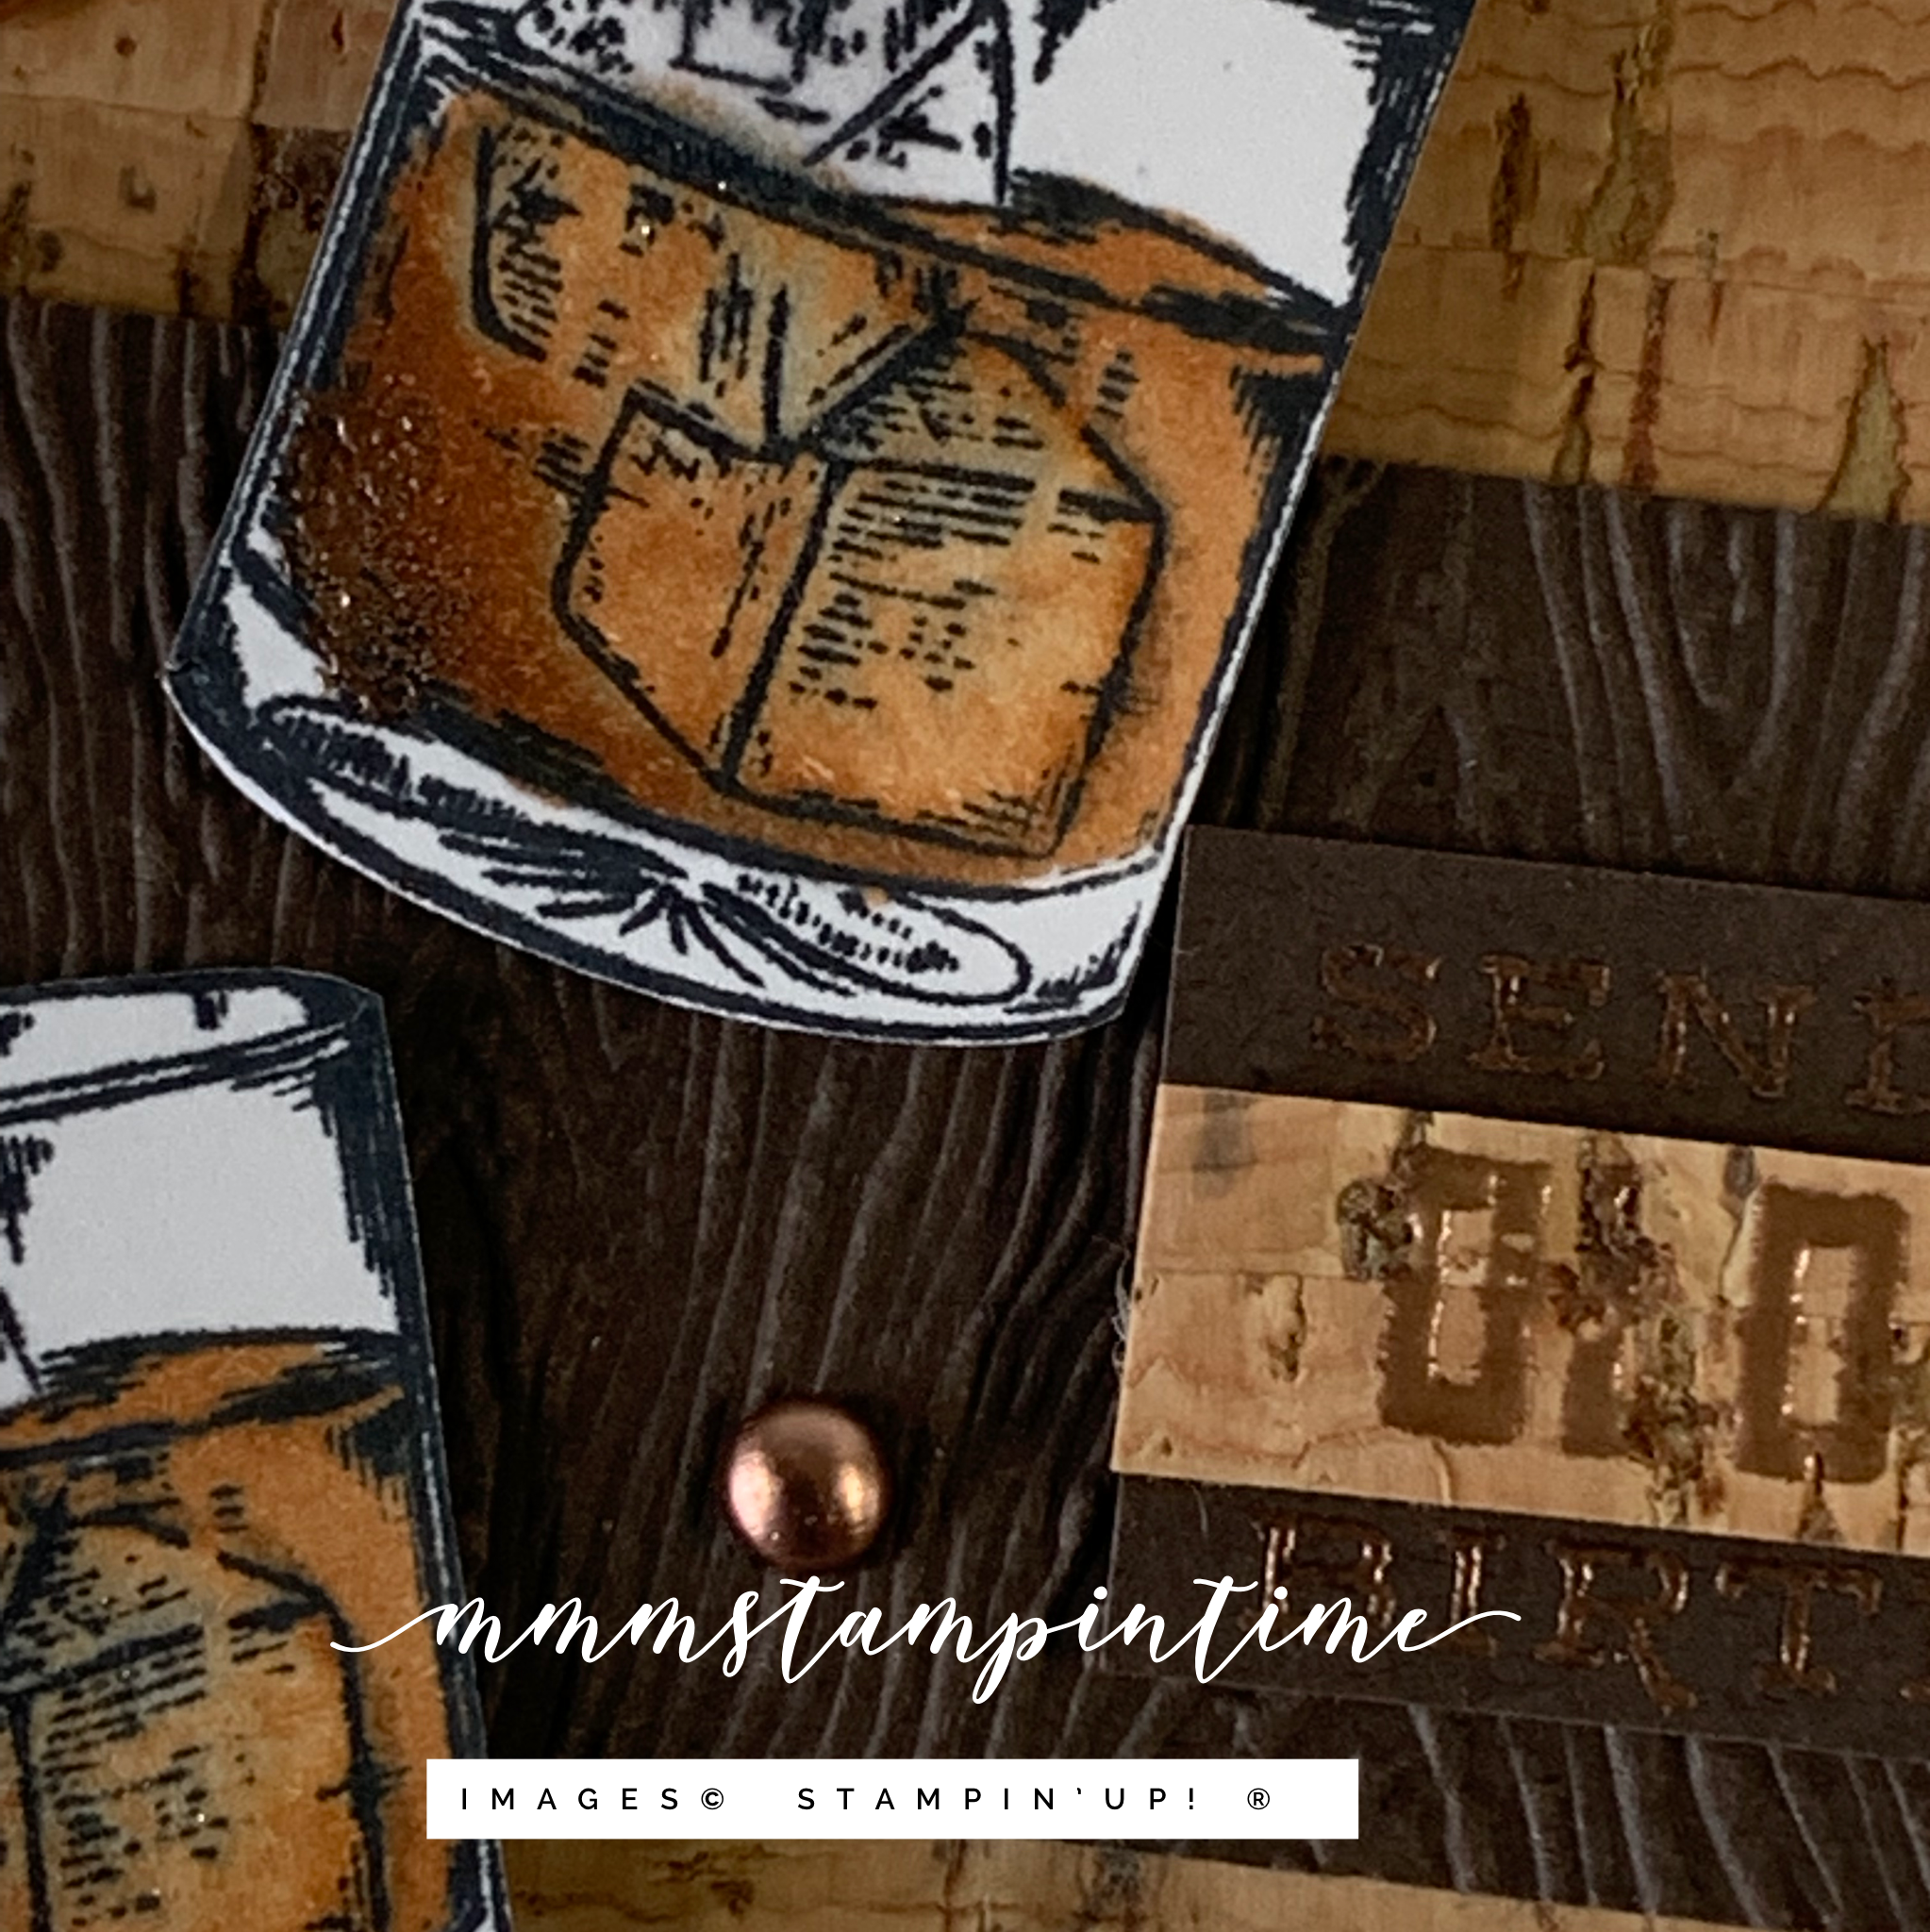
I started by adhering a panel of the Cork 12″x 12″ Specialty Paper to an Early Espresso card base.

Using the Timber 3D Embossing Folder I added texture to a 1-1/4″ strip of Early Espresso card. Stampin’ Dimensionals were added to the back of the embossed strip so that it would sit up off the cork layer.

The decanter and glasses were stamped in Memento Jet Black ink and coloured with the Cinnamon Cider Stampin’ Blends. I used the Colour Lifter Stampin’ Blend to lighten the colour of the ice cubes in the glass.

I brushed some Versamark onto the left hand corners of the glasses and the right hand corner of the decanter to add some Copper Stampin’ Emboss Powder to heat emboss. These fussy cut elements were then popped up on the card front using lots of Stampin’ Dimensionals.

I stamped the birthday greeting using Versamark and the copper embossing powder onto a piece of Early Espresso card and a piece of cork specialty paper. After they were heat embossed, I trimmed the pieces down as you can see.

I stamped the glass on the card insert and envelope. The glass on the insert was also coloured using the Blends. The final addition to the card were some Brushed Metallic Dots.

I thought that I had a spare packet of the Brushed Metallic Dots on hand to make this photo look better – oops, no. It has just been added to my shopping list. The Cork Specialty Paper also needs to be added to this list because I just love its texture and authentic appearance.

Until next time, happy stamping.

If you live in Australia, you can order any of the products I used to make this card by going to my online store. Just click on any of the images below.

Product List
Heat Tool
[129056]
$50.00
Paper Snips
[103579]
$17.00
Posted on Leave a comment

A CANDY CANE KIND OF CHRISTMAS

Hello and welcome to my latest project share. Thanks for popping by.

Today I wanted to share a card I made using the Candy Canes Stamp Set. It is an awesome background stamp with so many cute candy canes flowing in all directions.

I used my Stamparatus to stamp the image in both Real Red and Shaded Spruce. This meant I could achieve a well inked image in both colours. Once the images were stamped I decided to cut Christmas trees.

After I cut the tress, using the Christmas Tree Dies, I also cut the ‘tinsel trims’ and added them to the front of the trees using Adhesive Sheets.

Before I placed these on the front of the card, I used the Evergreen Forest 3D Embossing Folder to add texture to this base layer. The two green candy cane trees were adhered directly on the embossed layer and the red candy cane tree was popped up using Stampin’ Dimensionals.

The Christmas greeting, from the Evergreen Elegance Stamp Set, was stamped on a small piece of Basic White card and it was trimmed down before I added Stampin’ Dimensionals to pop it up.

I stamped the tree on the card insert and envelope. Then I added lots of lovely Holiday Rhinestone Basic Jewels for added Christmas cheer.

I still have more tree dies to play with and have some ideas brewing in my mind. What do you think of my candy cane trees?

Until next time, happy stamping.

If you live in Australia, you can order any of the products I used to make this card by going to my online store. Just click on any of the images below.

Product List
Paper Snips
[103579]
$17.00
Posted on Leave a comment

BE COOL THIS CHRISTMAS

Hello! Thanks for popping by. If this is your first visit please leave me a comment to say where you’re from.

Today I have a very cute shaker card to share with you.

I started by cutting the space for the Cloche Shaker Dome from a piece of Penguin Playmates 12″x 12″ Designer Series Paper. The die is from the Cloche Dies set. Then I wrapped and tied the lengths of Fresh Freesia and Soft Succulent Open Weave Ribbon.

I positioned this DSP layer over a piece of Basic White card and traced the shape of the cloche die cut space. Using a small piece of the spotted DSP I cut a dome shape and adhered it over the traced area. Then I stamped the hilly line from the Penguin Place Stamp Set, fussy cut along the stamped slope and glued it in place. I used Evening Evergreen to stamp the tree.

The Penguin Builder Punch was used to punch out the Fresh Freesia penguin. I used some of the Snowy White Velvet Sheet to punch out the peguin’s central area. The eyes were stamped using Jet Black StazOn, the scarf in Soft Succulent and the feet were punched from Misty Moonlight card.

The shaker dome was then attached to the DSP card front layer. Then I carefully placed some Subtle Shimmer Sequins in the centre of the dome area and peeled the backing from the dome and added Mutlipurpose Glue across the back to adhere these layers to the card base.

I stamped the sentiment several times before trimming then down into the smaller segments. They were popped up onto long, thin strips of Stampin’ Dimensionals cut from the edge of the sheet. It was fun to create a repeat of the sentiment – BE COOL – BE COOL . BE CHILL – BE CHILL . BE MERRY – BE COOL.

The same sentiment was stamped on the card insert and envelope. And, for the final tounch, I added some Fresh Freesia In Colour Gems to the card front.

These are most of the products I used for this project.

So, what do you think of my penguin shaker card? It was so much fun to make.

Until next time, happy stamping.

If you live in Australia, you can order any of the products I used to make this card by going to my online store. Just click on any of the images below.

Product List
Cloche Dies
[156386]
$50.00
Paper Snips
[103579]
$17.00