In recent years, I have seen and heard card makers and crafters described and categorised in many different ways.
For me, I don’t think it is about asking you “what type of card maker are you?” but “what type of card or project would you like to make?”.
Whether someone has never made a card before or they have made hundreds, they may want to make a simple card or project. Likewise, they might want to make a project that has all the bells and whistles.
This is why I prefer to describe the cards and projects I offer as “#simplestamping” or “basic”; “detailed” and “intricate/complex”. For each of these project categories I organise and guide crafters through the steps and techniques to achieve a successful project. For new cratfers this will involve more direct one-on-one instruction and for more experienced crafters this will involve guidance and support.
While I know my crafters are beginners, experienced or very experienced … have no, a few, lots or a craft room full of products … I like to offer them a “basic”, “detailed” or “intricate/complex” crafting experience.
These are three cards I created to demonstrate this. I chose the Simply Elegant Suite for these projects.
This is the “beginner” or “#simplestamping” card.

This card has a Very Vanilla card base with a piece of Simply Elegant 12″x 12″ Specialty Designer Series Paper added as a feature layer.
The sentiment, from the Elegantly Said Stamp Set, was stamped using Basic Gray ink onto a piece of Very Vanilla cardstock. It was trimmed back to a 1″ width and then had the banner end cut using the Banner Pick a Punch. This Very Vanilla strip was then attached to a piece of Basic Gray cardstock and the banner end was extended and cut using Paper Snips.
The sentiment layers had Stampin’ Dimensionals added to achieve added height to the card.

A length of Very Vanilla Baker’s Twine, from the Baker’s Twine Essentials Pack, was tied into a bow and added to the card front using a Mini Glue Dot.
A strip of the Designer Series Paper was adhered to the front of the envelope and inside the card.

The final touch was to add some silver Metallic Pearls to the card.
The detailed card has more design features.

The layout is similar but has some added features. The card base and DSP base layer are the same as the first card.
For this card, there are three more features – an additional Designer Series Paper panel and a die cut cardstock layer. The Very Vanilla layer was cut using one of the Scalloped Contours Dies.
The birthday greeting was stamped directly onto the die cut piece of Very Vanilla cardstock, just as it was for the first card.
For this card the twine was wrapped around the top of the punched shape and then tied into a bow.
Inside the card and on the front of the envelope are the same for the second card.

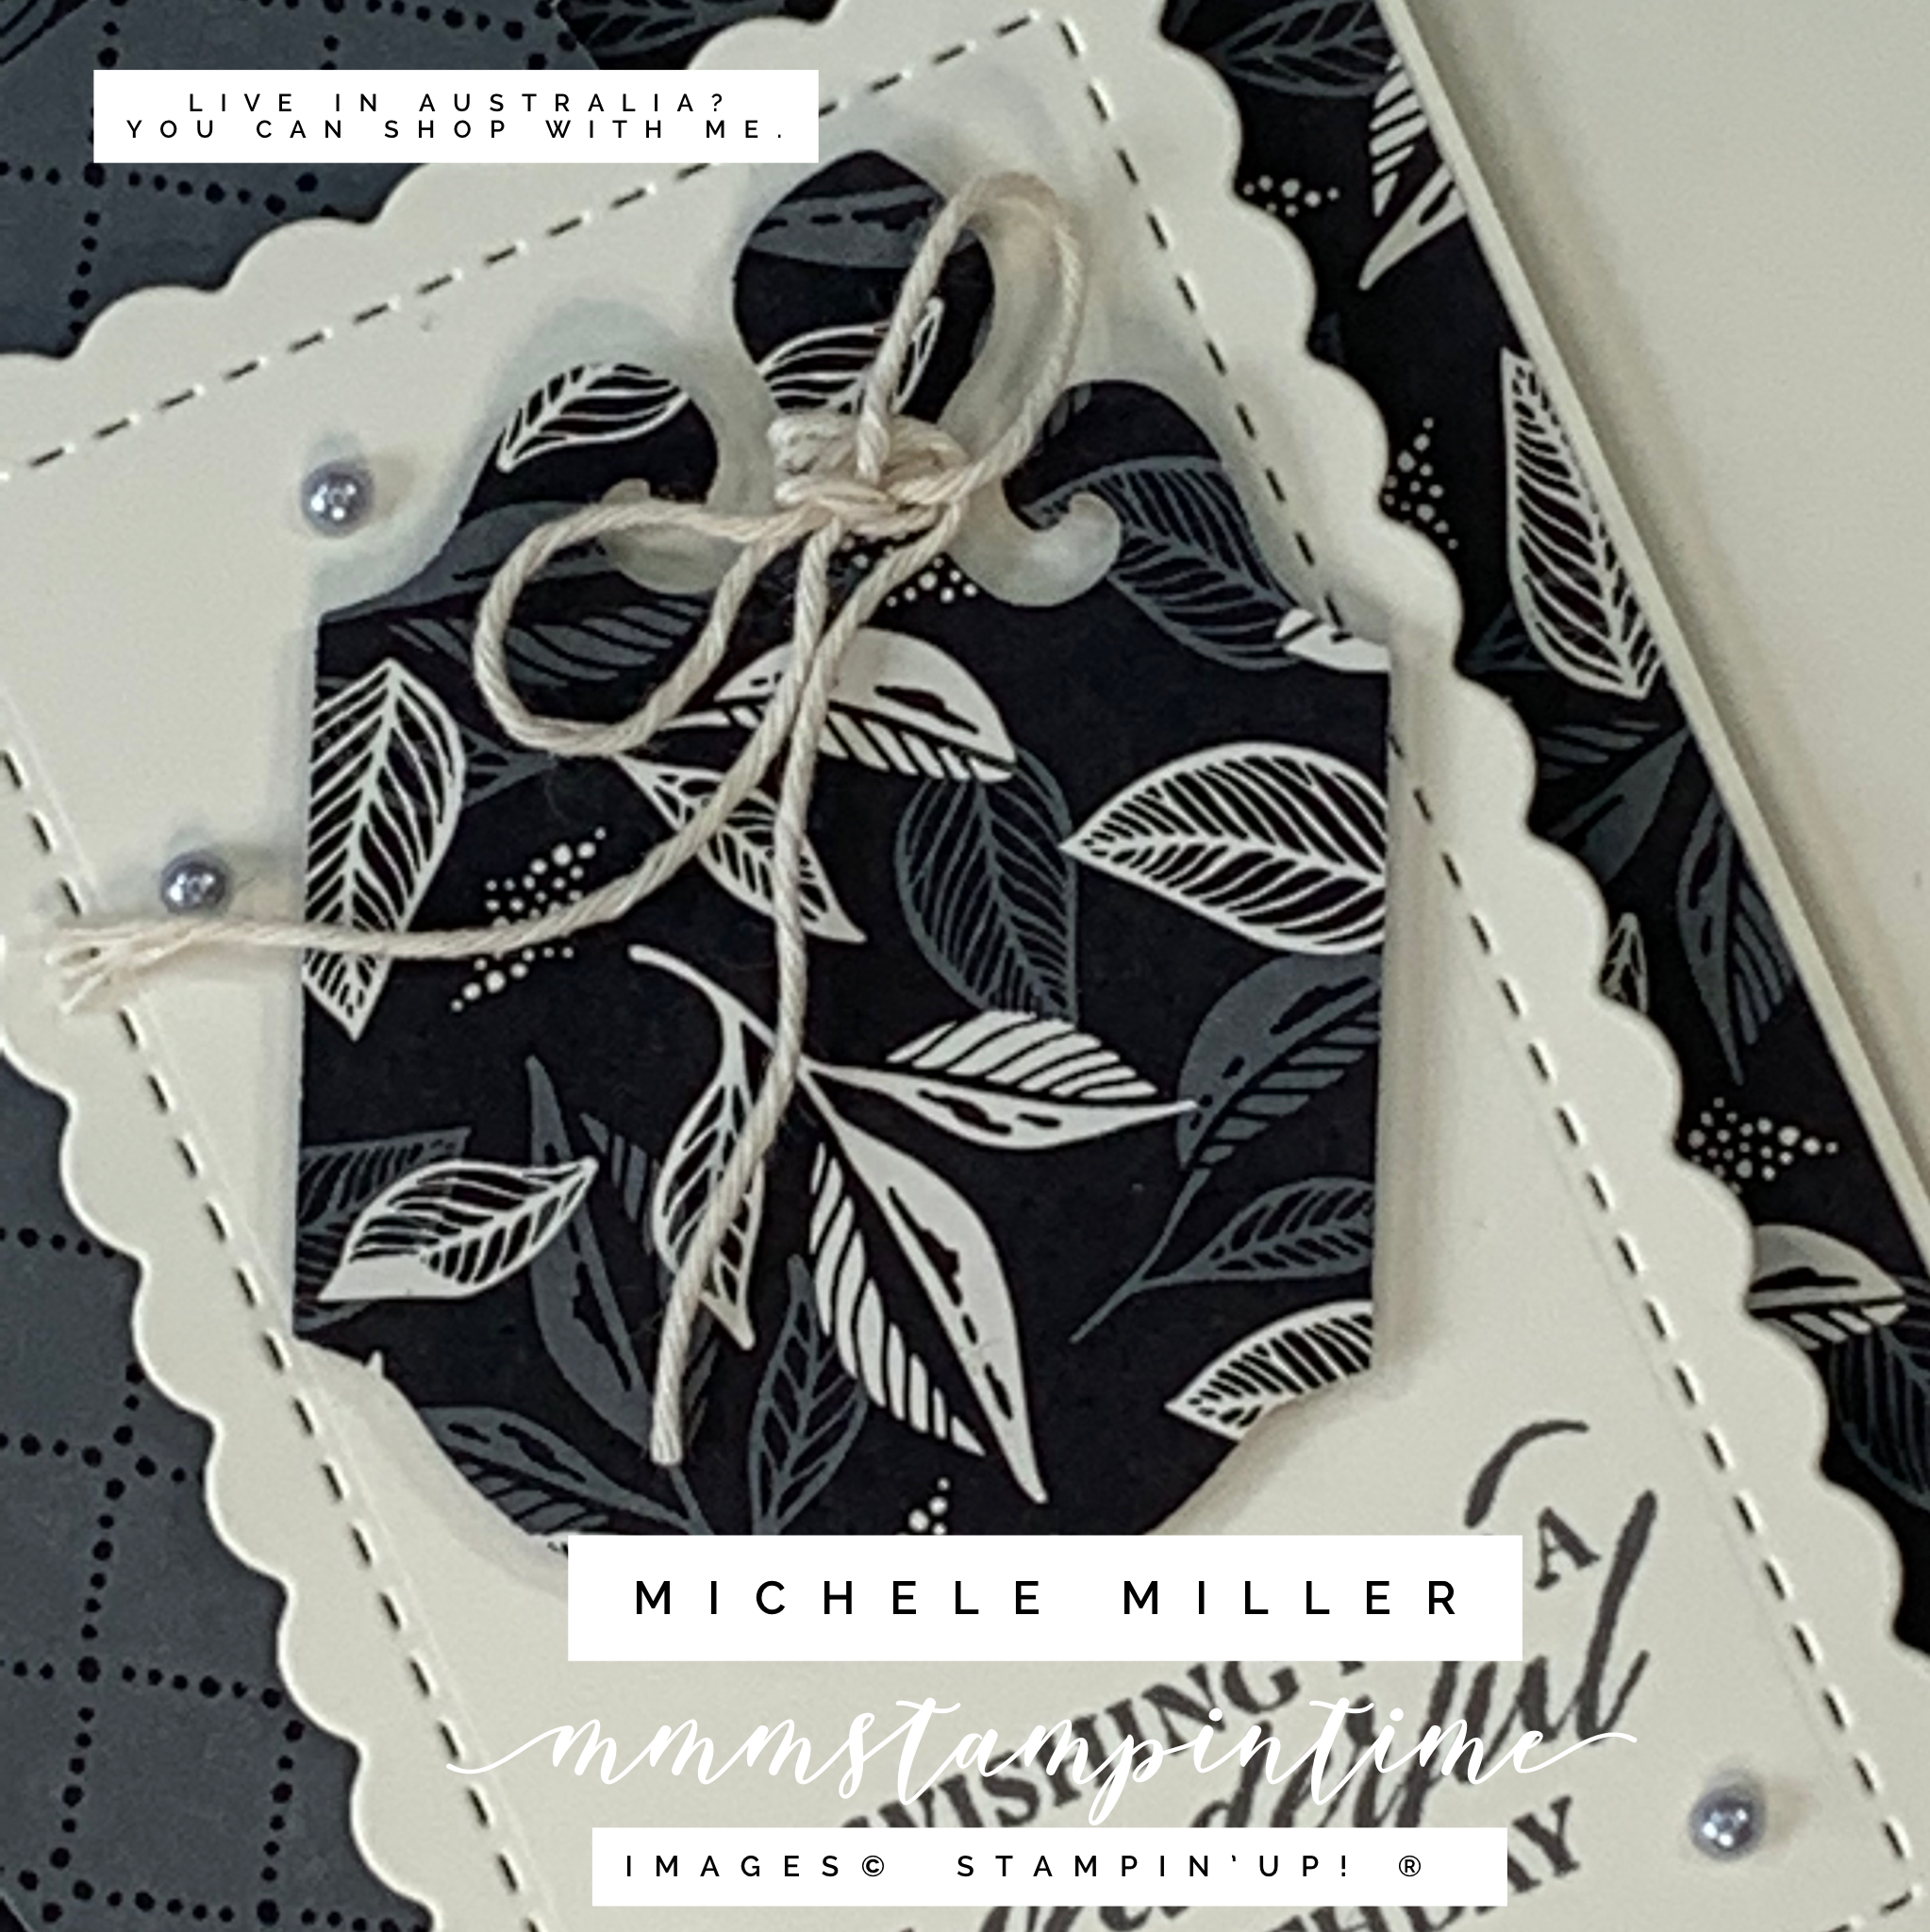
The third, and final card, takes the basic layout up another notch. The second, smaller piece of DSP was die cut this time.
The Very Vanilla Scalloped Contour Dies cut layer was embossed using one of the Meadow Moments Embossing Folders.
The birthday greeting was stamped onto Basic Gray cardstock and was then cut using one of the Stitched Rectangle Dies.
Some silver Simply Elegant Trim and Very Vanilla Baker’s Twine from the Essentials Pack was looped and secured behind the greeting panel. Then I added some Stampin’ Dimensionals to pop it up on the card front.
After adding some silver Metallic Pearls, I used my Clear Wink of Stella to pick up some Basic Gray ink and then coloured three of the floating leaves.

It has been an interesting project to make three cards using the same essential layout and products to create “#simplestamping” or “basic”; “detailed” and “intricate/complex” designs.
Which type of designs do you prefer to make? What would you like to see more of?
Until next time, happu stamping.

If you live in Australia, you can order any of the products I used to make this card by going to my online store. Just click on any of the images below.

") |  |  |  | |
 |  |  |  | |
 |  |  |  |  |
 |  |  |  |  |
 |  |  |
")
 Specialty Designer Series Paper")


 Shimmer Vellum")
 Shimmer Ribbon")


")


 Glittered Organdy Ribbon")


