Posted on Leave a comment

ANOTHER GLOBAL DESIGN PROJECT COLOUR CHALLENGE

This week’s challenge is #GPD317 and it is a colour challenge. Of all the GDP challenge categories, the colour challenge is definitely my favourite.

I love this colour combination! What do you think?

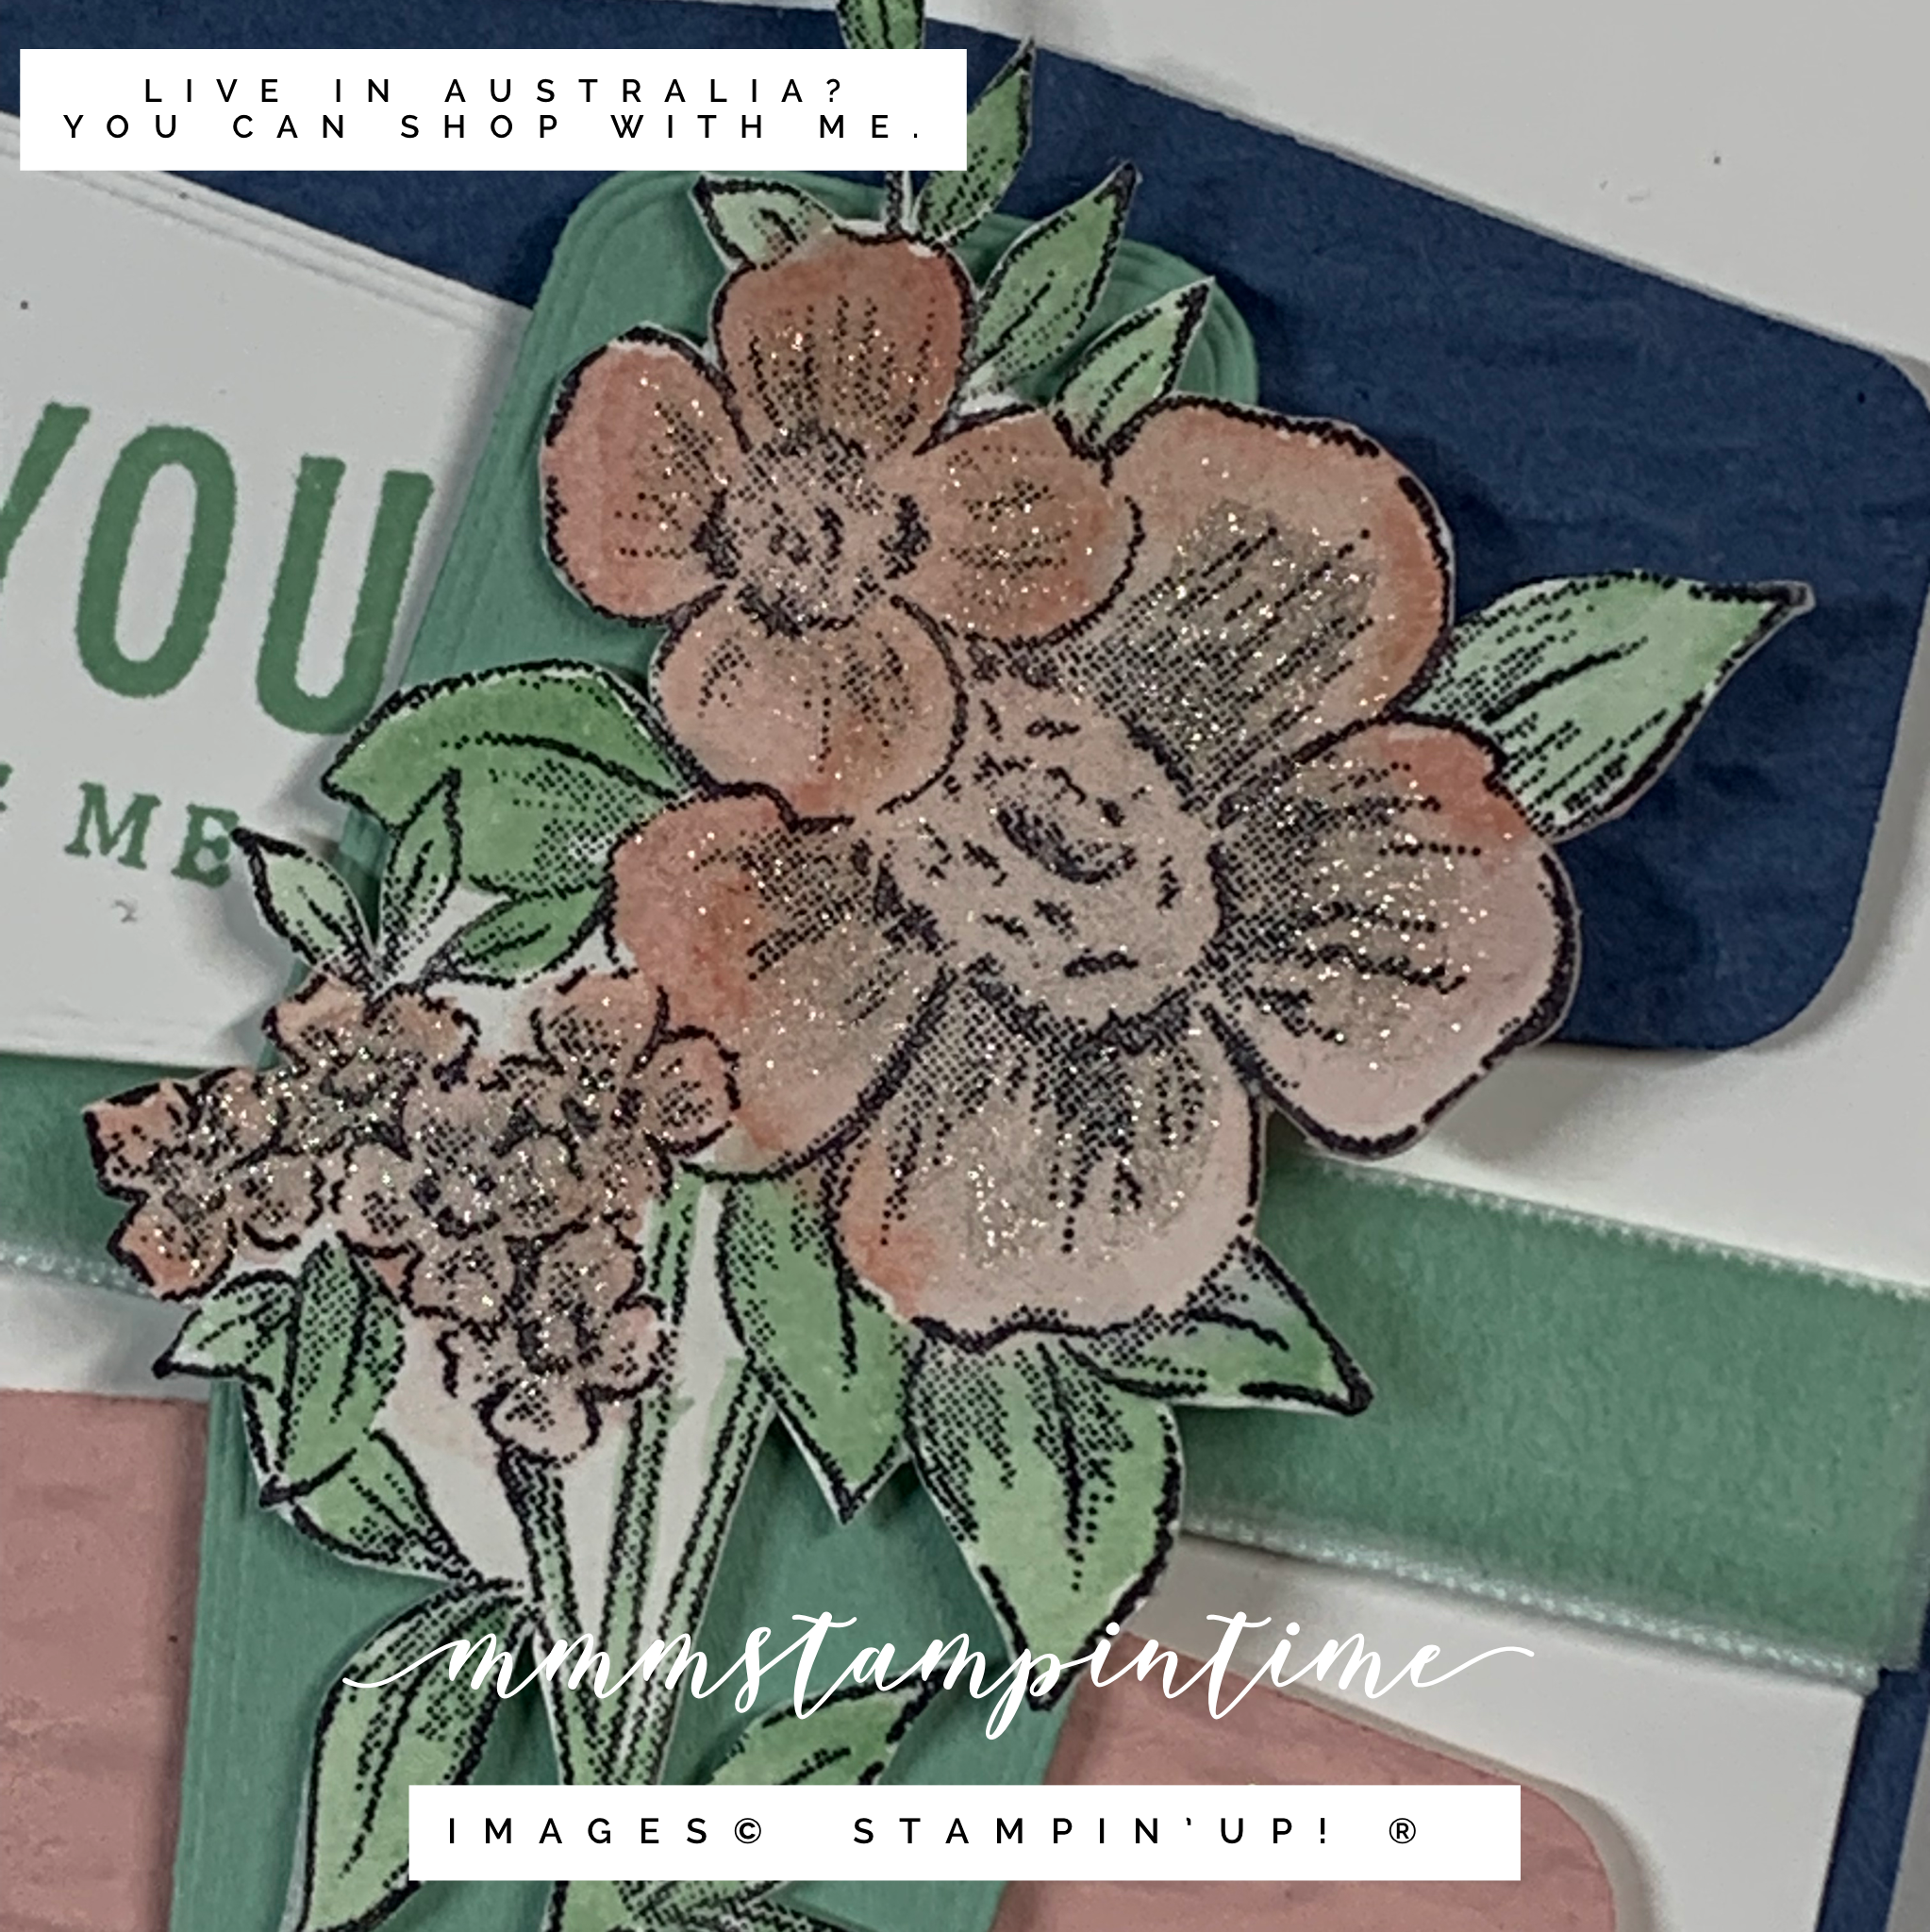
For my card, I decided to use the new Blessings of Home Stamp Set. This stamp set, with coordinating dies and Designer Series Paper was an early release bundle demonstrators were able to purchase for our 2021 OnStage @ Home event that was held from 11 – 13 November.

I decided to use a Misty Moonlight card base with a Basic White layer. Before securing the white layer, I wrapped a length of Mint Macaron Soft Velvet Ribbon and used Tear & Tape to fix it into place.

Then I cut a piece each of Blushing Bride and Misty Moonlight using one of the Tasteful Labels Dies. These two die cut pieces were then given some texture using the Bark 3D Embossing Folder. Then I added Stampin’ Dimensionals behind each embossed shape and positioned evenly above and below the ribbon.

I am so pleased with the way the embossed card and velvet ribbon combine to provide different textures to the card.

The floral image was stamped using Jet Black StazOn (not the Memento I mistakenly used in my product photo). Then I used my Water Painter to colour it. I decided to fussy cut, rather than die cut, the flower before popping it up onto a die cut piece of Mint Macaron card. This piece was then positioned over the other two embossed pieces.

The sentiment, from the Blessings of Home Stamp Set, was stamped in Mint Macaron and cut using the same Tasteful Labels Dies. Each end of the ‘Thank You’ label was trimmed and then positioned where you can see it.

When the water coloured image was dry, I painted Clear Wink of Stella across the flowers to add some shimmer.

I partially stamped the same floral image on the card insert and the envelope – there’s no surprise there. If you have seen any of my posts before, you will know that I never leave the inside of a card or an envelope undecorated.

I almost always add some embellishments to the front of my cards as my final step. This time I coloured some Clear Epoxy Essentials with the Dark Mint Macaron Stampin’ Blend.

During the OnStage @ Home event, we used the large floral image and I am looking forward to making more projects with this gorgeous set.

I’m so pleased with this card – lots of white space, layering and overlapping elements and such a great colour combination to use.

What do you think?

Until next time, happy stamping.

If you live in Australia, you can order any of the products I used to make this card by going to my online store. Just click on any of the images below.

Product List
Paper Snips
[103579]
$17.00
Posted on Leave a comment

BACK TO IT!

My last post was a week ago – oops!

The school holidays started a week ago and Rob has these two weeks at home. So, it was a perfect opportunity to order a second bookcase from Ikea and have him help me collect it, although I assembled it.

It was fun spending time rearranging my crafting supplies and need to get three more storage bins to finish.

I made a couple of cards over the weekend, so this morning I photographed the projects ready to post today and schedule another post for tomorrow.

It’s certainly a bit messy but this is my set up when I take photos. I use two tall table number stands and a length of textured wallpaper to create an endless background. There are two lights on adjustable stands – and, as you can see, a floor that needs to be vacuumed.

For the first one I decided to use the TASTEFUL TOUCHES BUNDLE.

I began by stamping the feather image onto the card front using Versamark and Clear Stampin’ Emboss Powder before using the heat tool. This gives it a glossy version same colour as the card stock – Soft Sea Foam.

The three Very Vanilla panels began as a 3.75″ square that I stamped using Versamark and Clear Stampin’ Emboss Powder again. When finished, I cut the piece into equal thirds.

I repeated the process using a 4″ x 2.25″ piece of card and die cut it with one of the TASTEFUL LABELS DIES. Then I stamped the feather over the heat embossed images.

As you can see, I have used the same die to cut the label that has the sentiment and feather stamped on it. I trimmed the right hand side to align with the edge of the card.

The flower was fussy cut and CLEAR WINK OF STELLA added. The final touch was to add a few embellishments.

This is a such a lovely card to send to someone to reach out and reconnect.

Who would you send it to?

Thanks for popping by … happy stamping.

These are the products I used to make this card. If you live in Australia, you can order any of them through me.

Product List
Heat Tool
[129056]
$50.00
Paper Snips
[103579]
$17.00
Posted on Leave a comment

LAYERS OF TEXTURE

Some of the paper, in the IN GOOD TASTE DSP pack, looks like embossing paste spread roughly over a coloured background. One is a Rococo Rose shade and the other Night of Navy.

For this card I chose the Rococo Rose.

Using some Rococo Rose ink refill , I coloured some WHITE EMBOSSING PASTE and applied it to a piece of card stock using a BASIC PATTERN DECORATIVE MASK.

It’s fun to try something different! When was the last time you played with embossing paste on a project?

Thanks for popping by … happy stamping.

These are the products I used to make this project. If you live in Australia, you can order any of these through me.

Product List
Paper Snips
[103579]
$17.00