Posted on Leave a comment

A GOLDEN GIFT BOX

I decided that it was time to make a 3D project so today I have a gift box to share with you.

The Gold and Rose Gold Metallic 6″x 6″ Specialty Paper, in the Annual Catalogue, is stunning. I have teamed it with some of the Eden’s Garden Collection products.

The gift box measures 4″x 4″ and is 1″ deep.

I made the box first and then created the belly band by cutting a 2″ wide strip of Evening Evergreen card. Then I adhered a 1-1/2″ strip of paper from the Ever Eden Specialty Designer Series Paper. The band was wrapped around the box and I gently pinched it along each edge. I was then able to burnish that pinched crease to create four sharp corners for the belly band.

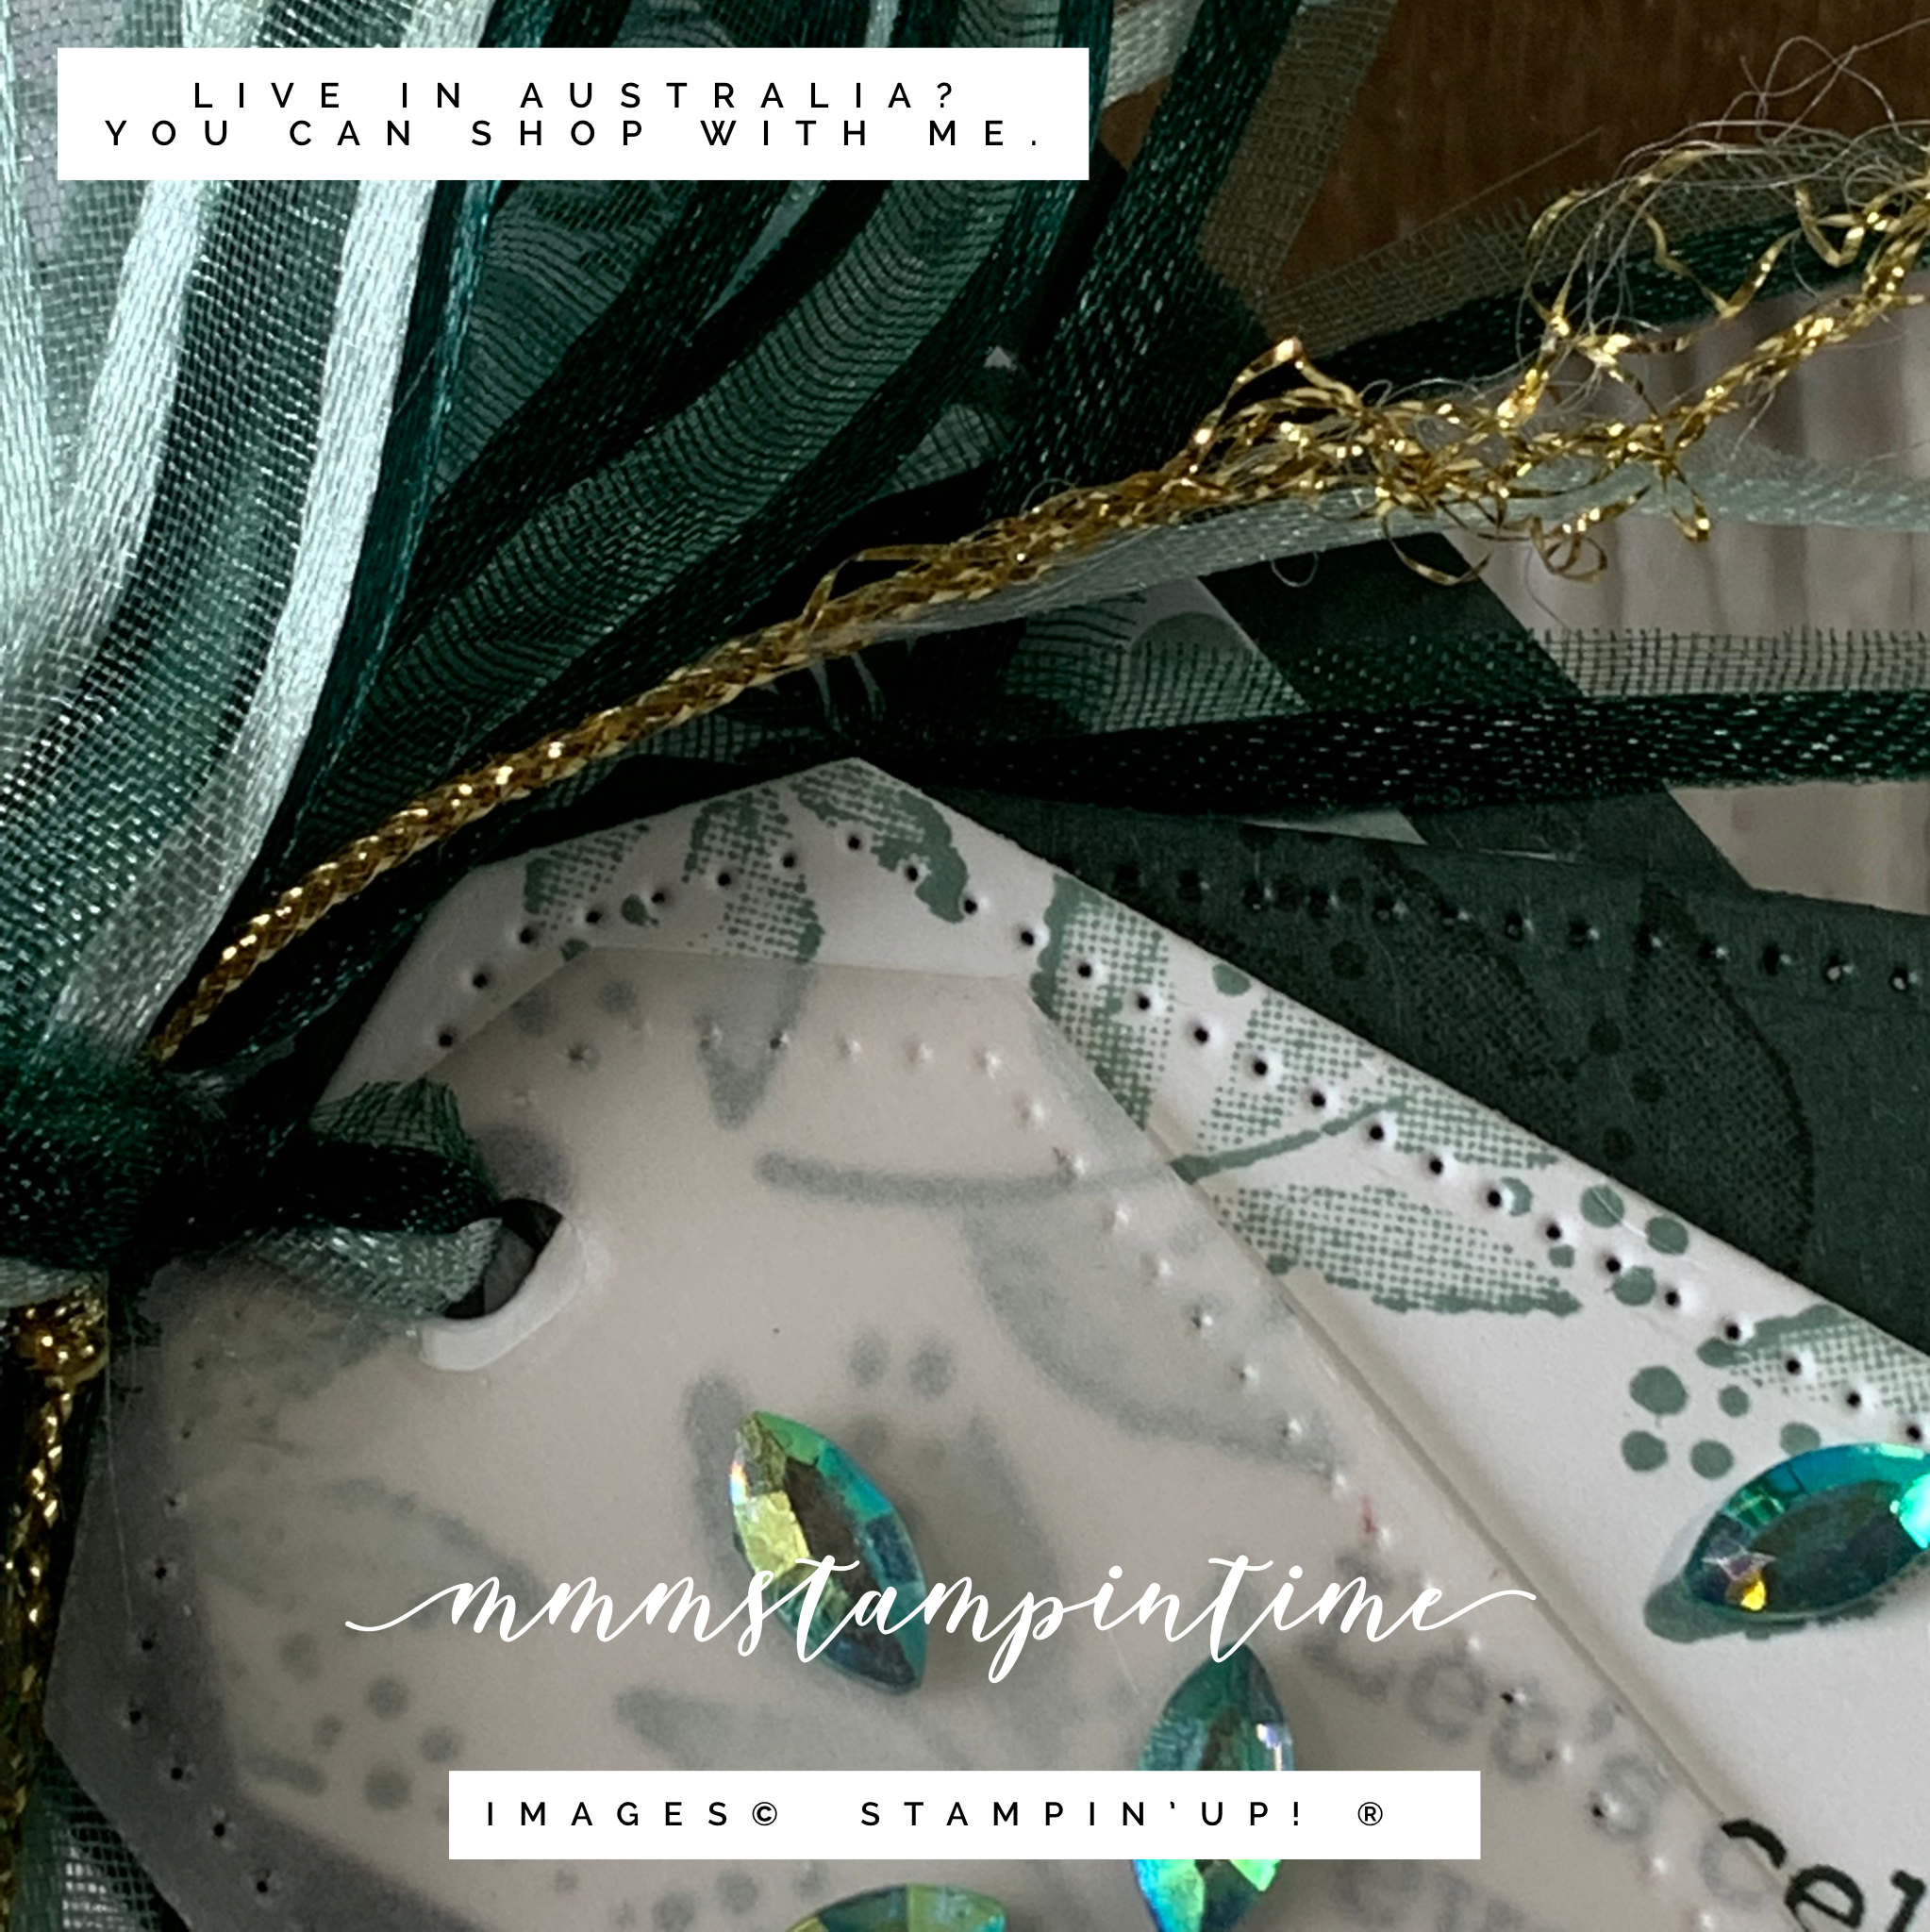
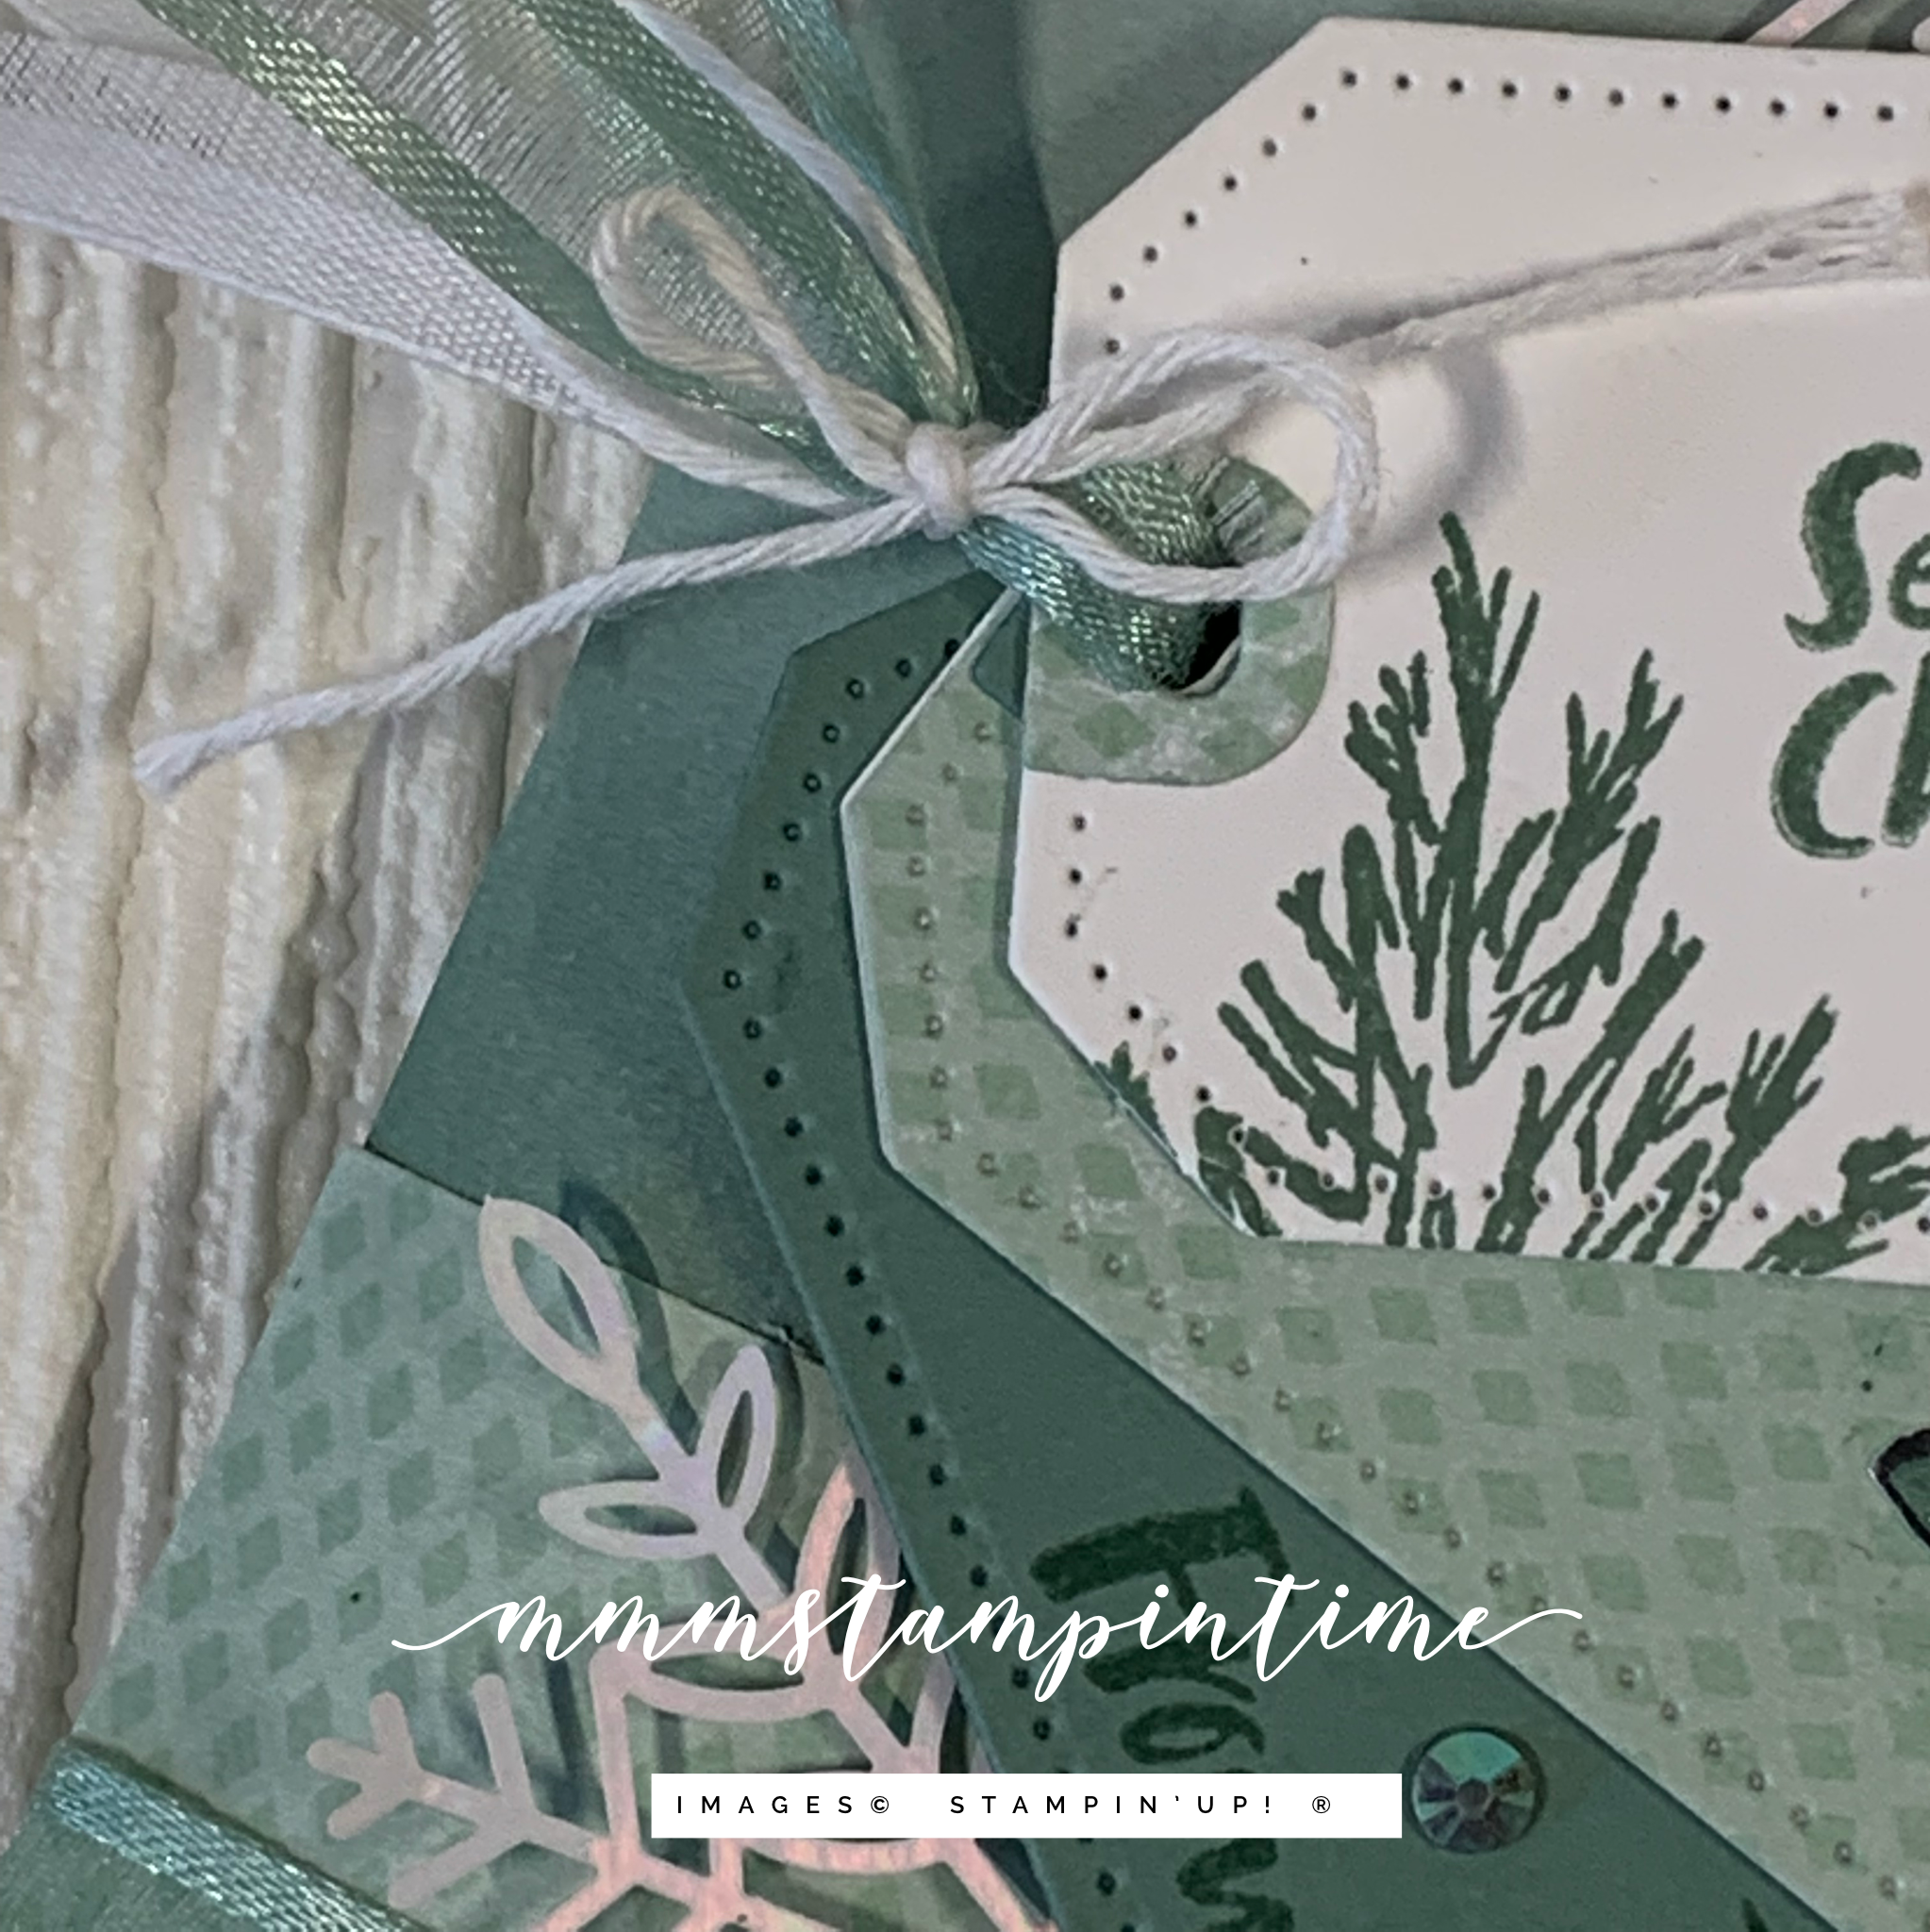
I created the bow by looping each of the four lengths of Open Weave Ribbon and held each loop in plce with a Mini Glue Dot (there are two Soft Succulent and two Evening Evergreen ribbons). The loops were then overlapped and tied tightly in the centre with a length of gold Simply Elegant Trim. Then I cut some lengths of the same ribbons in half lengthwise and tied them around the bow. Finally I unravelled the gold trim to create the individual filaments.

The sentiment, from the Eden’s Garden Stamp Set, was stamped onto a small piece of Basic White card stock using the Evening Evergreen ink. The leaves were stamped in Soft Succulent. Then I used one of the Tailor Made Tags Dies to cut the three tags that are attached to the top of the box. To keep the tags displayed this way I used Mini Glue Dots.

The last step was to add some Garden Gems to the tags. I love the marquise shaped gems!

Now I just need to find something gorgeous to pop inside the gift box. What would you put in the gift box?

Until next time, happy stamping and gift box making.

If you live in Australia, you can order any of the products I used to make this card by going to my online store. Just click on any of the images below.

Because some of the products I have used to make this card are not yet available to customers, I am not able to show them at this time. As soon as product images go live, I will create this section.

Product List
Paper Snips
[103579]
$17.00
Posted on Leave a comment

CHRISTMAS GIFT BAG

Hello friends! Thanks for popping by to see my latest project.

I decided to make a gift bag to coordinate with a card I shared a couple of days ago.

I used one of the Ombre Gift Bags, some of the Whimsy & Wonder Designer Series Paper and a few of the Wonderful Snowflakes.

I secured a length of the Soft Succulent Open Weave Ribbon to the back of the DSP layer and then adhered it to the front of the ombre bag.

Three snowflakes were added to the bag using Stampin’ Dimensionals.

I cut four tags using the Tailor Made Tags Dies – two in Basic White and one each in Sift Succulent and DSP. One of the white tags was glued to the back of the DSP tag.

Using the Delivering Cheer Stamp Set, I stamped the greeting and trees to the Basic White tag. Then I stamped the ‘to’ and ‘from’ on the Soft Succulent tag.

I stamped, coloured and fussy cut the gift boxes. After I photographed the gift bag I carefully removed the gift boxes and repositioned them so they are now parallel with the bottom of the bag (and it looks much better).

The tags were overlapped and glued in place. Then I cut a length of White Faux Linen Ribbon in half, from the Flowers for Every Season Ribbon Combo Pack, and frayed it before combining it with White Baker’s Twine and Soft Succulent Open Weave Ribbon to finish the tags.

I added some CLear Wink of Stella to the Soft Succulent ‘ribbon’ on the gift boxes before popping some coordinating 2021-2023 In Colur Jewels.

What do you think of this little gift bag? I think that I will make a gift card holder to pop inside the bag.

Until next time, happy stamping.

If you live in Australia, you can order any of the products I used to make this card by going to my online store. Just click on any of the images below.

Product List
Paper Snips
[103579]
$17.00
Posted on Leave a comment

THE CRAFT OF GIVING

Hello and welcome. Thanks for popping by today.

It is Wednesday and time for this week’s Freshly Brewed Projects Blog Hop. The theme is the Craft of Giving. Projects could include a bag, box or gift card holder.

I decided to use the new Kraft Gift Boxes from the July – December Mini Catalogue for my project.

I used the Tidings of Christmas Suite, from the Annual Catalogue, as well. The first step was to remove the acetate piece from one of the gift boxes so that I could make a template to cut card stock and Designer Series Paper.

The first layer that I adhered to the lid of the box was a piece of Evening Evergreen cardstock. I used the template to cut out the shape of the opening.

I used the same template to do the same with a piece of Tidings of Christmas 6″x 6″ DSP. After I adhered this piece to the lid of the box, I created a mitred Cherry Cobbler frame to coordinate with the strips of Real Red that I attached to the sides of the box.

A piece of Evening Evergreen was cut, using the template, and then embossed with the Merry Melody 3D Embossing Folder. It was then cut in half diagonally so that the gift could peek through.

I gathered up a length of Cherry Cobbler and Gold Metallic Ribbon to add to the card front – it almost looks like tinsel.

The stars from the Christmas Trimmings Dies were positioned using Stampin’ Dimensionals. Then, I made the gift tags using the Tailor Made Tags Dies and Gold Shimmer Ribbon to decorate the tags.

To ensure the simple gift of chocolate doesn’t slide around, I made two inserts to hold it in place.

What do you think? Would you like this gift?

Make sure you hop on over to see what the other Freshly Brewed crew have made.

Until next time, happy stamping.

If you live in Australia, you can order any of the products I used to make this card by going to my online store. Just click on any of the images below.

Product List
Paper Snips
[103579]
$17.00