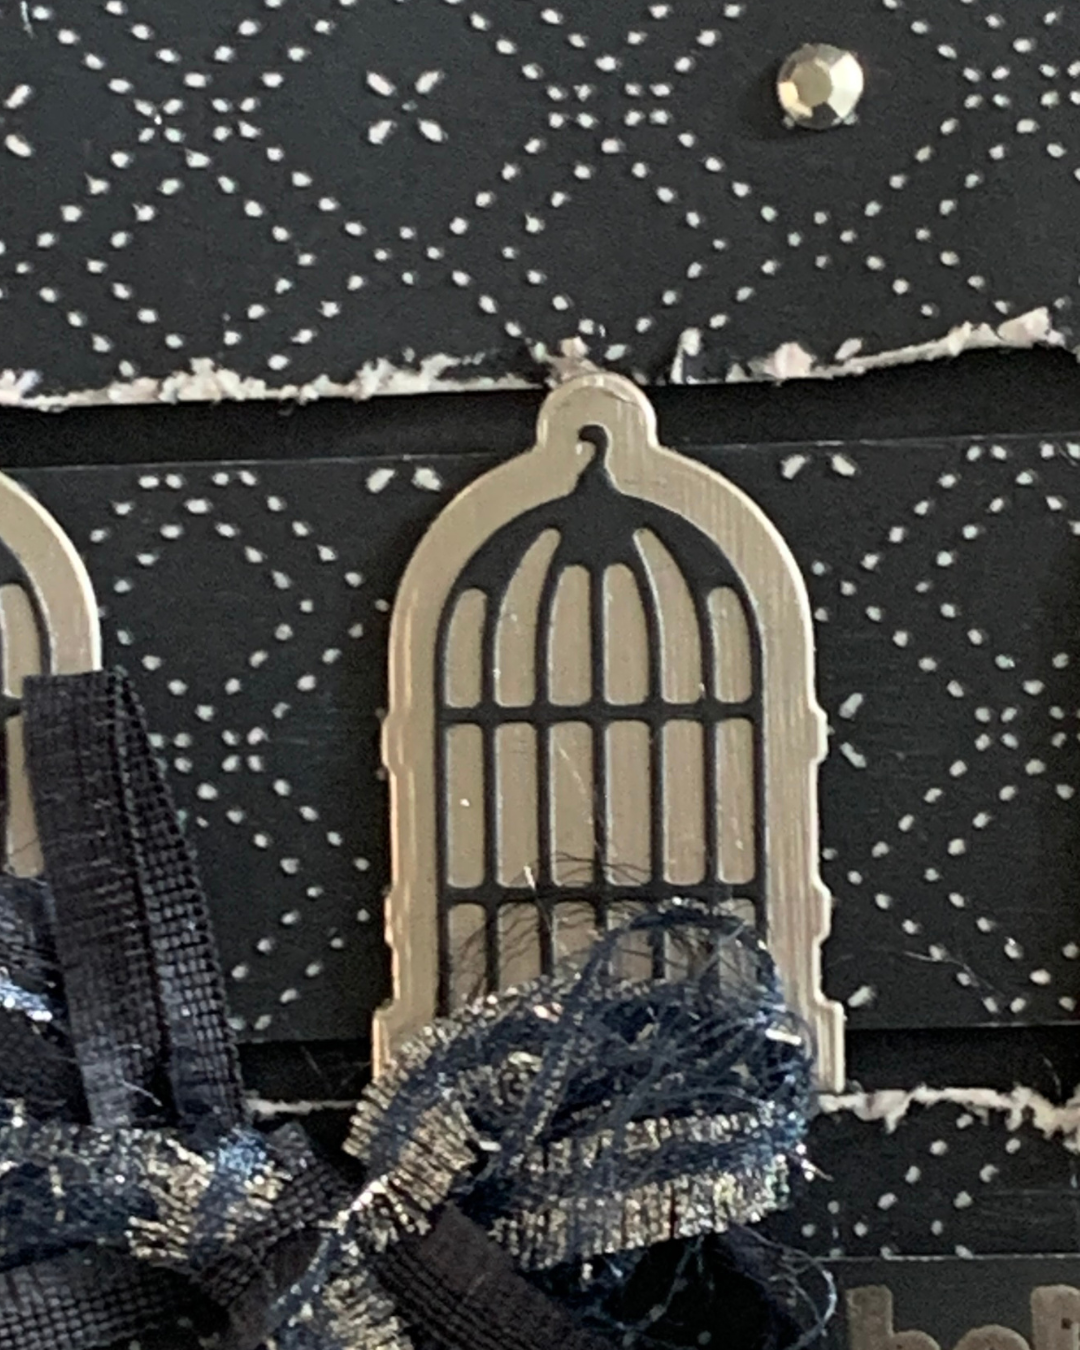
My last project for this week is a stepped up card.
I used Secret Sea 12″x 12″ Twotone card for the card base and embossed layers.

After preparing the card base, I embossed a panel of the Secret Sea Two tone card using the Beautiful Pattern Embossing Folder.
The embossed panel was lightly sanded to expose the white core. Then it was cut into three strips. The top and bottom strips were distressed with a pair of paper snips.
The embossed, sanded and distressed strips were attached to the card front with dimensionals.

Three solid silver cages were die cut and then, three detailed cages were cut from Secret Sea card. The cages were layered and then arranged over the middle embossed strip.
The silver heat embossed greeting was cut using the new Three Banner Punch (167050) and then added to the card front.
Lengths of the Misty Moonlight Silver Edged Ribbon and Secret Sea Faux Linen Ribbon were cut and trimmed down to expose frayed edges. The ribbons were then tied into a textured bow and attached to the card front with Mini Glue Dots.
The card insert had a length of the Faux Linen Ribbon attached to it and the back of the envelope had some of the card adhered to it.
Finally, I added three silver elements from the Metallic Gems pack.
Next week I will have new projects to share with you.
Until then, happy stamping and scrapbooking.

If you live in Australia, you can order any of the products I used to make this card by going to my online store. Just click on any of the images below.

![Adhesive Backed Metallic Gems [ 163780 ]](https://i0.wp.com/assets1.tamsnetwork.com/images/EC042017NF/163780s.jpg?w=140&ssl=1 "Adhesive Backed Metallic Gems [ 163780 ]") | ![Metallics Wow! Embossing Powder [ 165678 ]](https://i0.wp.com/assets1.tamsnetwork.com/images/EC042017NF/165678s.jpg?w=140&ssl=1 "Metallics Wow! Embossing Powder [ 165678 ]") | ![Versamark Pad [ 102283 ]](https://i0.wp.com/assets1.tamsnetwork.com/images/EC042017NF/102283s.jpg?w=140&ssl=1 "Versamark Pad [ 102283 ]") | |
![Embossing Additions Tool Kit [ 159971 ]](https://i0.wp.com/assets1.tamsnetwork.com/images/EC042017NF/159971s.jpg?w=140&ssl=1 "Embossing Additions Tool Kit [ 159971 ]") | |||
![Paper Snips [ 103579 ]](https://i0.wp.com/assets1.tamsnetwork.com/images/EC042017NF/103579s.jpg?w=140&ssl=1 "Paper Snips [ 103579 ]") | ![Paper Trimmer [ 152392 ]](https://i0.wp.com/assets1.tamsnetwork.com/images/EC042017NF/152392s.jpg?w=140&ssl=1 "Paper Trimmer [ 152392 ]") |
![Misty Moonlight & Silver Edged 1/2" (1.3 Cm) Ribbon [ 165931 ]](https://i0.wp.com/assets1.tamsnetwork.com/images/EC042017NF/165931s.jpg?w=140&ssl=1 "Misty Moonlight & Silver Edged 1/2\" (1.3 Cm) Ribbon [ 165931 ]")
![Heat Tool [ 129056 ]](https://i0.wp.com/assets1.tamsnetwork.com/images/EC042017NF/129056s.jpg?w=140&ssl=1 "Heat Tool [ 129056 ]")
![Secret Sea 3/8" (1 Cm) Faux Linen Ribbon [ 165273 ]](https://i0.wp.com/assets1.tamsnetwork.com/images/EC042017NF/165273s.jpg?w=140&ssl=1 "Secret Sea 3/8\" (1 Cm) Faux Linen Ribbon [ 165273 ]")
![Silver Foil 12" X 12" (30.5 X 30.5 Cm) Specialty Pack [ 163096 ]](https://i0.wp.com/assets1.tamsnetwork.com/images/EC042017NF/163096s.jpg?w=140&ssl=1 "Silver Foil 12\" X 12\" (30.5 X 30.5 Cm) Specialty Pack [ 163096 ]")
![Secret Sea 12" X 12" (30.5 X 30.5 Cm) Two Tone Cardstock [ 166709 ]](https://i0.wp.com/assets1.tamsnetwork.com/images/EC042017NF/166709s.jpg?w=140&ssl=1 "Secret Sea 12\" X 12\" (30.5 X 30.5 Cm) Two Tone Cardstock [ 166709 ]")



![Nested Essentials Dies [ 161597 ]](https://i0.wp.com/assets1.tamsnetwork.com/images/EC042017NF/161597s.jpg?w=140&ssl=1 "Nested Essentials Dies [ 161597 ]")
![Brushed Brass Butterflies [ 158136 ]](https://i0.wp.com/assets1.tamsnetwork.com/images/EC042017NF/158136s.jpg?w=140&ssl=1 "Brushed Brass Butterflies [ 158136 ]")
![Gold Striped 3/8" (1 Cm) Mesh Ribbon [ 165599 ]](https://i0.wp.com/assets1.tamsnetwork.com/images/EC042017NF/165599s.jpg?w=140&ssl=1 "Gold Striped 3/8\" (1 Cm) Mesh Ribbon [ 165599 ]")
![Basic White A4 Thick Cardstock [ 159230 ]](https://i0.wp.com/assets1.tamsnetwork.com/images/EC042017NF/159230s.jpg?w=140&ssl=1 "Basic White A4 Thick Cardstock [ 159230 ]")
![Cloud Cover A4 Cardstock [ 165293 ]](https://i0.wp.com/assets1.tamsnetwork.com/images/EC042017NF/165293s.jpg?w=140&ssl=1 "Cloud Cover A4 Cardstock [ 165293 ]")
![Secret Sea A4 Cardstock [ 165296 ]](https://i0.wp.com/assets1.tamsnetwork.com/images/EC042017NF/165296s.jpg?w=140&ssl=1 "Secret Sea A4 Cardstock [ 165296 ]")
![Gold Foil Sheets [ 132622 ]](https://i0.wp.com/assets1.tamsnetwork.com/images/EC042017NF/132622s.jpg?w=140&ssl=1 "Gold Foil Sheets [ 132622 ]")
![Multipurpose Liquid Glue [ 110755 ]](https://i0.wp.com/assets1.tamsnetwork.com/images/EC042017NF/110755s.jpg?w=140&ssl=1 "Multipurpose Liquid Glue [ 110755 ]")
![Stampin' Dimensionals [ 104430 ]](https://i0.wp.com/assets1.tamsnetwork.com/images/EC042017NF/104430s.jpg?w=140&ssl=1 "Stampin' Dimensionals [ 104430 ]")
![Mini Glue Dots [ 103683 ]](https://i0.wp.com/assets1.tamsnetwork.com/images/EC042017NF/103683s.jpg?w=140&ssl=1 "Mini Glue Dots [ 103683 ]")
![Adhesive Sheets [ 152334 ]](https://i0.wp.com/assets1.tamsnetwork.com/images/EC042017NF/152334s.jpg?w=140&ssl=1 "Adhesive Sheets [ 152334 ]")
![Mini Stampin' Cut & Emboss Machine [ 150673 ]](https://i0.wp.com/assets1.tamsnetwork.com/images/EC042017NF/150673s.jpg?w=140&ssl=1 "Mini Stampin' Cut & Emboss Machine [ 150673 ]")
![Basic White C6 Envelopes [ 159235 ]](https://i0.wp.com/assets1.tamsnetwork.com/images/EC042017NF/159235s.jpg?w=140&ssl=1 "Basic White C6 Envelopes [ 159235 ]")



![Mossy Meadow A4 Cardstock [ 133683 ]](https://i0.wp.com/assets1.tamsnetwork.com/images/EC042017NF/133683s.jpg?w=140&ssl=1 "Mossy Meadow A4 Cardstock [ 133683 ]")
![Mossy Meadow Classic Stampin' Pad [ 147111 ]](https://i0.wp.com/assets1.tamsnetwork.com/images/EC042017NF/147111s.jpg?w=140&ssl=1 "Mossy Meadow Classic Stampin' Pad [ 147111 ]")
![Stampin' Cut & Emboss Machine [ 149653 ]](https://i0.wp.com/assets1.tamsnetwork.com/images/EC042017NF/149653s.jpg?w=140&ssl=1 "Stampin' Cut & Emboss Machine [ 149653 ]")




