Posted on Leave a comment

TODAY, IT’S A LITTLE LATTICE AND DRAGONFLIES

Yesterday I shared a card that featured layered lattice and lots of bumblebees.

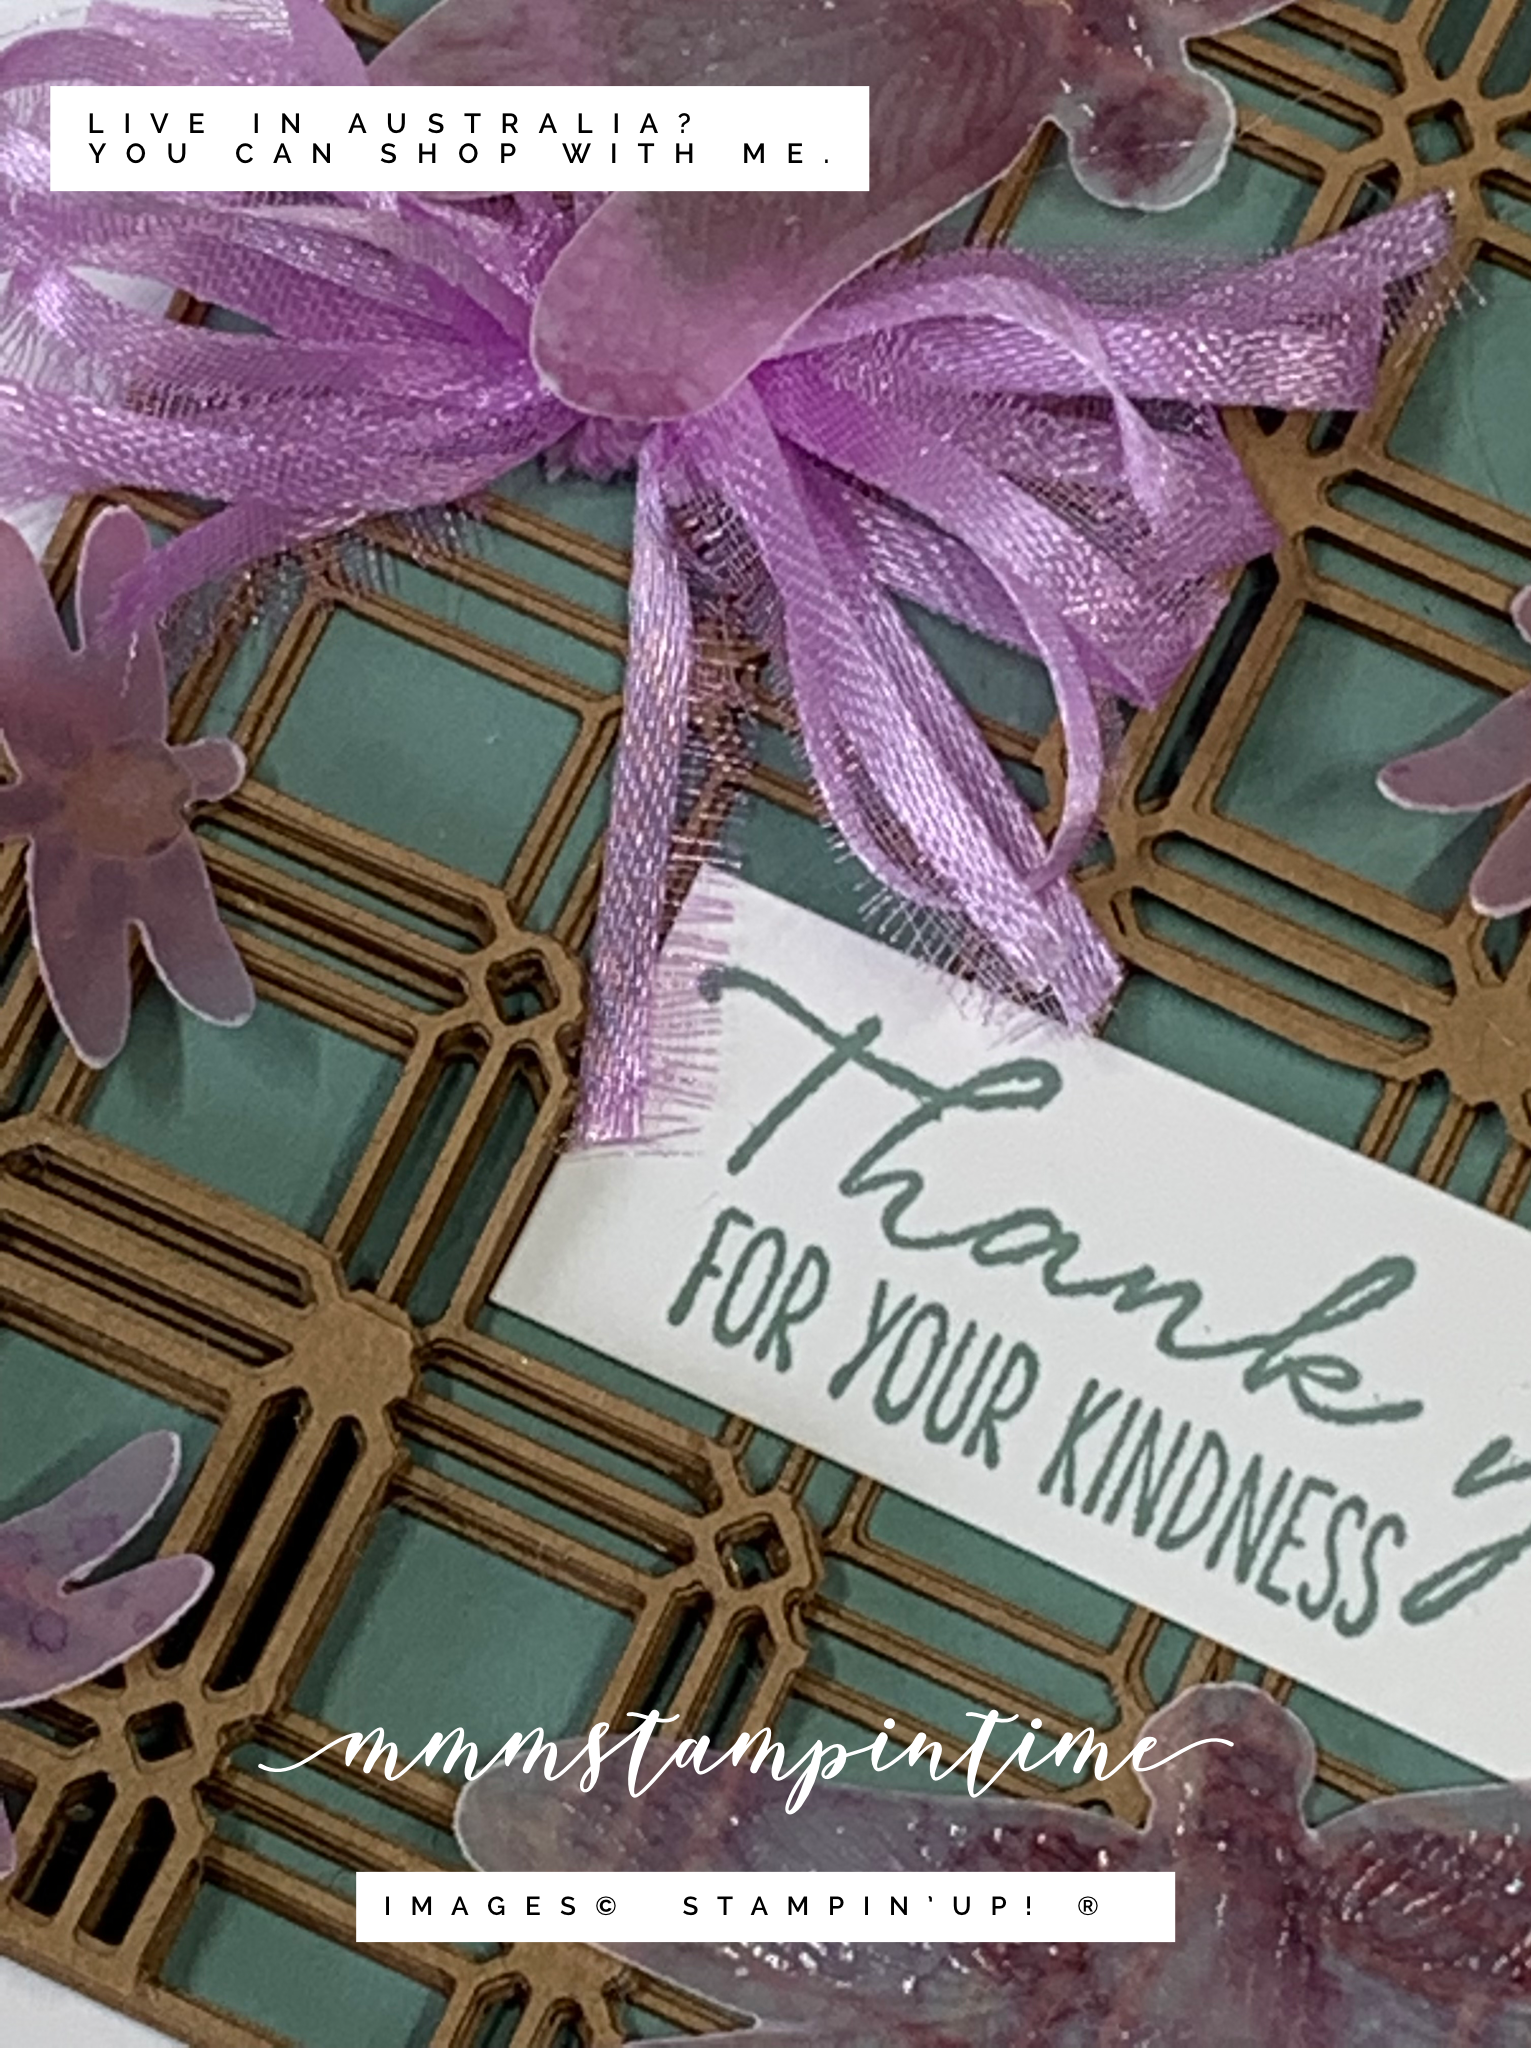
Today, I have revisited the layered lattice construction and added dragonflies.

For this card I used a Basic white card base. Then I took lots of the Lattice Paper pieces and cut several of them before I started adhering the layers to create the constructed shapes.

Trimming before adhering.

The lattice layers were then adhered to a piece of Soft Succulent card stock. This was then added to the card front.

For the dragonflies, I used Clear Stampin’ Emboss Powder to heat emboss the dragonfly image from the Dragonfly Garden Stamp Set onto White Vellum Paper. Then I added colour to the other side of the vellum using the Fresh Freesia Stampin’ Blends and the dark Rich Razzleberry Stampin’ Blend. The colours were integrated by spritzing the Blends with isopropyl alcohol.

When the ink was dry, I used the Dragonfly Punch to punch out the large and small dragonflies. They were then placed on the lattice using Mini Glue Dots.

The sentiment, from the Dragonfly Garden Stamp Set, was stamped in Soft Succulent ink. I trimmed it down and attached it to the card front.

The multi-loop bow was made using a length of Fresh Freesia Open Weave Ribbon that was cut in half and looped several times before being tightly tied in the centre. The bow was secured in place with Mini Glue Dots.

The image with lots of little dragonflies was stamped inside the card and on the envelope.

I thought the shimmer from the clear embossing powder was enough ‘bling’ for this card. What do you think?

I have enjoyed using the lattice to construct the multilevel elements on this and yesterday’s card. It was a totally different way to use this embellishment.

Tomorrow I will have something different to share.

Until next time, happy stamping.

If you live in Australia, you can order any of the products I used to make this card by going to my online store. Just click on any of the images below.

Product List
Heat Tool
[129056]
$50.00
Paper Snips
[103579]
$17.00
Posted on Leave a comment

ALL SQUARED AWAY

Hello and welcome to today’s post. Thank you for popping by see what I have been up to.

I decided to make a birthday card before I spend the rest of the week making projects using new products from the July – December Mini Catalogue.

The All Squared Away Bundle is a hidden gem in the 2021-2022 Annual Catalogue.

I chose Basic White, Misty Moonlight and Polished Pink as the colours for this card. Then I cut one of the Floral Square frames. I stamped the spots image in the pink and blue and trimmed down one of the stamped images to secure behind the frame. As you can see, I created two further squares of the cardstock and images.

The Basic White cardstock was run through my Stampin’ Cut & Emboss Machine using the Painted Texture 3D Embossing Folder to give the card texture. I wrapped a length of Polished Pink Open Weave Ribbon around this layer before flicking ink from the Stampin’ Blend Pen. This panel was then attached to the card base.

The three squares were then positioned across the card front using Stampin’ Dimensionals to pop them up for that little extra height. A length of the same ribbon was cut in half and tied in a bow around the first length. I cut a spare stamped square in half, diagonally, and placed one on the card insert and the other on the envelope. A small dragonfly was punched and added to the card. A few 2021-2023 In Colour Jewels finished the project.

I love the way the two In Colours, from the 2020-2022 and 2021-2023 bundles, work together so well.

So, another birthday card ‘all squared away’.

Happy stamping.

If you live in Australia, you can order any of the products I used to make this card by going to my online store. Just click on any of the images below.

Product List
Paper Snips
[103579]
$17.00
Posted on Leave a comment

COFFEE & CARD SAMPLES

Hello! I am so pleased that you have popped by.

Today I wanted to share some of the sample cards I had for my Coffee & Card classes last week. It has been more than a year since I had my classes, so I was so pleased to start again. I hold them at two different local cafes, here in Kangaroo Point – Nourish at 9.30 on a Monday morning and Medley at 1.30 on a Wednesday afternoon.

For our first get together, in 2021, I used products from the Dandy Garden Suite. The cards were ideal for the two new beginner stampers who came along. I was pleased to see one of previous ladies return.

We used Notecards and Envelopes to make everything that little bit easier first time around. The options for the cards were to stamp an image on the card front or start with a piece of Dandy Garden 6″x 6″ Designer Series Paper.

I was surprised that no-one chose to start with the DSP.

I think it was the idea of being able to colour the stamped floral image that interested everyone . So that is what we did. We also stamped, coloured and punched the dragonfly using the Dragonfly Punch.

I was able to show everyone how to use a thin strip of cardstock or some DSP to punch out the smaller dragonflies. It was also good to demonstrate the features and benefits of the Stampin’ Write Markers™ and Stampin’ Blends.

These samples gave everyone some ideas about which colours they could use and how they could work together. Everyone stamped five times – the floral image, the dragonfly, the sentiment and an image for inside the card and on the envelope. This was good to be able to show the differences between the Memento Tuxedo Black and the Classic Stampin’ Pads and how to get ink onto the stamp. And, then how to get that ink from the stamp onto the cardstock. I enjoy seeing the look on new stalpers’ faces when that first image is stamped.

I had two greetings ready to choose from – not too many choices because that just makes it all too complicated. One was from the Garden Wishes Stamp Set and the other was from the Best Year Stamp Set.

Some of our cards used lots of different colours while others only needed two colours. There are so many options and if you only have a small range of colours, you can still create lovely cards.

I am looking forward to more Coffee & Card get togethers and sharing what I love with others.

Happy stamping.

If you live in Australia, you can order any of the products I used to make this card by going to my online store. Just click on any of the images below.

Product List
Paper Snips
[103579]
$17.00