Taking part in regular blog hops and challenges has been a great way for me to try something creatively that I might not have planned myself.
This week’s #GDP313 is a colour challenge. I love colour challenges – and I love this combination! Real Red and Basic Black – too easy. The Sahara Sand is the twist in this colour trio.

To REALLY challenge myself, with these colours, I decided to create a Christmas card. These are not really your “go to” Christmas colours. REal Red is definitely a Christmas colour standard, but Basic Black and Sahara Sand?

So here is what I created.
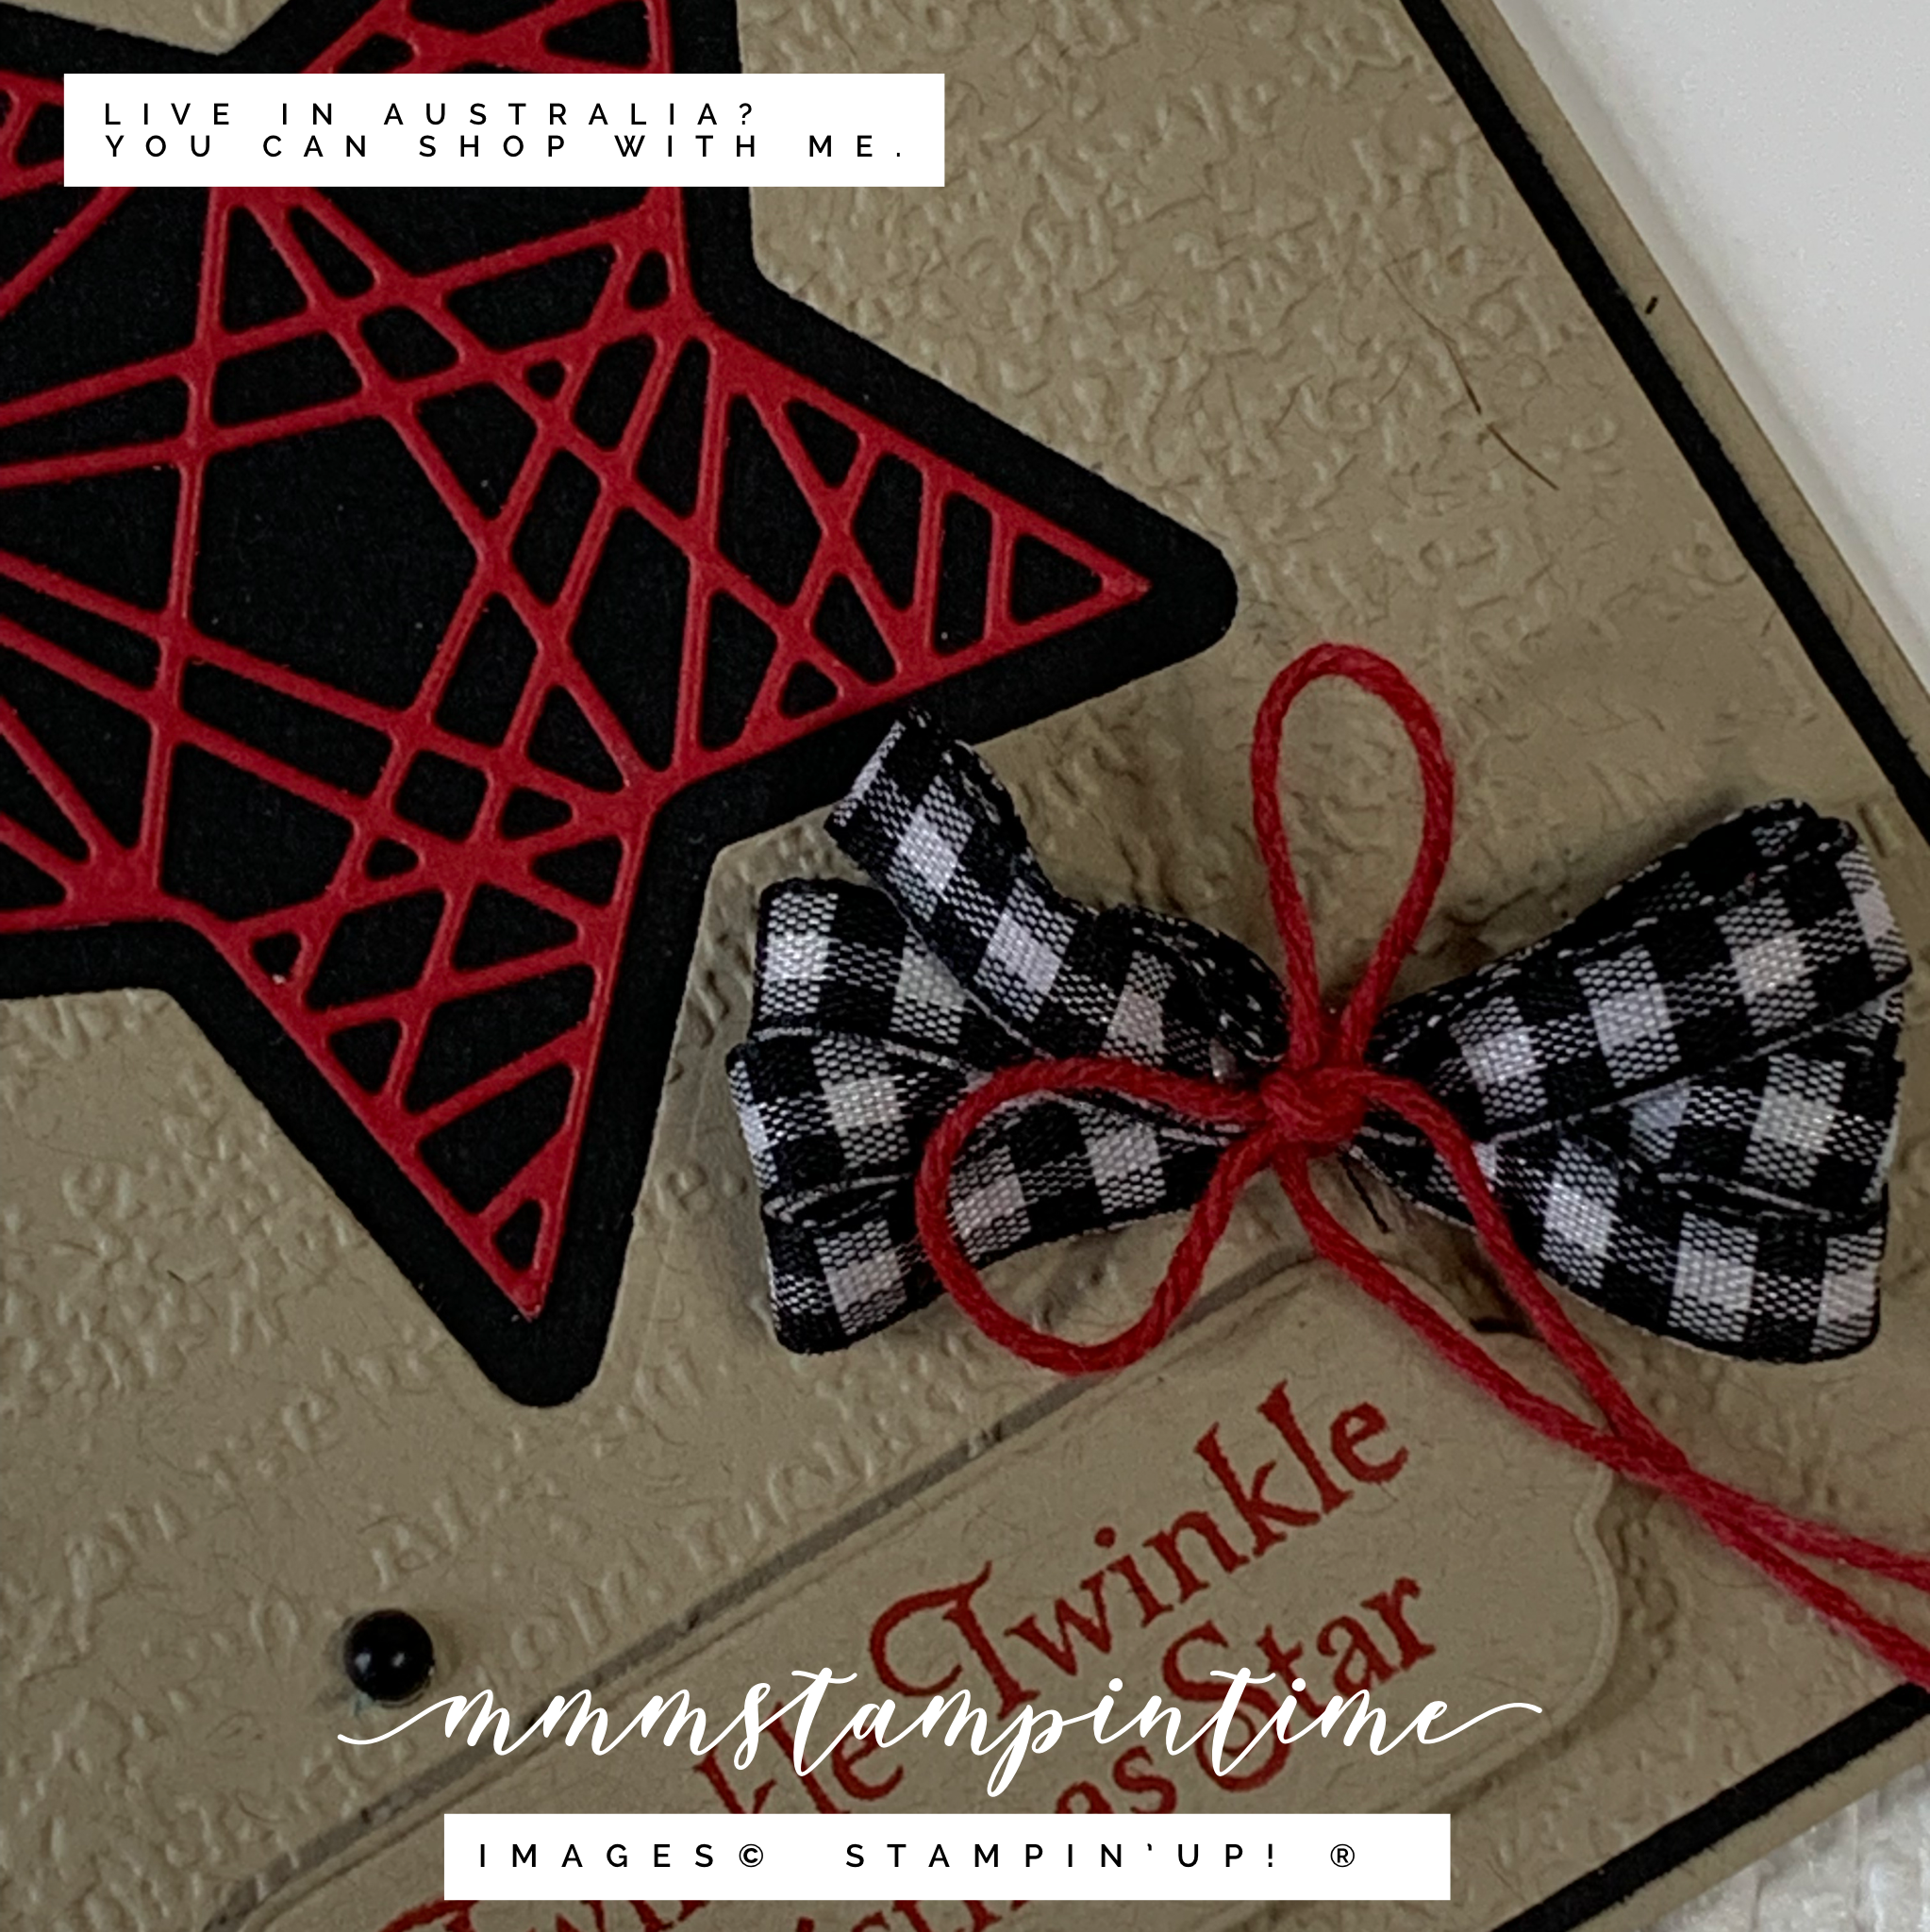
I chose a Sahara Sand card base and added a layer of Basic Black card. The Sahara Sand upper layer had a star cut away from the ‘centre’ using the large star from the Christmas Trimmings Dies. Then I added texture to this layer by running it through my Stampin’ Cut & Emboss Machine using the Timeworn Type 3D Embossing Folder.
This embossed layer was then adhered over the card base and black.
To fill the empty black star space, I took a piece of Real Red card that had some Adhesive Sheet attached and cut the detailed star from the Christmas Trimmings Dies. After removing the cut-away pieces, I peeld away the Adhesive Sheet backing and positioned this intricate start in the black space. I think it is a striking contrast.
The Christmas sentiment is from the Stars Are Shining Stamp Set and is perfect for this card. It was stamped in Real Red ink onto Sahara Sand card. Then I cut around the sentiment using one of the Seasonal Labels Dies. This die is longer than I needed so I cut the sentiment a second and moved the die to make the piece shorter.

For the bow I cut a 2″ piece of card and wrapped some Black & White Gingham Ribbon around it five times. I used a Mini Glue Dot at the start and then the finish to hold the ribbon in place.
Using my dark Real Red Stampin’ Blend, I coloured a length of white baker’s twine from the Baker’s Twine Essentials Pack. After I slipped the wrapped gingham ribbon off the card, I ties the coloured baker’s twine around the middle of the gingham and ties a tight knot and then a bow. With a Mini Glue Dot at the centre back of the bow I then positioned it, as you can see.
After the bow was in place I added Stampin’ Dimensionals to the back of the Christmas greeting and then positioned it.
I stamped the same sentiment on the card insert and added another trimmed Real Red detailed star to the envelope.
The final step was to add some Matte Black Dots to the card front.

This is another card that reminds me how versatile Stampin’ Up!® products are. I have combined different colours, ribbons, embellishment, stamp set and dies for this Christmas card – that is not red, green and white!
What do you think of this unusual Christmas card? I would love to know.
UNtil next time, happy stamping.

If you live in Australia, you can order any of the products I used to make this card by going to my online store. Just click on any of the images below.

 |  |  | ||
 |  |  |  |  |
 |  |  |  | |
 |  |  |  |  |
 |  |
")
 Gingham Ribbon")


")


 Designer Series Paper")


