There are two new kits available that I think you will like.
The first is the SWEET & SPOOKY KIT (166229 – $37).
Make Halloween gifting extra special with the Sweet & Spooky Kit! This kit makes 15 treat boxes (5 each of 3 playful designs) featuring cute ghosts, bats, pumpkins, and more in a fun palette of black, pink, orange, and iridescent. With matching tags and ribbon included, these sweet boxes are perfect for party favours, classroom treats, or spooky surprises.

The second is the BIRTHDAY FANCY KIT (155211 – $44)
Serve up a slice of celebration with the Birthday Fancy Kit! With layered cakes, teacups, florals, and doily details in soft pastels, these 12 cards (4 each of 3 designs) are like a birthday party in an envelope. Whether you’re crafting for birthdays or other sweet occasions, each design makes it easy to create something charming and full of cheer.

If you like the look of either of these kits, head over to my online store and place your order.

Today I have another project to share woth you.

I chose another one of the designs from the Floral Charm Designer Series Paper pack and add to the Old Olive card base.
Before securing the DSP, I cut two lengths of the new Petal Pink Braided Trim and wrapped them around and secured them to the DSP with Tear and Tape.
I used the leaves die, from the Lifetime of Love Dies, to cut several Old Olive branches. The branches, with Adhesive Sheet on the back, were then added to the card front and tucked under the braided trim.

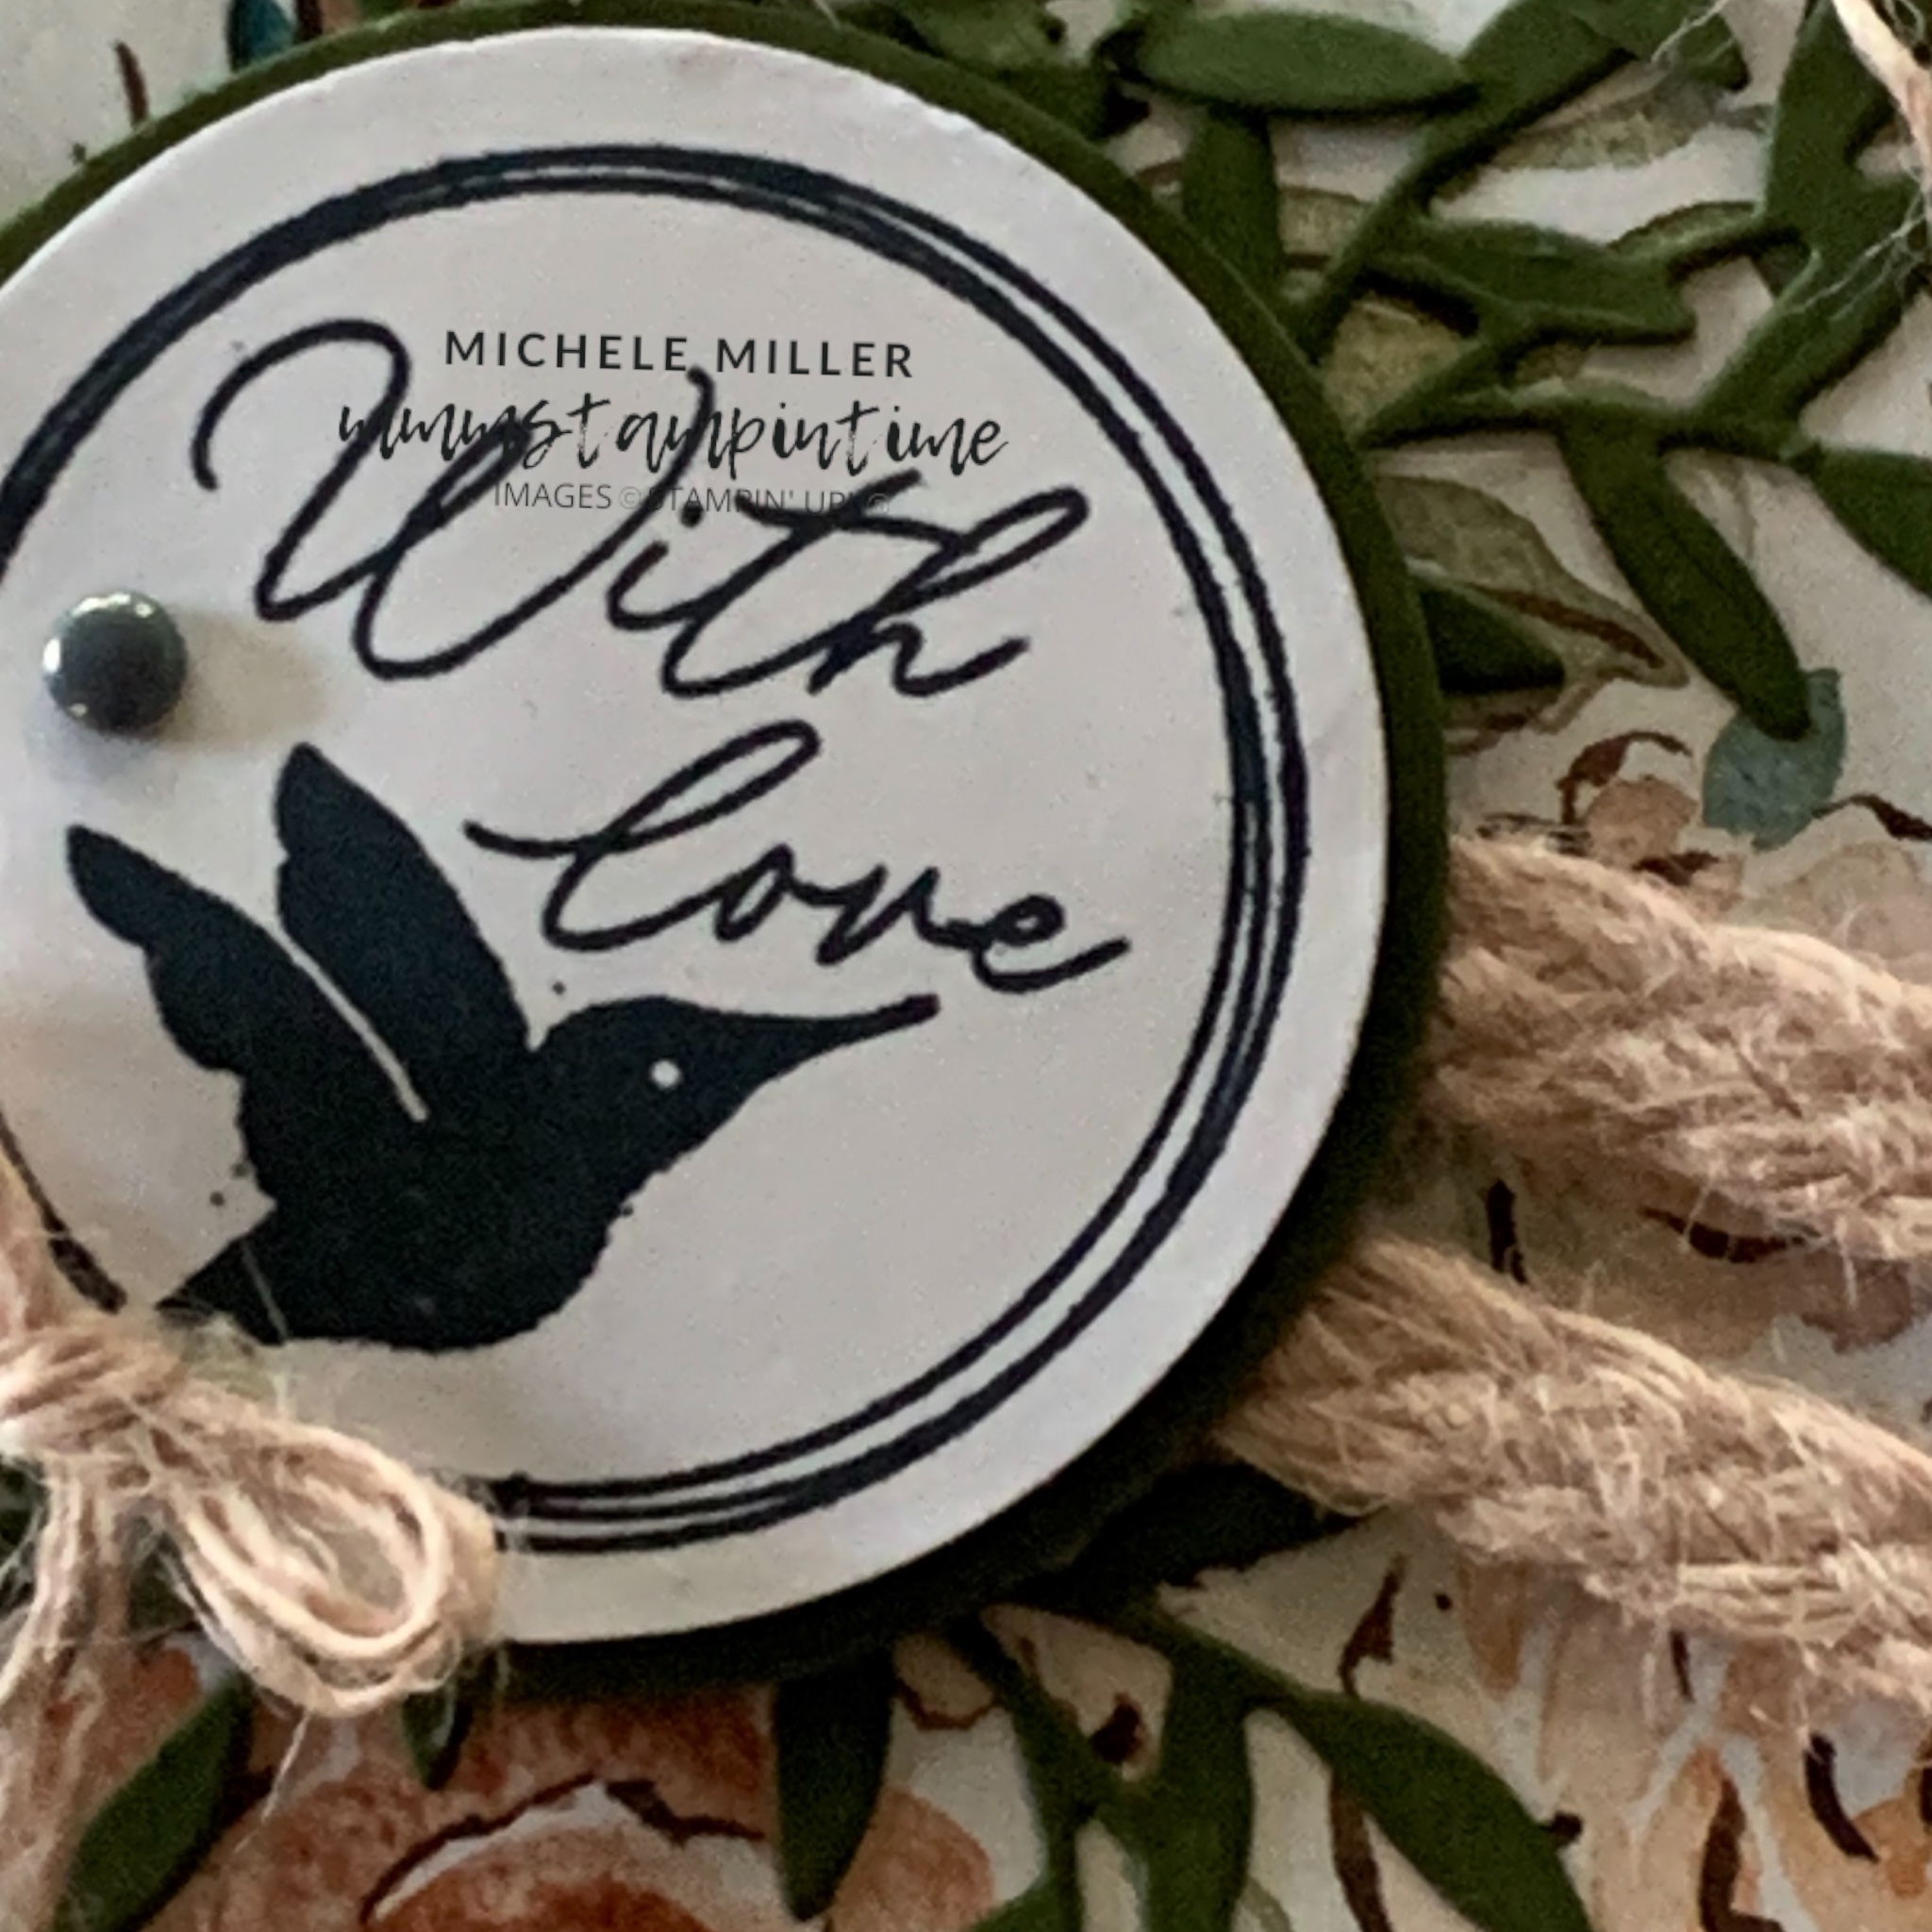
I used one of the Encircled with Love stamps for the greeting. It was stamped in Secret Sea before I punched it out with the 1 3/4″ Circle Punch.
Then I punched a 1 7/8″ circle. The white circle was added to the Old Olive circle using dimensionals.
The circles were then positioned over the braided trim, again using dimensionals.
I took another length of the braided trim and pulled it apart. Taking three sets of three strands of the twine and tied three bows. These were then placed on the card front using Mini Glue Dots.
The card insert and envelope were finished using some of the same DSP.
Finally, I added some Secret Sea Flat Pearls for a little hit of bling.

Tomorrow is Thursday and that means that it is time for a 3D project.
Until then, happy stamping and scrapbooking.

If you live in Australia, you can order any of the products I used to make this card by going to my online store. Just click on any of the images below.

![Lifetime Of Love Dies [ 162583 ]](https://i0.wp.com/assets1.tamsnetwork.com/images/EC042017NF/162583s.jpg?w=140&ssl=1 "Lifetime Of Love Dies [ 162583 ]") | ![2025–2027 In Color™ Flat Pearls [ 165192 ]](https://i0.wp.com/assets1.tamsnetwork.com/images/EC042017NF/165192s.jpg?w=140&ssl=1 "2025–2027 In Color™ Flat Pearls [ 165192 ]") | ![1-3/4" (4.4 Cm) Circle Punch [ 119850 ]](https://i0.wp.com/assets1.tamsnetwork.com/images/EC042017NF/119850s.jpg?w=140&ssl=1 "1-3/4\" (4.4 Cm) Circle Punch [ 119850 ]") | ![1 7/8" (4.8 Cm) Circle Punch [ 165259 ]](https://i0.wp.com/assets1.tamsnetwork.com/images/EC042017NF/165259s.jpg?w=140&ssl=1 "1 7/8\" (4.8 Cm) Circle Punch [ 165259 ]") | |
![Basic White A4 Cardstock [ 166781 ]](https://i0.wp.com/assets1.tamsnetwork.com/images/EC042017NF/166781s.jpg?w=140&ssl=1 "Basic White A4 Cardstock [ 166781 ]") | ![Secret Sea Classic Stampin' Pad [ 165285 ]](https://i0.wp.com/assets1.tamsnetwork.com/images/EC042017NF/165285s.jpg?w=140&ssl=1 "Secret Sea Classic Stampin' Pad [ 165285 ]") | ![Multipurpose Liquid Glue [ 110755 ]](https://i0.wp.com/assets1.tamsnetwork.com/images/EC042017NF/110755s.jpg?w=140&ssl=1 "Multipurpose Liquid Glue [ 110755 ]") | ![Stampin' Dimensionals [ 104430 ]](https://i0.wp.com/assets1.tamsnetwork.com/images/EC042017NF/104430s.jpg?w=140&ssl=1 "Stampin' Dimensionals [ 104430 ]") | |
![Adhesive Sheets [ 152334 ]](https://i0.wp.com/assets1.tamsnetwork.com/images/EC042017NF/152334s.jpg?w=140&ssl=1 "Adhesive Sheets [ 152334 ]") | ![Tear & Tape Adhesive [ 154031 ]](https://i0.wp.com/assets1.tamsnetwork.com/images/EC042017NF/154031s.jpg?w=140&ssl=1 "Tear & Tape Adhesive [ 154031 ]") | ![Paper Trimmer [ 152392 ]](https://i0.wp.com/assets1.tamsnetwork.com/images/EC042017NF/152392s.jpg?w=140&ssl=1 "Paper Trimmer [ 152392 ]") | ![Basic White C6 Envelopes [ 159235 ]](https://i0.wp.com/assets1.tamsnetwork.com/images/EC042017NF/159235s.jpg?w=140&ssl=1 "Basic White C6 Envelopes [ 159235 ]") |
![Encircled With Love Photopolymer Stamp Set (English) [ 165338 ]](https://i0.wp.com/assets1.tamsnetwork.com/images/EC042017NF/165338s.jpg?w=140&ssl=1 "Encircled With Love Photopolymer Stamp Set (English) [ 165338 ]")
![Old Olive 12" X 12" (30.5 X 30.5 Cm) Two Tone Cardstock [ 166683 ]](https://i0.wp.com/assets1.tamsnetwork.com/images/EC042017NF/166683s.jpg?w=140&ssl=1 "Old Olive 12\" X 12\" (30.5 X 30.5 Cm) Two Tone Cardstock [ 166683 ]")



![Perennial Postage Dies [ 162607 ]](https://i0.wp.com/assets1.tamsnetwork.com/images/EC042017NF/162607s.jpg?w=140&ssl=1 "Perennial Postage Dies [ 162607 ]")
![Playful Alphabet Dies [ 152706 ]](https://i0.wp.com/assets1.tamsnetwork.com/images/EC042017NF/152706s.jpg?w=140&ssl=1 "Playful Alphabet Dies [ 152706 ]")
![Timid Tiger A4 Cardstock [ 165298 ]](https://i0.wp.com/assets1.tamsnetwork.com/images/EC042017NF/165298s.jpg?w=140&ssl=1 "Timid Tiger A4 Cardstock [ 165298 ]")
![Old Olive Stampin' Blends Combo Pack [ 154892 ]](https://i0.wp.com/assets1.tamsnetwork.com/images/EC042017NF/154892s.jpg?w=140&ssl=1 "Old Olive Stampin' Blends Combo Pack [ 154892 ]")
![Timid Tiger Stampin’ Blends Combo Pack [ 165291 ]](https://i0.wp.com/assets1.tamsnetwork.com/images/EC042017NF/165291s.jpg?w=140&ssl=1 "Timid Tiger Stampin’ Blends Combo Pack [ 165291 ]")
![Stampin' Cut & Emboss Machine [ 149653 ]](https://i0.wp.com/assets1.tamsnetwork.com/images/EC042017NF/149653s.jpg?w=140&ssl=1 "Stampin' Cut & Emboss Machine [ 149653 ]")



![Stylish Shapes Dies [ 159183 ]](https://i0.wp.com/assets1.tamsnetwork.com/images/EC042017NF/159183s.jpg?w=140&ssl=1 "Stylish Shapes Dies [ 159183 ]")
![Daffodil Delight 1/8" (3.2 Mm) Satin Ribbon [ 164715 ]](https://i0.wp.com/assets1.tamsnetwork.com/images/EC042017NF/164715s.jpg?w=140&ssl=1 "Daffodil Delight 1/8\" (3.2 Mm) Satin Ribbon [ 164715 ]")
![Petal Pink 3/8” (1 Cm) Scalloped Ribbon [ 164680 ]](https://i0.wp.com/assets1.tamsnetwork.com/images/EC042017NF/164680s.jpg?w=140&ssl=1 "Petal Pink 3/8” (1 Cm) Scalloped Ribbon [ 164680 ]")
![Daffodil Delight A4 Card Stock [ 121680 ]](https://i0.wp.com/assets1.tamsnetwork.com/images/EC042017NF/121680s.jpg?w=140&ssl=1 "Daffodil Delight A4 Card Stock [ 121680 ]")
![Petal Pink A4 Cardstock [ 147009 ]](https://i0.wp.com/assets1.tamsnetwork.com/images/EC042017NF/147009s.jpg?w=140&ssl=1 "Petal Pink A4 Cardstock [ 147009 ]")
![Secret Sea A4 Cardstock [ 165296 ]](https://i0.wp.com/assets1.tamsnetwork.com/images/EC042017NF/165296s.jpg?w=140&ssl=1 "Secret Sea A4 Cardstock [ 165296 ]")
![Paper Snips [ 103579 ]](https://i0.wp.com/assets1.tamsnetwork.com/images/EC042017NF/103579s.jpg?w=140&ssl=1 "Paper Snips [ 103579 ]")
![Mini Stampin' Cut & Emboss Machine [ 150673 ]](https://i0.wp.com/assets1.tamsnetwork.com/images/EC042017NF/150673s.jpg?w=140&ssl=1 "Mini Stampin' Cut & Emboss Machine [ 150673 ]")




