Although my Fridays are normally spent sharing Fun Fold cards, today I have the last eight cards that I made for my card gift box.
First let me share four birthday cards with you.

I have used the uneven number rule for all of these birthday cards.

I’m keeping the bicycle birthday card to give to my brother later this month – he’s turning 55!
The last four cards that are going into the gift box are Christmas cards.

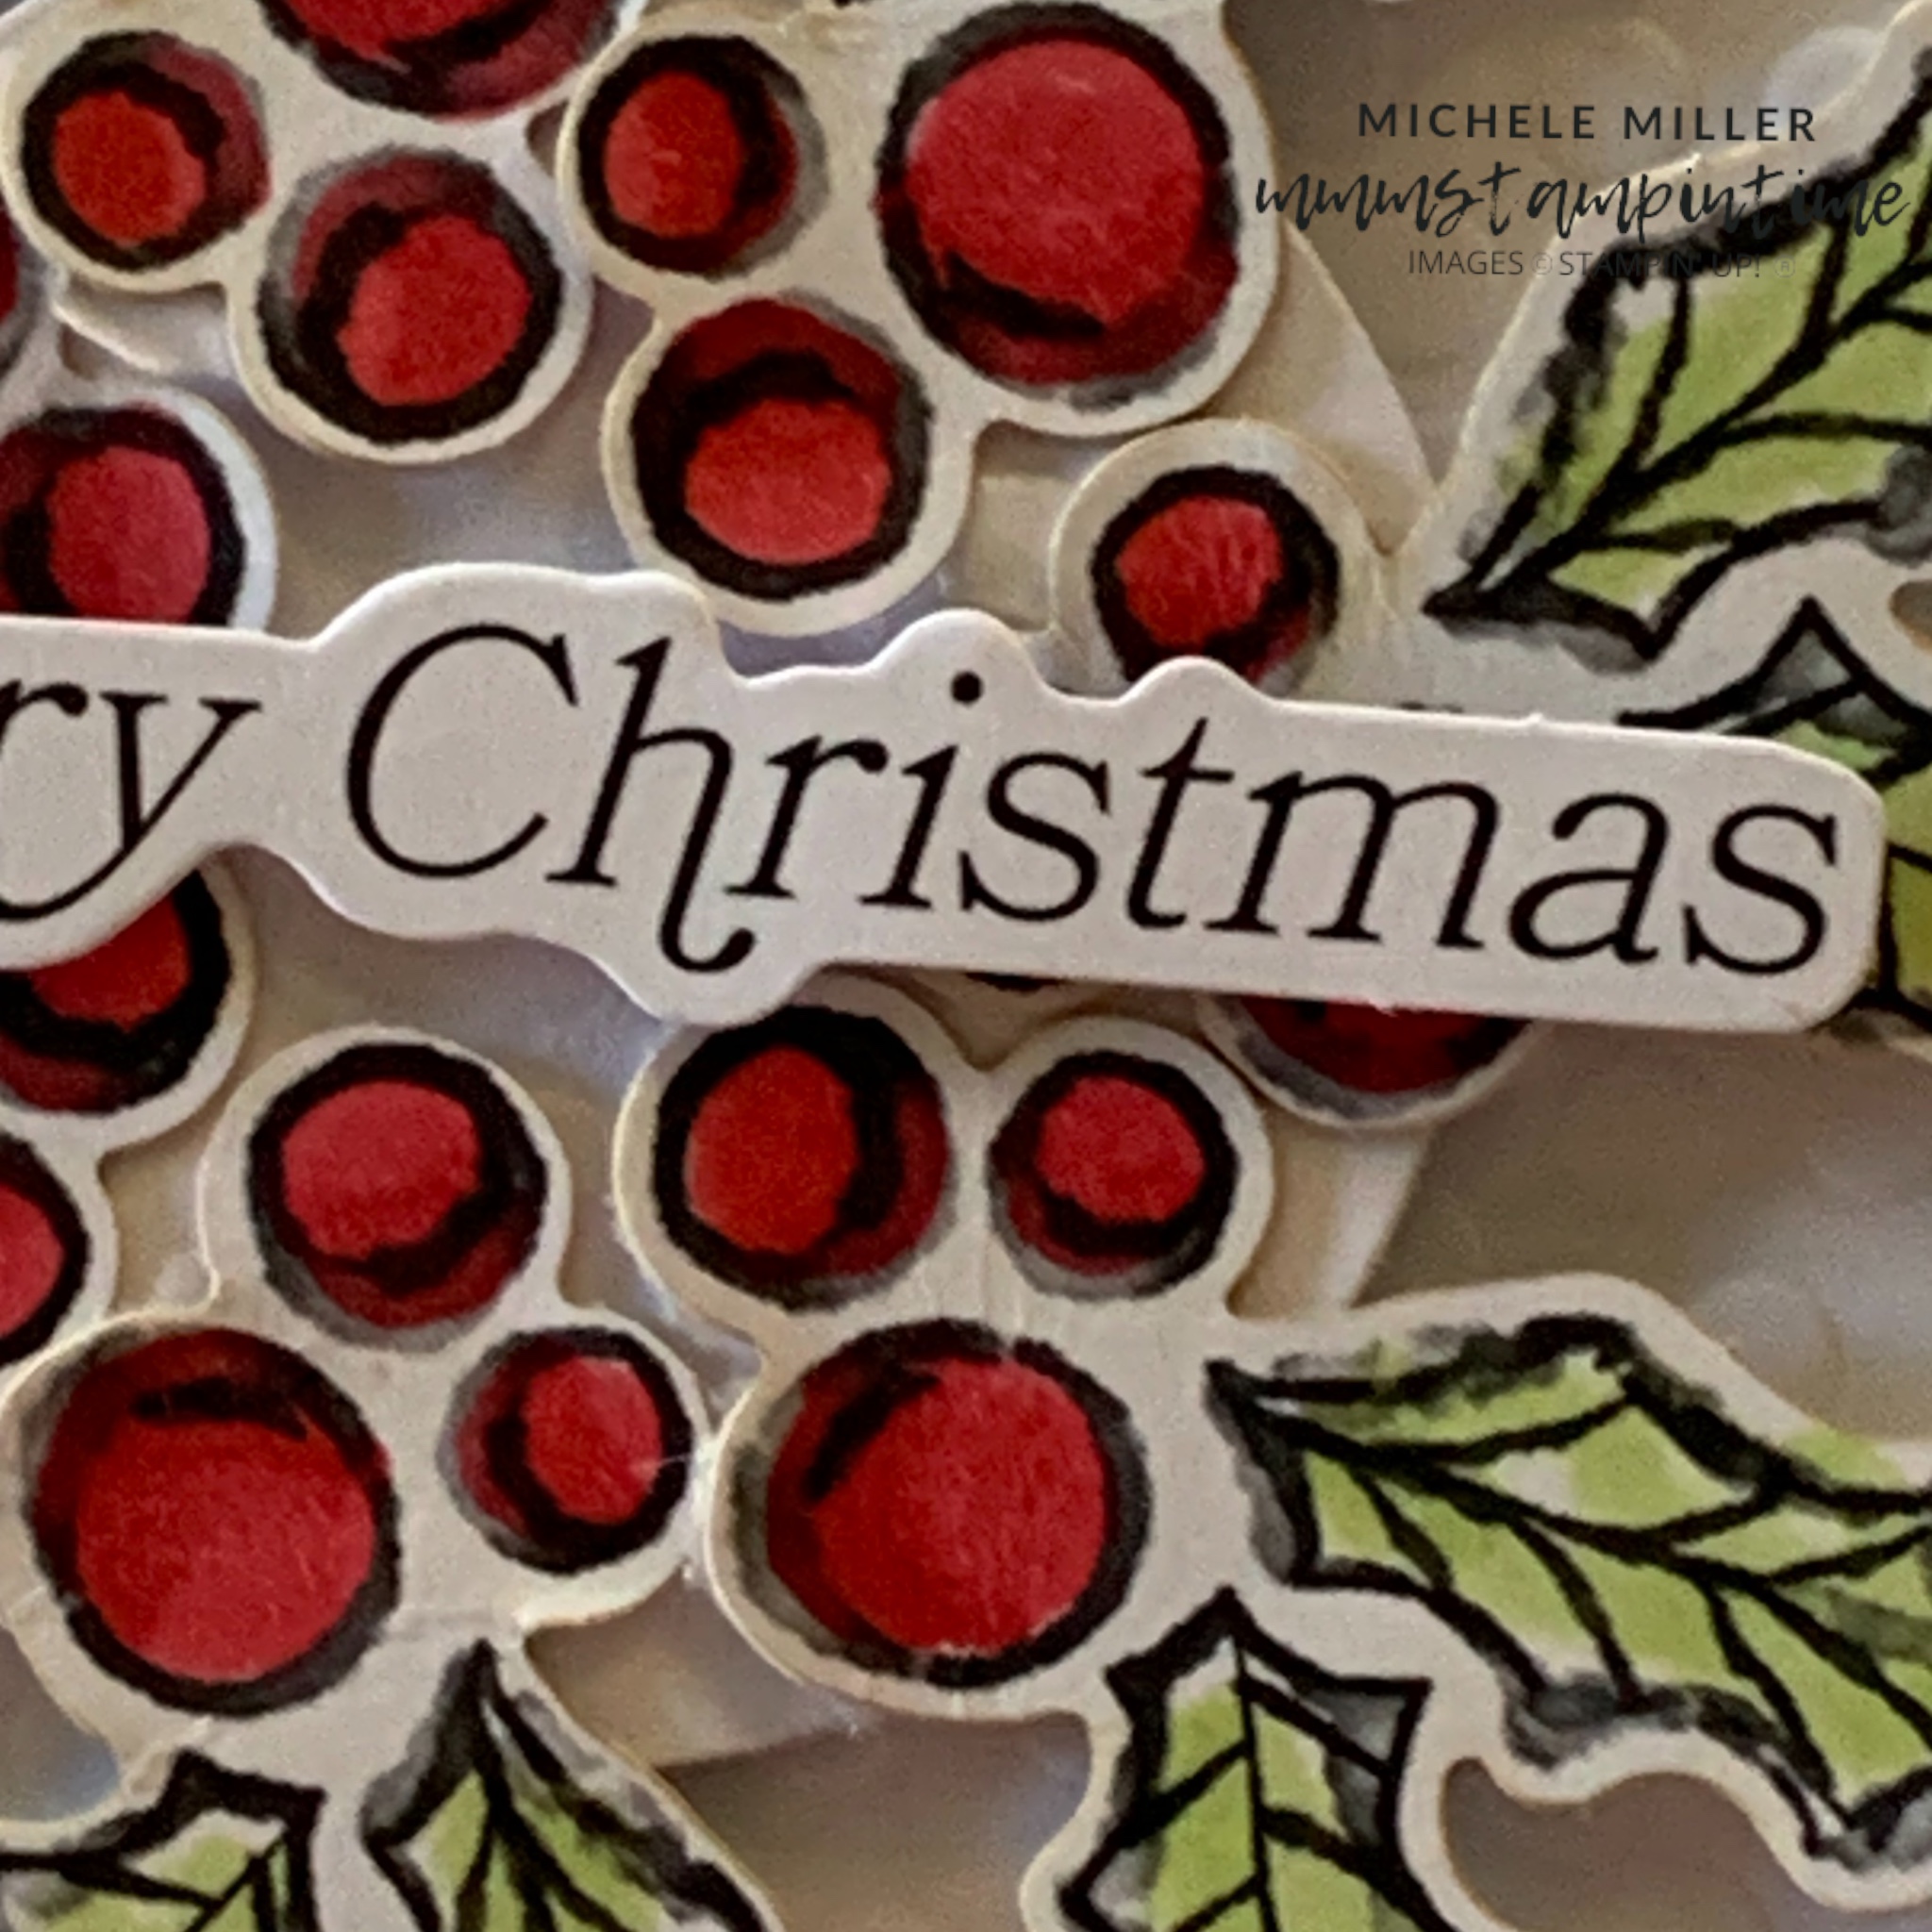
The Christmas puddings are so cute!
Real Red is always a great colour for Christmas projects.

The holly wreath was created after colouring 7 sprigs and then placing them on a 1 7/8″ circle. The new circle punch is a great addition to the collection.
The background, for the baubles card, was made by adhering many of the snowflake shapes to the white card base. Then the Misty Moonlight banner was added using Stampin’ Dimensionals.
I used the Hole Punch Assortment (165409) to punch the small hole in the three baubles. This allowed me to thread some white twine through them to create this look.

And, there you have it – a thank you gift box filled with cards for most occasions.

This week has been so much fun. It is so quick and easy to create lots and lots of cards when you use the Ephemera Packs,
I hope that you add some to your crafting stash.
Next week I will have something new to share with you.
Until then, happy stamping and scrapbooking.

If you live in Australia, you can order any of the products I used to make this card by going to my online store. Just click on any of the images below.

![Baker's Twine Essentials Pack [ 155475 ]](https://i0.wp.com/assets1.tamsnetwork.com/images/EC042017NF/155475s.jpg?w=140&ssl=1 "Baker's Twine Essentials Pack [ 155475 ]") | ![Party Banners Dies [ 165264 ]](https://i0.wp.com/assets1.tamsnetwork.com/images/EC042017NF/165264s.jpg?w=140&ssl=1 "Party Banners Dies [ 165264 ]") | ![1 7/8" (4.8 Cm) Circle Punch [ 165259 ]](https://i0.wp.com/assets1.tamsnetwork.com/images/EC042017NF/165259s.jpg?w=140&ssl=1 "1 7/8\" (4.8 Cm) Circle Punch [ 165259 ]") | ![Hole Punch Assortment [ 165409 ]](https://i0.wp.com/assets1.tamsnetwork.com/images/EC042017NF/165409s.jpg?w=140&ssl=1 "Hole Punch Assortment [ 165409 ]") | ![Basic White A4 Cardstock [ 166781 ]](https://i0.wp.com/assets1.tamsnetwork.com/images/EC042017NF/166781s.jpg?w=140&ssl=1 "Basic White A4 Cardstock [ 166781 ]") |
![Misty Moonlight A4 Cardstock [ 153086 ]](https://i0.wp.com/assets1.tamsnetwork.com/images/EC042017NF/153086s.jpg?w=140&ssl=1 "Misty Moonlight A4 Cardstock [ 153086 ]") | ![Real Red A4 Card Stock [ 106578 ]](https://i0.wp.com/assets1.tamsnetwork.com/images/EC042017NF/106578s.jpg?w=140&ssl=1 "Real Red A4 Card Stock [ 106578 ]") | ![Multipurpose Liquid Glue [ 110755 ]](https://i0.wp.com/assets1.tamsnetwork.com/images/EC042017NF/110755s.jpg?w=140&ssl=1 "Multipurpose Liquid Glue [ 110755 ]") | ![Mini Stampin' Dimensionals [ 144108 ]](https://i0.wp.com/assets1.tamsnetwork.com/images/EC042017NF/144108s.jpg?w=140&ssl=1 "Mini Stampin' Dimensionals [ 144108 ]") | ![Stampin' Dimensionals [ 104430 ]](https://i0.wp.com/assets1.tamsnetwork.com/images/EC042017NF/104430s.jpg?w=140&ssl=1 "Stampin' Dimensionals [ 104430 ]") |
![Paper Snips [ 103579 ]](https://i0.wp.com/assets1.tamsnetwork.com/images/EC042017NF/103579s.jpg?w=140&ssl=1 "Paper Snips [ 103579 ]") | ![Stampin' Cut & Emboss Machine [ 149653 ]](https://i0.wp.com/assets1.tamsnetwork.com/images/EC042017NF/149653s.jpg?w=140&ssl=1 "Stampin' Cut & Emboss Machine [ 149653 ]") | ![Mini Stampin' Cut & Emboss Machine [ 150673 ]](https://i0.wp.com/assets1.tamsnetwork.com/images/EC042017NF/150673s.jpg?w=140&ssl=1 "Mini Stampin' Cut & Emboss Machine [ 150673 ]") |
![Good Times Mix & Match Ephemera Pack [ 165353 ]](https://i0.wp.com/assets1.tamsnetwork.com/images/EC042017NF/165353s.jpg?w=140&ssl=1 "Good Times Mix & Match Ephemera Pack [ 165353 ]")
![Greetings For All Mix & Match Ephemera Pack (English) [ 164862 ]](https://i0.wp.com/assets1.tamsnetwork.com/images/EC042017NF/164862s.jpg?w=140&ssl=1 "Greetings For All Mix & Match Ephemera Pack (English) [ 164862 ]")
![Time For Celebration Mix & Match Ephemera Pack [ 165354 ]](https://i0.wp.com/assets1.tamsnetwork.com/images/EC042017NF/165354s.jpg?w=140&ssl=1 "Time For Celebration Mix & Match Ephemera Pack [ 165354 ]")
![Embossed Designs Mix & Match Specialty Cards & Envelopes [ 165358 ]](https://i0.wp.com/assets1.tamsnetwork.com/images/EC042017NF/165358s.jpg?w=140&ssl=1 "Embossed Designs Mix & Match Specialty Cards & Envelopes [ 165358 ]")
![Textured Stripes Mix & Match Cards & Envelopes [ 165357 ]](https://i0.wp.com/assets1.tamsnetwork.com/images/EC042017NF/165357s.jpg?w=140&ssl=1 "Textured Stripes Mix & Match Cards & Envelopes [ 165357 ]")


![Real Red & White Baker's Twine [ 164051 ]](https://i0.wp.com/assets1.tamsnetwork.com/images/EC042017NF/164051s.jpg?w=140&ssl=1 "Real Red & White Baker's Twine [ 164051 ]")
![Party Dies Bundle [ 165265 ]](https://i0.wp.com/assets1.tamsnetwork.com/images/EC042017NF/165265s.jpg?w=140&ssl=1 "Party Dies Bundle [ 165265 ]")
![Party Alphabet Dies [ 165263 ]](https://i0.wp.com/assets1.tamsnetwork.com/images/EC042017NF/165263s.jpg?w=140&ssl=1 "Party Alphabet Dies [ 165263 ]")
![Adhesive Sheets [ 152334 ]](https://i0.wp.com/assets1.tamsnetwork.com/images/EC042017NF/152334s.jpg?w=140&ssl=1 "Adhesive Sheets [ 152334 ]")