Posted on Leave a comment

IT’S MONDAY & THAT MEANS IT IS TIME TO HIGHLIGHT SOME NEW STAMIN’ UP! PRODUCTS

This week I am showcasing the Beach Day Bundle.

For 35 years Ilived a five minute walk from Kelly’s Beach, Bargara. Bargara is a coastal township that is a 15 minute drive from Bundaberg, Queensland.

In Australia, most beaches are patrolled by Australian Surf Life Saving life savers. These amazing people are volunteers. Their observation ‘towers’ are quite different to the style in this stamp set. The image below is from Kurrawa Beach, on the Gold Coast.

Here is my first project using this bundle.

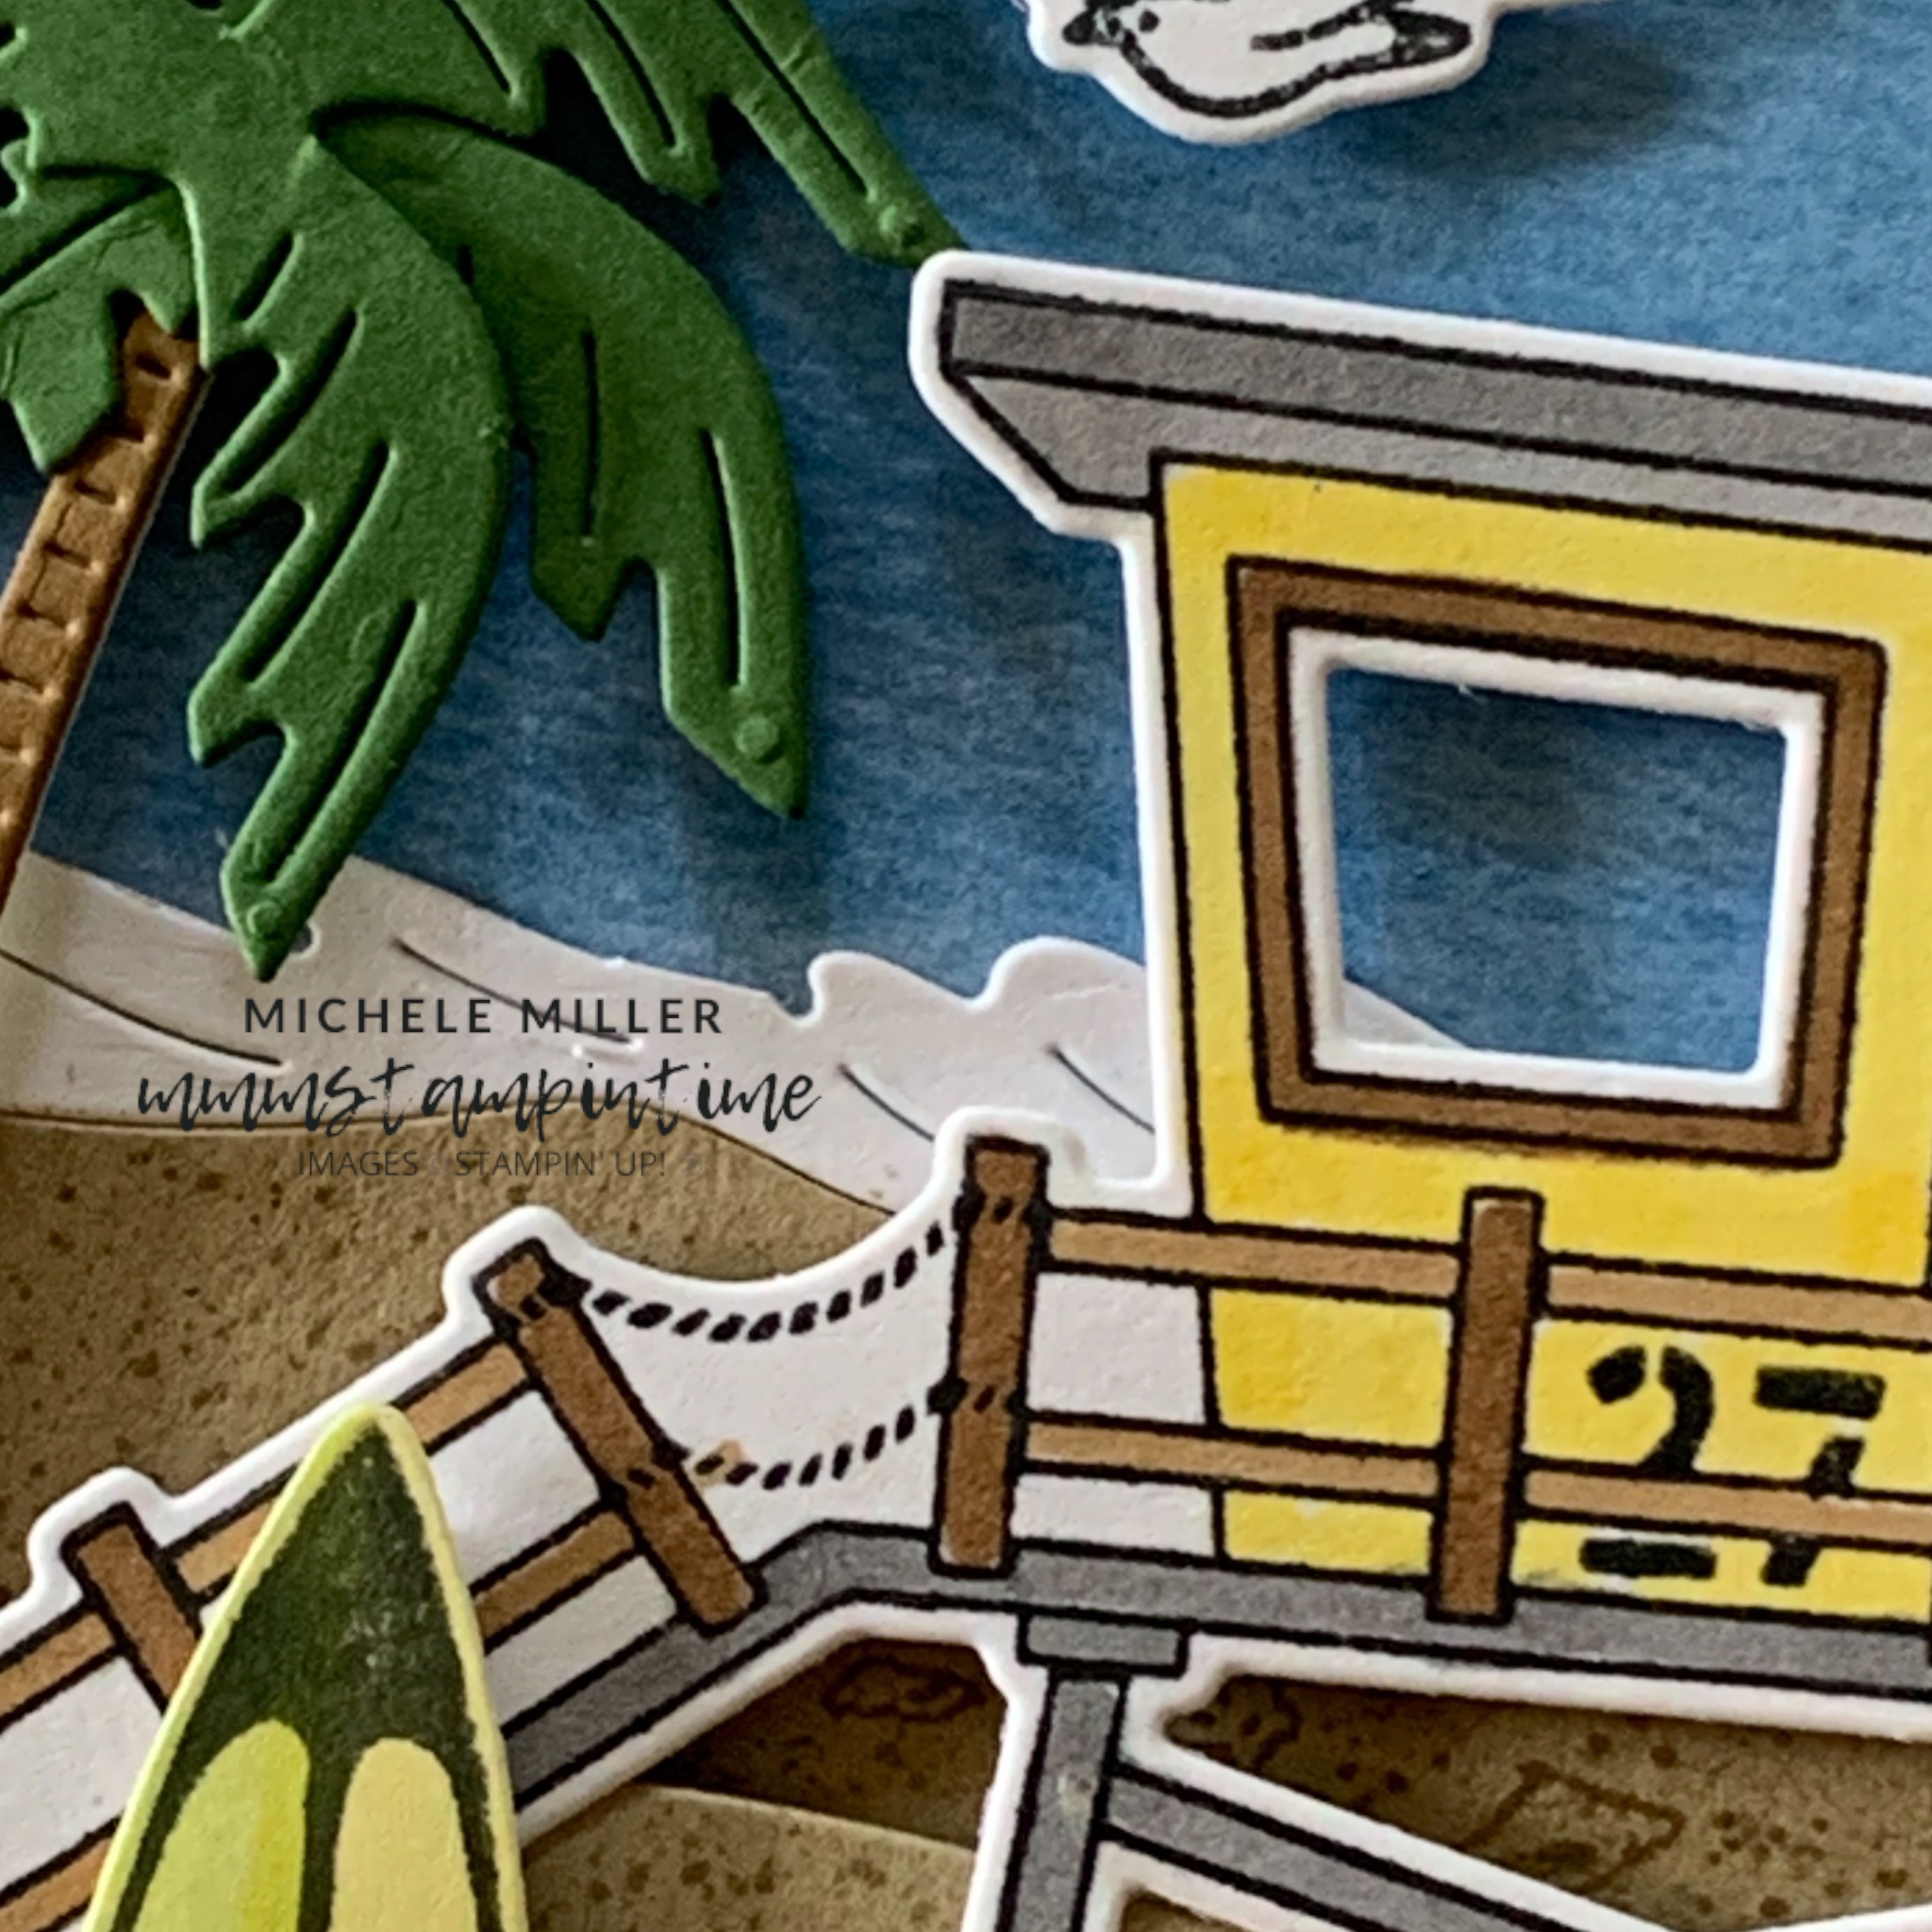
This card is all about sand, sea and surf life saving.

I started with the Bright & Beautiful 6″x 6″ Designer Series Paper and found this wonderful blue background paper.

Then I used the wavy die, from the Beach Day Dies collection, to cut two beach layers. These were cut from Crumb Cake card and then I used the Crumb Cake Stampin’ Blends to add flecks of colour to the card.

I layered these two beach elements using Stampin’ Dimensionals.

Using the wave die, I cut the white waves element to add to the card front.

After combining the sand, waves and sky layers to the card base, I was ready to add the decorative elements.

I stamped, coloured and die cut the beach hut. Then I stamped and cut the surfboard, from a piece of the DSP.

The sandcastles were stamped and cut, as were the seagulls.

The palm tree was cut from card stock and adhered together.

Each of these elements were then adhered to the card front using adhesive and dimensionals, creating layers to the card front.

The greeting was stamped, trimmed and added to the card front, using Stampin’ Dimensionals.

Finally, I stamped and cut two more surfboards and added them to the card insert and envelope.

Tomorrow I will share a technique inspired project with you.

Until then, happy stamping.

If you live in Australia, you can order any of the products I used to make this card by going to my online store. Just click on any of the images below.

Product List
Paper Snips
[103579]
$19.25
Posted on Leave a comment

TIME FOR A SUNDAY SHARE

Today I want to share my project for this week’s Global Design Project. This week it is a theme challege.

If you click on the image below, you will go to the GDP site and you can see all the amazing projects created by the design crew and other crafters who are participating.

For my project, I decided to combine the Share a Milkshake and Simply Sparkling Bundles, to make a milkshake shaker card.

I started by cutting out the milkshake glass. This panel worked as a perfect template to stamp the glass filler image onto a second Basic White panel.

I secured a Window Sheet panel behind the die cut layer and then added lengths of Foam Adhesive Sheets to create the shaker space.

For the shaker shimmer, I used the Loose Silver Sequins. After I had added then over the stamped image, I secured the top layer to the base.

The Basic White layers were then adhered to a Poppy Parade card base.

I stamped, coloured and die cut the frothy milkshake top. After stamping and cutting the Granny Apple Green straw, I inserted it into the ‘froth’ and secured it in place with some Tear & Tape.

Stampin’ Dimensionals were attached to the back of the froth and then it was added to the top of the glass.

I stamped, coloured and die cut several strawberries. After painting them with some Clear Wink of Stella, I added them around the base of the glass using Multipurpose Glue and Stampin’ Dimensionals.

The greeting, from the Share a Milkshake Stamp Set, was stamped in Poppy Parade. Then it was cut using one of the Autumn Leaves Dies. I also cut two Granny Apple Green layers that were staggered under the greeting layer.

I placed dimensionals under the greeting layers and positioned it on the card front. Then I added an extra strawberry to the greeting layers.

I coloured and trimmed down a length of White Iridescent Ribbon before tying it into a bow. Using silver trim, from the Simply Elegant Trim, I tied a double bow. I used Mini Glue Dots to attach both of these bows just under the straw.

The two extra strawberries were added to the card insert and the back of the envelope.

Finally, I used the Dark Poppy Parade Stampin’ Blend Pen to colour some of the Loose Silver Sequins. They were attached to the card front using Mini Glue Dots.

I am very happy with this very sweet little card. What do you think?

Tomorrow, I will start the week with a new collection of projects featuring the Beach Day Bundle.

Until the, happy stamping.

If you live in Australia, you can order any of the products I used to make this card by going to my online store. Just click on any of the images below.

Product List
Paper Snips
[103579]
$19.25
Posted on Leave a comment

IT’S FRIDAY & TIME FOR SOME FEATURES AND A FUN FOLD CARD

This week I used the Just Kiddin’ Suite Collection and Filled with Fun Bundle.

The Just Kiddin’ Suite, as you can see below, includes the Kiddin’ Around Cling Stamp set. This set has five fun images and three wonderful greetings.

The suite also has a coordinating set of 14 dies.

The Just Kiddin’ Designer Series Paper has 12 sheets – 2 each of 6 double sided designs. One side has a variety of images of children and the other side has wonderful background designs.

Finally, there is a pack of Iridescent Foil Gems to add bling to projects.

The Filled with Fun Bundle includes the Filled with Fun Photopolymer Stamp Set. The stamp set has 10 amazing images to help you stamp and build some amazing pull cart variations. It also has three lovely greetings.

I still have so many ideas for using these products.

For my final project this week , I have made a fun fold card. I started with a card base measuring 12″ x 6″.

I scored the 12″ side at 6″, 9″ and 10 1/2″.

I cut this blue DSP design to fit each of the card base panels.

THen I spent time fussy cutting each of the reading characters to include in the card.

The Mini Alphabet Dies were perfect to create each of the words included in this card.

I don’t think that have done this much fussy cutting in quite a while. I really like the little reader tucked in under his blanket.

On the ‘read with passion’ page, I included a gift card pocket. This will be the perfect place for a bookstore gift card for an avid little reader.

I am not sure what I will have for you tomorrow. So until then, happy stamping.

If you live in Australia, you can order any of the products I used to make this card by going to my online store. Just click on any of the images below.

Product List
Paper Snips
[103579]
$19.25