Posted on Leave a comment

IT’S MONDAY & THAT MEANS IT IS TIME TO HIGHLIGHT SOME NEW STAMPIN’ UP! PRODUCTS

This week I will feature a few different Stampin’ Up! products because the main theme this week is Easter.

My first project uses the Excellent Eggs Bundle and some bright, rainbow-inspired colours.

I started by preparing a Basic White cardbase and then die cutting all the coloured card elements. Before cutting them, I added Adhesive Sheets to the back of the card.

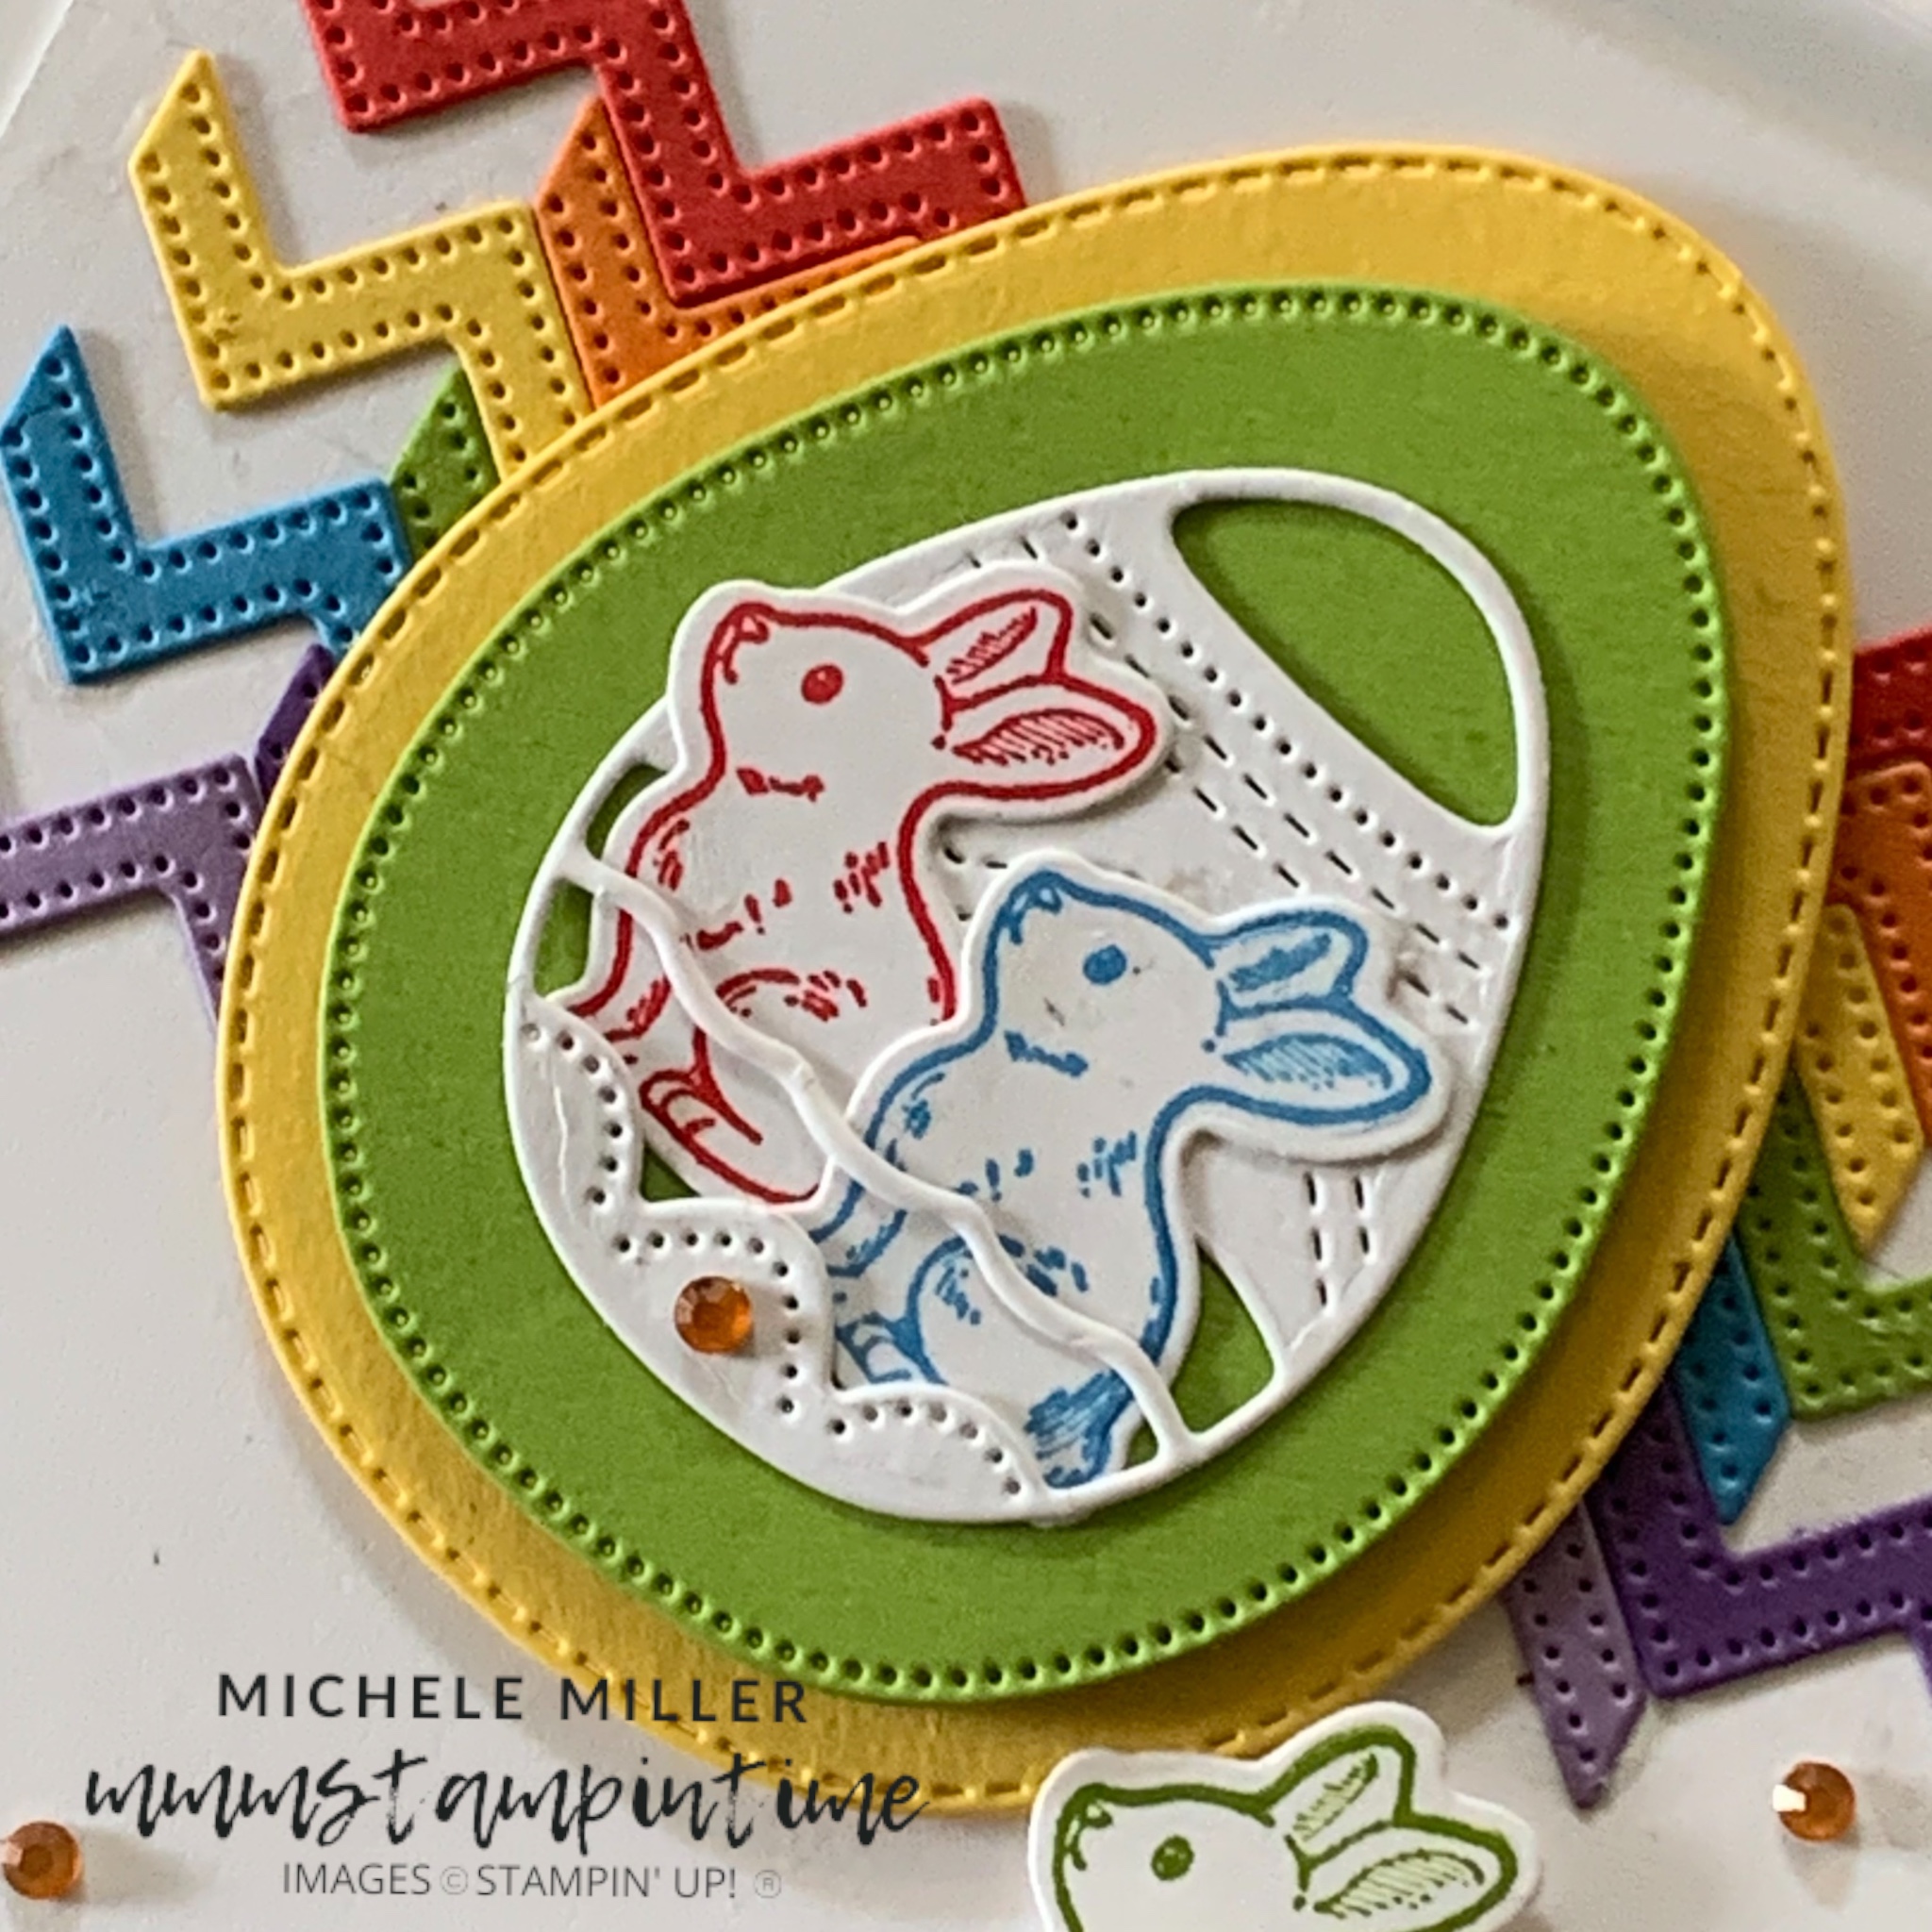
The zigzag rainbow pieces were cut first. I used Poppy Parade, Pumpkin Pie, Daffodil Delight, Granny Apple Green, Azure Afternoon, Gorgeous Grape and Highland Heather.

I adhered the zigzags to the front of the card, staggering them on top of each other.

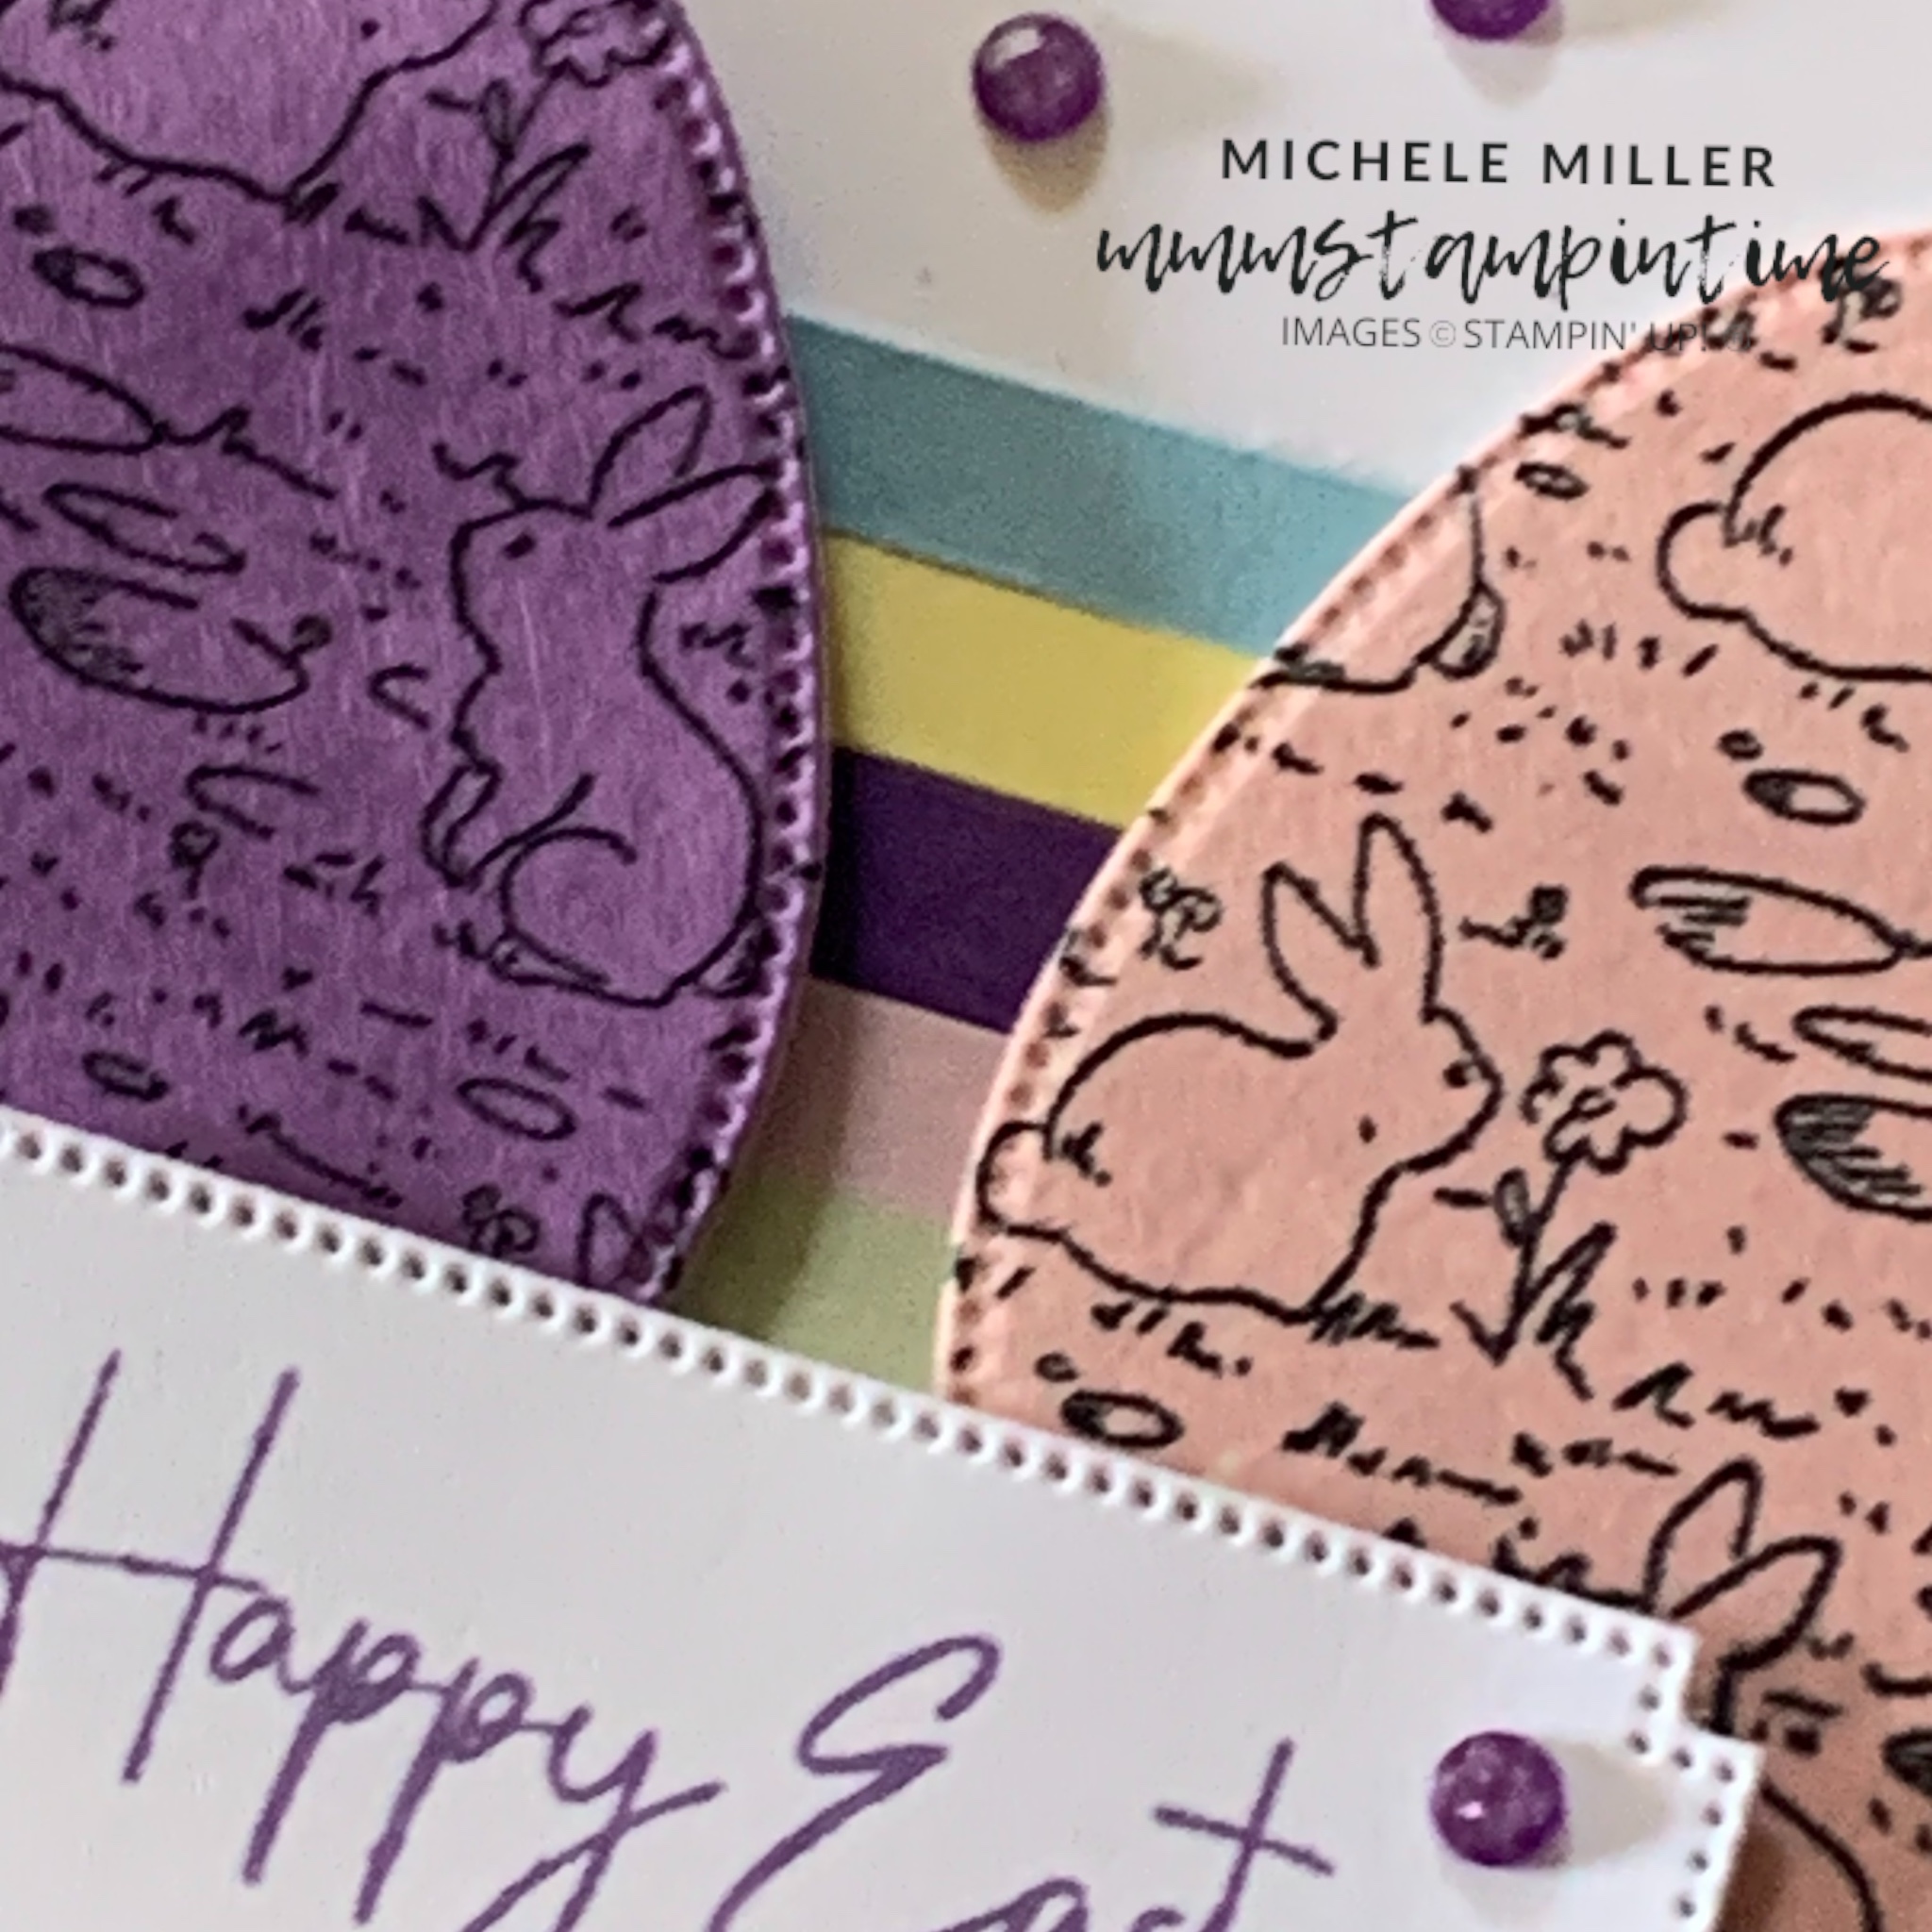
Three different sized eggs were cut and layered, with Stampin’ Dimensionals to give them height.

I stamped and cut some of the small rabbits. Two of them were tucked inside the white egg. The third bunny was positioned in the bottom right-hand area of the card.

The greeting was stamped on a scrap of white cardstock and was then cut with one of the Everyday Details Dies.

I cut two more smaller eggs and added them inside the card and on the envelope.

Finally, I coloured some small Rhinestone Basic Jewels with a Dark Pumpkin Pie Stampin’ Blends pen. I added five of them to the card front.

Tomorrow I have a lovely Easter Lilies card to share with you.

Until then, happy stamping.

If you live in Australia, you can order any of the products I used to make this card by going to my online store. Just click on any of the images below.

Product List
Paper Snips
[103579]
$19.25
Posted on Leave a comment

THURSDAY MEANS THAT IT’S TIME FOR A 3D PROJECT

I decided to make a gift box to hold three coffee satchets. This would be a great little gift for a work colleague.

This will probably be a quick post today.

The box measures 7″ x 1 1/2″ x 1 1/2″ and was made using Early Espresso cardstock.

After cutting, scoring and trimming the box, I cut four pieces of this great coffee bean design DSP into strips that were 6 7/8″ x 1 7/8″. Then these panels were adhered in place.

Using Stampin’ Seal+ to construct the gift box.

I glued three die cut coffee cups to the front of the box.

For the lid, I cut a large square Perennial Postage Die in Early Espresso and a smaller one in in the same coffee bean DSP. I layered and adhered them together.

I looped a length of Lost Lagoon Bordered Ribbon under a die cut coffee cup. Then I popped some dimensionals under the cup and added them to the postage shapes.

Then I glued these layers to the top of the box lid.

The Nescafe sachets fit perfectly inside the gift box.

The greeting was stamped using Lost Lagoon and cut using the smaller square Perennial Postage Dies.

I used dimensionals to pop it up on the front of the box.

Finally, I added some Lost LAgoon Tinsel Gems to the top and front of the box.

Tomorrow I will share my last project using the A Little Latte Suite Collection.

Until then, happy stamping.

If you live in Australia, you can order any of the products I used to make this card by going to my online store. Just click on any of the images below.

Product List
Paper Snips
[103579]
$19.25
Posted on Leave a comment

TIME TO SHARE MY #160 COLOUR INKSPIRATION PROJECT

Welcome to our 160th challenge at Colour INKspiration!

Today’s picture which has inspired our colour palette was chosen by Colour INKspiration Crew Member, Nicole WilsonVicki Boucher.

Phot credit – https://www.flickr.com/photos/-etiana-/17086077241/?fbclid=IwAR1-ZRBjW5R0Jb9USe2mkJUZiAyljAxtI51kuYBf3daqyCAzkw4QRiHPIyk

As well as the chosen colour combination for #CI160, Bubble Bath, Lemon Lolly, Soft Sea Foam, Balmy BLue and Highland Heather. You may also add Basic White, Very Vanilla, Crumb Cake, Basic Black and metallics to your project. We also allow ‘Ivory’, ‘Bronze’ and ‘Natural Tones’ in the Stampin’ Blends. If you don’t have the colours in our palette, feel free to use the closest Stampin’ Up! substitute.

For my contribution to the Crew Album, I opted for the Excellent Eggs Bundle.

I started by adding a watercolour wash to some pieces of Fluid 100 Watercolour Paper.

Then I stamped the bunny egg image over the five watercoloured pieces. The next step was to cut the images with the smallest egg die

To fit five eggs across the card front, it needed to be a slimline card.

I cut a 1/4″ strip of each of challenge colours and adhered them across the centre of the card. Then I trimmed the ends.

I cut the Balmy Blue and Soft Sea Foam eggs in half.

Each of the eggs then had Stampin’ Dimensionals attached to their backs. Then I placed the eggs across the card front.

The Easter greeting was stamped and then cut using one of the Autumn Leaves Dies.

I added the other half of the Balmy Blue egg inside the card.

Finally, I added some Purple Fine Shimmer Gems to the card.

This was a fun card to make.

Happy stamping.

If you live in Australia, you can order any of the products I used to make this card by going to my online store. Just click on any of the images below.

Product List
Paper Snips
[103579]
$19.25