Yesterday I shared a video sneak peek of some of the exciting new products from the 2022 – 2023 Annual Catalogue. So, today, it is time to catch up with my usual weekend posts.
This week I am featuring one of these new product collections – the Tea Boutique Suite Collection.
The first two cards are seriously, extra #simplestamping projects.
I used Basic White Notecards & Envelopes, acrylic blocks and adhesives; along with these little goodies.

Card #1 is great for people who have never stamped before. They will go ‘wow’ when the ink transfers from the stamp to the card.

The teacup was stamped using Crushed Curry ink and the leaves were stamped in Parakeet Party.
The tea tag, stamped in the same col was fussy cut. I used my Take Your Pick Tool to punch a small hole to thread the twine through. Then I used a mini glue dot to secure the twine to the back of the tag. The tea tag has a Stampin’ Dimensional behind it to pop it up over the stamped teacup.
The small flower was stamped insode the card and on the envelope.

For this card I added one more colour and a second stamp. I used a strip of Post It note to mask the tops of the bottom two cups and create this tea cup stack.

Now for something different.

This time I stamped the tea cups directly onto a piece of the Tea Boutique 6″x 6″ Designer Series Paper. I also added an extra colour – Sweet Sorbet.
Let’s start stepping it up.

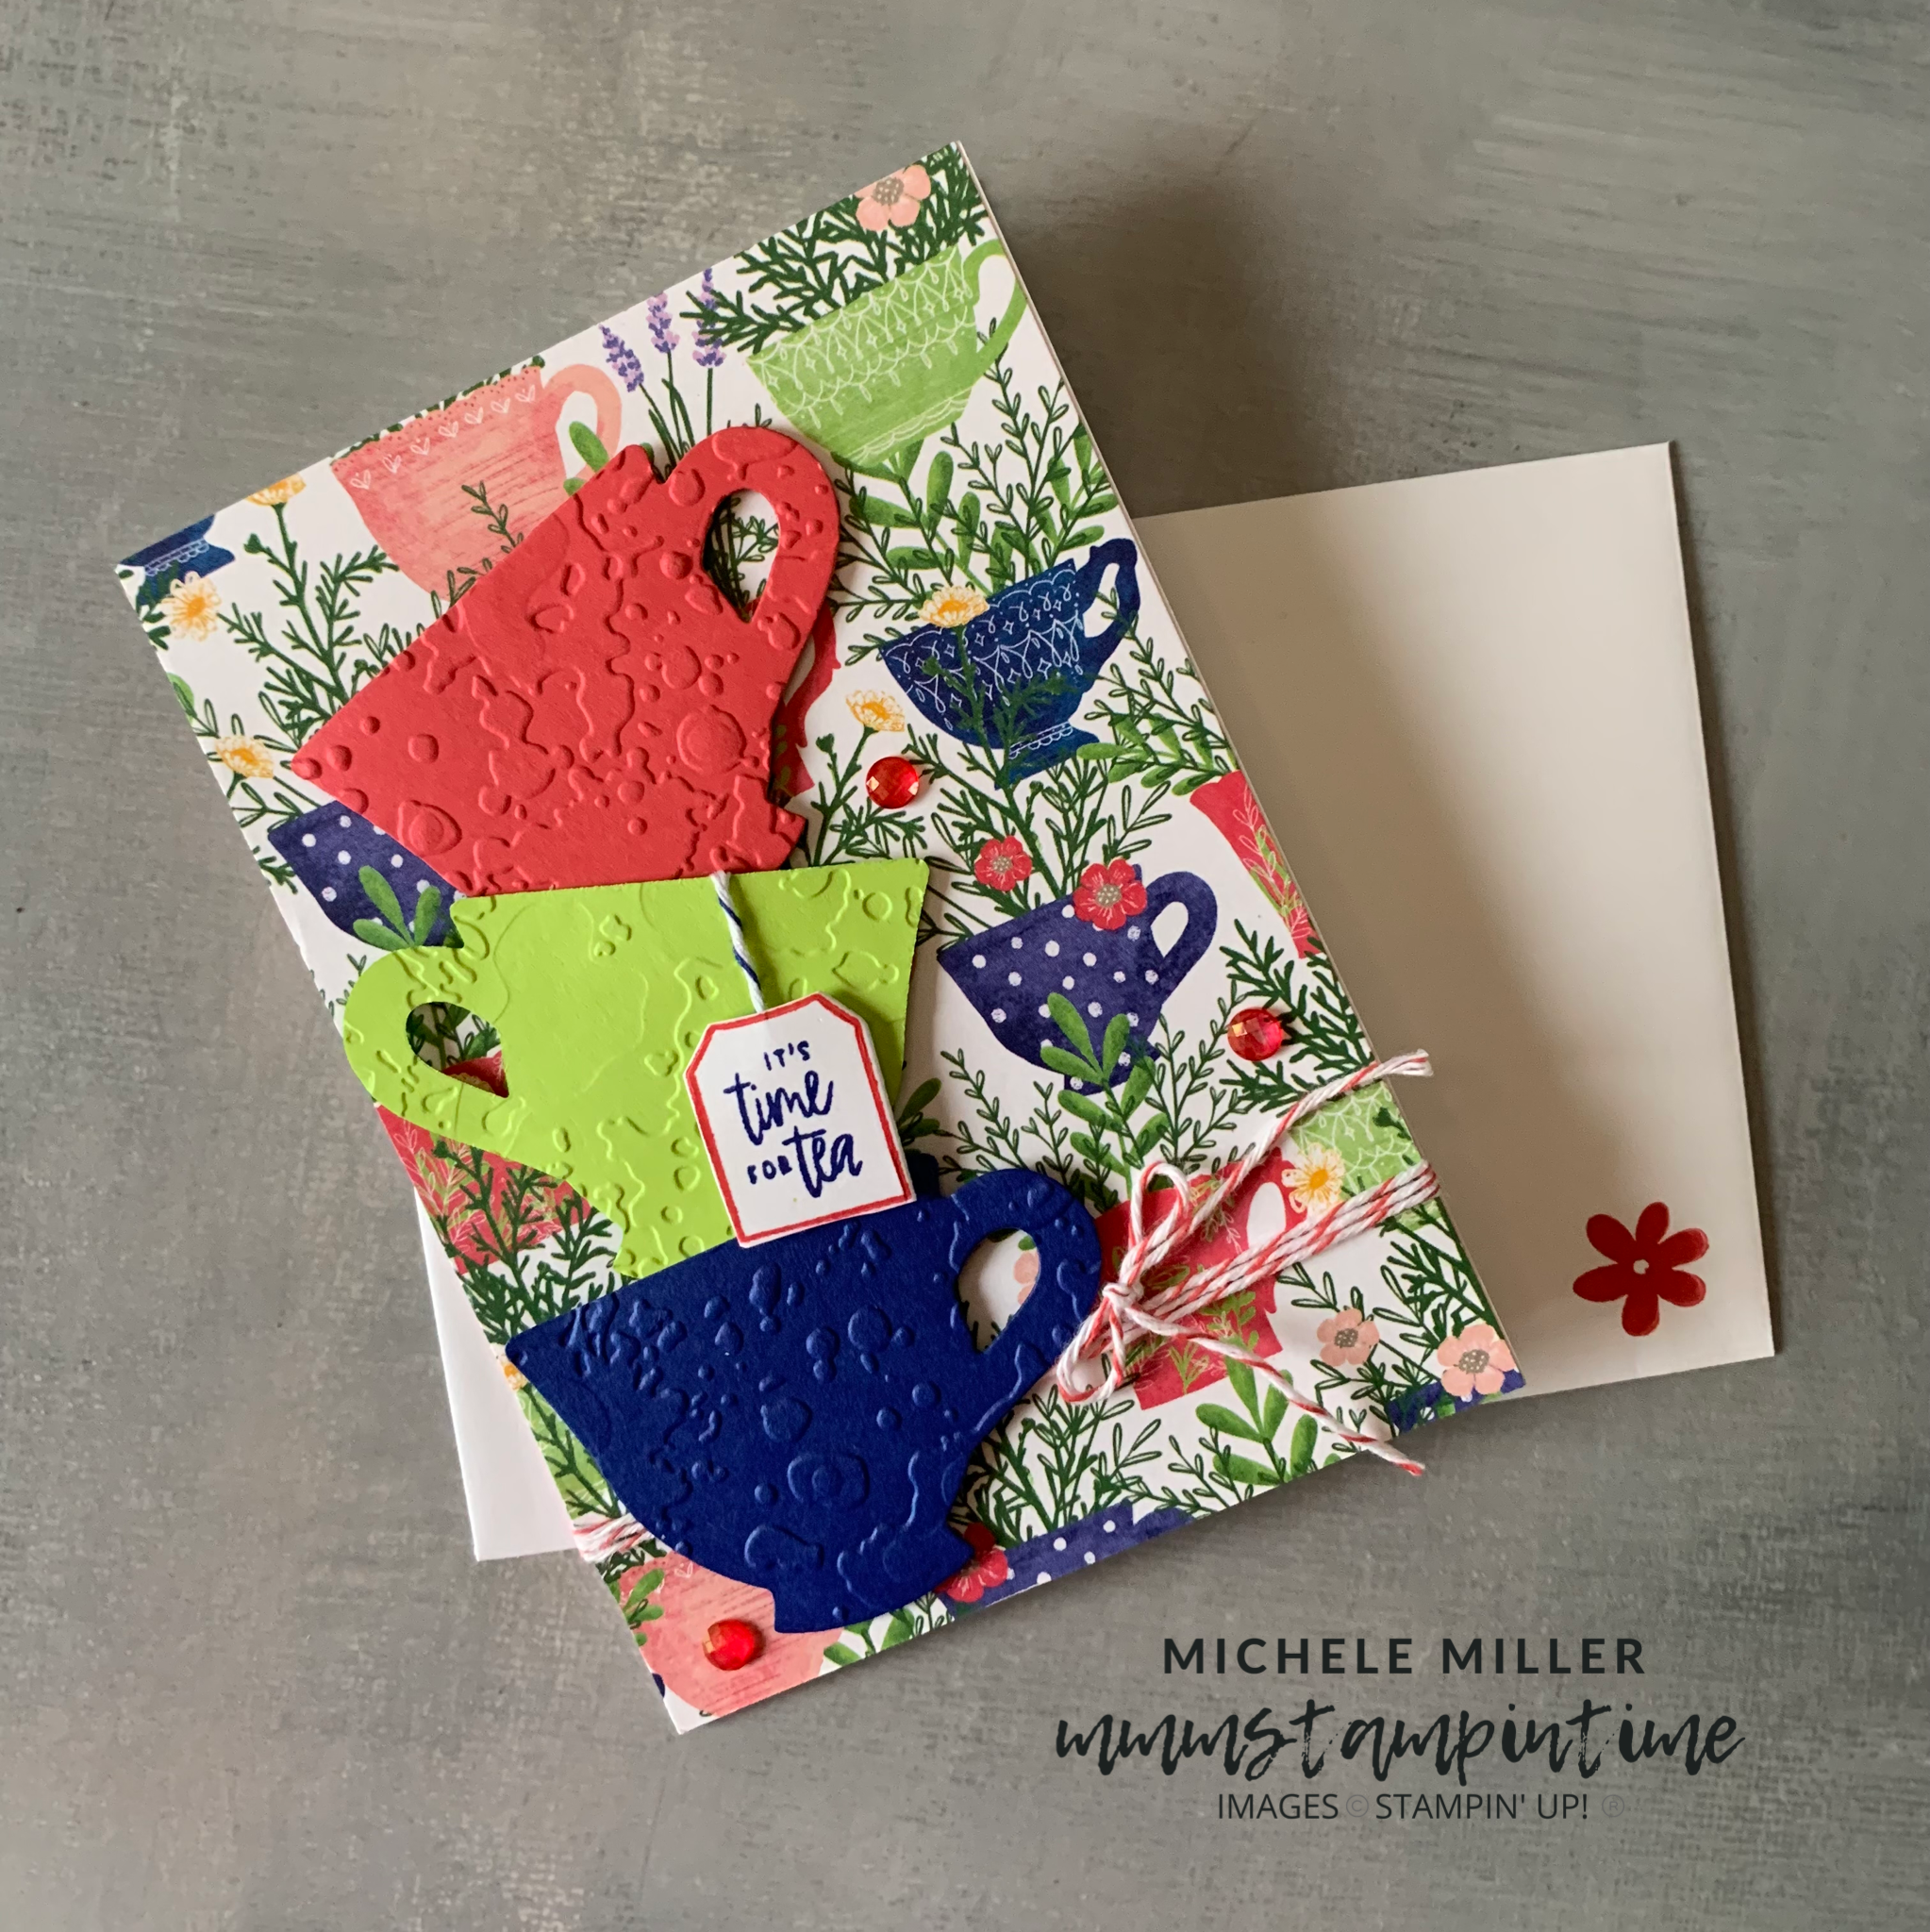
Using the same colours as before, this time I have added the Teacup Dies to the range of products I’m using.
I also stamped the flower image on Crushed Curry DSP layer.

For this card, I added the Banners Pick a Punch to cut the banner ends in the five different strips of DSP.

I used my Dark Tahitian Tide Stampin’ Blends pen to colour these Elegant Faceted Gems for the card front.
The teacups for this card have been layered differently as well.

This card has 5″x 3-1/2″ floral DSP front with Sweet Sorbet & Basic White Baker’s Twine wrapped around it and tied in a bow.
The teacups were die cut before being embossed with the splatters folder from the Stripes & Splatters 3D Embossing Folders.

I coloured the same gems using the Dark Sweet Sorbet Stampin’ Blends pen.

This soon to be available Tea Boutique Suite Collection is so lovely. I’m looking forward to creating with it this week.

Well, that was fun. From super #simplestamping to stepped up cards – 6 in total. I hope you like what I have shared today.
Tomorrow, we’re back to Memories on Monday.
Until then, happy stamping.

If you live in Australia, you can order any of the products I used to make this card by going to my online store. Just click on any of the images below.

Because some of the products I have used to make this card are not yet available to customers, I am not able to show them at this time.
Product List  |  |  | |
 |  |  |  |
 |  |  |


