I love the gorgeous colourful old buildings that can be found in Scandanavian countries.

For this challenge I wanted to use the Happy Little Things Stamp Set.

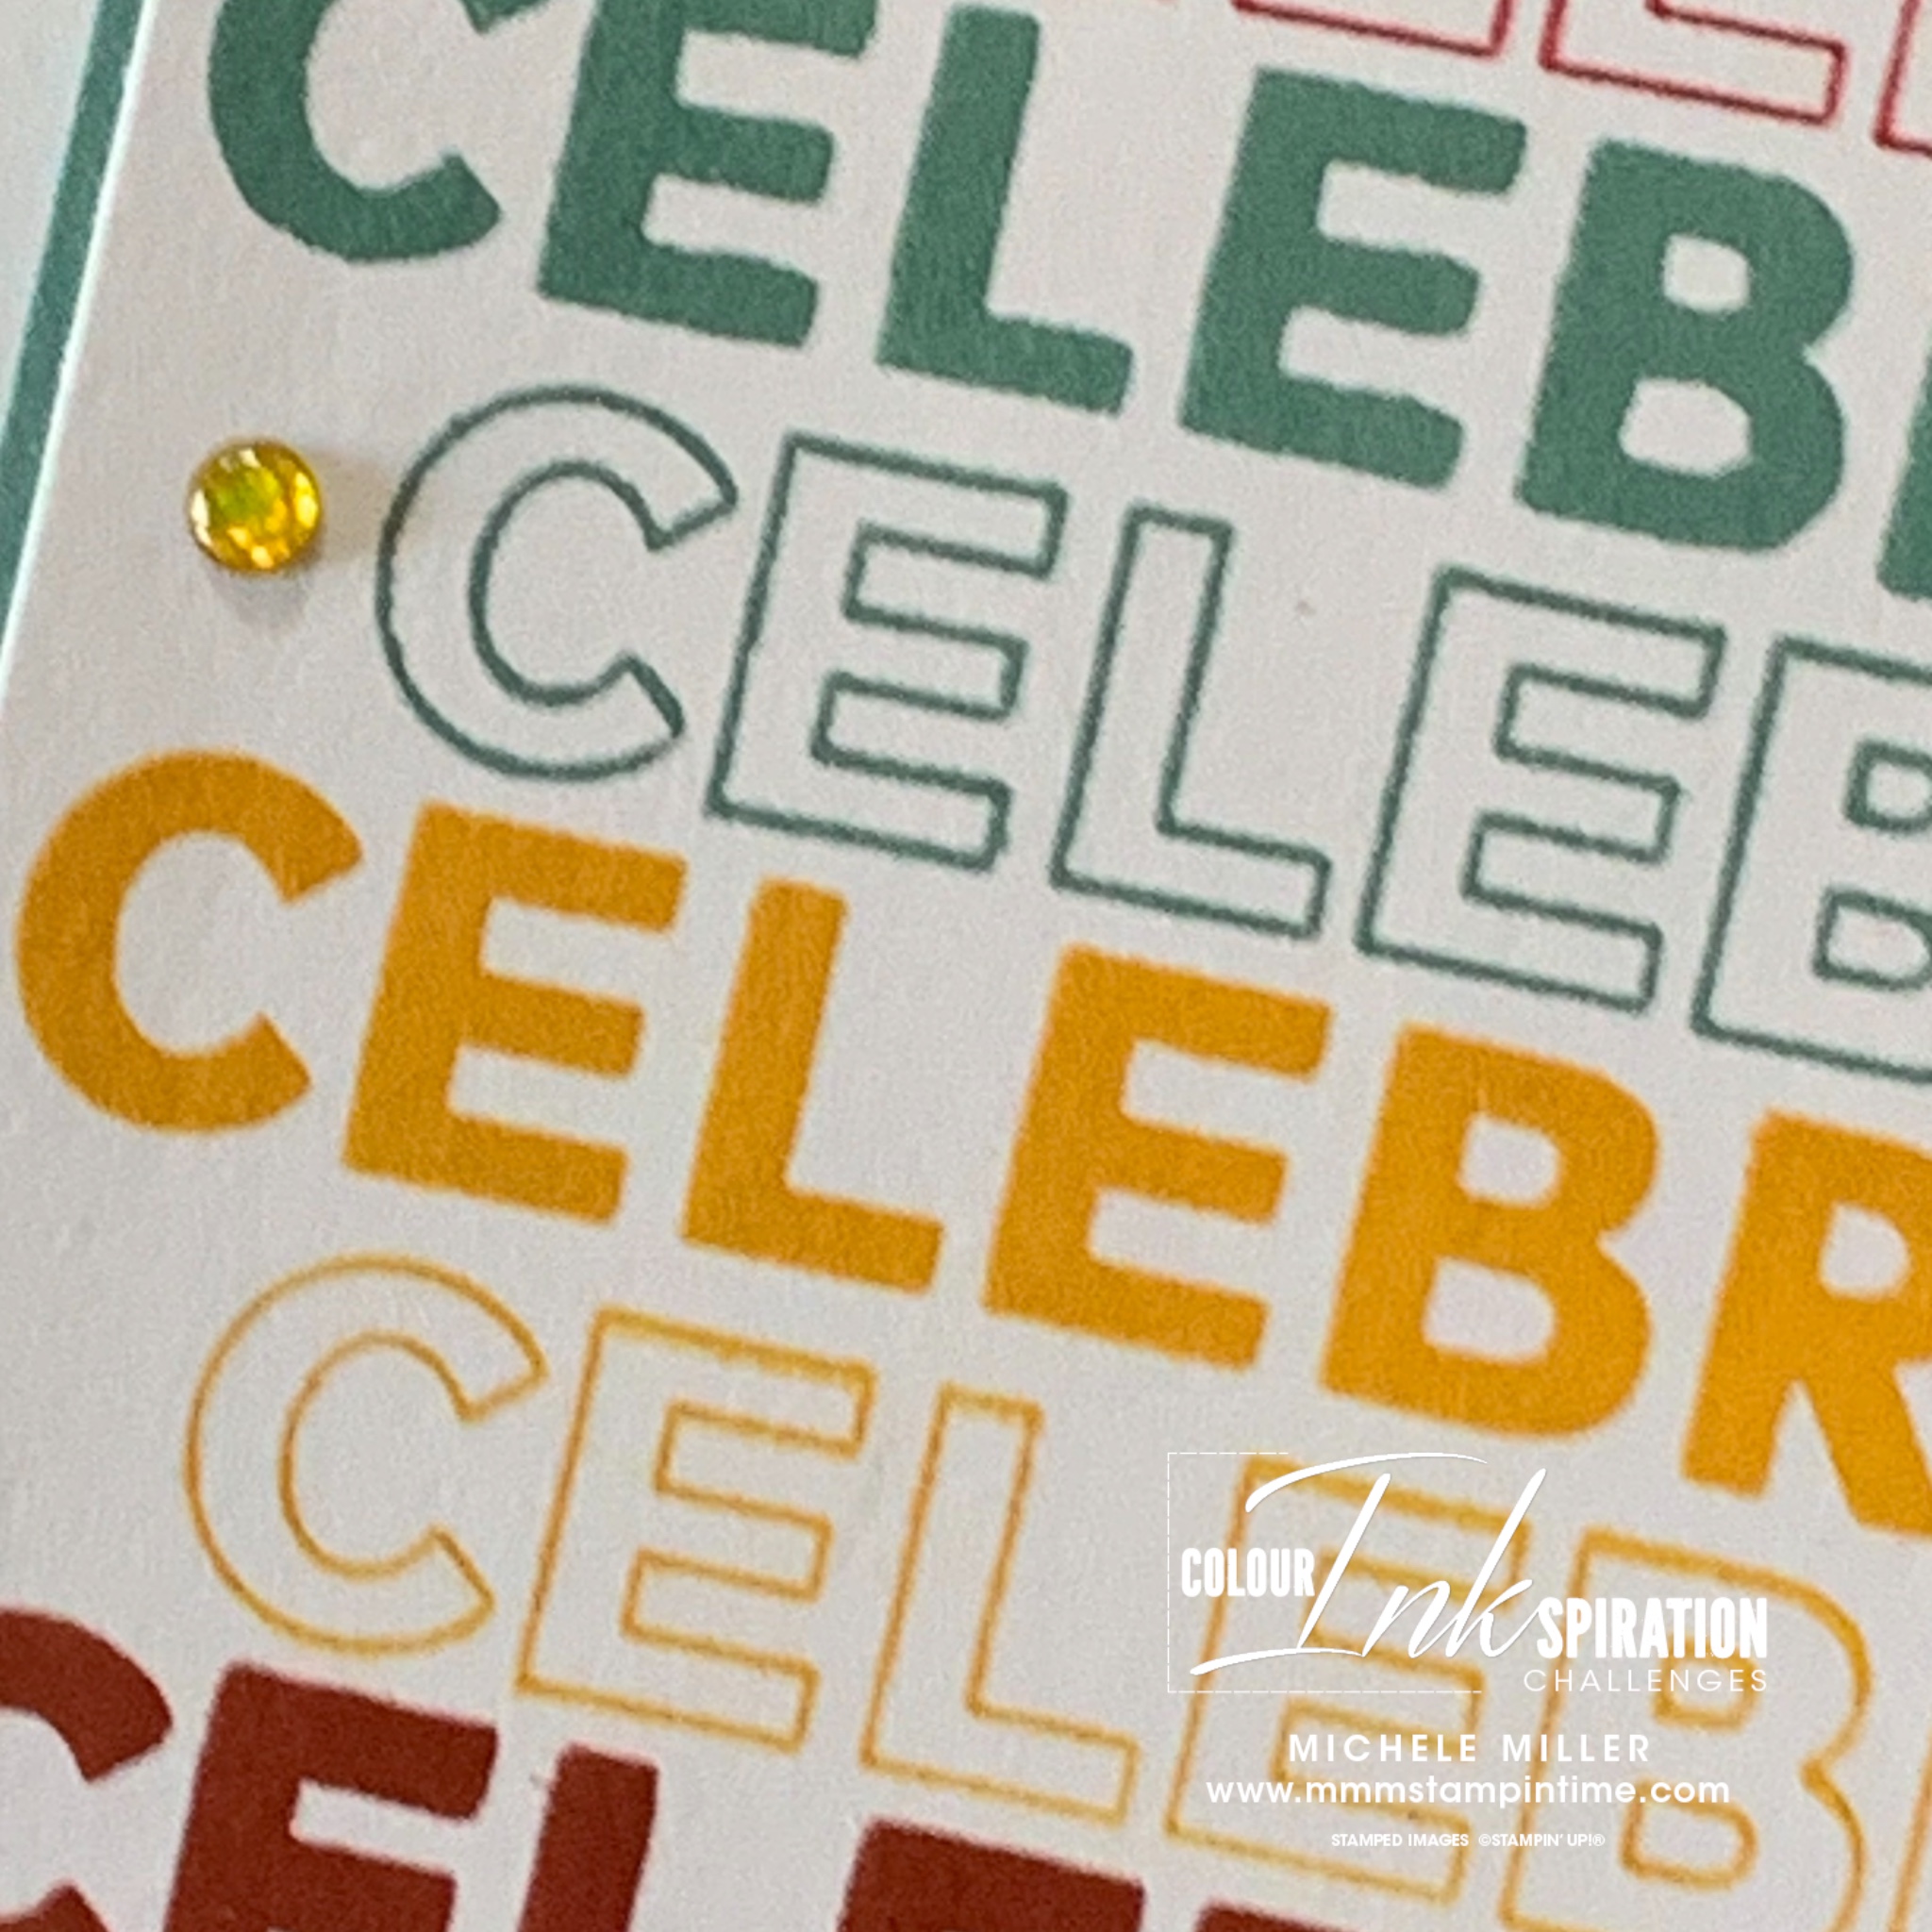
I chose a Lost Lagoon card base and a Basic White panel for the stamping.
Confession – I used my now retired Stamparatus to stamp the ‘celebrate’ greeting. It’s just the best way to achieve perfect spacing.
The smaller greeting was stamped and then cut with one of the Happy Little Things Dies. I cut two more of these banners, in Lost Lagoon, and layered them under the greeting. After placing some Stampin’ Dimensionals behind the greeting, I positioned it at the bottom of the card front.

The small greeting was also stamped inside the card and on the envelope.
Finally, I added some Daffodil Delight Glossy Dots to the card front.

This project is posting on the same day we return home from our holiday, so I will be back in my craft room tomorrow and back to creating new projects to share with you.
Until then, happy stamping.

If you live in Australia, you can order any of the products I used to make this card by going to my online store. As you read through this post, you will see the products I used for this project. THe new items are available from May 1st.