Posted on Leave a comment

WONDERFUL NEWS – MORE PRODUCTS HAVE BEEN ADDED TO SALE-A-BRATION FOR FEBRUARY

From embellishments and ribbon to stamp sets and dies, Stampin’ Up! has added more products to the collection of Sale-a-bration goodies you can earn.

Click on the image below to see the new FREE products.

For every $100 and $200 you spend, you’ll earn an exclusive Sale-A-Bration item for free! Depending on the amount you spend, you’ll be able to mix and match the Sale-A-Bration items you earn! Shop now until 28 February.

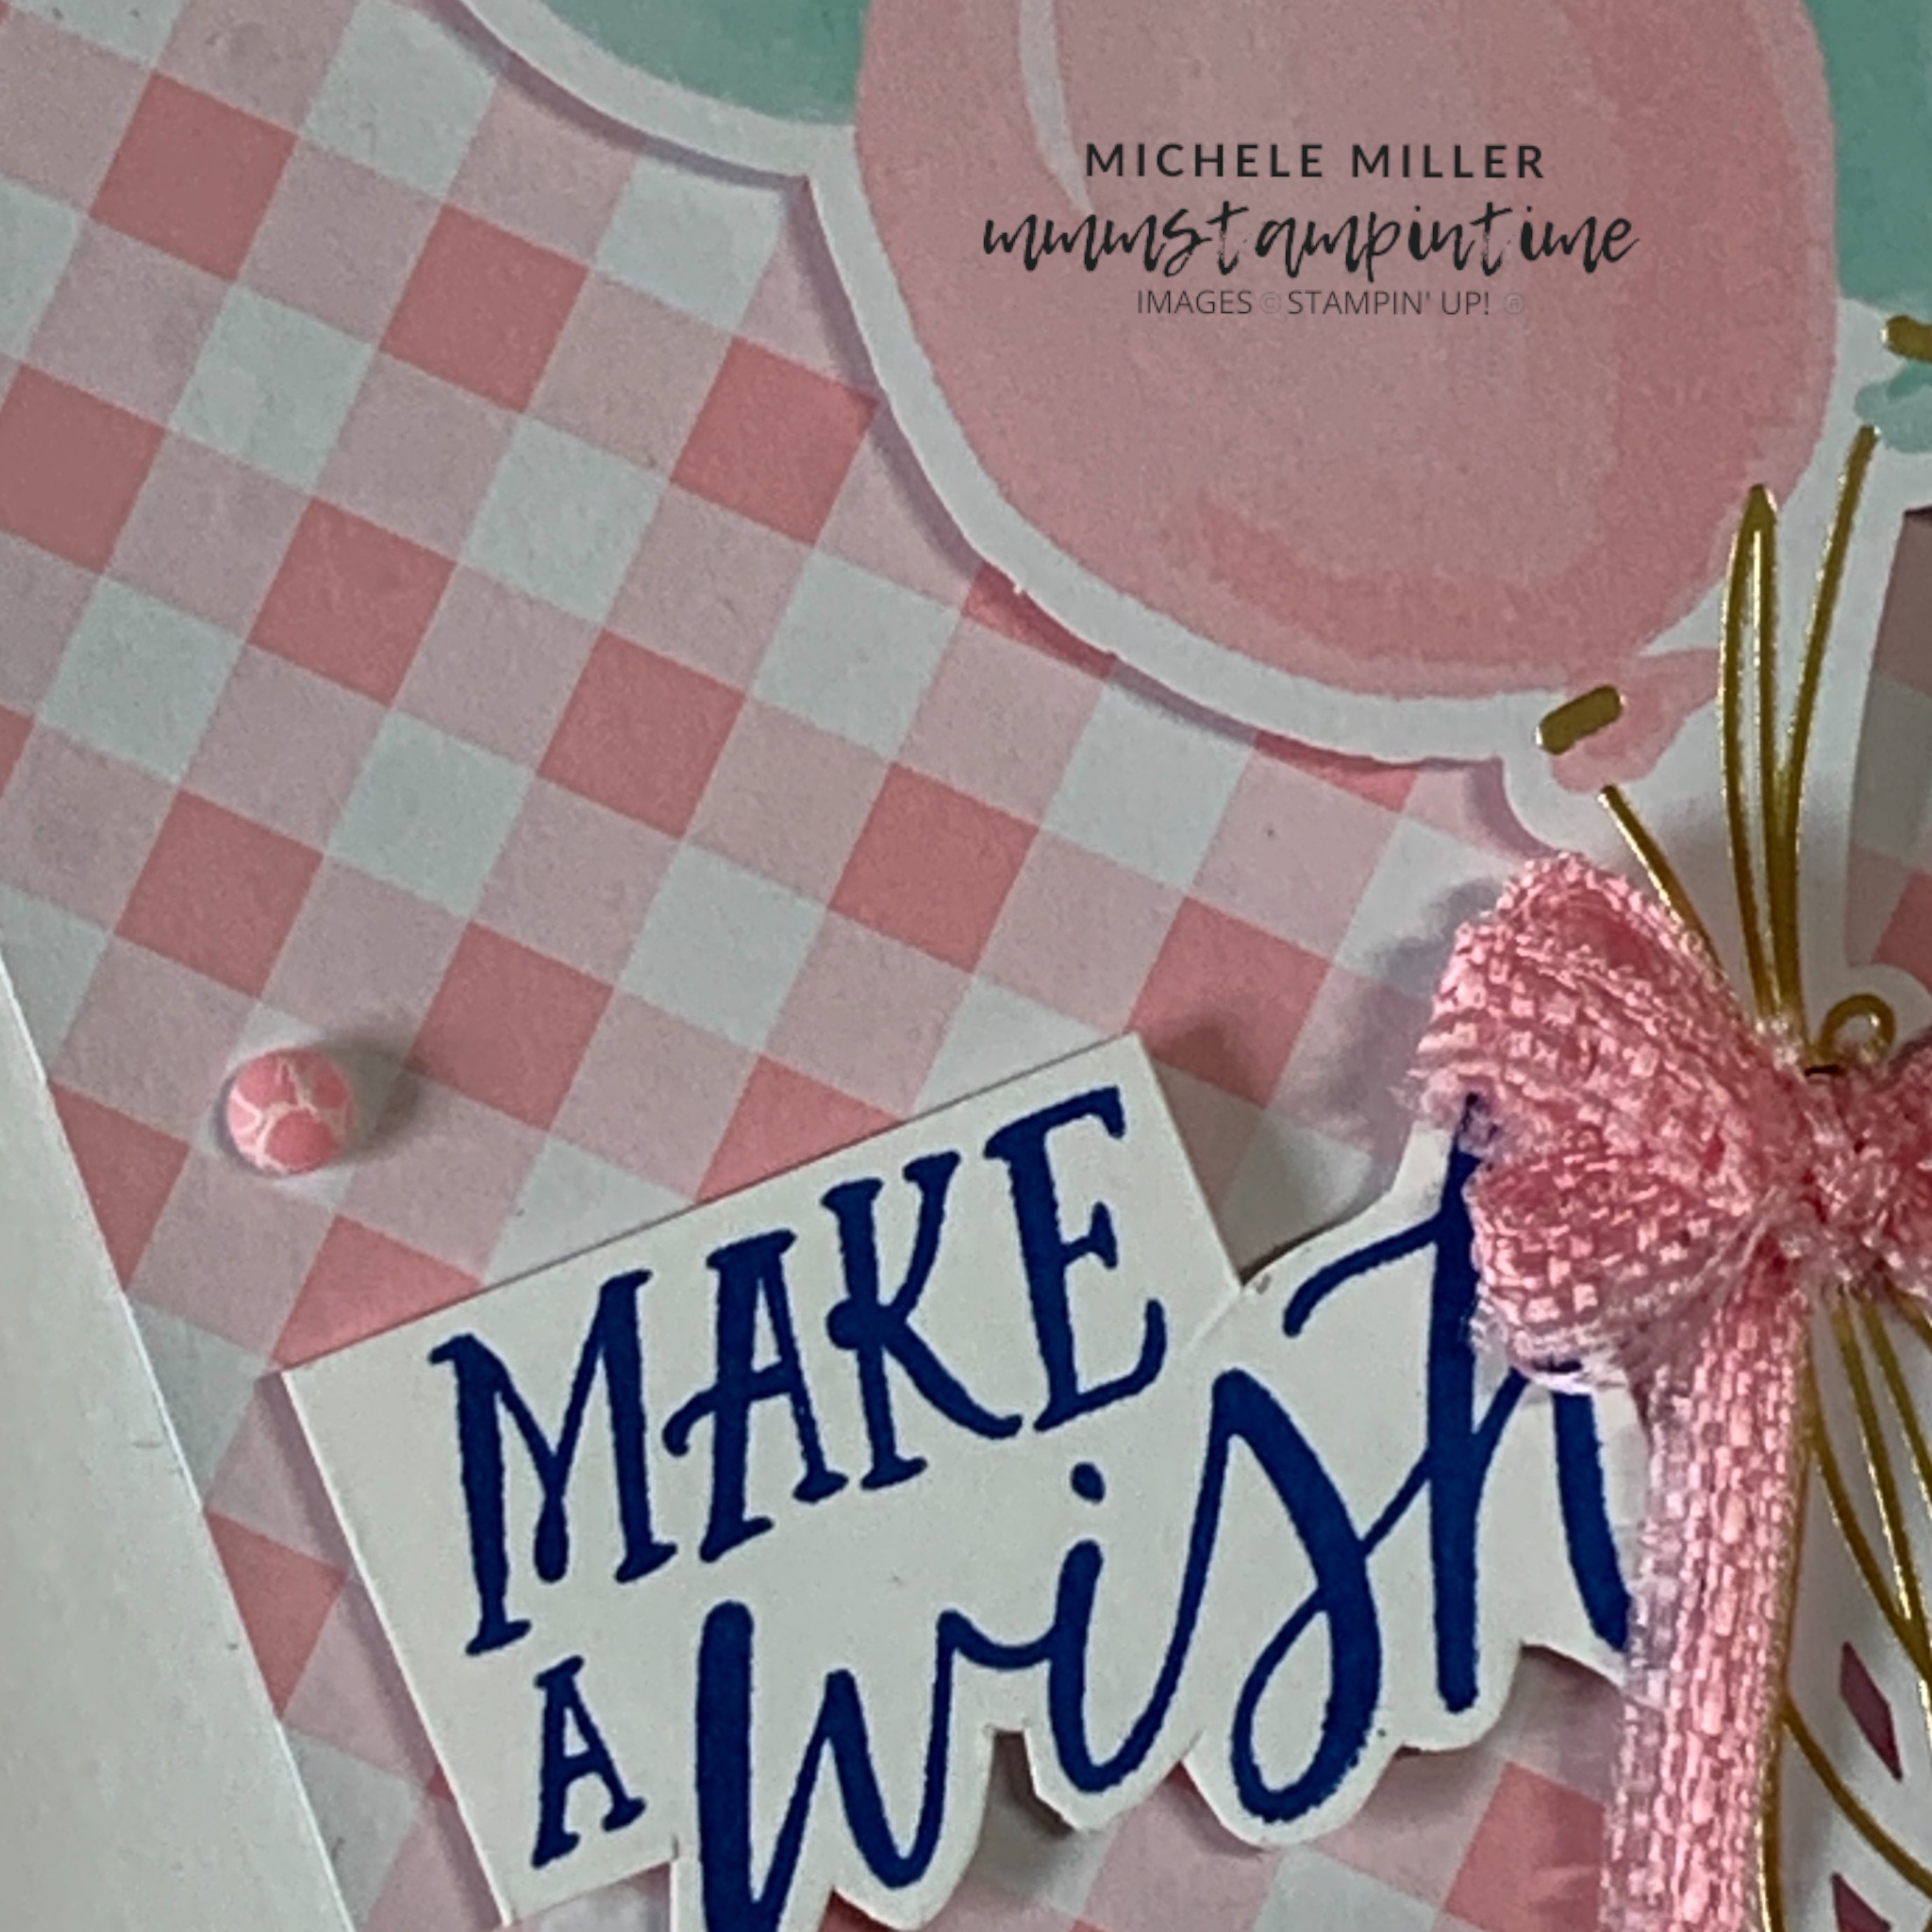
Today’s card is another for my birthday collection.

I started with a Pretty in Pink card base and added a Basic White panel.

The pink gingham paper was cut so that it could be added to the white panel at an angle.

I chose the balloon bundle from the die cut images in the Wildflower Birthday DSP and placed it on the card using Stampin’ Dimensionals.

The greeting was stamped then trimmed and fussy cut. Then I used more dimensionals to pop it up on the card front as well.

A length of Pretty in Pink Bordered Ribbon was cut in half and tied into a multiple bow. I used a Mini Glue Dot to hold it in place.

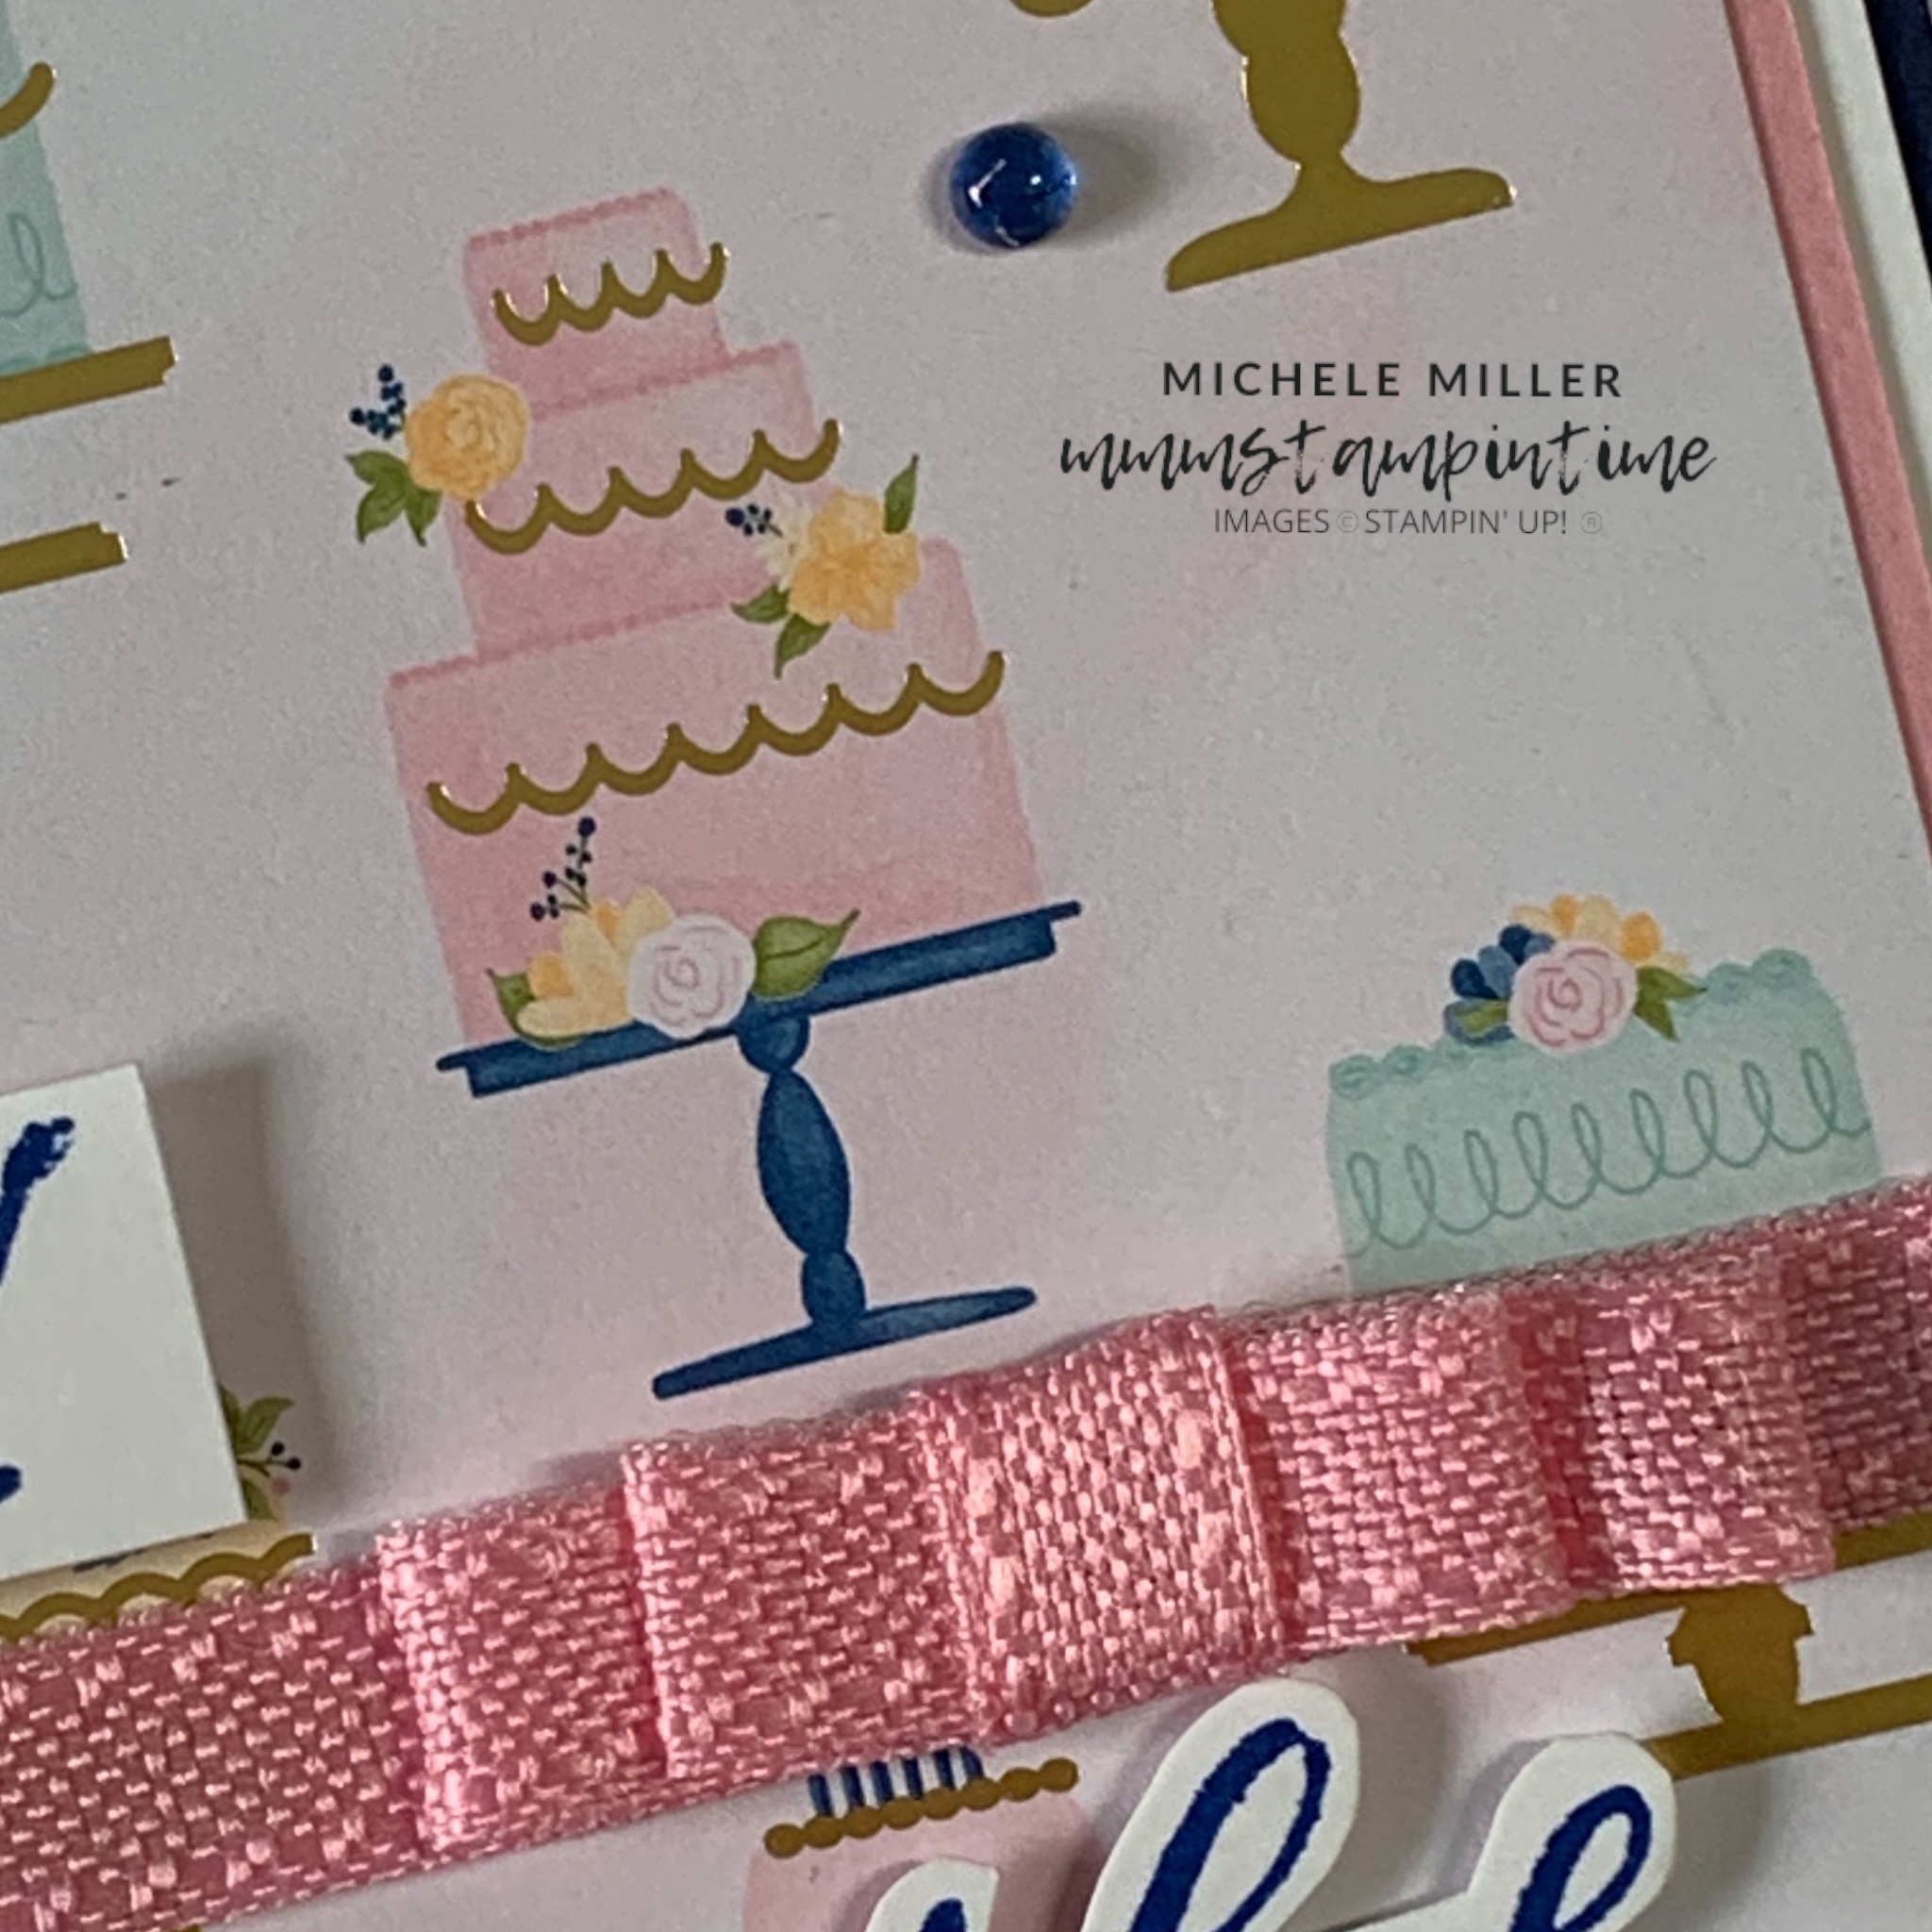
I used the same gingham paper to decorate the card insert and the back of the envelope.

Then I added some pink dots from the Adhesive-backed Dappled Dots.

Tomorrow I have a 3D project to share with you.

Until then, happy stamping.

If you live in Australia, you can order any of the products I used to make this card by going to my online store. Just click on any of the images below.

Product List
Paper Snips
[103579]
$21.00
Posted on Leave a comment

TIME FOR TUESDAY TIPS & TECHNIQUES

Today I have another product focused project to share with you.

I started by layering Blueberry Bushel and Basic White.

Then I layered a Pretty in Pink panel with a panel of the multiple birthday cake paper.

TECHNIQUE: Folded bow – I created this wrap around bow using the Petal in Pink Bordered Ribbon and lots of Mini Dots.

Each time I folded the ribbon to create this bow, I used Mini Glue Dots to hold the ribbon in place. Every turn and fold, needed a mini glue dot.

After I finished this bow I wrapped and attached the bow to the card front.

The ends of the ribbon were tucked under the pink panel and secured with double sided tape.

The layers were then adhered to a Blueberry Bushel card base.

The birthday greeting was stamped in Blueberry Bushel. The ‘birthday’ was fussy cut and added to the card front with Stampin’ Dimensionals.

TIP: When fussy cutting, I use sharp paper snips and take my time.

I added a strip of the birthday cake DSP to the card insert and a cupckae die cut to the back of the envelope.

The final step was to add some Blueberry Bushel gems, from the Tinsel Gems Four Pack, to the card.

Tomorrow I will have a Stampin’ Up! update for you and another birthday card to share with you.

Until then, happy stamping.

If you live in Australia, you can order any of the products I used to make this card by going to my online store. Just click on any of the images below.

Product List
Paper Snips
[103579]
$21.00
Posted on Leave a comment

HOW TO MAKE A FUN FOLD CARD THIS FRIDAY

For today’s fun fold card I decided to use the Everyday Arches Dies to create a triple fold card.

These are most of the products I used to make this card.

For this card I measured the width of the largest arch die ( 5-3/16″ x 3-15/16″/13.2 x 10 cm) and tripled it. I scored at 13.2cm and 26.4cm and folded the card and burnished the folds.

Then I positioned the die over the folded card making sure the left-hand cutting edge of the die was just outside the folds. This ensured the three arches were joined … a bit like an old-fashioned paper doll cutout.

For the front of this card I used the next size down arch die and cut some of the DSP. Then I adhered it to the front.

I cut a somewhat smaller arch and embossed it with the Soft Waves #D Embossing Folder.

The greeting was stamped onto Melon Mambo card in the same ink colour. Then I used one of the banner dies to cut it out.

To finish the card front I die cut two of the crabs from the DSP and added some of the Sunny Day Iridescent Dots.

When you open the card front you can see one of the arches deocrated with a DSP arch and piece of Summer Splash coral. THe other panel has Melon Mambo and Basic White arches added.

When you open out the Melon mambo and Basic White centre pael you get to see the completely decorated three inner panels of the card.

The coral and lobster are both die cut and the fish is fussy cut.

When you turn the card over this is the layout you will find.

I’m not sure what I have for you next week – yet.

But until then, happy stamping.

If you live in Australia, you can order any of the products I used to make this card by going to my online store. Just click on any of the images below.

Product List
Paper Snips
[103579]
$21.00