Posted on Leave a comment

WHEN A TACKLE BOX CAN BE SEEN AS SOMETHING DIFFERENT

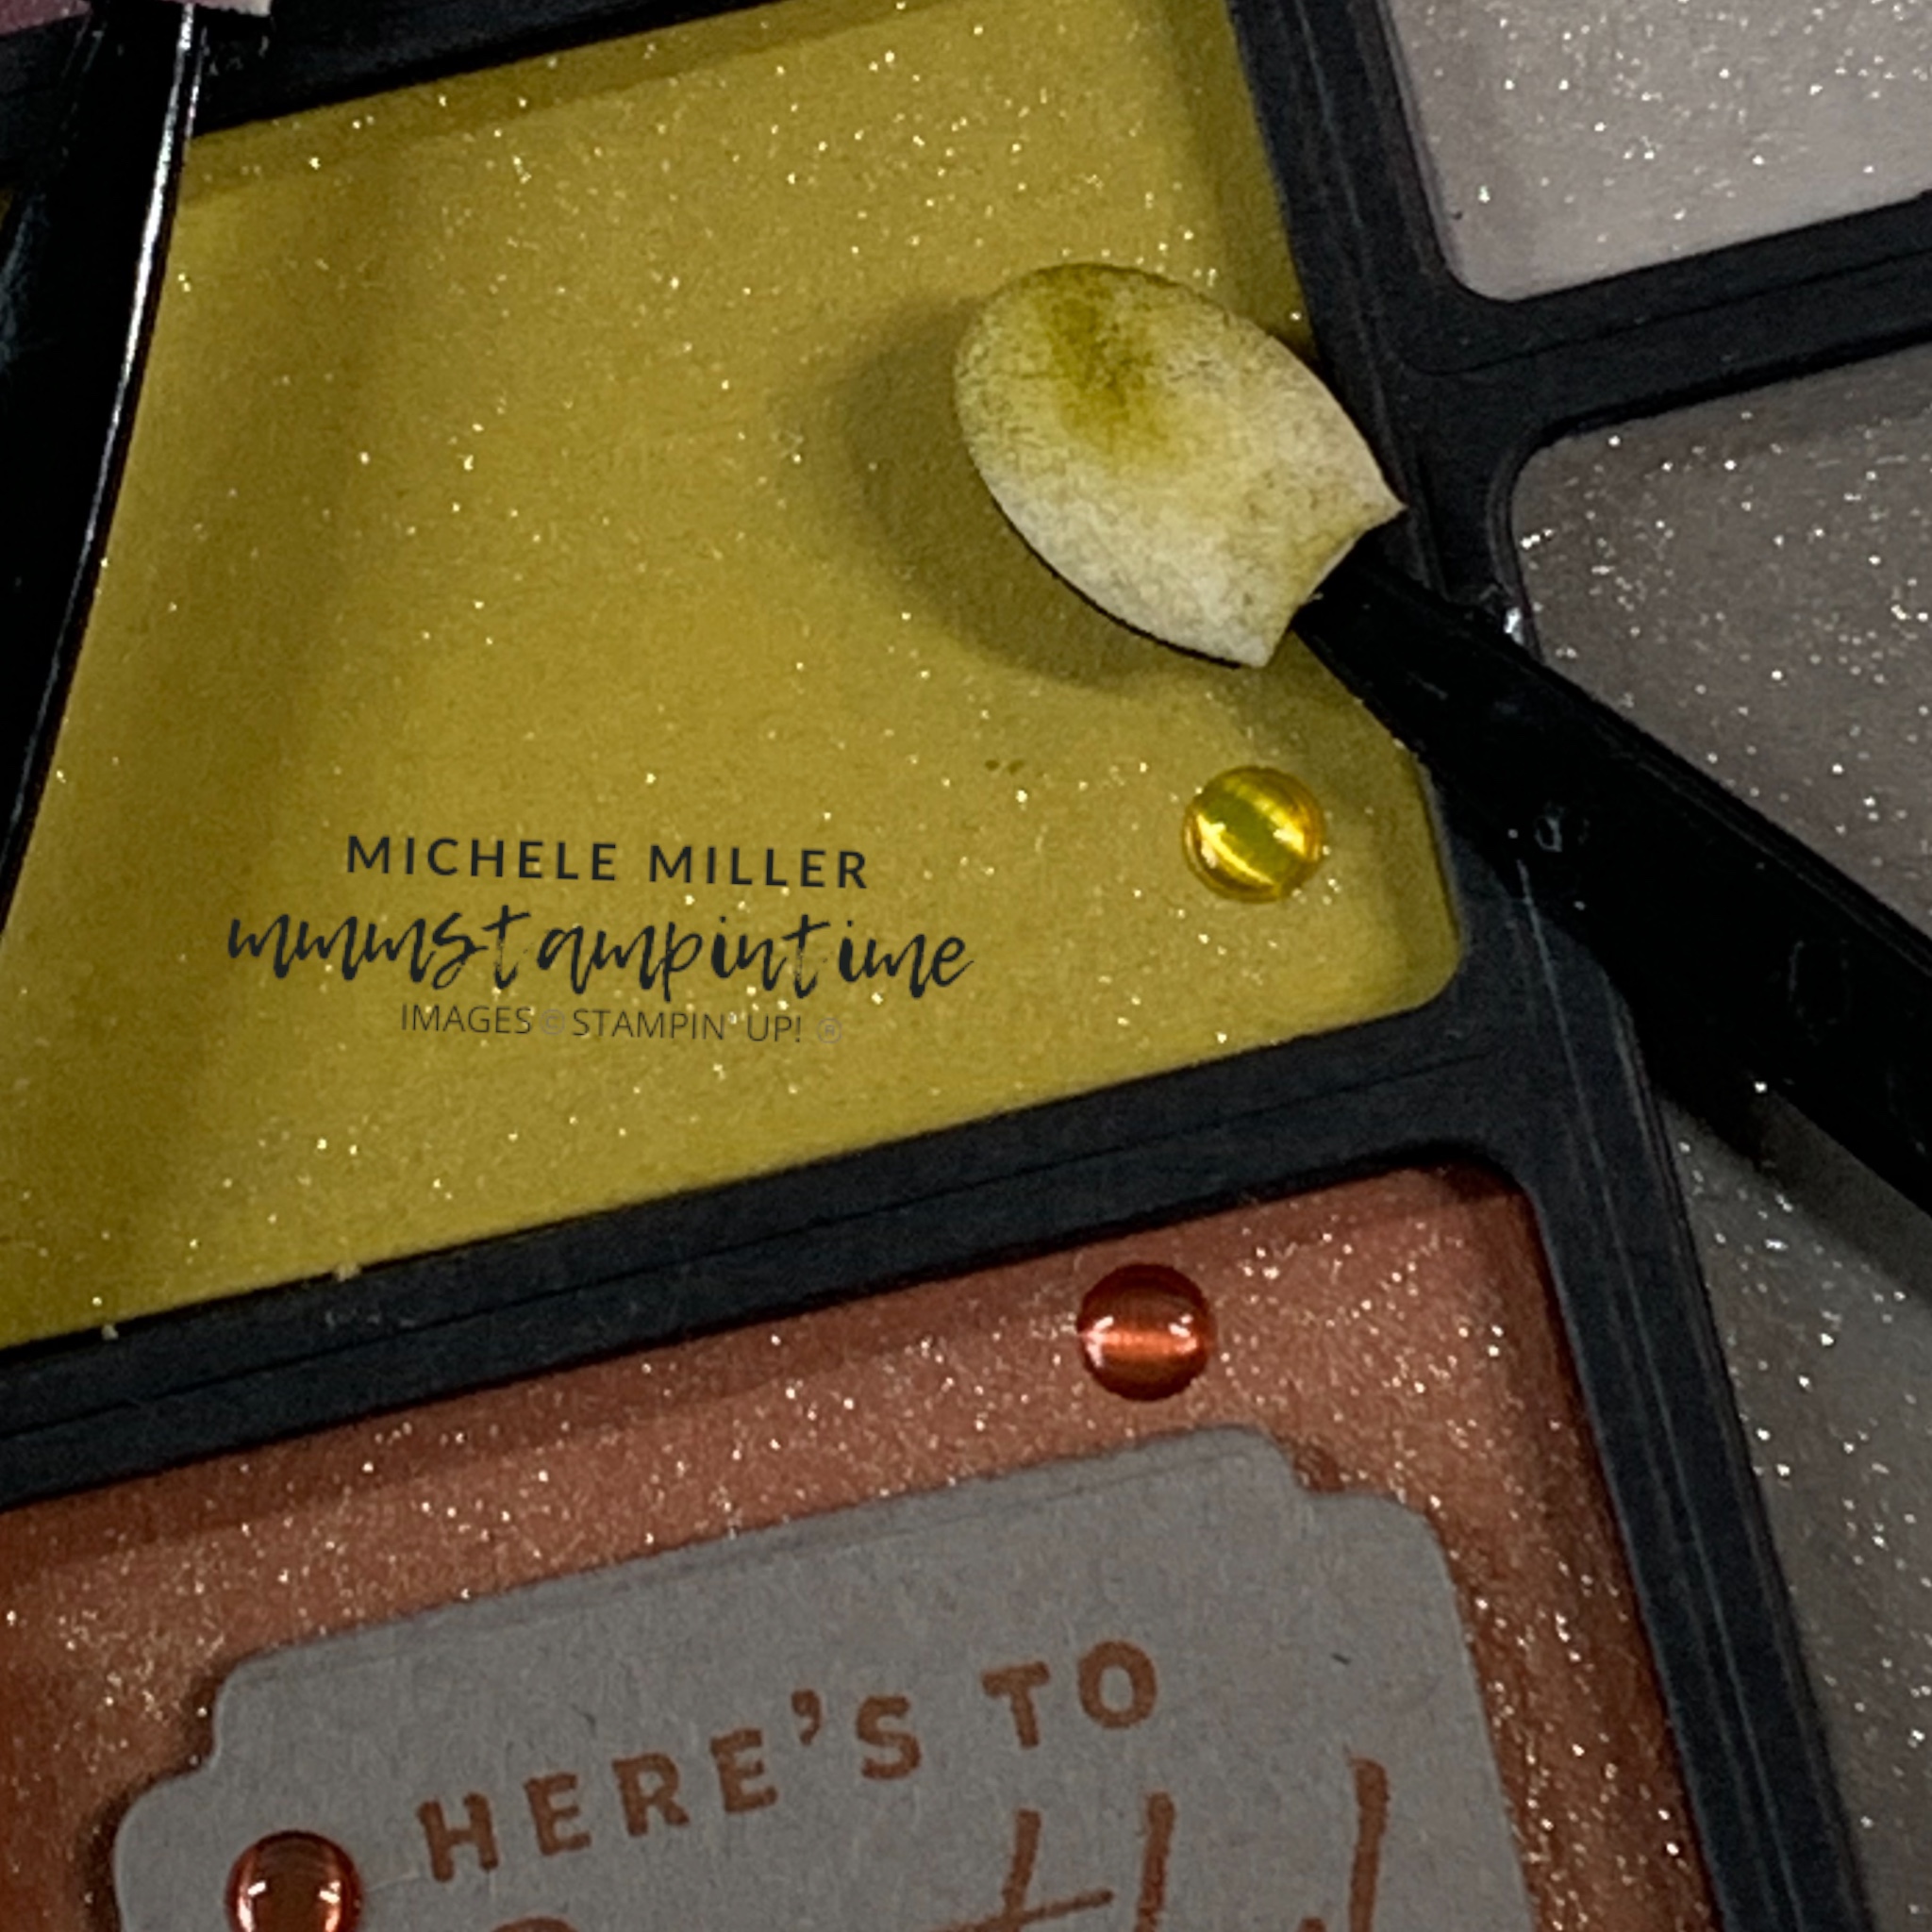
When I first saw the Gone Fishing Dies, I didn’t picture a tackle box. I saw a makeup palette filled with sparkling eye shadows.

I made the makeup box using Basic Black cardstock and Foam Adhesive Strips. To help the foam strips ‘fit in’, I used the Dark Basic Black Stampin’ Blends to colour ini the white sides.

I used the same sectioned die to cut the small coloured pieces. These were then given some gorgeous shimmer using the Wink of Stella Brush.

The greeting and die are both from the Something Fancy Bundle.

I added some of the 2023-2025 In Colour Dots to give the palette even more bling.

It took me three shops before I found these foam makeup sticks. I coloured them to match the palette. They were then secured using Mini Glue Dots.

I think the next project I amke with this Suite Collection is a shaker card – stay tuned.

Tomorrow I have a new project to share with you. It will feature the Just My Type Stamp Set.

Until then, happy stamping.

If you live in Australia, you can order any of the products I used to make this card by going to my online store. Just click on any of the images below.

Product List
Paper Snips
[103579]
$19.25
Posted on Leave a comment

Colour INKspiration #148 – Paper Florist

Welcome back for another Colour INKspiration challenge. This inspiration picture which has inspired our colour palette was chosen by Crew Member, Brenton Golley. 

Picture credit – https://www.henrycowls.net/blog-en/the-bullfinch.html

As well as the chosen colour combination for #CI148, Daffodil Delight, Cajun Craze, Pebbled Path and Basic Black, you may also add Basic White, Very Vanilla, Crumb Cake, and metallics to your project. We also allow Ivory, Bronze and Natural Tones in Stampin’ Blends. If you don’t have the colours in our palette, feel free to use the closest Stampin’ Up! substitute.

To get your creative ideas flowing make sure you check out the Crew’s Projects in the CI#148 album. 

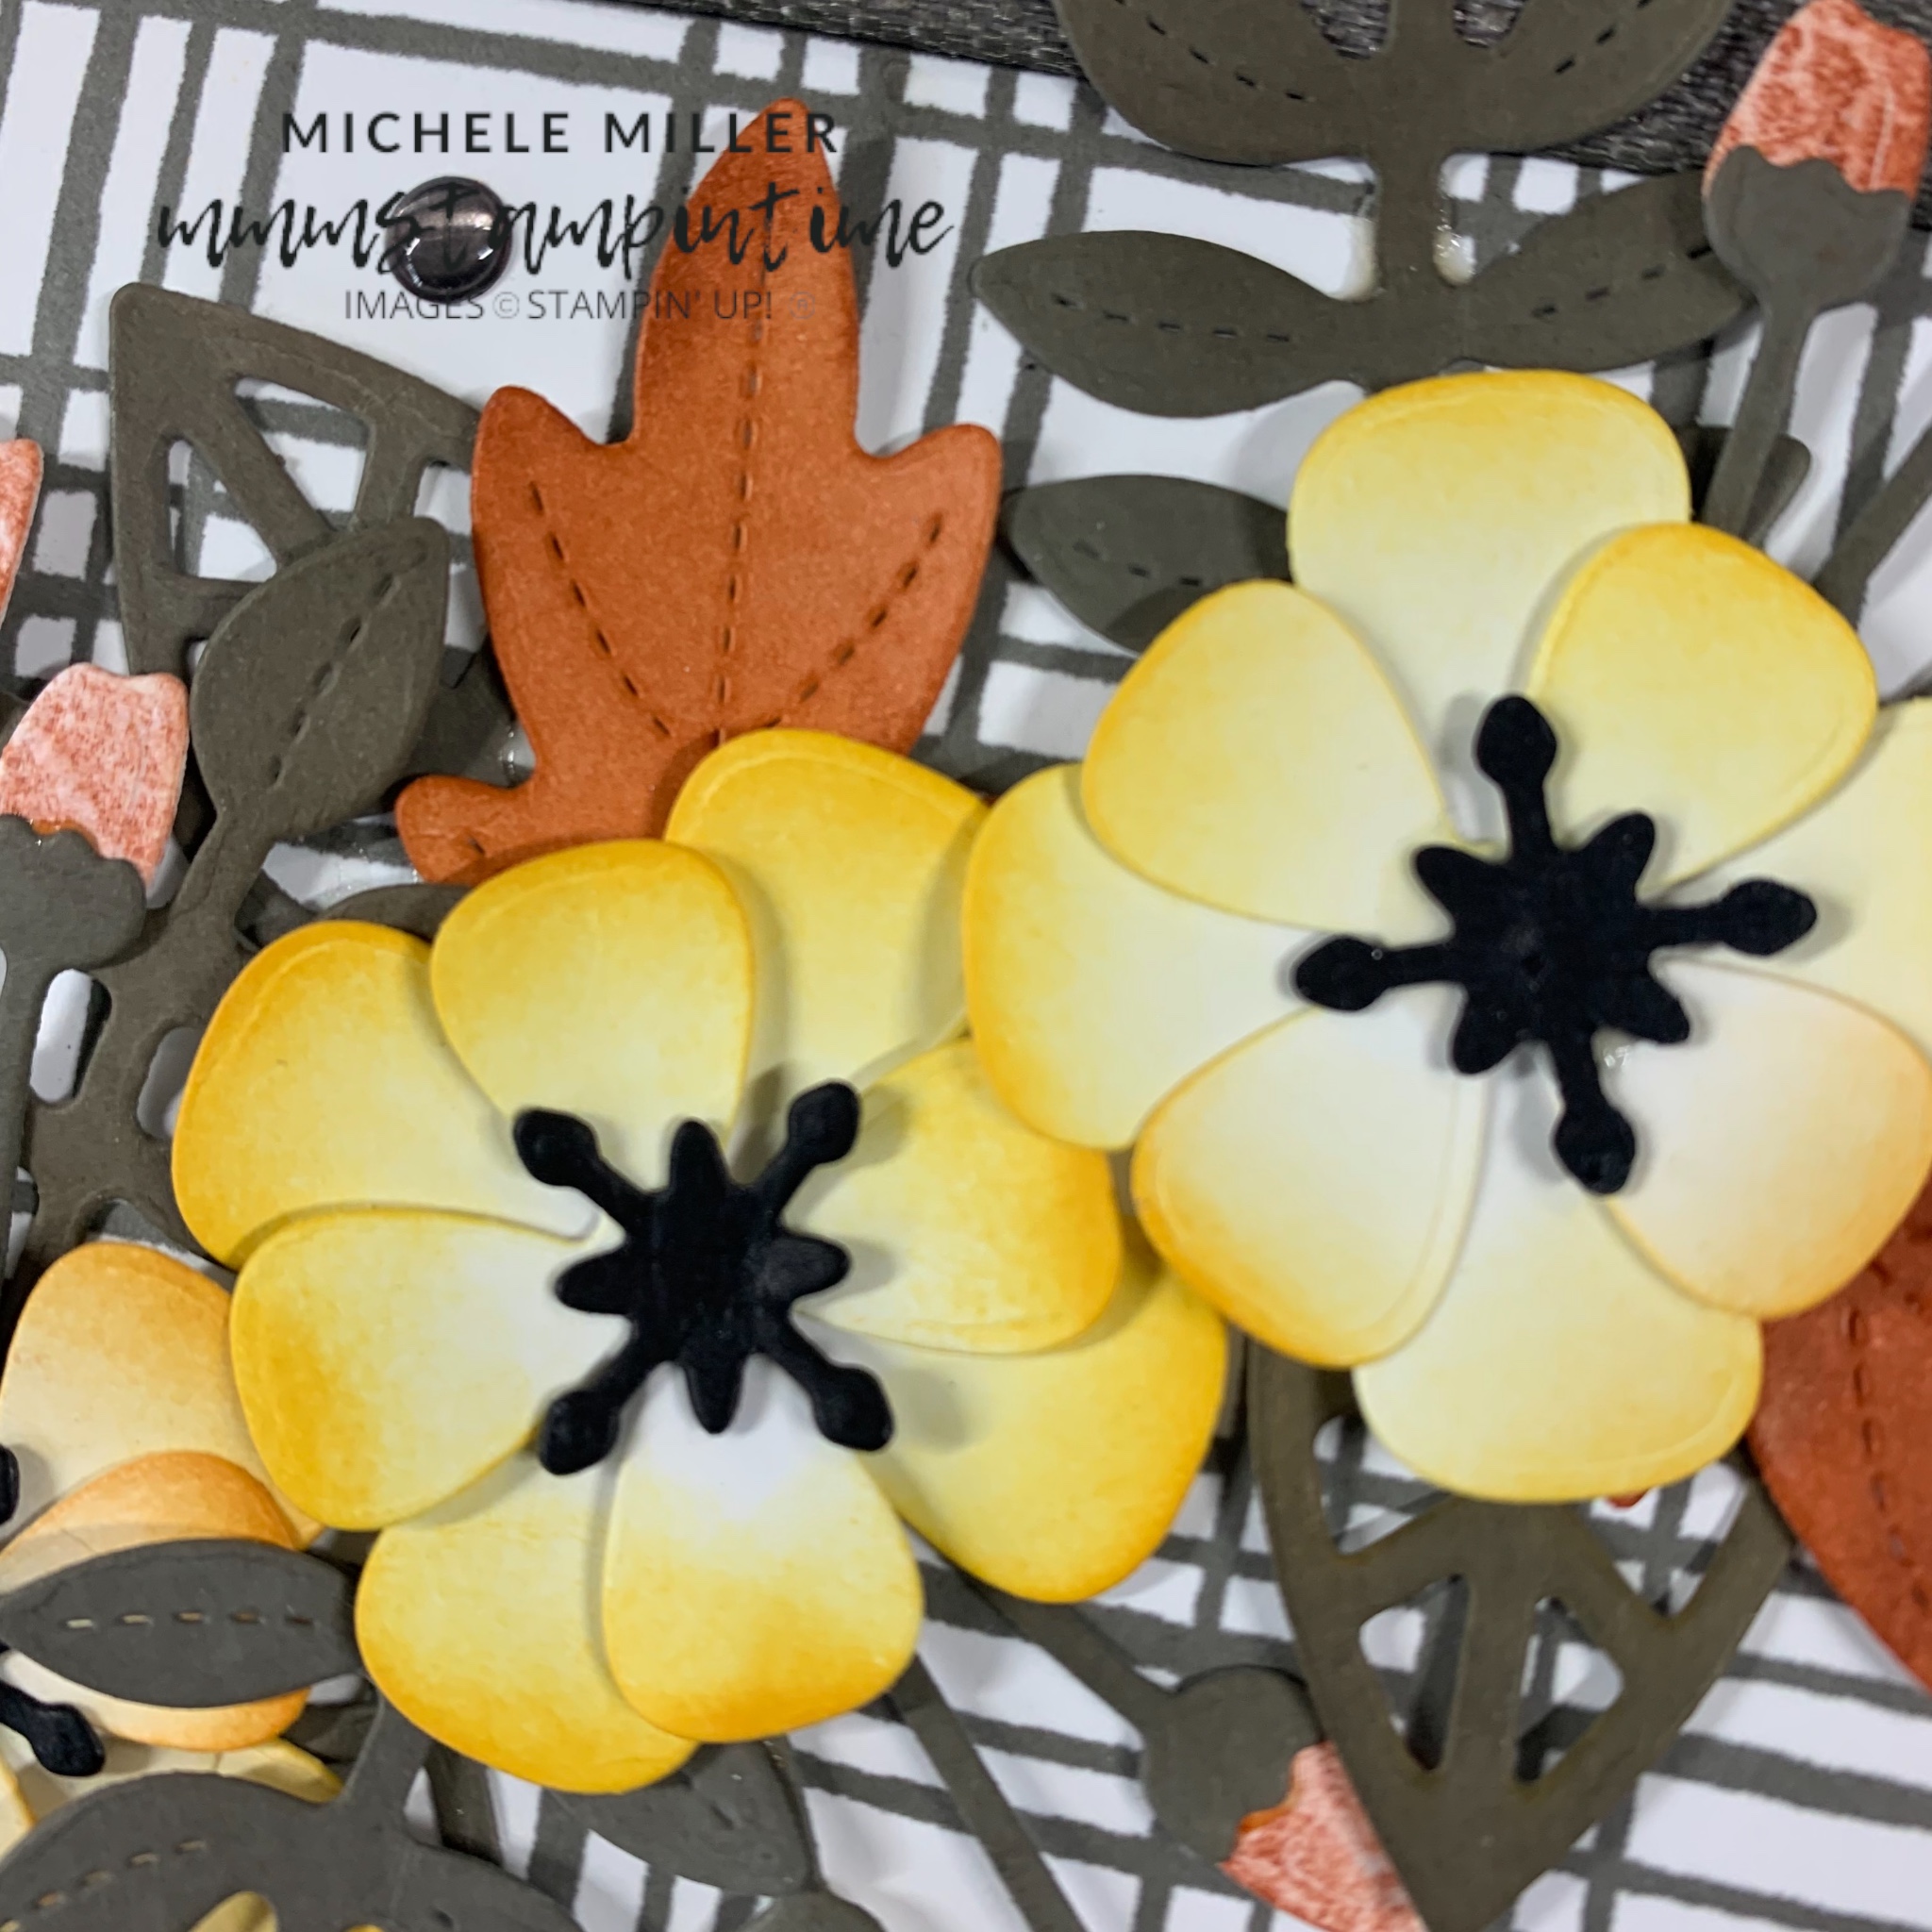
My contribution features the Sketched PlaidStamp Set and Paper Florist Dies.

The first step for this card was to stamp the Sketched Plaid background image onto a piece of Basic White cardstock, using Pebbled Path ink. I used my Stamparatus (now retired) to ensure that I would be able to ensure a clear image.

A length of Pebbled Path Textured Ribbon was wrapped around the stamped background layer.

I used the Paper Florist Dies to cut loads of flowers, stems and leaves from Basic White cardstock. Then I used three Blending Brushes to colour the floral elements I had cut.

After assembling the floral elements, I attached them to the card front.

I secured two other floral elements to the card insert and back of the envelope. The two layers of the flower were secured using the small black Round Brads.

The sentiment was stamped and heat embossed. I used the Wonderful Thoughts Stamp set and coordinating Dies.

Finally, I added some of Pebbled Path In Colour Dots to the card front.

If you live in Australia, you can order any of the products I used to make this card by going to my online store. Just click on any of the images below.

Product List
Heat Tool
[129056]
$54.00
Paper Snips
[103579]
$19.25
Stamparatus
[148187]
$85.50
Posted on Leave a comment

FLOATING CIRCLE BIRTHDAY CARD WITH ZANY ZOO CREATURES

There is an amazing US Stampin’ Up! demonstrator who is celebrating her birthday this month and I have created a card to send to her.

If you can guess who she is, then message me and I might send you a card as well.

She loves riding her bike and lives close to too many ‘gators for my liking.

This is the card I created … and, it is the mail now.

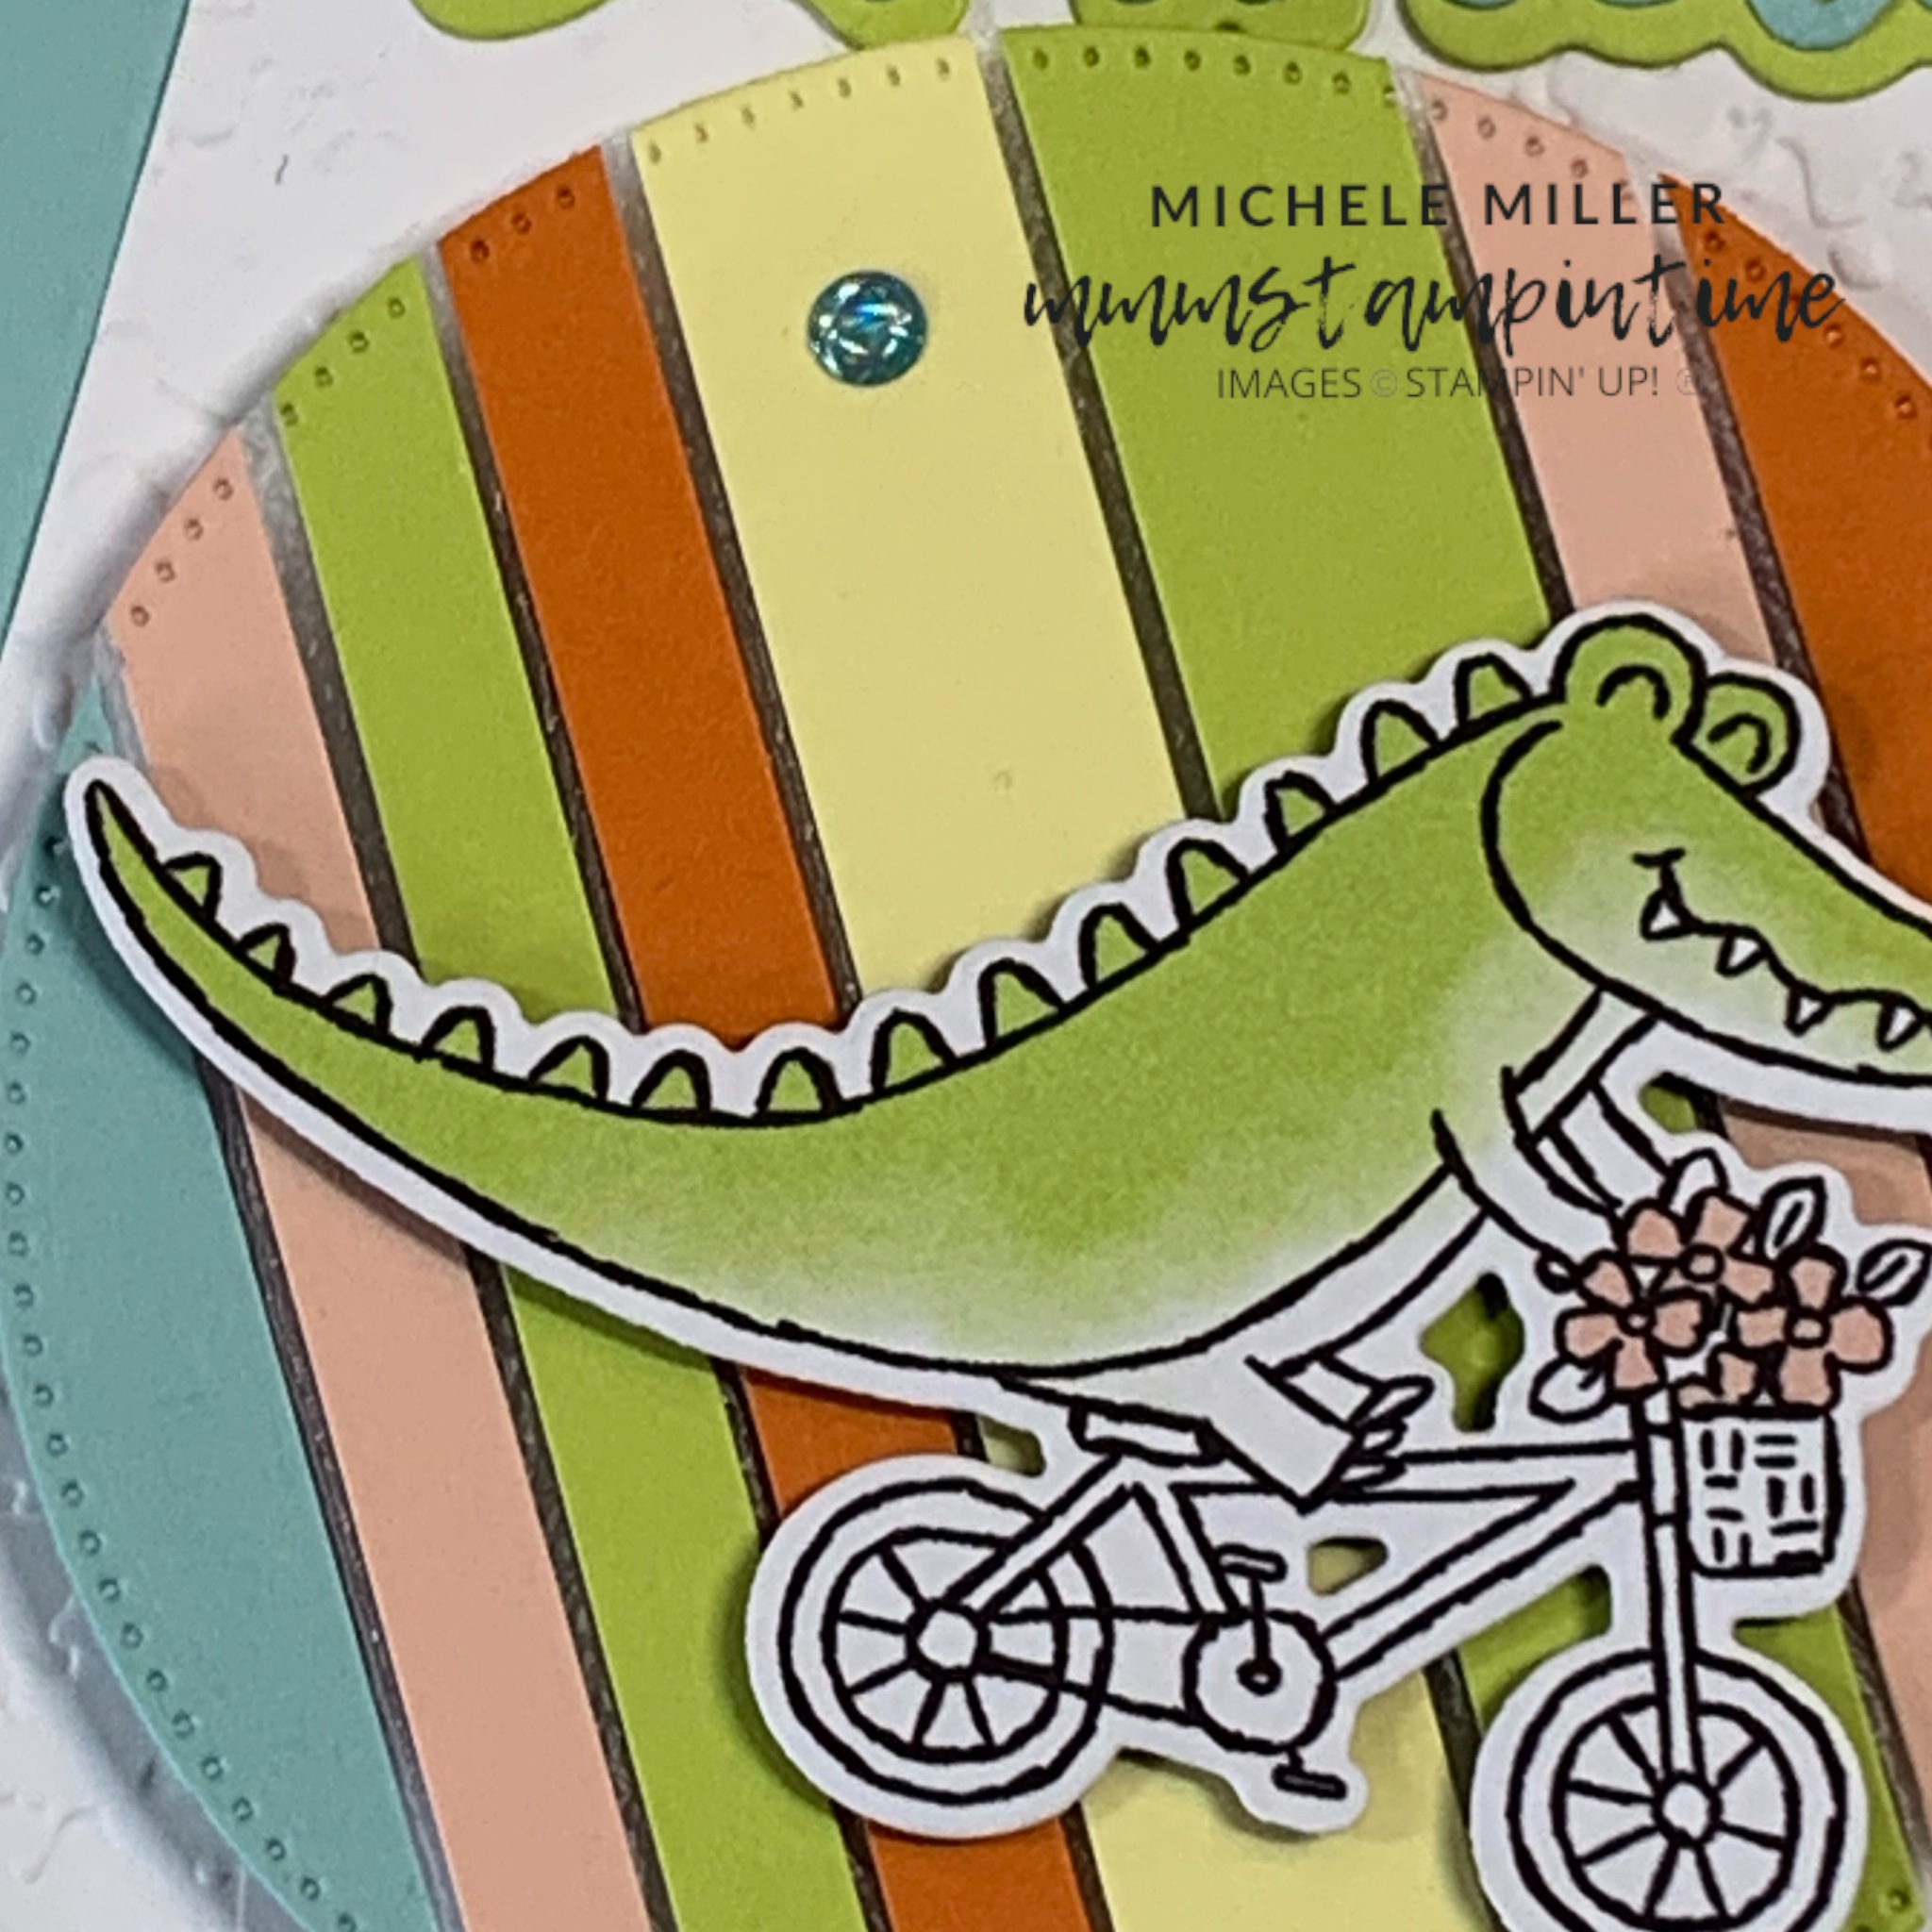
I used the Zany Zoo Dies to cut the ‘gator from the Zoo Crew Designer Series Paper.

For the floating circle background, I added 1/4″ and 1/2″ strips of cardstock to a piece of Glad Press and Seal. Then I used the largest of the circles from the Stylish Shapes Dies to cut this layer.

I attached Foam Adhesive Strips to the back of this layer so that it would sit up from the Splatters Embossed basic white panel. Then I added the cycling ‘gator to floating strips circle.

The birthday greeting is from the Wanted to Say Dies. I used Adhesive Sheets to attach the sentiment layers to the card front … I have used these dies for all of the projects I’m sharing today.

To finish the card, I added some Glossy Dots for that little bit of bling.

The ‘gator was added to the card insert and the back of the envelope.

I adore all the critters in the Zany Zoo Stamp Set and the Zoo Crew Designer Series Paper. Many can be die cut but the rest need a little fussy cutting.

This is my next card.

This banner elephant is from the DSP and needed some fussy cutting. I added the same fussy cut elephant to the card insert and envelope flap.

The floating strips circle was made in the same way – just using a different colour combination.

I used the same Glossy Dots on this card.

This next card features the fussy cut hippo in a tutu, with some balloons that were attached to the racoon.

This card has balloons, cut from the Zany Zoo Dies, added to the card insert and on the back of the envelope.

All the cards, that are part of this project, have a Basic White panel that has been embossed with the Splatters 3D Embossing Folder.

The final project in this series is an exploding gift box.

I decided to make it to showcase as many of the Zany Zoo creatures that I could … and hold a gift voucher for the recipient.

Here it is!

The box measures 4″ x 4″ x 4″. The floating circle was made in the same way as described before. While the racoon was die cut, the hippo and dog were fussy cut.

I used the same Glossy Dots on this 3D project.

These are the external parts of the gift box. I used Subtles 6″x 6″ DSP for these panels before adding lots of creatures from the DSP.

Inside the explosion gift box, I added a gift card pocket in the centre. The bear was fussy cut from the DSP before being adhered to the gift card pocket. I cut away the balloons from the die cut racoon to add to the bear’s paw.

Each of the four internal panels had panels of DSP that were coloured using Lemon Lime Twist and Lemon Lolly Stampin’ Blends.

Four projects, with one of them for a very talented colleague in the US. I hope she likes it.

Until next time, happy stamping.

If you live in Australia, you can order any of the products I used to make this card by going to my online store. Just click on any of the images below.

Product List
Paper Snips
[103579]
$19.25